


Christmas will soon be here and an Advent Calendar is a fun and festive way that many people use to count down the days until Christmas. To me, there is nothing more special than an Advent Calendar that is made by hand. It’s Juliana and today I’m sharing how to create your very own handmade Advent Calendar using Gina K. Designs Foil Mates™ and Therm O Web Adhesives.
Advent Calendar with Gina K. Designs Foil-Mates™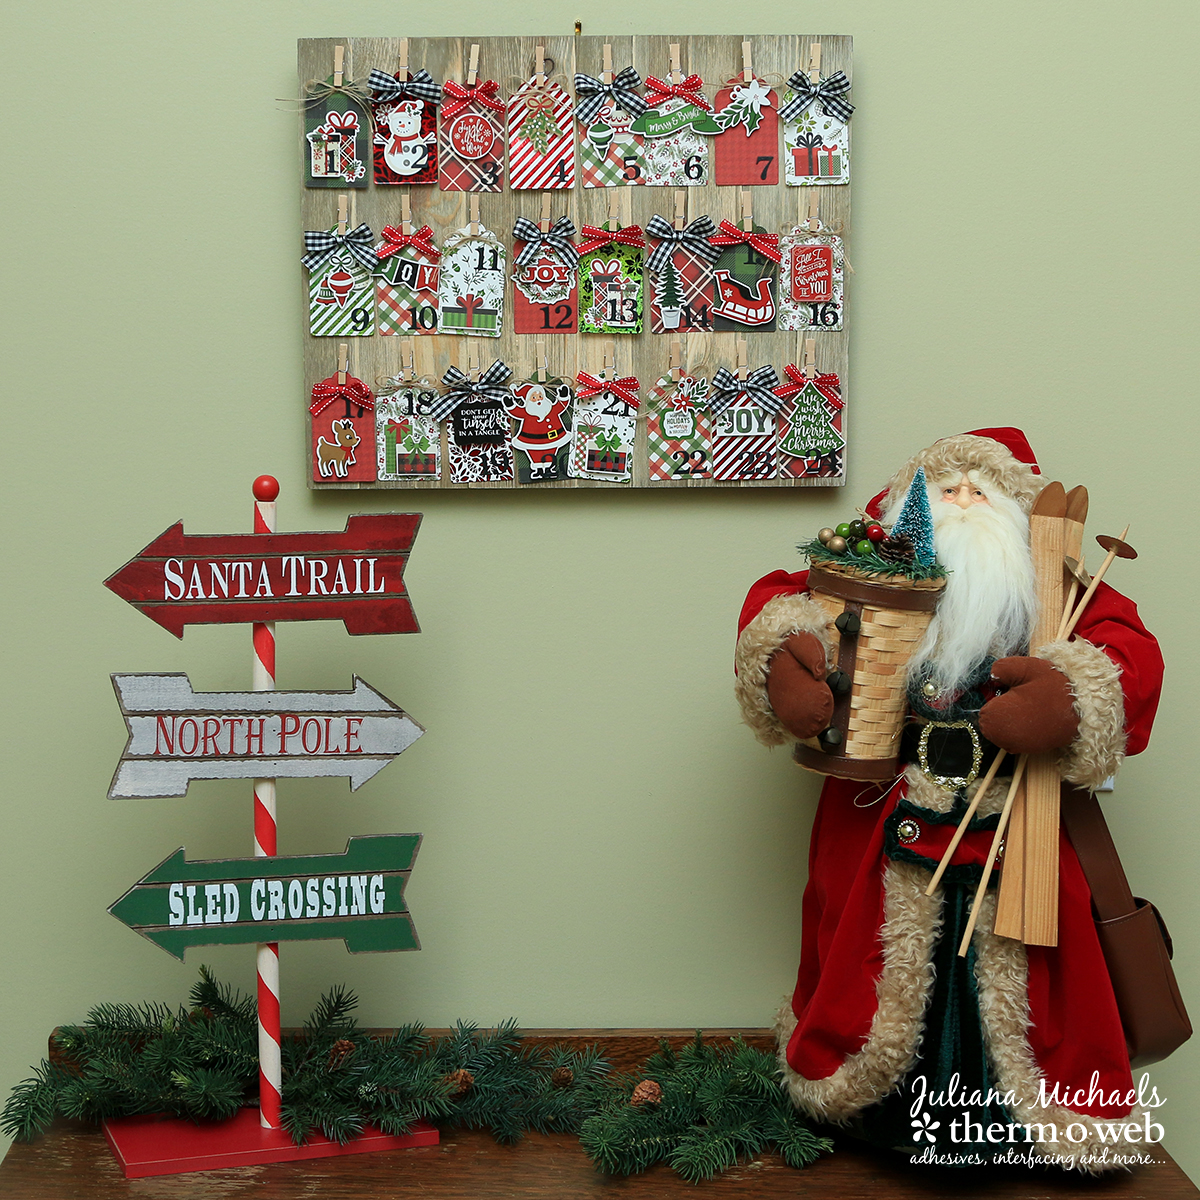
There are many variations and options when it comes to creating an Advent Calendar. For a more religious take on this one, you could easily add an image, Bible verse, or Christian prayer to the back side of each tag. Another option would be to attach a gift card or other flat gift item. Either way, your family is sure to enjoy the surprise behind each tag.
Advent Calendar Supplies
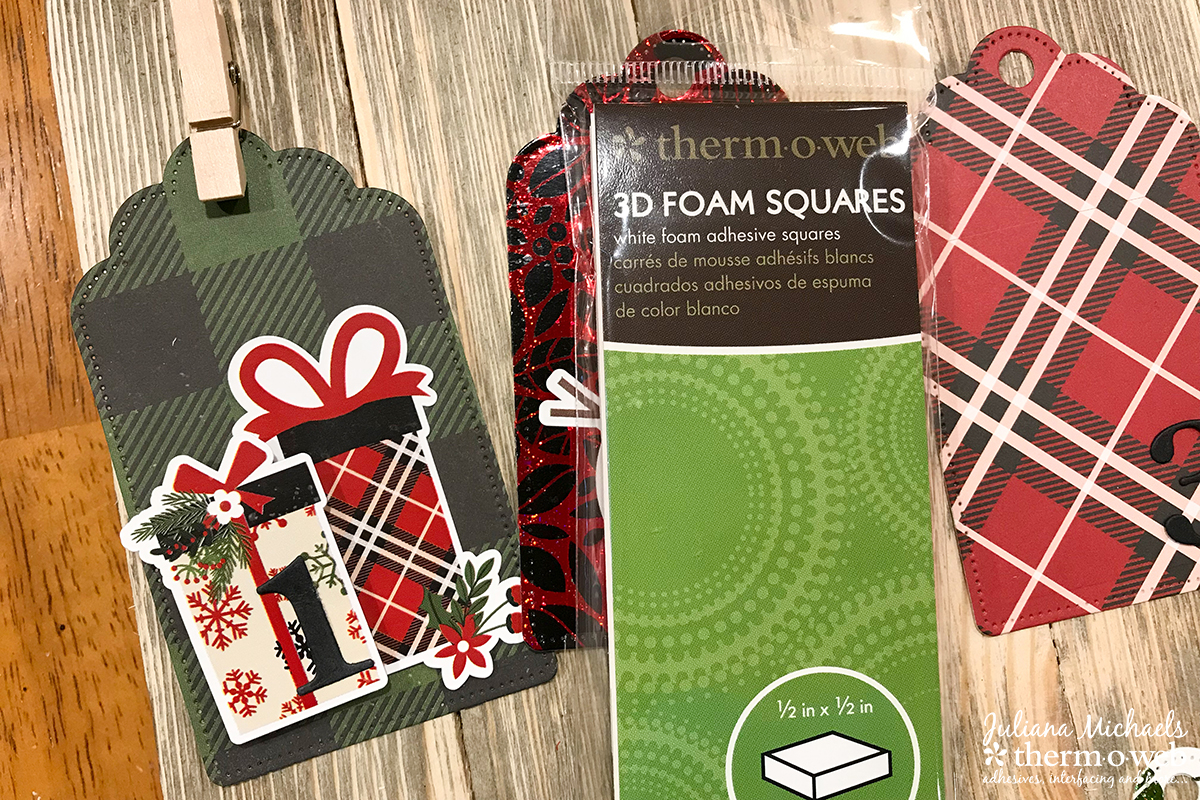
To create your very own Advent calendar, gather the following supplies: Jillibean Soup Mix the Media 18×24 Wood Panel, patterned paper and stickers from Echo Park Paper – A Perfect Christmas, small wooden clothespins, ribbon (including Gina K Designs Gingham Fancy Ribbon), manual die cut machine, Scissors, powder tool, Gina K Designs Nested Tag Dies Set, number die set, Gina K Designs Premium Black Cardstock, Therm O Web Toner Sheets, Gina K Designs Foil-Mates™ in Holiday Flora and Ornamental Holiday, Gina K Designs Fancy Foils in Glittering Green and Radiant Red , Laminator, Therm O Web iCraft Mixed Media Adhesive, Memory Tape Runner XL, SuperTape™, 3D Foam Squares and Zots Medium.

Advent Calendar with Gina K. Designs Foil-Mates™ Instructions:
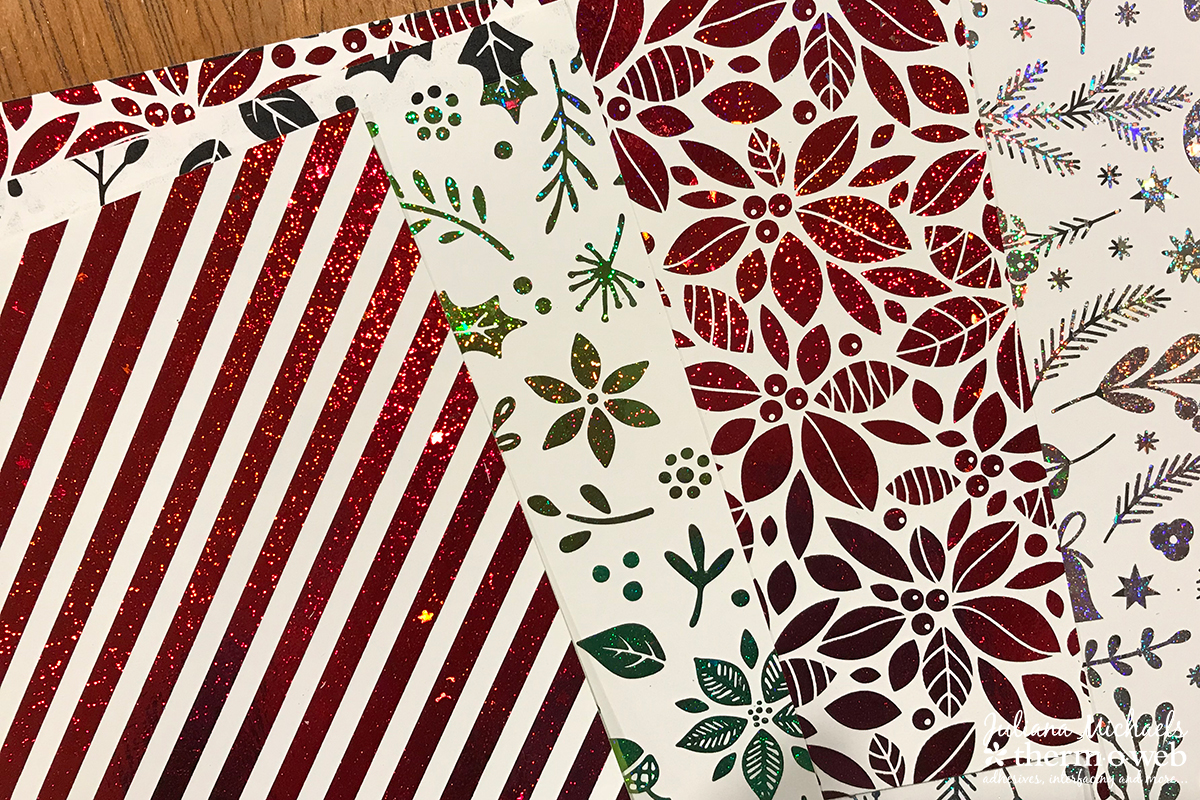
Once you have all of your supplies, begin by preheating your laminator. Allow it to warm up for at least 30 minutes. When your laminator is ready, apply your choice of Fancy Foil to a Gina K Designs Foil-Mates™, place them in a piece of folded parchment paper and run them through the laminator.
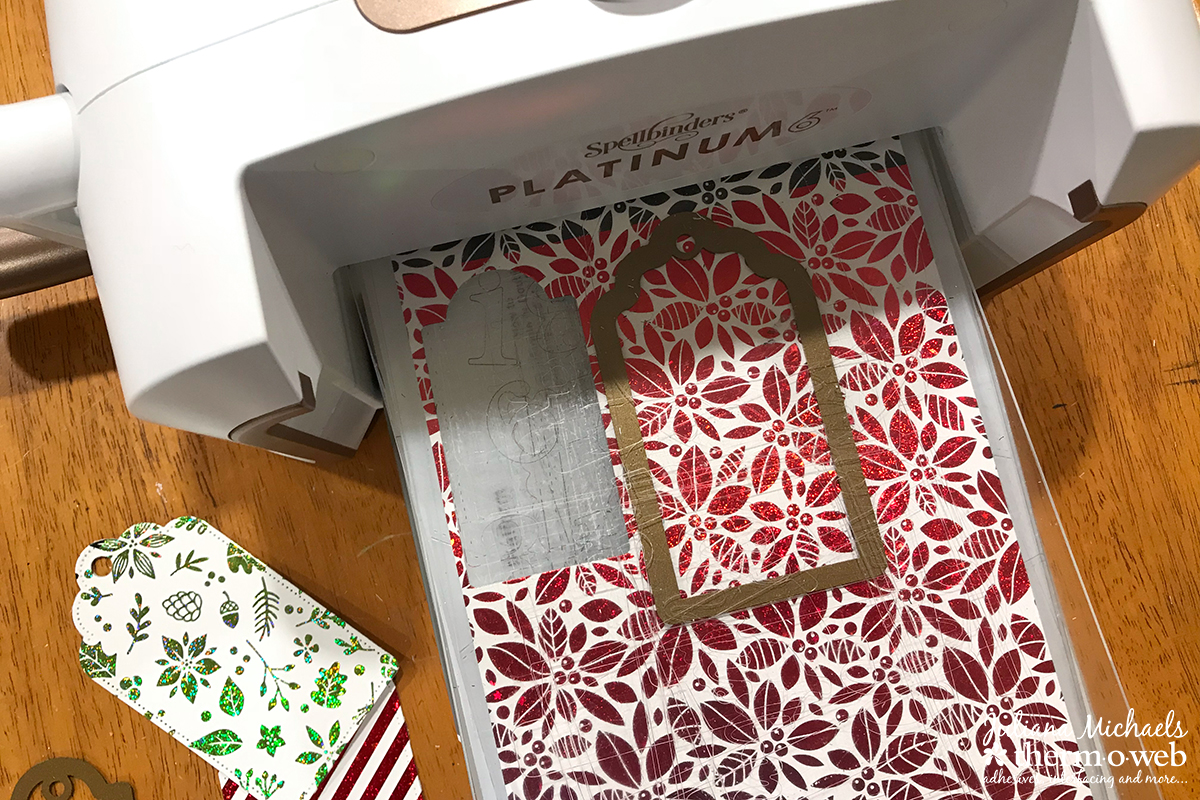
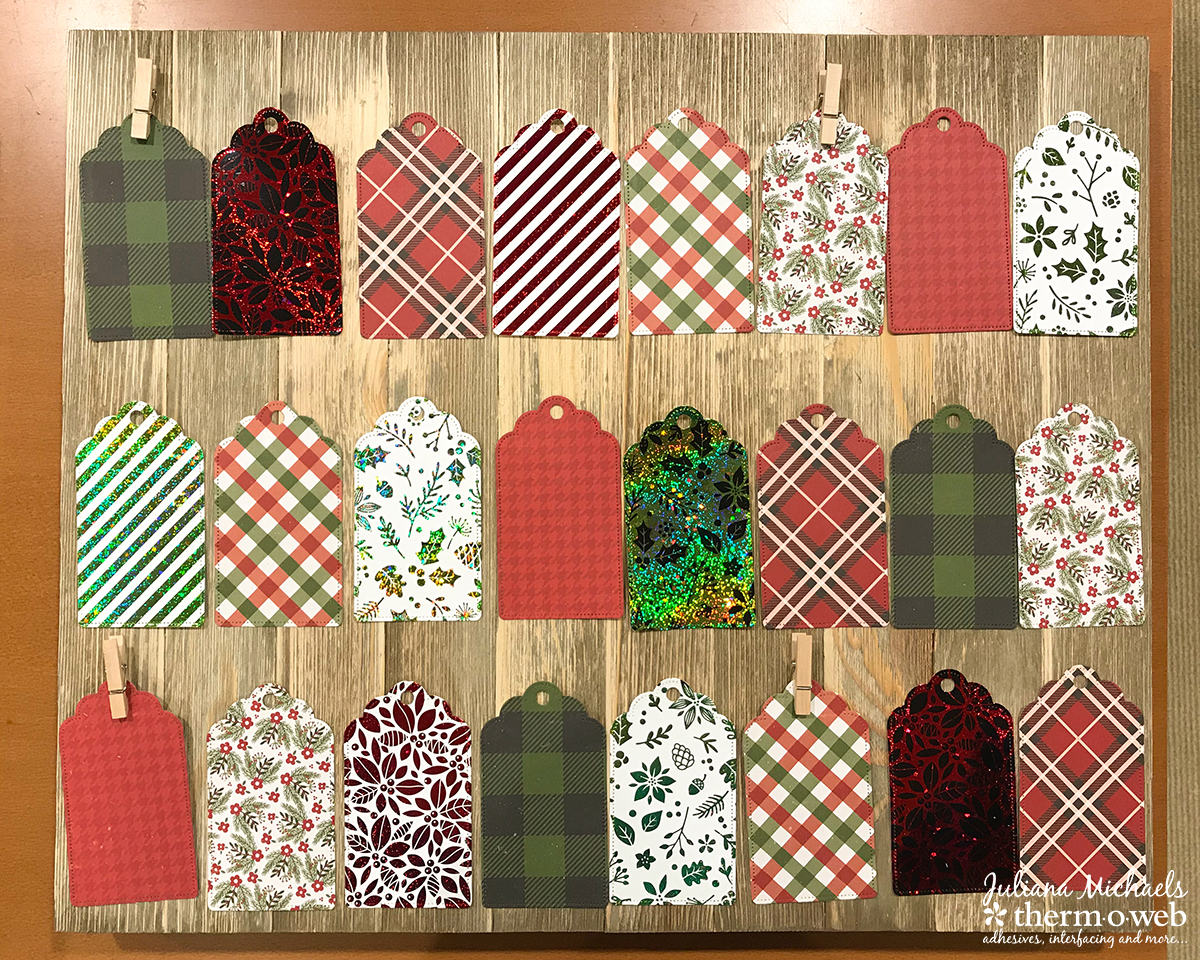
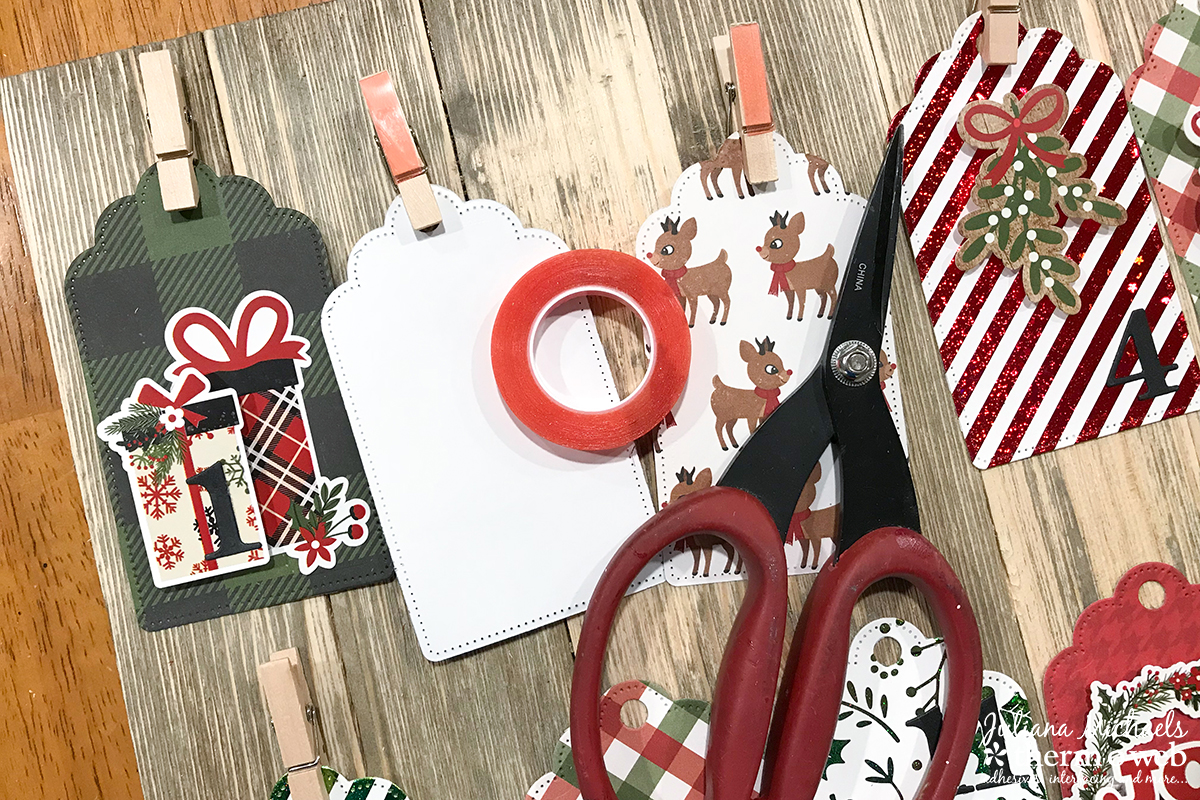
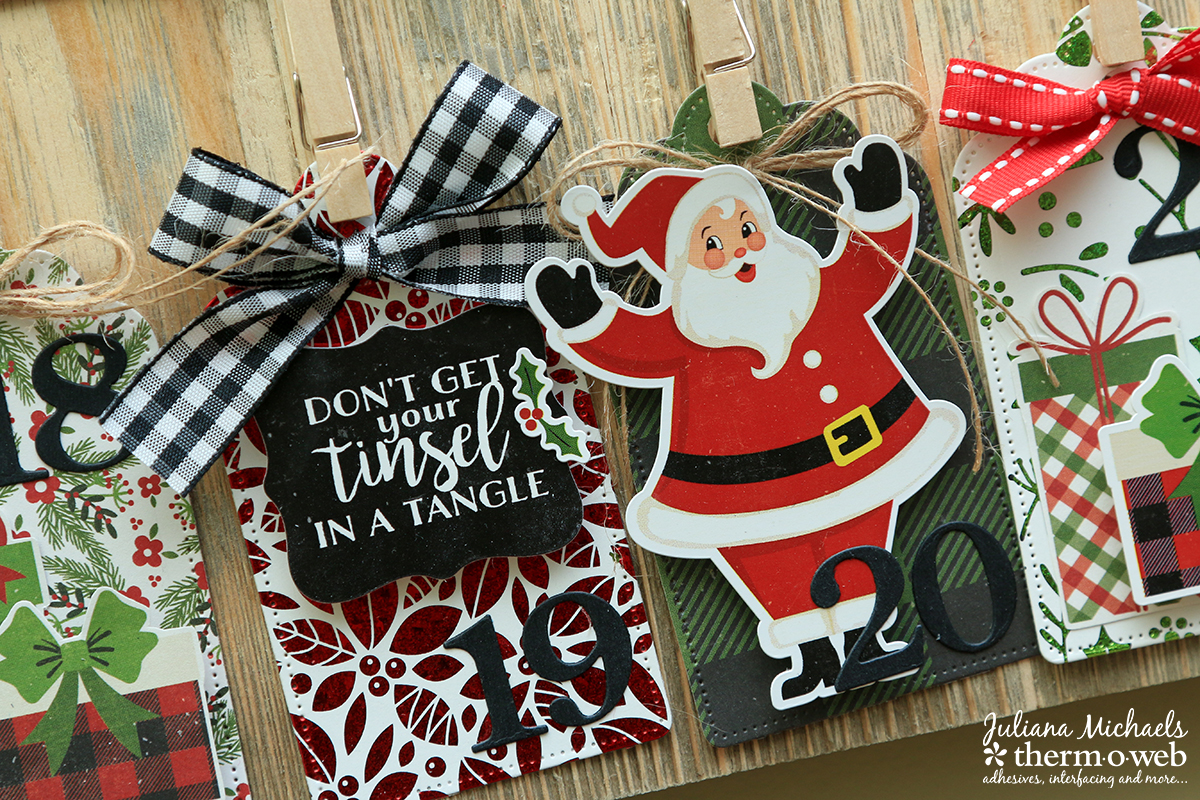
Use the large tag from the Gina K Designs Nested Tag Dies and a manual die cutting machine to cut out 24 tags from the Foil-Mates and your patterned papers.
Designer Tip
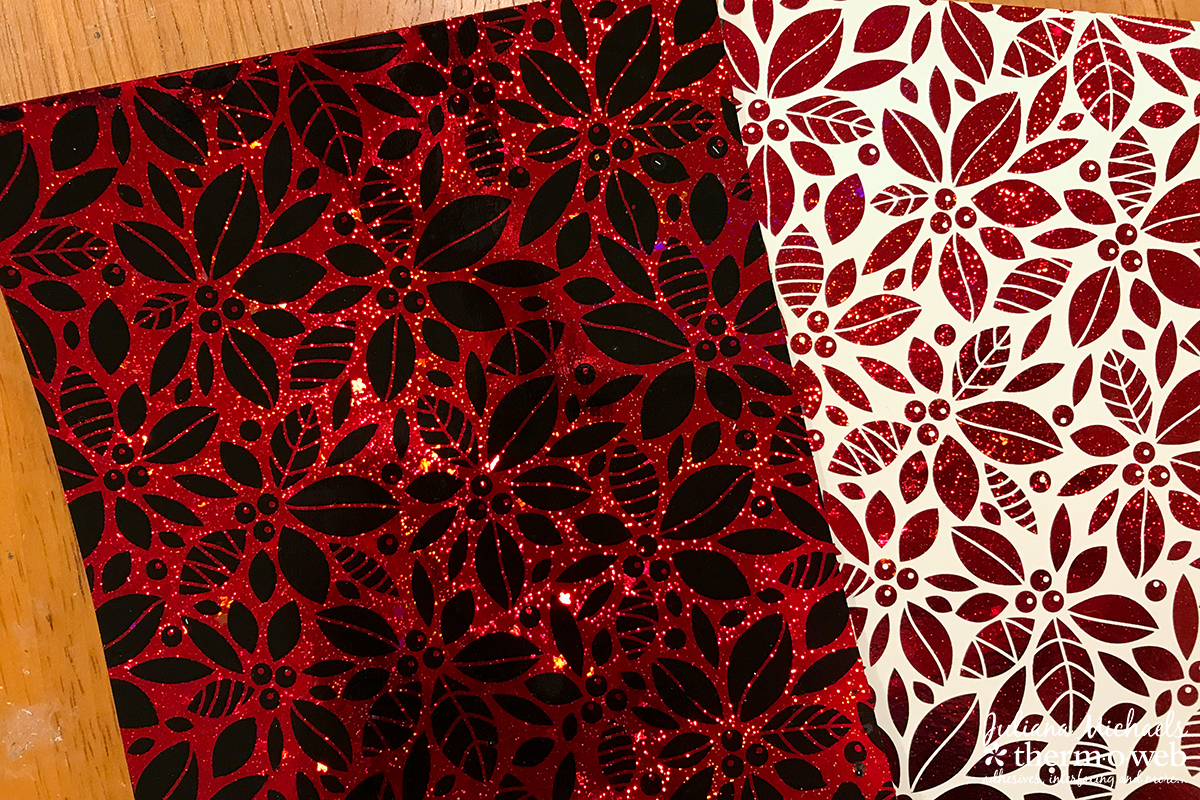
A fun tip to share with you is how to use your foil scraps. Take a Therm O Web Toner Sheet and the scrap. Place the scrap (pictured below on the left-hand side) on top of the toner sheet and run it through your laminator.
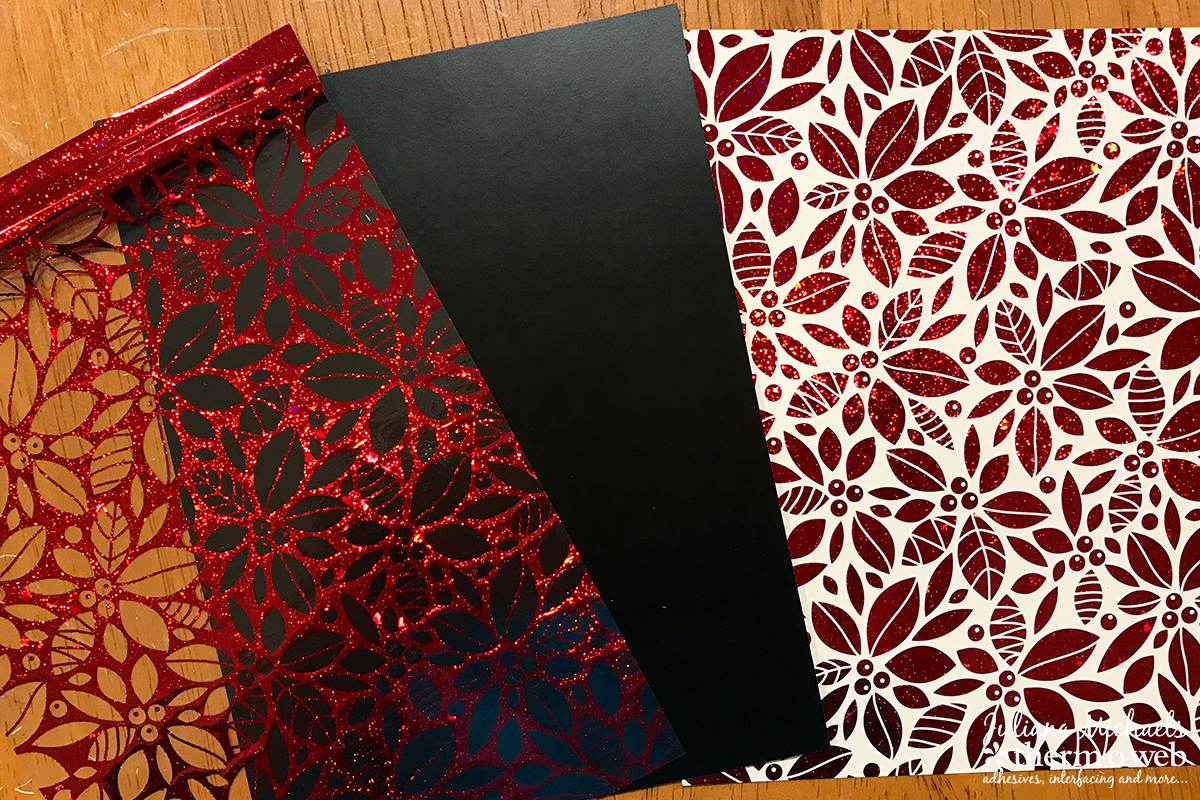
You will then be left with the following dramatic foiled design. I used this technique with two different scrap designs as I was creating the tags for this project.
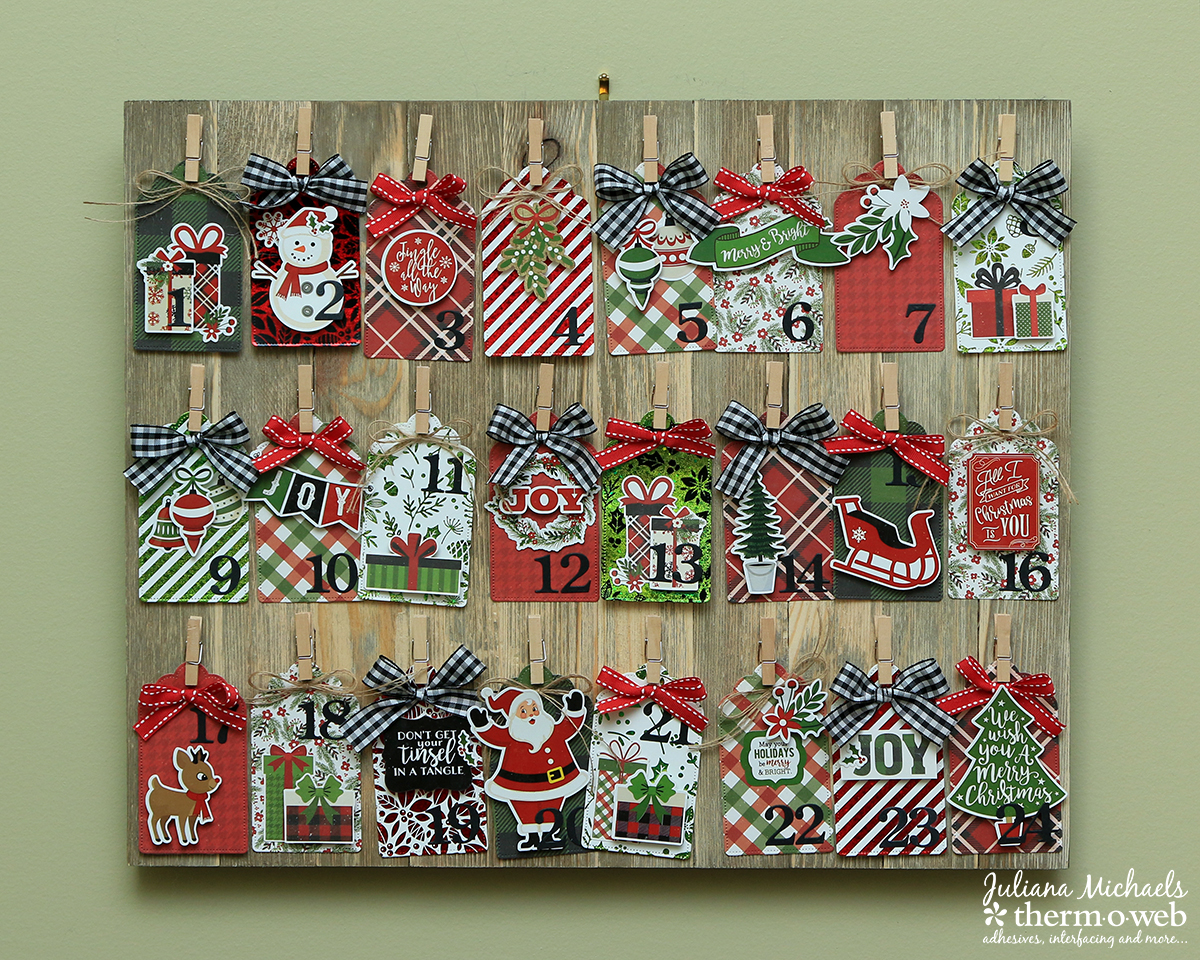
After you have cut out all of your tags, determine the placement of each on your wood plank.
Decorating The Tags
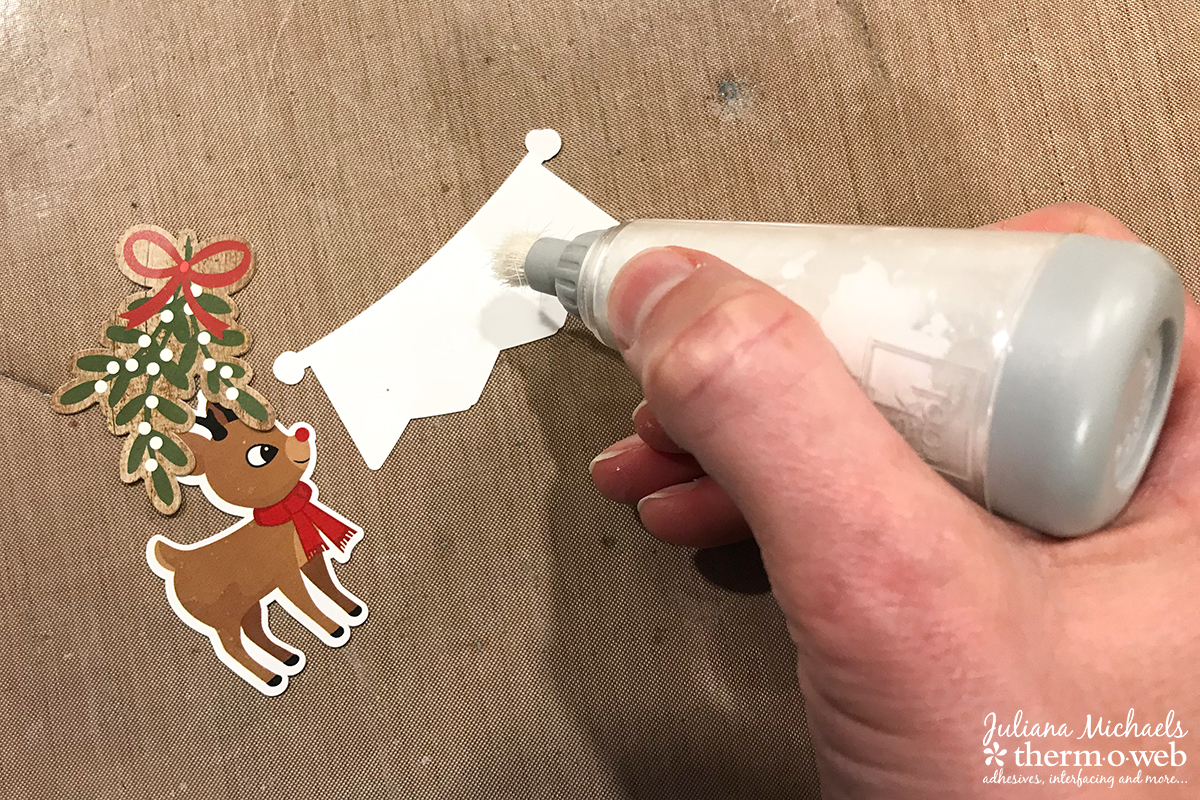
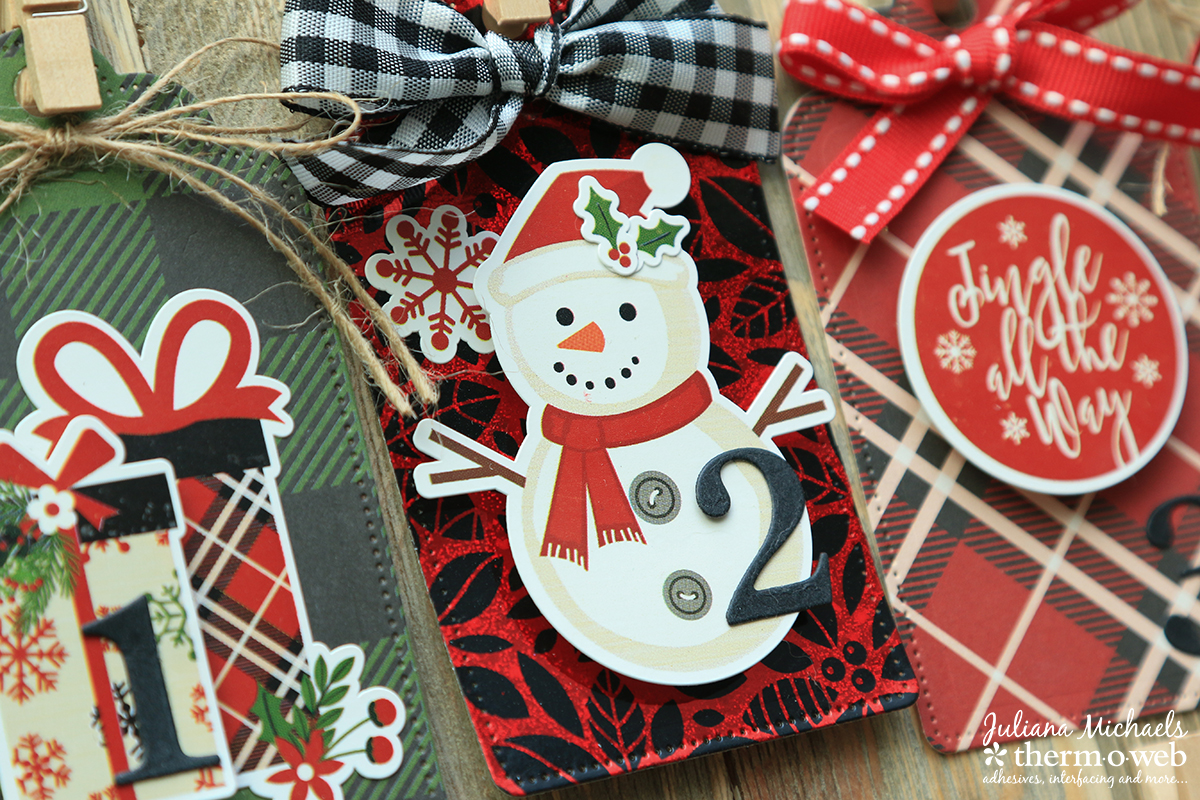
Now it’s time to decorate each of the tags. Die-cut numbers from black cardstock using a number die and your manual die cut machine. You could also use number stickers. Speaking of stickers, use some coordinating stickers to dress up the tags as well. Use a powder tool to “remove” the adhesive from the stickers. This is a trick I like to use when I want to be able to either play around with the placement of a sticker before I finally stick it down or if I want to turn it into a 3D embellishment.
To make some of the stickers more dimensional, use Therm O Web 3D Foam Squares to pop them up on the tags.
Continuing adding the stickers and numbers until each tag is decorated.

To hang each of the tags, cut a piece of 1/4″ SuperTape™ and stick it to the back side of each clothespin. Peel off the liner and adhere the clothespin to the wood plank.
For the final touch, adhere ribbon or twine bows to each of the tags using Medium Zots.
Here are a few more up close photos of the tags.
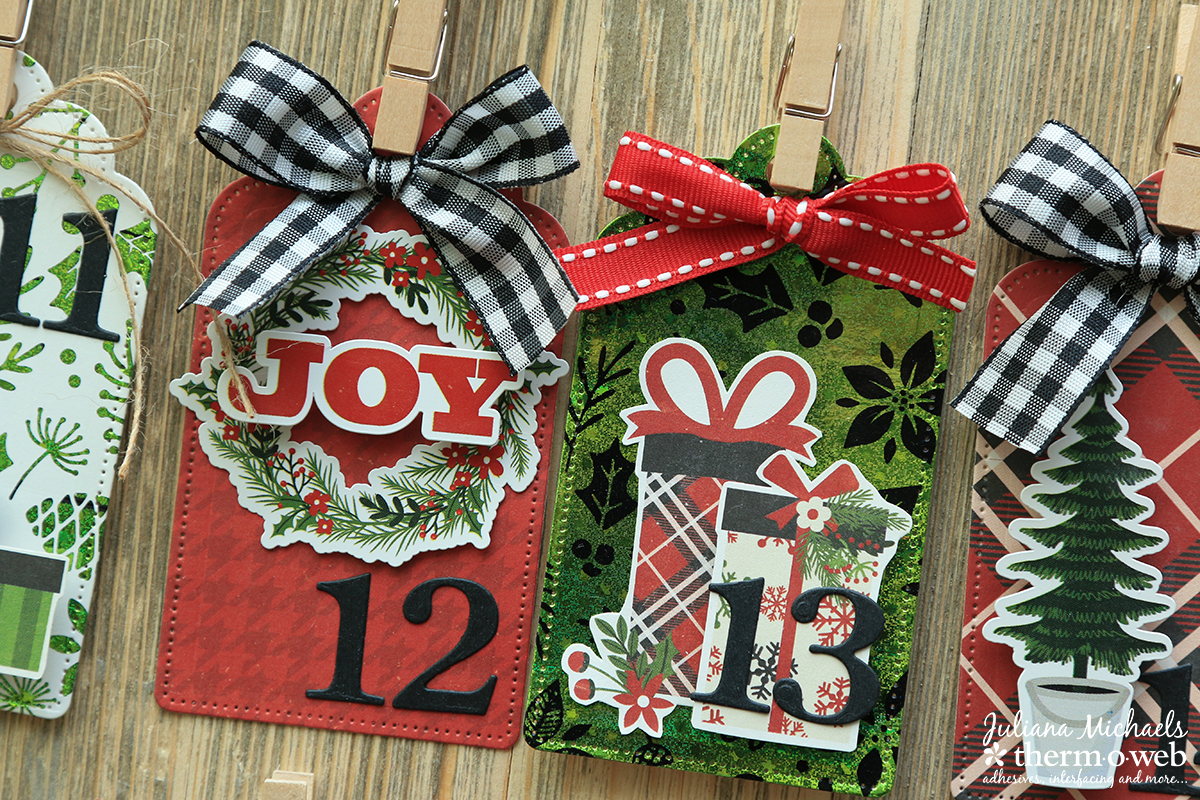
As you can see, the foil adds a wonderful touch of shimmer and shine to the tags on the Advent Calendar.

I hope you enjoyed learning how to use some of the wonderful products from Therm O Web to create your own handmade Advent Calendar.