


Hello Therm O Web friends!
It’s Juliana here today to share a tutorial on how to apply Deco Foil™ to cardstock die cuts using the new iCraft® Deco Foil™ Hot Melt Adhesive Sheets. I used this technique to add foil to both the title piece and the die cuts behind my photos. This has seriously become my new favorite way to add foil to my die cuts! I created the cut files that I used on my layout and I cut them out using my Silhouette Cameo. Don’t worry, though if you don’t have a Silhouette, you can also use punches and metal dies with this technique.

Therm O Web Supplies:
Therm O Web Memory Tape Runner XL
Therm O Web Sticky Dots Adhesive
Therm O Web 3D Foam Squares 1/4″
Therm O Web 3D Foam Squares 1/2″
Therm O Web iCraft® DecoFoil™ – Teal
Therm O Web iCraft® DecoFoil™ Hot Melt Adhesive
12″ Foil Royal Sovereign Laminator
Other Supplies: Patterned Paper, Stickers, Letter Stickers, Die Cuts, Wood Veneer – Cocoa Vanilla Studio; Cardstock – American Crafts; Sewing Machine; Electronic Cutting Machine: Silhouette Cameo
Foiled Die Cuts Tutorial
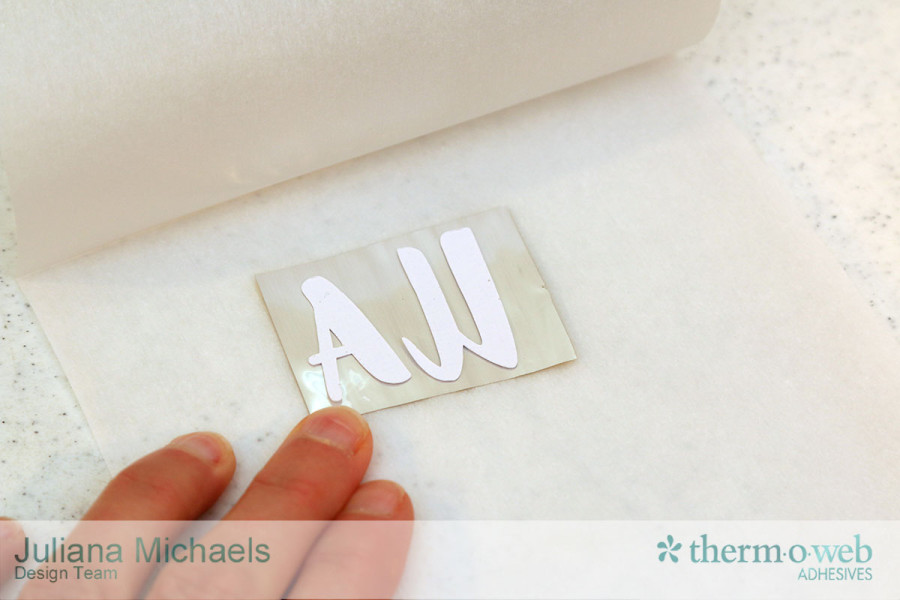
1. Before I began, I determined what size my die cut shape was going to be and I then cut a piece of iCraft® Deco Foil™ Hot Melt and a piece of cardstock that were the same size and slightly larger than my die cut.
2. I placed the iCraft® Deco Foil™ Hot Melt with the rough side (adhesive side) facing down on top of the cardstock.
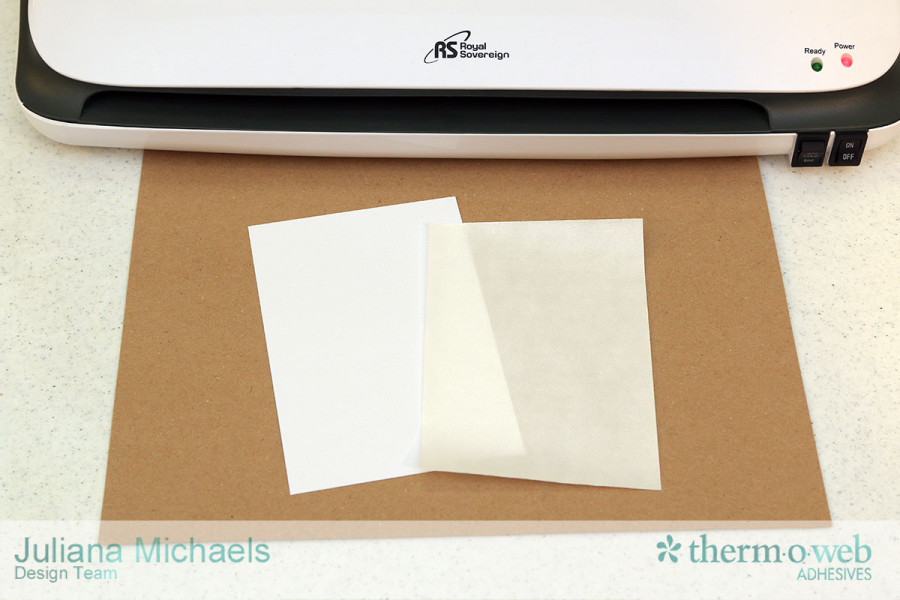
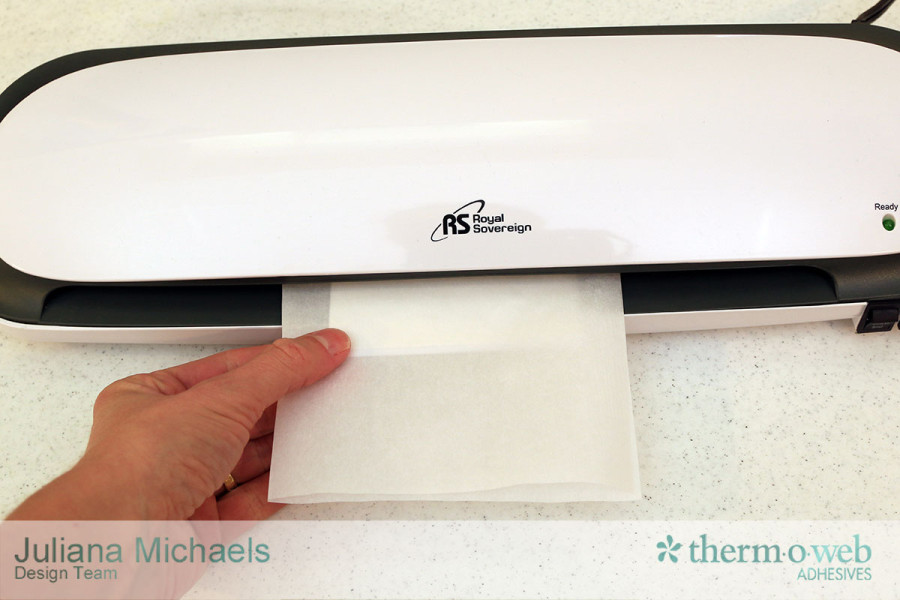
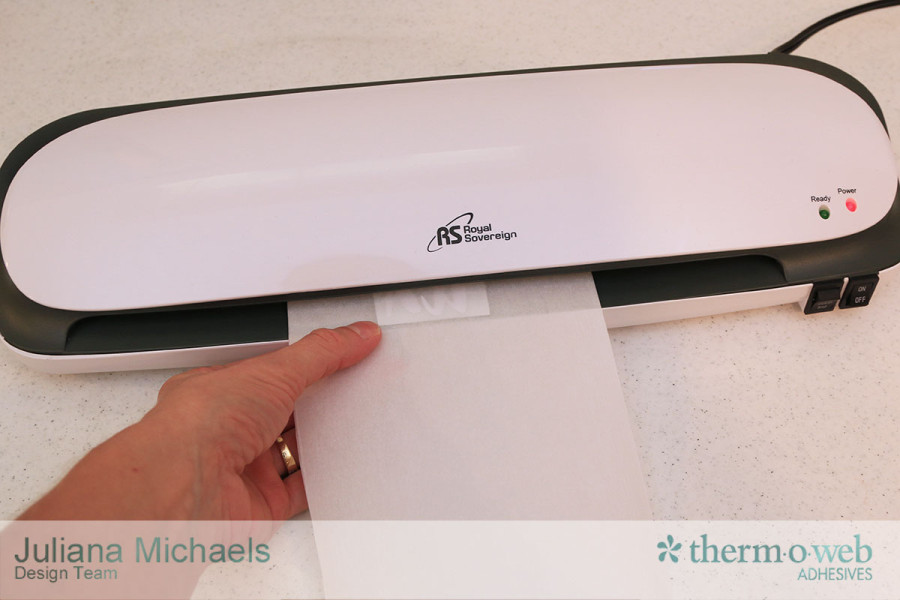
3. Next, I placed the Deco Foil™ Hot Melt Adhesive and cardstock stack onto a piece of parchment paper and inserted it into my laminator. The parchment paper comes with the Hot Melt Adhesive and it acts as a carrier sheet to feed the material through your laminator. Make sure you have allowed plenty of time for your laminator to warm up and that you have it set to 5 mil.
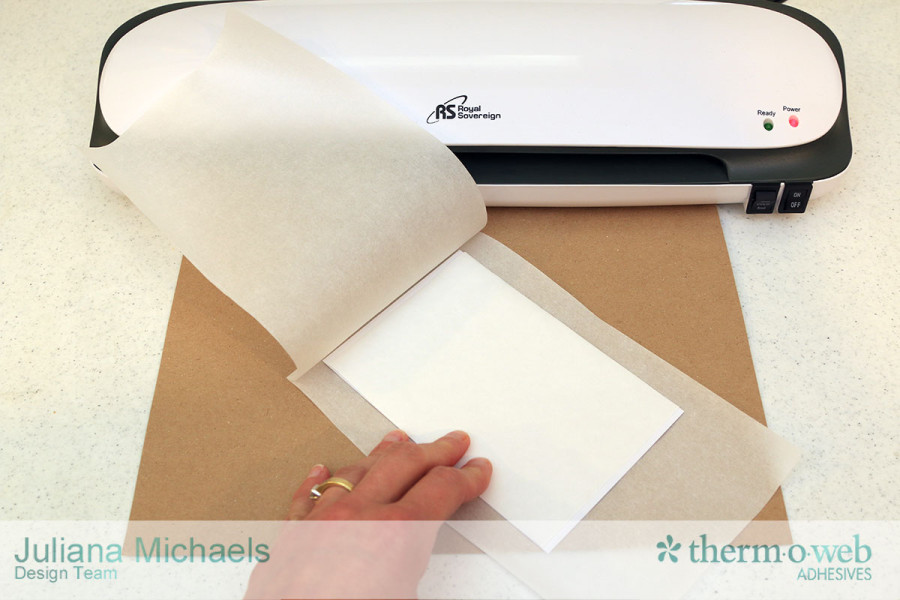
4. Once everything had finished going through my laminator, I positioned the piece on my Silhouette cutting mat with the cardstock side facing down onto the cutting mat and cut out the design I had selected.
The settings I used for cutting through the iCraft® Deco Foil™ Hot Melt Adhesive Sheets and Cardstock with my Silhouette Cameo are as follows:
- Textured Cardstock Setting
- Blade to 6
- Double Cut
I used a relatively new blade, so if your blade is old and dull, you may have to adjust these settings. I always recommend doing a test piece first.

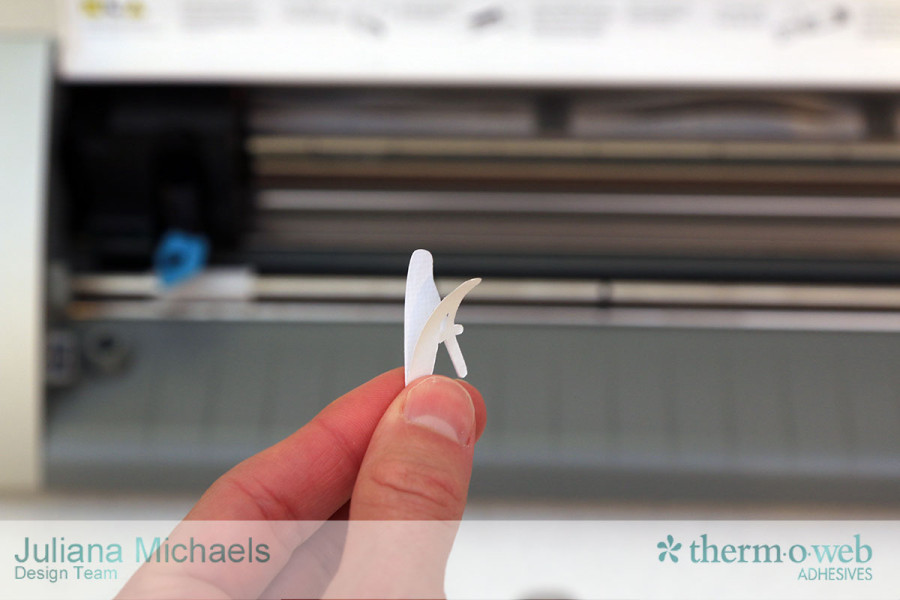
5. After I finished cutting my image, I removed it from the cutting mat and peeled off the liner from the die cut design.
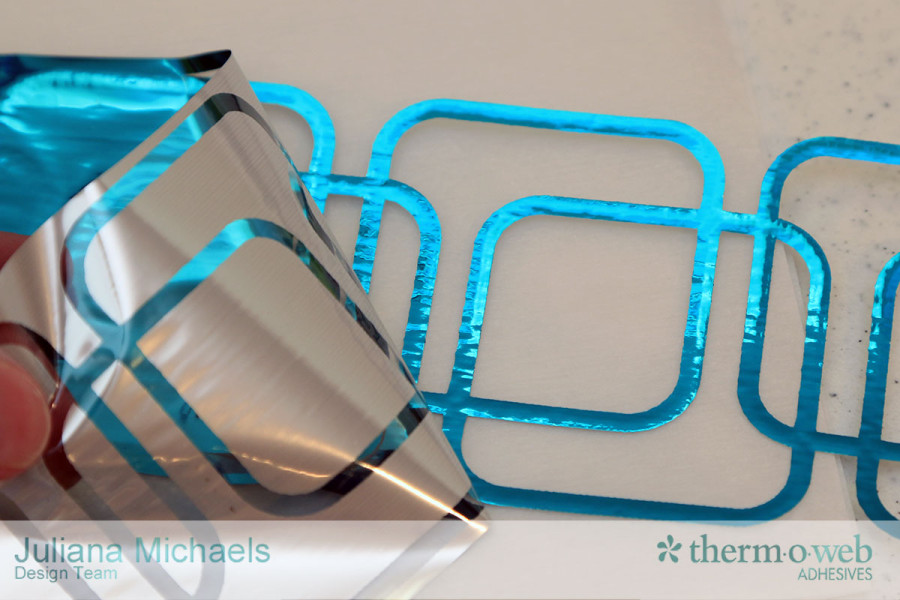
7. Next, I cut a piece of Deco Foil in Teal slightly larger than my die cuts. I then placed the die cuts adhesive side down onto the back side of the Deco Foil.
8. I placed the Deco Foil™ and die cuts inside the parchment paper carrier and inserted it into my laminator again.
9. Once the piece was finishing going through my laminator, I removed it and allowed it to cool. I then peeled off the foil transfer sheet to reveal my gorgeously foiled title.
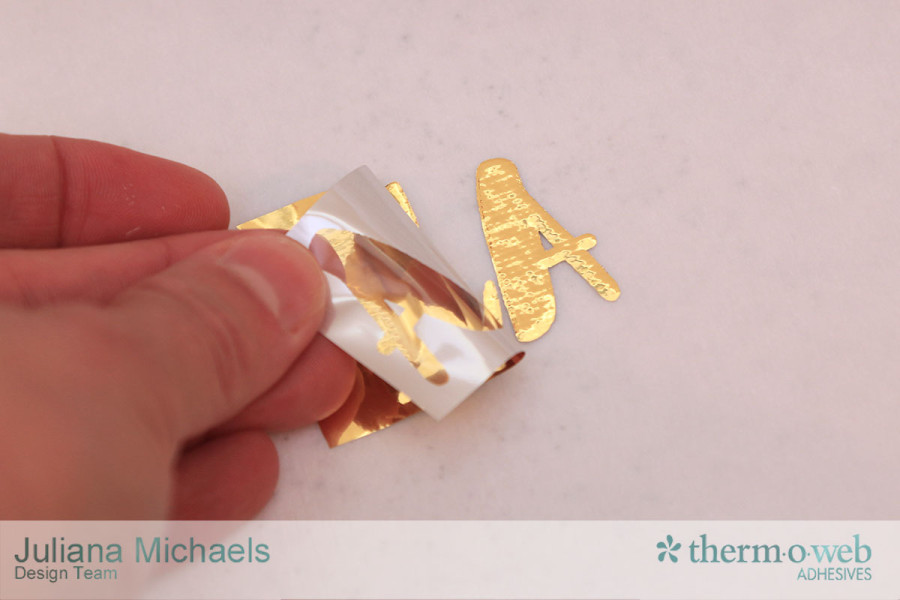
Here you can see the foil being removed from the die cut shapes that I used behind my photos.
Like I mentioned above, this technique is now my new favorite method to add foil to my die cuts! These are the die cuts that I created and used on my layout. If you are interested in using these die cuts on your next project, you can download them for free HERE.


I also used Therm O Web Sticky Dots Adhesive to adhere my wood veneer pieces to my layout. These are perfect for applying adhesive to more intricate and small embellishments.
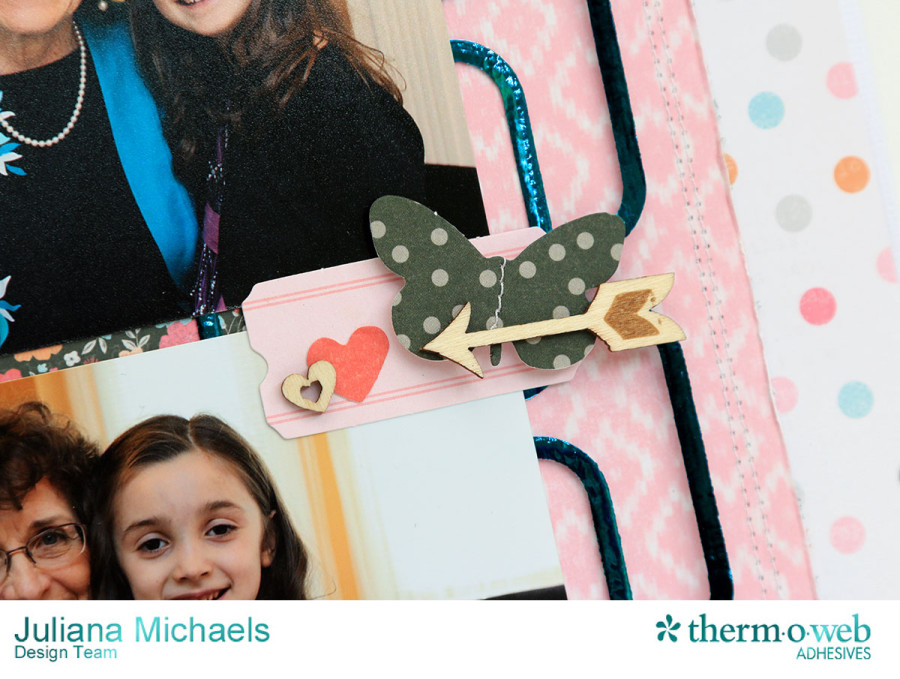
To add more dimension to the die cut butterfly and hearts, I used Therm O Web 3D Foam Squares.

Now it’s your turn to pull out your Deco Foil and die cuts and start creating your own gorgeous embellishments!
HUGS!
Juliana
5 Comments on All Smiles – Deco Foil Die Cuts Tutorial
4Pingbacks & Trackbacks on All Smiles – Deco Foil Die Cuts Tutorial
-
[…] Melt Adhesive Sheets. The technique I used is the same one I shared recently with a step by step Foiled Die Cuts Tutorial right here on the Therm O Web […]
-
[…] Deco Foil™ Transfer Sheets in Black on this layout to create the spider web die cuts. I used the Deco Foil Die Cuts Technique to adhere the foil to the die cuts. I cut the spider web die cuts using my Silhouette Cameo and a […]
-
[…] Hot Melt Adhesive Sheets. I applied the DecoFoil using one of my favorite techniques – Deco Foiled Die Cuts. You can check out the entire step by step tutorial HERE. I also created a free digital cut file […]
-
[…] Wafer Thin Dies and then foiled them using Gina K Designs Fancy Foils. You can check out my How to Deco Foil Die Cuts Tutorial to learn how to do this. This particular tutorial discusses using an electronic cutting machine, […]
Tracey Sabella
July 23, 2015 at 6:18 pm (9 years ago)Fabulous LO, Juliana!! Great explanation of your process too!! ~ Blessings, Tracey