


In today’s day and age..t’s more common then not to own an ipad, Kindle or some other fun tablet.
In fact more people now use those tablets as their primary computer then notebooks and desktops.
Today talented Designer Audrey Pettit has a project to take your tablet up a notch! 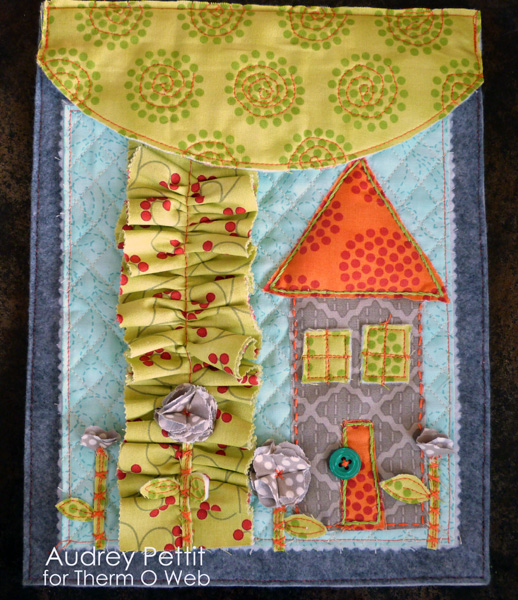
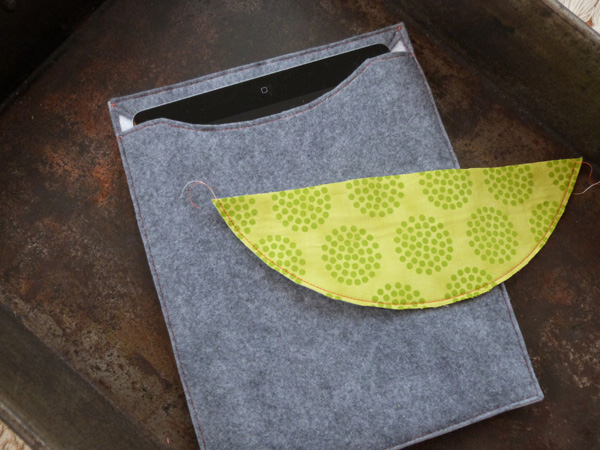
HeatnBond iPad Cover by Audrey Pettit
Supplies:
Therm O Web HeatnBond Iron-On Fusible Interfacing
Therm O Web HeatnBond Iron-On Fusible Fleece
Therm O Web StitchnSew Sew-In Fleece
Therm O Web PeelnStick Ruler Tape
Therm O Web PeelnStick Fabric Fuse Tape
Fabric and Jelly Roll: Bits n’ Bobs by Pat Sloan for Moda Fabrics
Felt: Sewing Supply
Floss: DMC
Flower Die: Spellbinders
Button: Craft Supply
Polyfill Fiber
If you’re in the market for a new tablet case, why not try making your own? You can personalize them to fit your own unique style, and they have the added benefit of being a lot less expensive than ones from the store. And with Therm O Web’s fabulous line-up of sewing and quilting products, creating your own handmade fabric projects has never been easier.
To begin, measure the height and width of your tablet and cut two panels of wool-blend felt that are one-inch wider and one-inch taller than your tablet measurements.
Cut two panels of Therm O Web HeatnBond Iron-On Fusible Fleece that are a bit bigger than your felt pieces, and following the manufacturer instruction, iron the fleece onto the back of the felt.
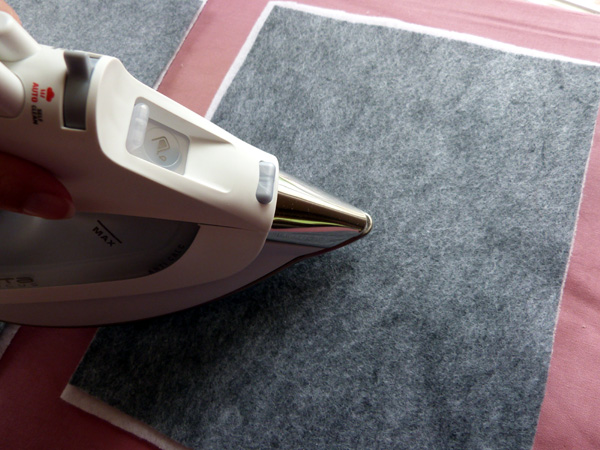
Once your panels are heat set, trim off the excess fusible fleece.
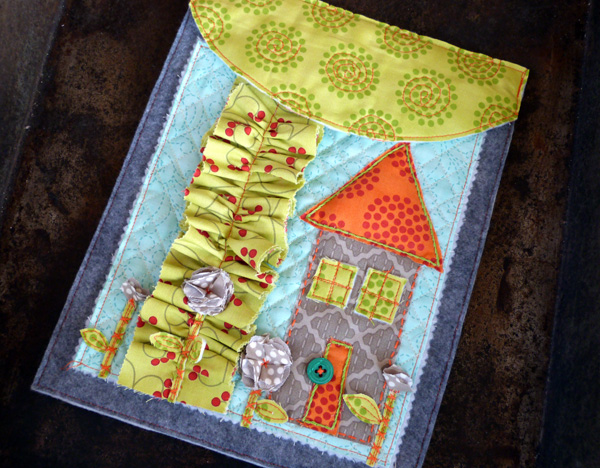
Create a rounded-edge pattern piece from scratch paper. For mine, I simple traced around the edge of a small plate. Pin the pattern onto the top of the front panel of felt so that the rounded edge goes down about an inch and a half from the top, and cut out. Save the trimmed off portion to stitch to the inside top of the back panel.
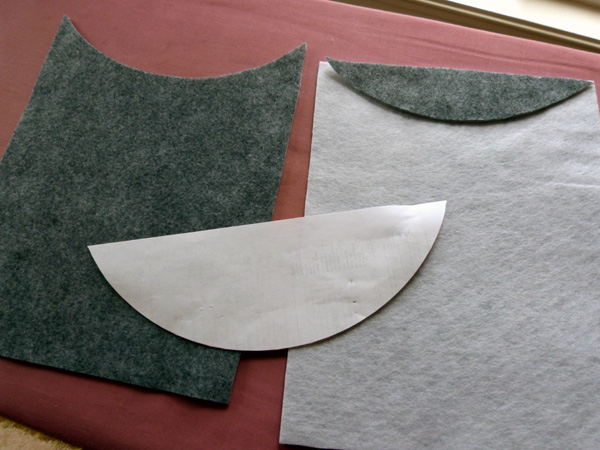
Iron on the fusible fleece to the back of some decorative fabric, and using your paper pattern, cut out a rounded panel for the flap closure of the case. Save the excess lined fabric scraps to use later.

Now we’ll begin the construction.
For the back panel, pin the rounded excess piece that was cut from the front panel onto the inside top of the panel. Machine stitch in place.
For the front panel, trim off about half an inch of the top corners so that the entire front panel is 1/2″ smaller than the back panel. Pin the two pieces together, wrong sides facing, and starting at the top left corner, stitch down the side, across the bottom, and up the other side.
Stitch along the curved edge of the flap piece.
If you wish, add a bit of decorative stitching to the flap piece. For mine, I stitched some random spiral circles over the dotted pattern in the fabric. Pin the top of the flap to the top of the back panel and machine stitch across.
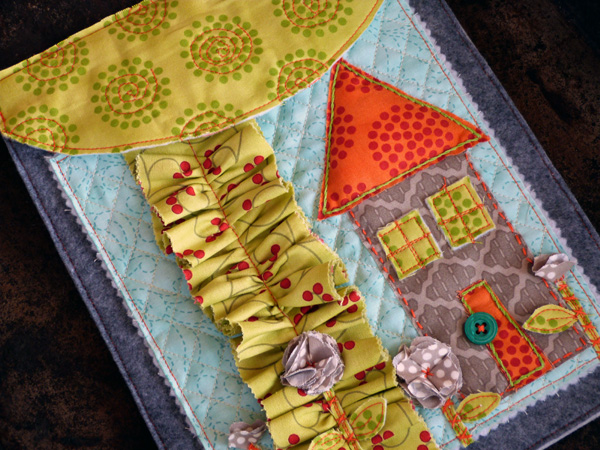
Now we’ll add a decorative scene to the front of the tablet case.
Cut a panel of fabric that is one inch shorter, and one inch thinner than the finished tablet cover. Cut a piece of Therm O Web sewable interfacing that is slightly larger than the fabric.
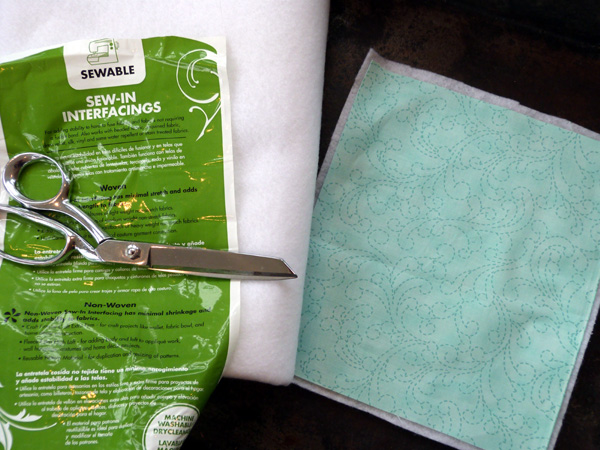
Machine stitch the sew-in interfacing to the fabric. Trim out the panel using pinking shears.
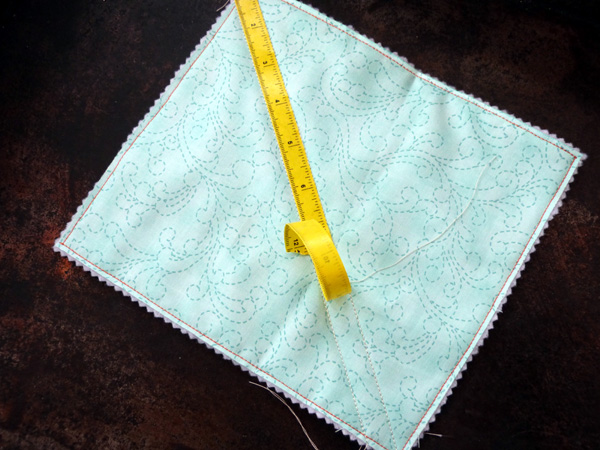
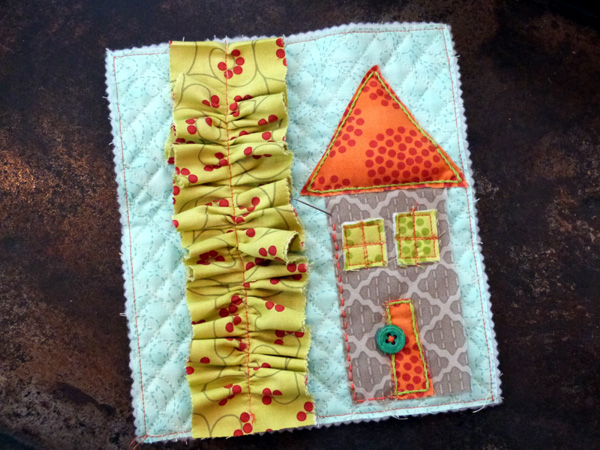
Apply PeelnStick Ruler Tape from the top left corner of the fabric panel to the bottom right corner, and using the ruler tape as a guide, stitch down both sides of the tape.
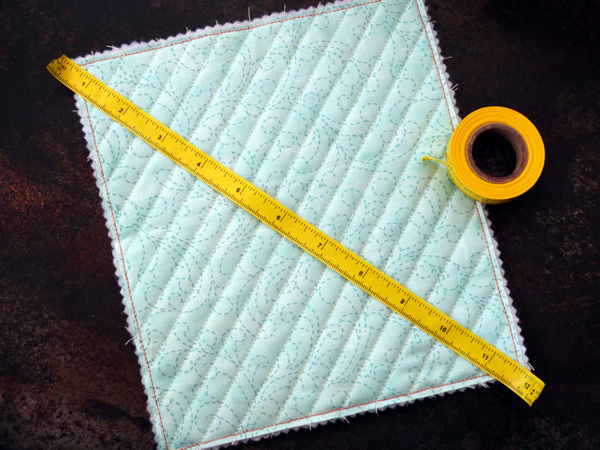
Peel the tape up and align it with the edge of the last row of stitching. Stitch along the tape again, and repeating the process, stitch the entire panel. Then rotate the panel to the diagonal and repeat the process again.
Fold a strip of fabric from the Jelly Roll in half, and stitch a loose running stitch down the middle. Pull the running stitch threads to gather the fabric into a ruffle. Continue to pull and gather until the strip fits the front of the quilted panel.

Adhere the fabric ruffle to the left side of the panel using Fabric Fuse Tape.
For the House applique, iron on HeatnBond Fusible Interfacing to the back of several fabric swatches. Cut out a rectangle for the house and a triangle for the roof, and hand stitch the pieces to the quilted panel. I added a bit of polyfill fiber under the roof to create dimension.
Embellish house with widows and doors cut from scraps. Add a button for the door handle.
Die cut small flowers from fabric to embellish the scene. Add stems and leaves cut from leftover fabric and handstitch the flowers to the panel. Adhere panel to the tablet case using Fabric Fuse Tape, or lightly hand-tack with a few stitches.
Enjoy!
How about we treat you to some of our most popular HeatnBond products and interfacings?!
Simply follow the easy to use Rafflecopter entry form and we’ll enter you to win a fun assortment of our products including our:
HeatnBond Lite, Batting Tape, StitchnSew, Fusible Fleece and more!
a Rafflecopter giveaway
4 Comments on Create a iPad Case with HeatnBond Fusible Fleece
1Pingbacks & Trackbacks on Create a iPad Case with HeatnBond Fusible Fleece
-
[…] have the full tutorial up on the Therm O Web blog, in case you’re interested in learning more. Therm O Web is offering a lovely giveaway of […]
Sharon Joyner Griffith
June 11, 2013 at 12:18 pm (11 years ago)Oh this looks like a wonderful project and Ineed one….I will give it a try…thanks so much.
Sylvia/LittleTreasures
June 12, 2013 at 8:15 pm (11 years ago)Wow, this is out of this world cute. Love the fabric, design and looks so easy with the step by step posted. Thanks for the inspiration.
Paula Z
June 21, 2013 at 10:57 pm (11 years ago)This is the cutest project so adorable! I would like to know where you purchased your measuring tape “tape”? That is great, and would be most helpful when teaching my granddaughter to quilt. I absolutely need some of that. I’d appreciate any information. Thanks again, keep on sewing!