


We are so excited to welcome spring with some amazing new products to the Therm O Web family. This sweet card features one of two new Stampn’Stencil sets that includes clear stamps, detail stencils, and dies in a coordinating system that is absolutely perfect for spring time cards and crafting. And what could be cuter than soft, velvety spots on a ladybug? I’ll show you how you can easily add dimensional accents like these with our new Deco Foil Flock transfer sheets. Let’s get started.
Deco Foil Flock Transfer Sheets
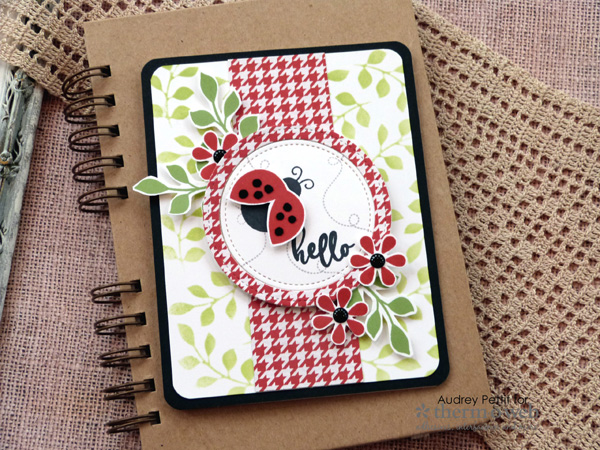
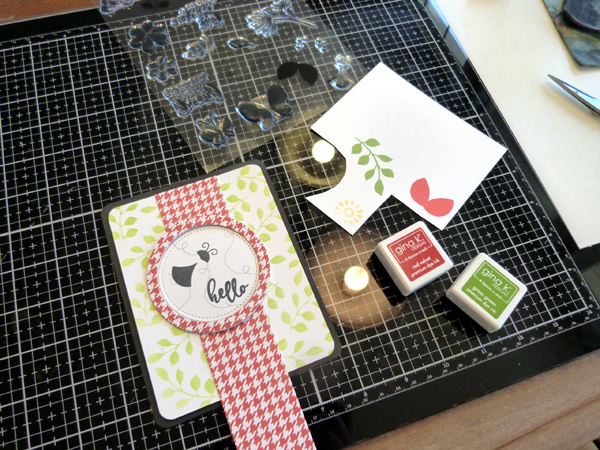
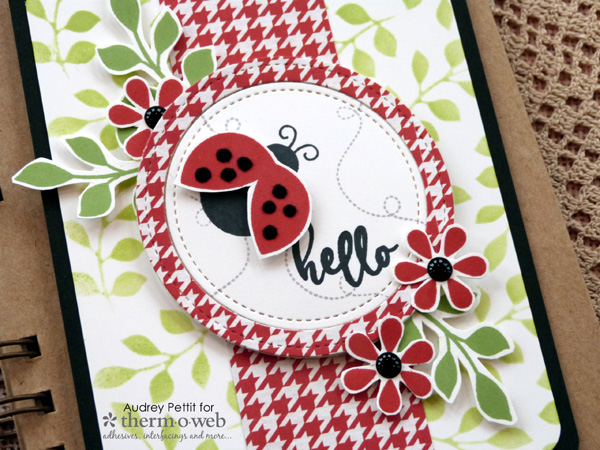
Deco Foil Flock Petals and Wings Hello Card
by Designer Audrey Pettit
Therm O Web Supplies:
DecoFoil Flock Transfer Sheet: Black Velvet
DecoFoil Transfer Gel
Gina K Designs Premium Cardstock: Luxury White, Black Onyx
Gina K Designs StampnStencil Petals and Wings: Stamp Set, Detail Stencil, Die Set
Gina K Designs Wafer-Thin Die Set: Stitched Circles Large
Stencil Pal
Purple Tape
XL Memory Tape Runner
3D Adhesive Squares
Royal Sovereign Laminator
Patterned Paper: Photo Play Paper Boarding Pass Collection
Enamel Dots: Simple Stories
Ink: GinaK Designs Amalgam Black, Red Velvet, Jelly Bean Green, Grass Green
Ink Blending Tool: Ranger Ink
Corner Rounder: EK Success
We are so excited to welcome spring with some amazing new products to the Therm O Web family. This sweet card features one of two new Stampn’Stencil sets that includes clear stamps, detail stencils, and dies in a coordinating system that is absolutely perfect for springtime cards and crafting. And what could be cuter than soft, velvety spots on a ladybug? I’ll show you how you can easily add dimensional accents like these with our new Deco Foil Flock transfer sheets. Let’s get started.
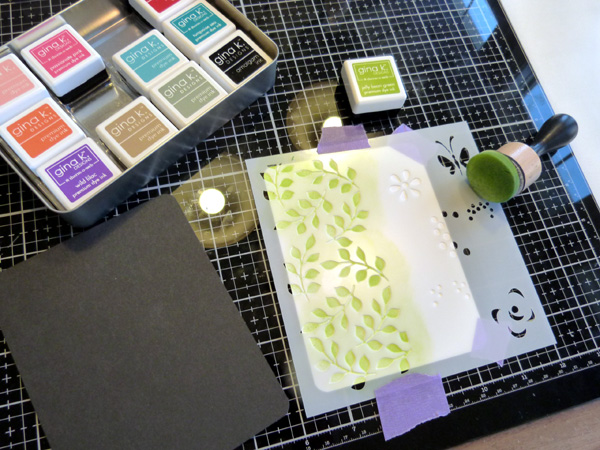
To begin, cut an A2 sized panel of Black Onyx cardstock, and a slightly smaller panel of Luxury White cardstock. Round all four corners of both pieces with a corner rounder punch. Tape the white cardstock down onto your work surface with Purple Tape. Place the detail stencil over the paper, and secure it with additional pieces of tape. Apply green ink to the stencil using an ink blending tool. As you can see here, the stencil isn’t large enough to cover the entire panel in one pass, so simply lift the stencil, wipe it clean with a baby wipe or damp towel, shift it over, and repeat the process.
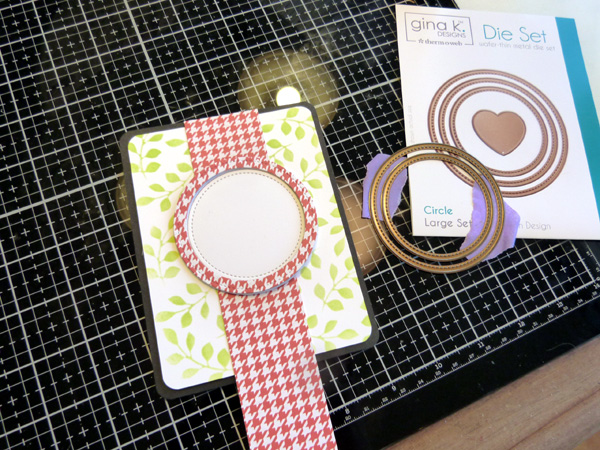
Create a top folding A2 card base from Luxury White cardstock. Round all four corners, and then adhere the black cardstock to the card base using the memory tape runner. Attach the white stenciled panel to the center of the card. Trim a strip of patterned paper that is about 1.25″ wide, and adhere it down the center of the card, trimming off the excess as needed. Nestle the largest and second largest dies together from the Large Circle die set, and secure them in place with Purple Tape. Die cut the shapes once from white cardstock, and once from the same patterned paper. Set the middle of the patterned paper die cut aside for another project.
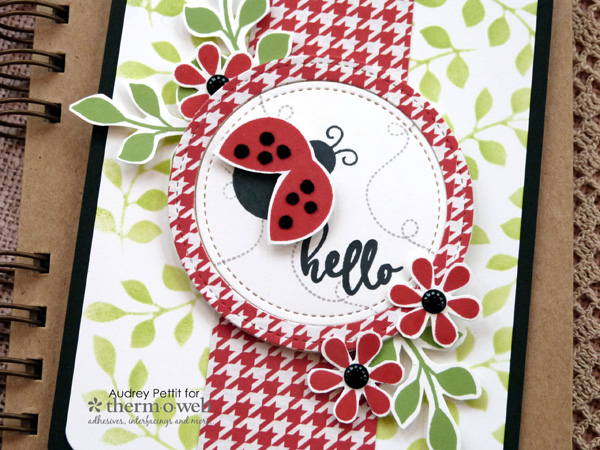
Working on the white cardstock circles, stamp the ladybug body, the dotted flight lines, and a sentiment in black ink. On a separate piece of Luxury White cardstock, stamp the lady bug wings and small flowers in red ink, and several leaf branches in green.
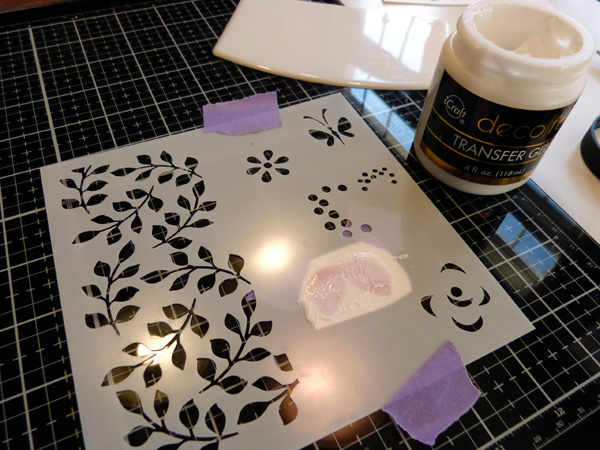
To add flocked dots to the ladybug wings, roughly cut out the stamped image and secure it to your work surface with Purple Tape. Place the dot detail stencil image over the wings, centering the dots on the wings as desire, and hold the stencil in place with more tape. Add a dab of Deco Foil Transfer Gel onto the stencil with a palette knife. Use the Stencil Pal to smoothly and evenly apply the gel over the stencil. Immediately lift the stencil off the paper, and set the paper aside to dry. Wash the stencil and Stencil Pal immediately with warm soapy water.
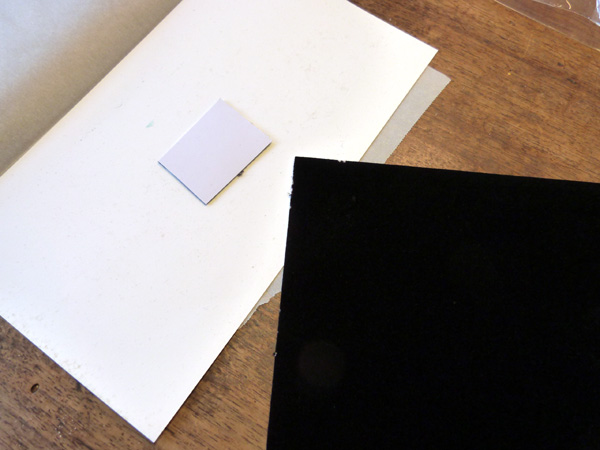
Allow the Transfer Gel to dry until it turns from a cloudy white color to completely clear. The adhesive should feel tacky, but not wet, to the touch. Cut a small section of Black Velvet Deco Foil Flock Transfer Sheet, just slightly larger than the area to be flocked. Heat up your laminator machine. Between the sheets of a folded piece of parchment paper, place a piece of scrap cardstock, then the ladybug wings with the adhesive side up, then the flock sheet with the fuzzy side down. Run this sandwich through the heated laminator.
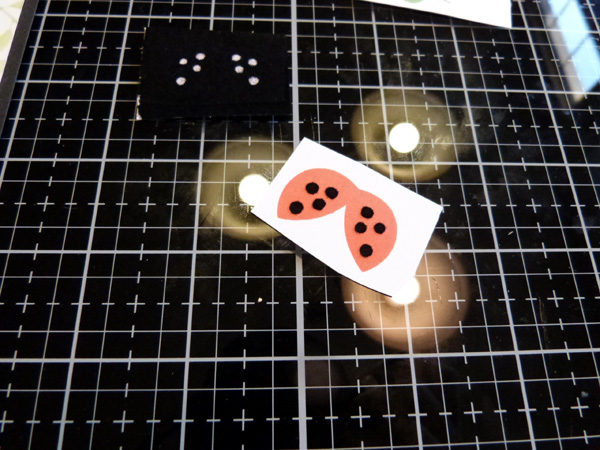
Peel up the flock transfer sheet to reveal the fabulous velvety texture. Now die cut all the images with the matching dies. Adhere the stamped circle to the center of the card, and add the patterned paper frame to the outer edge. Tuck flowers and greenery under and around the frames, popping up the images with 3D adhesive squares, as needed. Add the wings to the ladybug using foam squares. Add enamel dots as a final embellishment.
Enjoy!
Save

Be sure not to miss a chance to get yourself entered in a National Craft Month Giveaway!
Each week this month we’re giving away TWO prizes that you’re going to want to win!
CLICK HERE for all the details!