Decorating for the holidays is always fun but decorating with your own handmade decorations (made of course with Therm O Web!) is even more rewarding!
Designer Debbie Sherman has a holiday stocking banner that might look time-consuming but was really very easy to make. And Designer Erin Yamabe has some sweet table decor for the upcoming Thanksgiving holiday!


Stocking Garland by Debbie Sherman
Therm O Web Supplies:
Zots – 3D and Jumbo
Glitter Dust
Tape Runner XL
Foam Squares
Additional Supplies:
Glue gun, score board, patterned paper of choice, bells, Berry sprig, Ribbon, Jump rings, flowers, stocking pattern, Doily die, scallop die.

Instructions:
Cut 3 stockings from pattern
Cut 3 doilies from die
Cut 3 scallops from die
Make 3 lollies
Adhere top of stocking with tape runner
Adhere doily to front of stocking
Adhere scallop using foam squares
Adhere lollie to scallop using Jumbo Zot
Adhere flower to center of Lollie using 3D Zot
Add ribbons and embellishments
Spray final project with Glitter Dust

Pumpkin Place Holders by Erin Yamabe
Therm O Web Supplies:
ICraft Adhesive Dots
ICraft Adhesive Tape – 1/4 inch
Zots – Medium
Zots – 3D

Other supplies:
Tim Holtz – Rosette die large
Tim Holtz – Rosette die medium & small
Floral wire
Authentique & Echo Park – patterned paper
Green Felt
My Little Shoebox – Alpha stickers

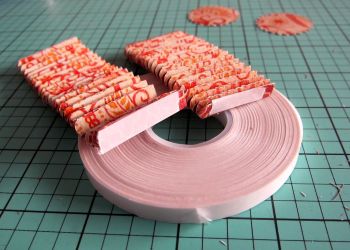
Cut pattern paper to create 2 large rosette dies, 2 medium rosette dies, and 1 small rosette die.

Accordian fold each rosette. Place strip of iCraft Adhesive Tape on each end of rosette. Remove adhesive from both ends, and secure rosette together as one piece.

Place medium Zots around perimeter of each circle to secure rosette onto. Make sure there is a space in the center, untouched by Zots.

Pierce hold into center of rosette, through the circle on the bottom.

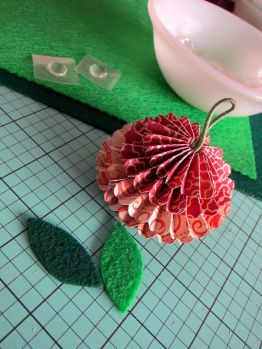
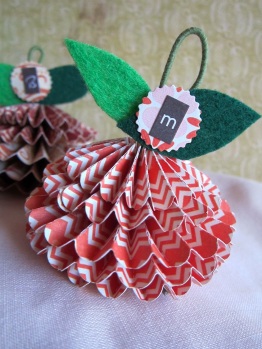
With each of your finished rosettes, thread in the following order onto your floral wire: small, medium, large, large, medium. This will leave the small rosette on the top.

Secure bottom of floral wire with iCraft Adhesive dot on the bottom, and add a paper circle for a flat surface underneath. Cut out felt leaves.

Cut a 3D Zot in half, and adhere to back side of the front leaf. Secure second leaf to the opposite side of floral wire. Add initial for personalization onto small circle paper with medium Zot.

And don’t forget to enter our Adhesive Giveaway!
Simply follow through the Punchtab entry to gain multiple entries into our giveaway. We’ll select one random winner to enjoy this prize! (please note due to mailing restrictions we cannot mail Glitter Dust to any winners outside the US at this time)


