


 Hey there Therm O Web fans! It’s Katrina sharing a project with the new Gina K Designs “Baby It’s Cold Outside” StampnFoil limited release. I am a snow lover, so this is a perfect crafting item for me!!
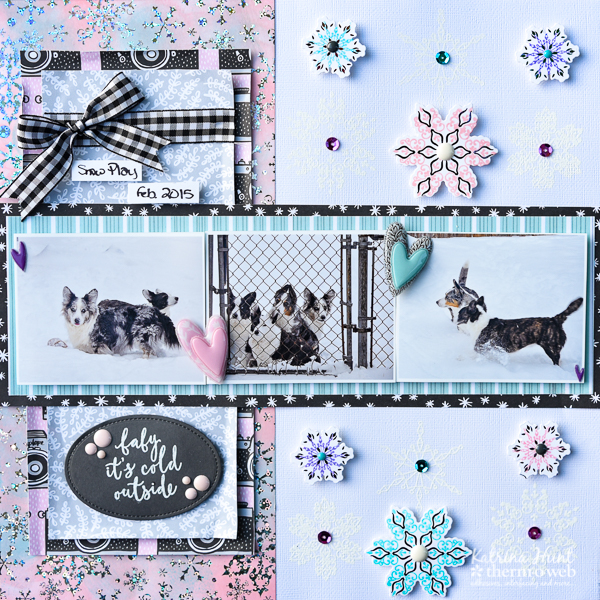
Design a Wintery Scrapbook Layout with StampnFoil “Baby It’s Cold Outside”
I love non-traditional colors for snow inspired crafting, so that is the way I went when I was planning this layout!
Therm O Web Supplies Used:
Therm O Web 3D Foam Squares– 1/2 inch
Gina K Designs Fancy Foil- Wild Lilac, Turquoise Sea, Bubblegum, Sparkling Silver
Gina K Designs Foil-Mates-Blizzard
Gina K Designs Nested Oval Dies-Single Stitch Large Set
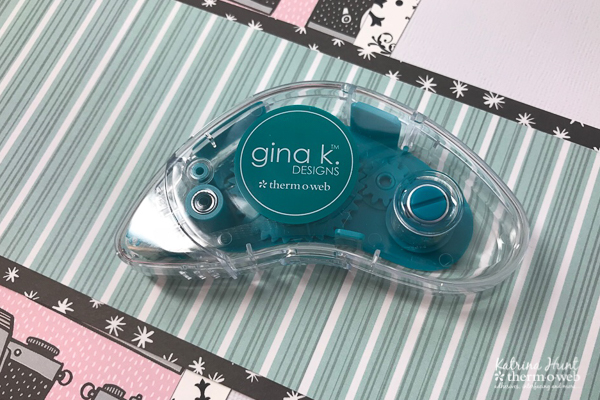
Laminator
I-Craft Purple Tape
Gina K New Releases
Gina K Adhesive Dot Tape Runner
Gina K StampNFoil Stamp Set and Dies-Baby It’s Cold Outside
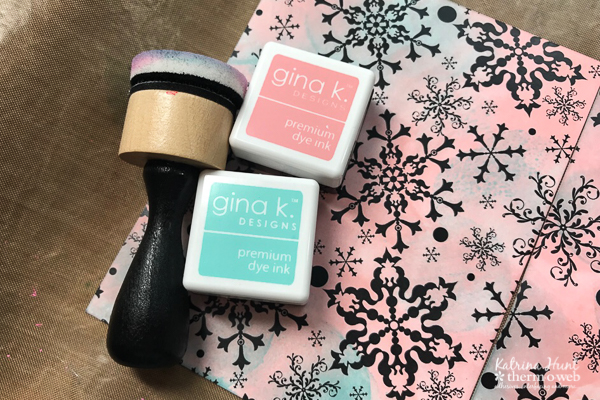
Other Supplies Used: Cardstock, Pattern Paper, Puffy Hearts-American Crafts; Slate Cardstock-Gina K Designs; Versamark Ink; Embossing Powder-Hero Arts; Gina K Inks-Innocent Pink, Wild Lilac, Turquoise Sea
“Baby It’s Cold Outside” Scrapbook Layout Instructions:
Select a Foil-Mates background sheet and cut at 4.25 inches to cut in half. Ink background with Gina K Inks in a couple of different colors before foiling. Once inked, run thru laminator with your color choice of foil.
Adhere one half of the foil-mate to the bottom edge and side of your cardstock, using the Gina K Designs Adhesive Dot tape runner. Repeat the process for the other half of the foil-mate to the top and same side edge of your cardstock. This will leave a gap that will be covered by other pattern paper.
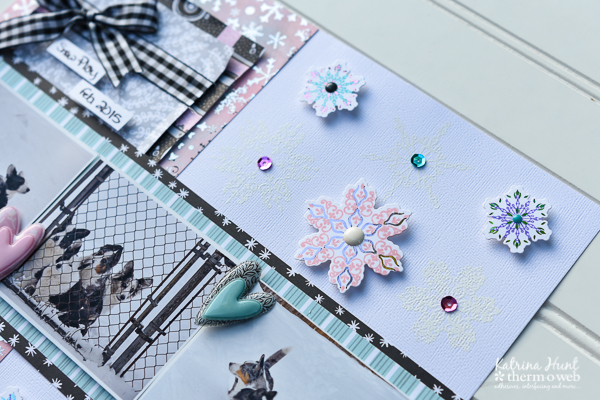
Trim pattern paper, keeping the length of 12 inches and your desired width to cover the gap left by the foil-mate. This will separate your cardstock background into two areas that you can stamp and heat emboss the snowflakes on the background. I lined them up and then stamped all at once with an acrylic block. If you have a full-sized stamping platform you could use that also.
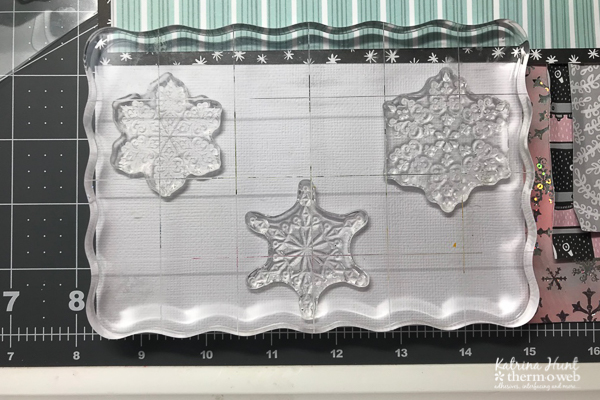
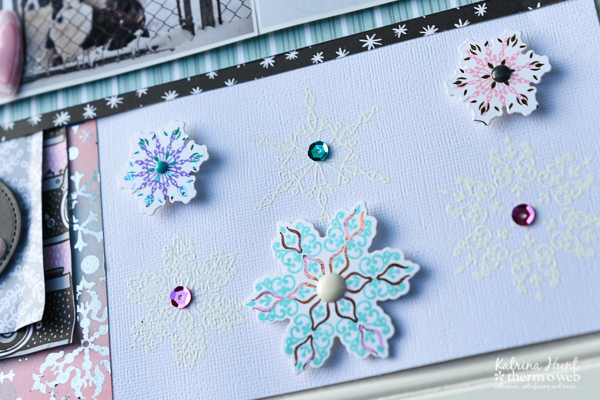
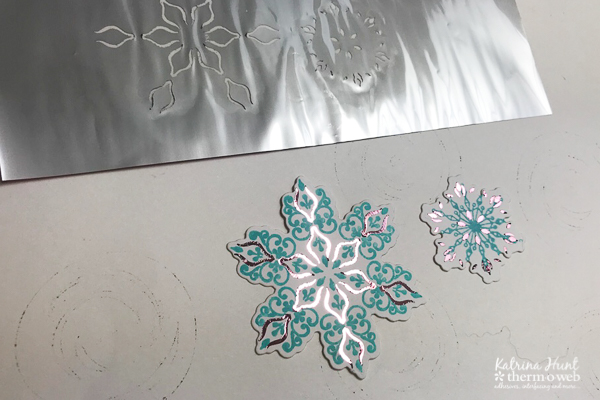
Stamp, die cut and foil snowflakes for embellishments on the project. Select inks and foils depending on colors in pattern paper. Switch things up and use contrasting inks and foils for each snowflake. Add enamel dots or sequins to the middle of snowflakes if desired.
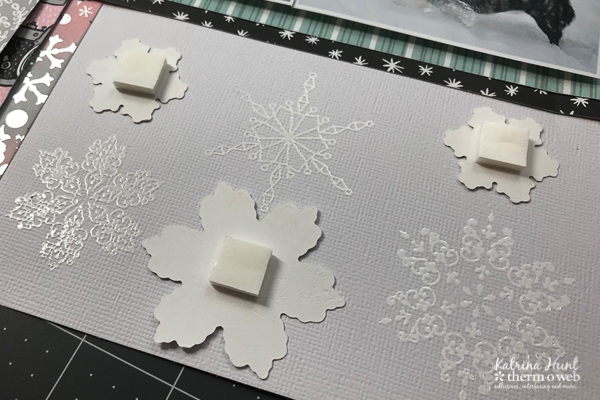
Raise the snowflakes by adding 3D foam squares to the backs of the die cuts. Place the snowflakes in areas were your heat embossed snowflakes aren’t.
Die cut an oval that the “baby it’s cold outside” saying will fit on. Stamp saying with Versamark ink, cover with embossing powder in color of your choice and heat emboss. Raise die cut oval with 3D foam squares and place on the layout. You can add additional details to the die cut if you choose.
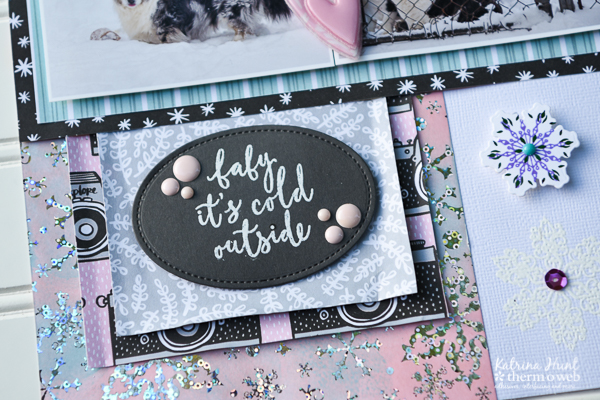
And then I just added an additional touch of ribbon and some journaling strips and called my project done! I love the colors of those and the snowflakes just make the layout!
Thanks for stopping by today! Have a wonderful crafty week.
Ivory
September 19, 2018 at 7:02 pm (6 years ago)Fabulous! I love this post
Pamela Edwards
September 19, 2018 at 7:24 pm (6 years ago)I love the blog hop. The ideas are fantastic.
AndreaH
September 25, 2018 at 8:31 pm (6 years ago)Beautiful. I too love the snowflakes. I’d love to know more ideas to use snowflakes throughout the year, any ideas? Xxx