


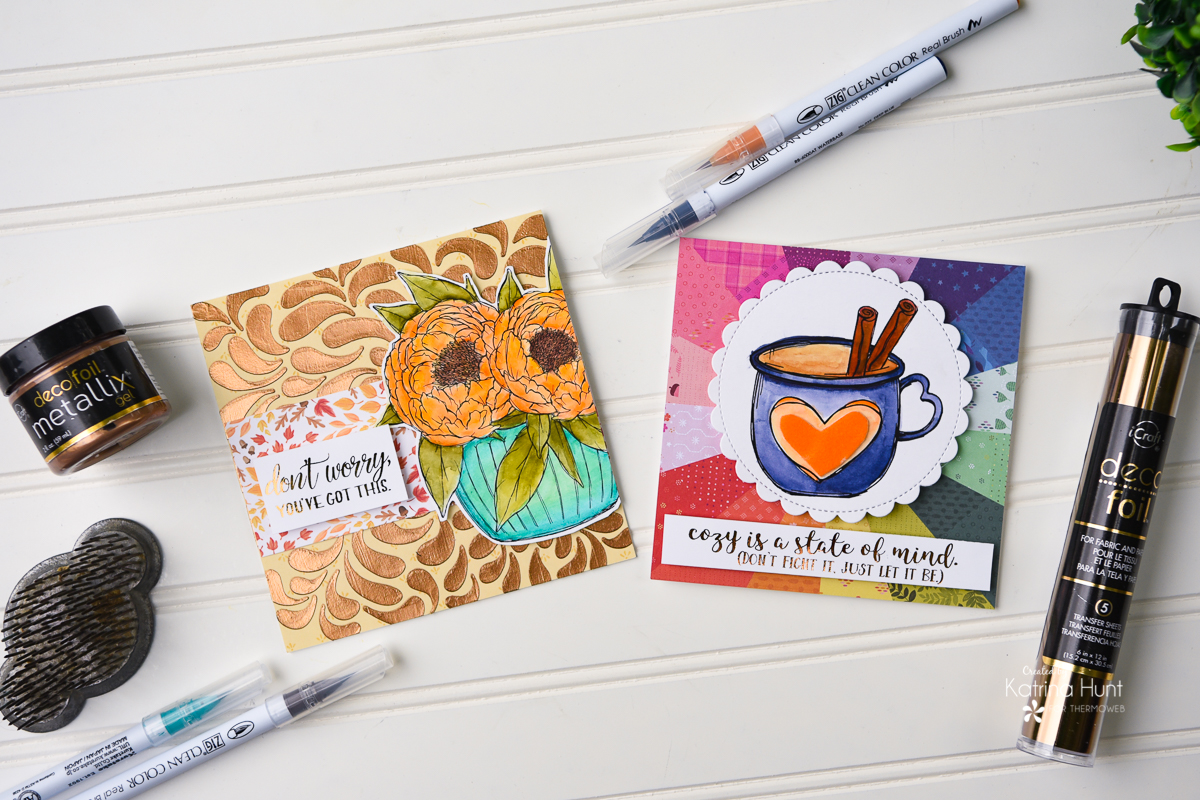
Hey Therm O Web Fans! It’s Katrina from Paper, Scissors, Glue and Hybrid Too today sharing a couple of cards from our Graceiellie Designs swap. If you have a laser printer or copier, or even access to one, these are a great way to get some foiled images and sentiments for your cards. The bonus is you can customize the size to your project!
Everyday Cards with Deco Foil
Therm O Web Supplies Used
• Deco Foil Foam Adhesive Sheets
• iCraft 3D Foam Squares Combo Pack
• iCraft 3D Foam Squares ½ Inch White
• Deco Foil Transfer Sheets-Copper
• Deco Foil Transfer Sheets-Bronze
• iCraft 3D Foam Squares ¼ Inch White
• iCraft Easy Tear Adhesive Tape .5 Inch
• iCraft Deco Foil Metallix Gel – Aged Copper
• iCraft Deco Foil Stencil Pal
• iCraft Purple Tape .5 inch
• iCraft Pixie Spray
• Gina K Designs Foam Tape
• Memory Tape Runner XL
Other Supplies Used:
• Graciellie Designs Peony Hugs
• Gracielle Designs Stay Cozy
• Zig Kuretake Clean Color Real Brush Brown
• Zig Kuretake Clean Color Real Brush Deep Red
• Zig Kuretake Clean Color Real Brush Dark Brown
• Zig Kuretake Clean Color Real Brush Light Brown
• Zig Kuretake Clean Color Real Brush Mid Green
• Zig Kuretake Clean Color Real Brush Colorless Blender
• Zig Kuretake Clean Color Real Brush Olive Green
• Zig Kuretake Clean Color Real Brush Green Shadow
• Zig Kuretake Clean Color Real Brush Turquoise Green
• Zig Kuretake Clean Color Real Brush Deep Blue
• Zig Kuretake Clean Color Real Brush Mustard
• Zig Kuretake Clean Color Real Brush Bright Yellow
• Zig Kuretake Clean Color Real Brush Orange
• Canson XL Bristol Smooth 9×12
Card Making Process
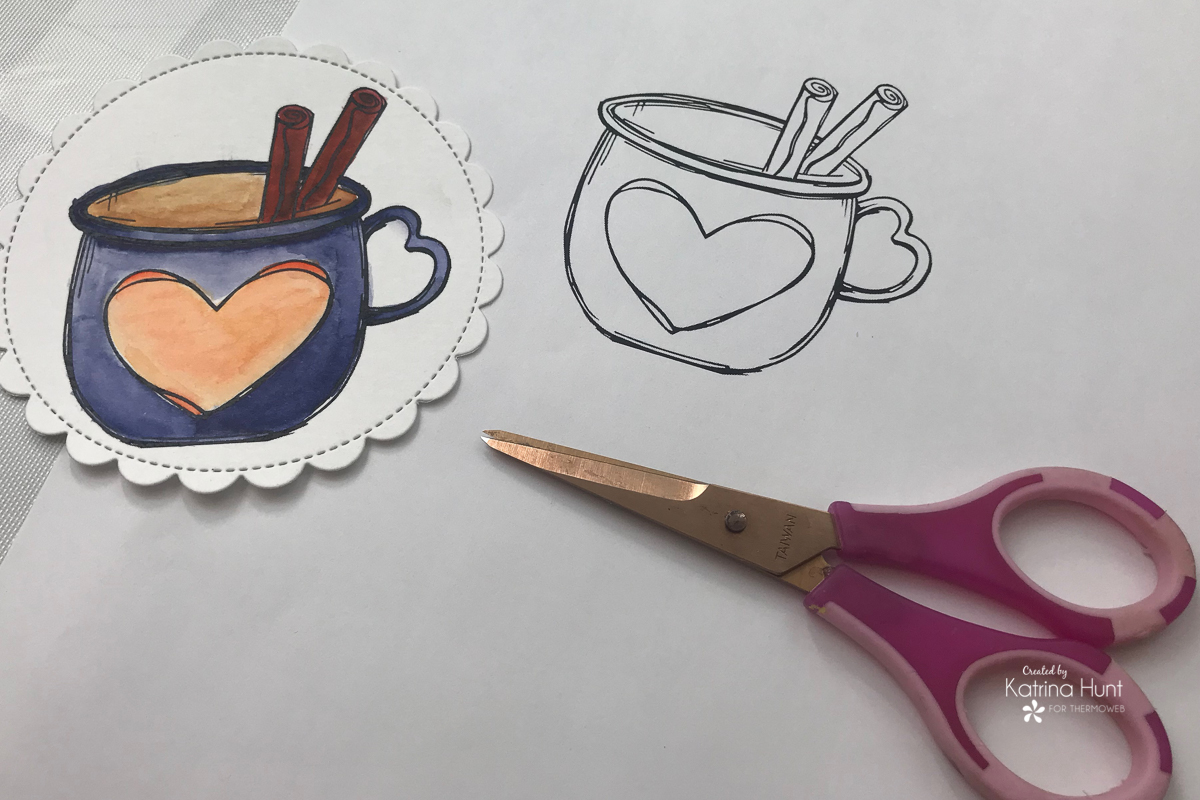
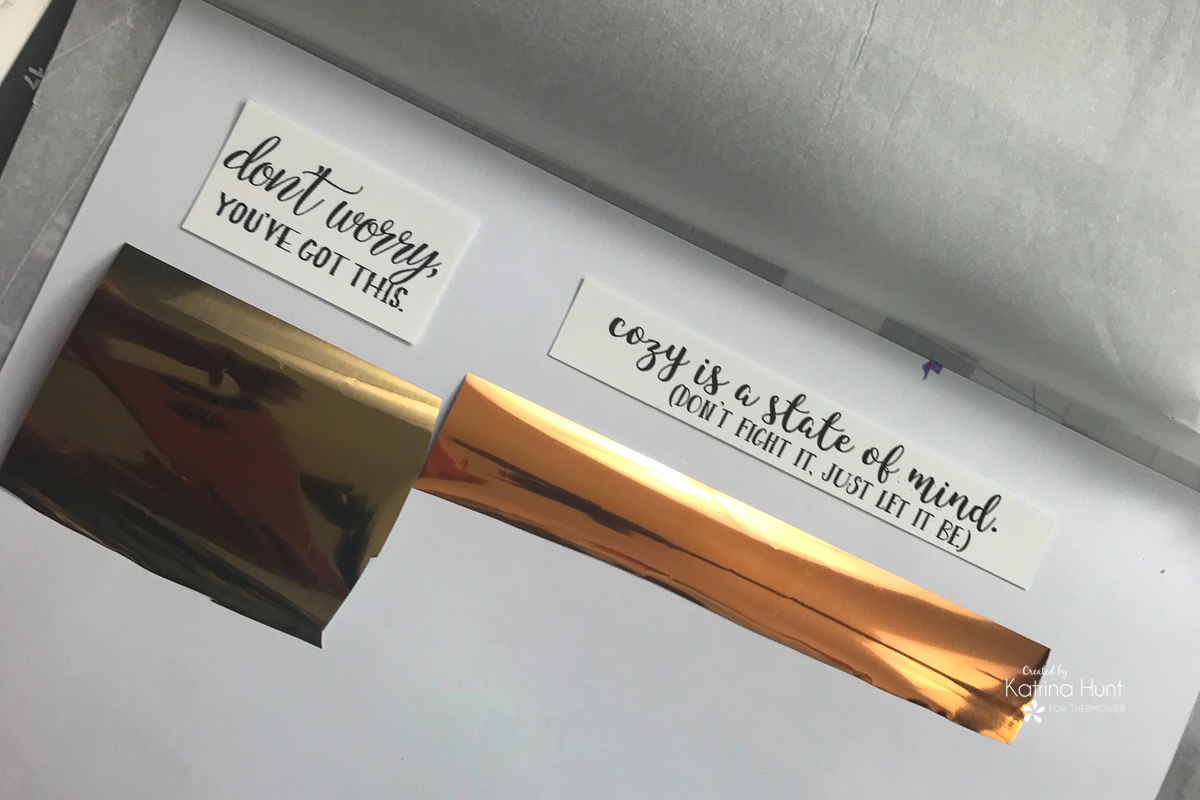
Start by printing images. You do not need anything fancy like Photoshop. You can pull the images and sentiments into a Word document by creating a new document, going to the “insert” tab and then select “picture from file” in the drop-down menu. Find where you saved your downloaded images or sentiments, select image and then hit ok. You can now resize your image by dragging the corners. Confession, I made mine a little larger than I intended too, so I just adjusted the sizes of my cards!
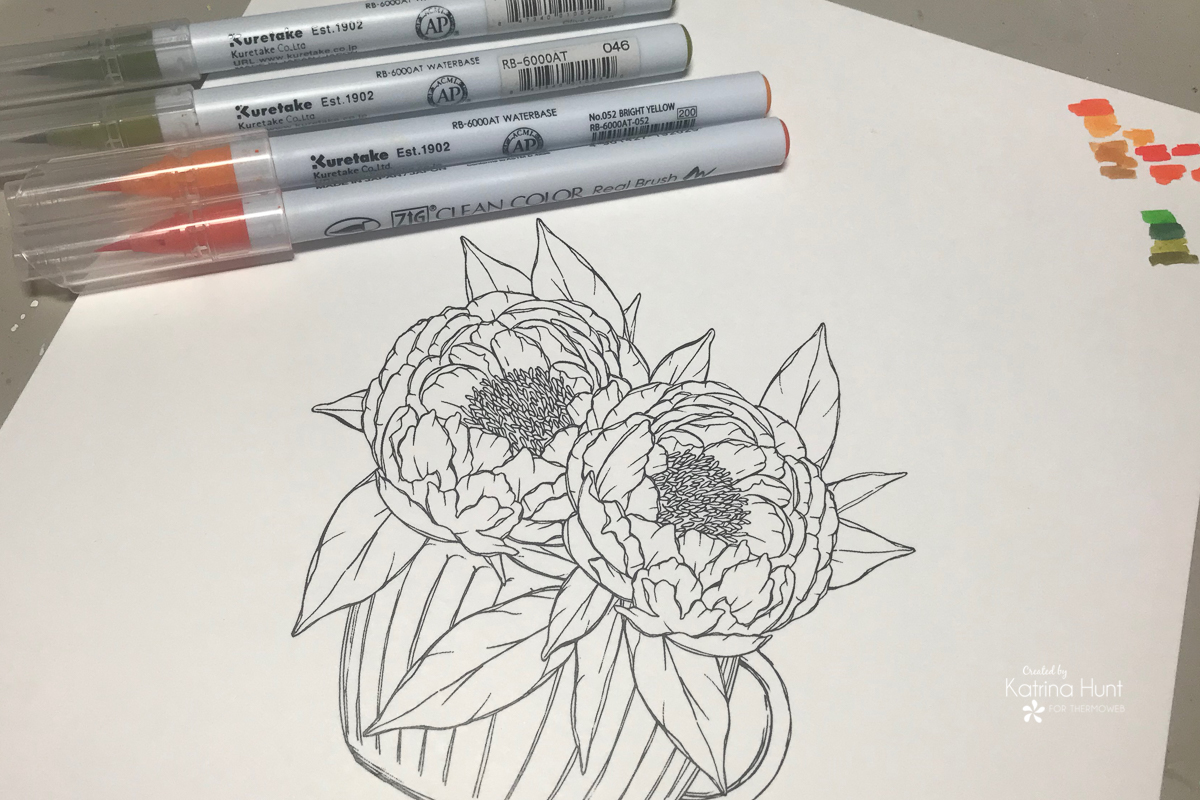
Print image on paper that fits your coloring medium. Luckily, my laser printer will take the Canson Bristol paper so that I could color the images with my Zig Clean Color markers. If you are planning on foiling your images, you would want to do that before coloring.
Coloring with Zigs can be done in various ways. Below I scribbled spots of colors on the flowers and then blended with water and a watercolor brush. You could also just color without the water if you like.
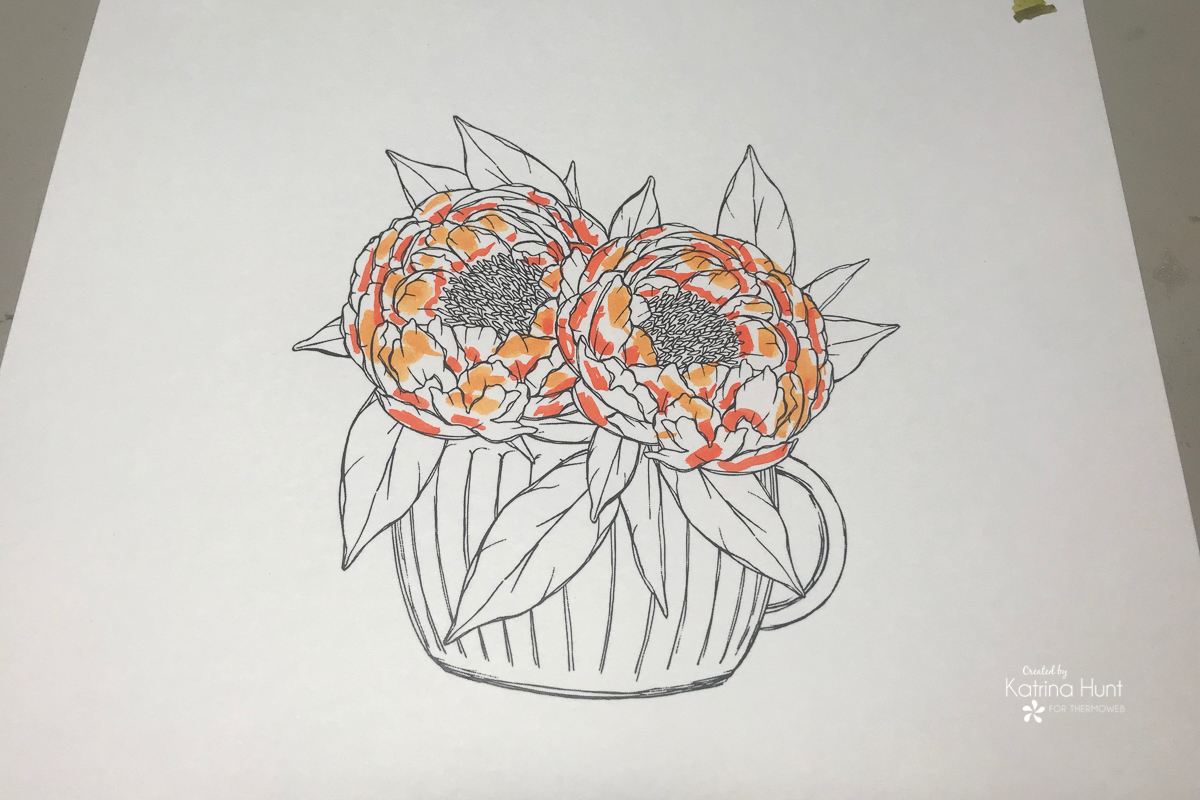
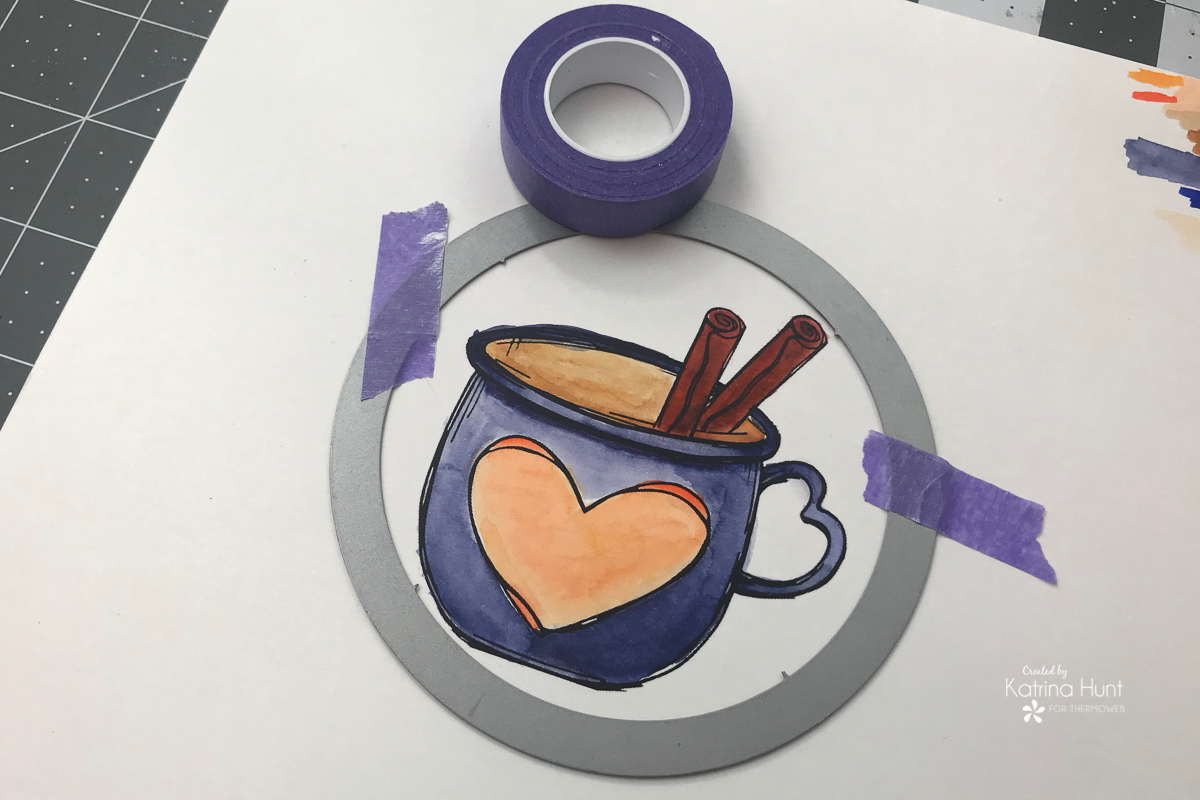
After coloring your images, then you can die cut using your favorite shaped dies, or just trim with a trimmer. This is where size and planning come into play! I used Purple Tape to hold the die in place on the image below, which come in great when you size your image a little bigger than you planned on!
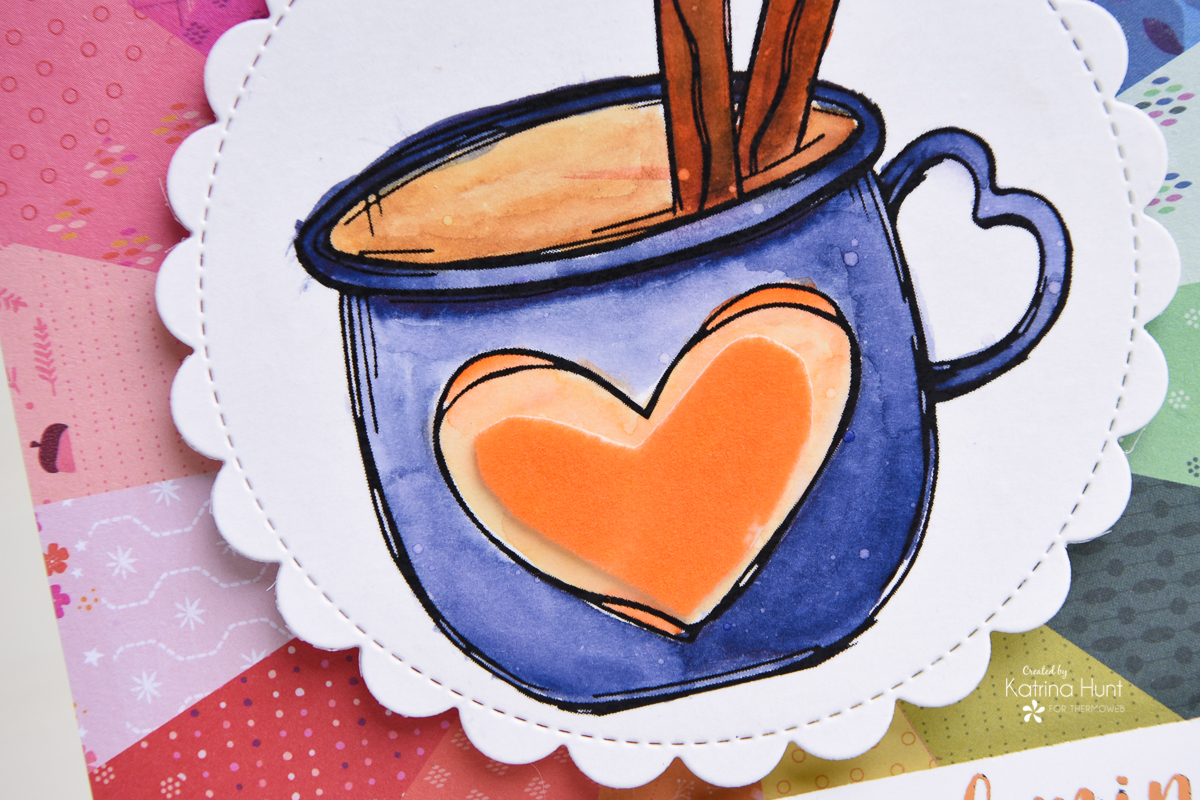
Deco Foil Flocked Accents for Images
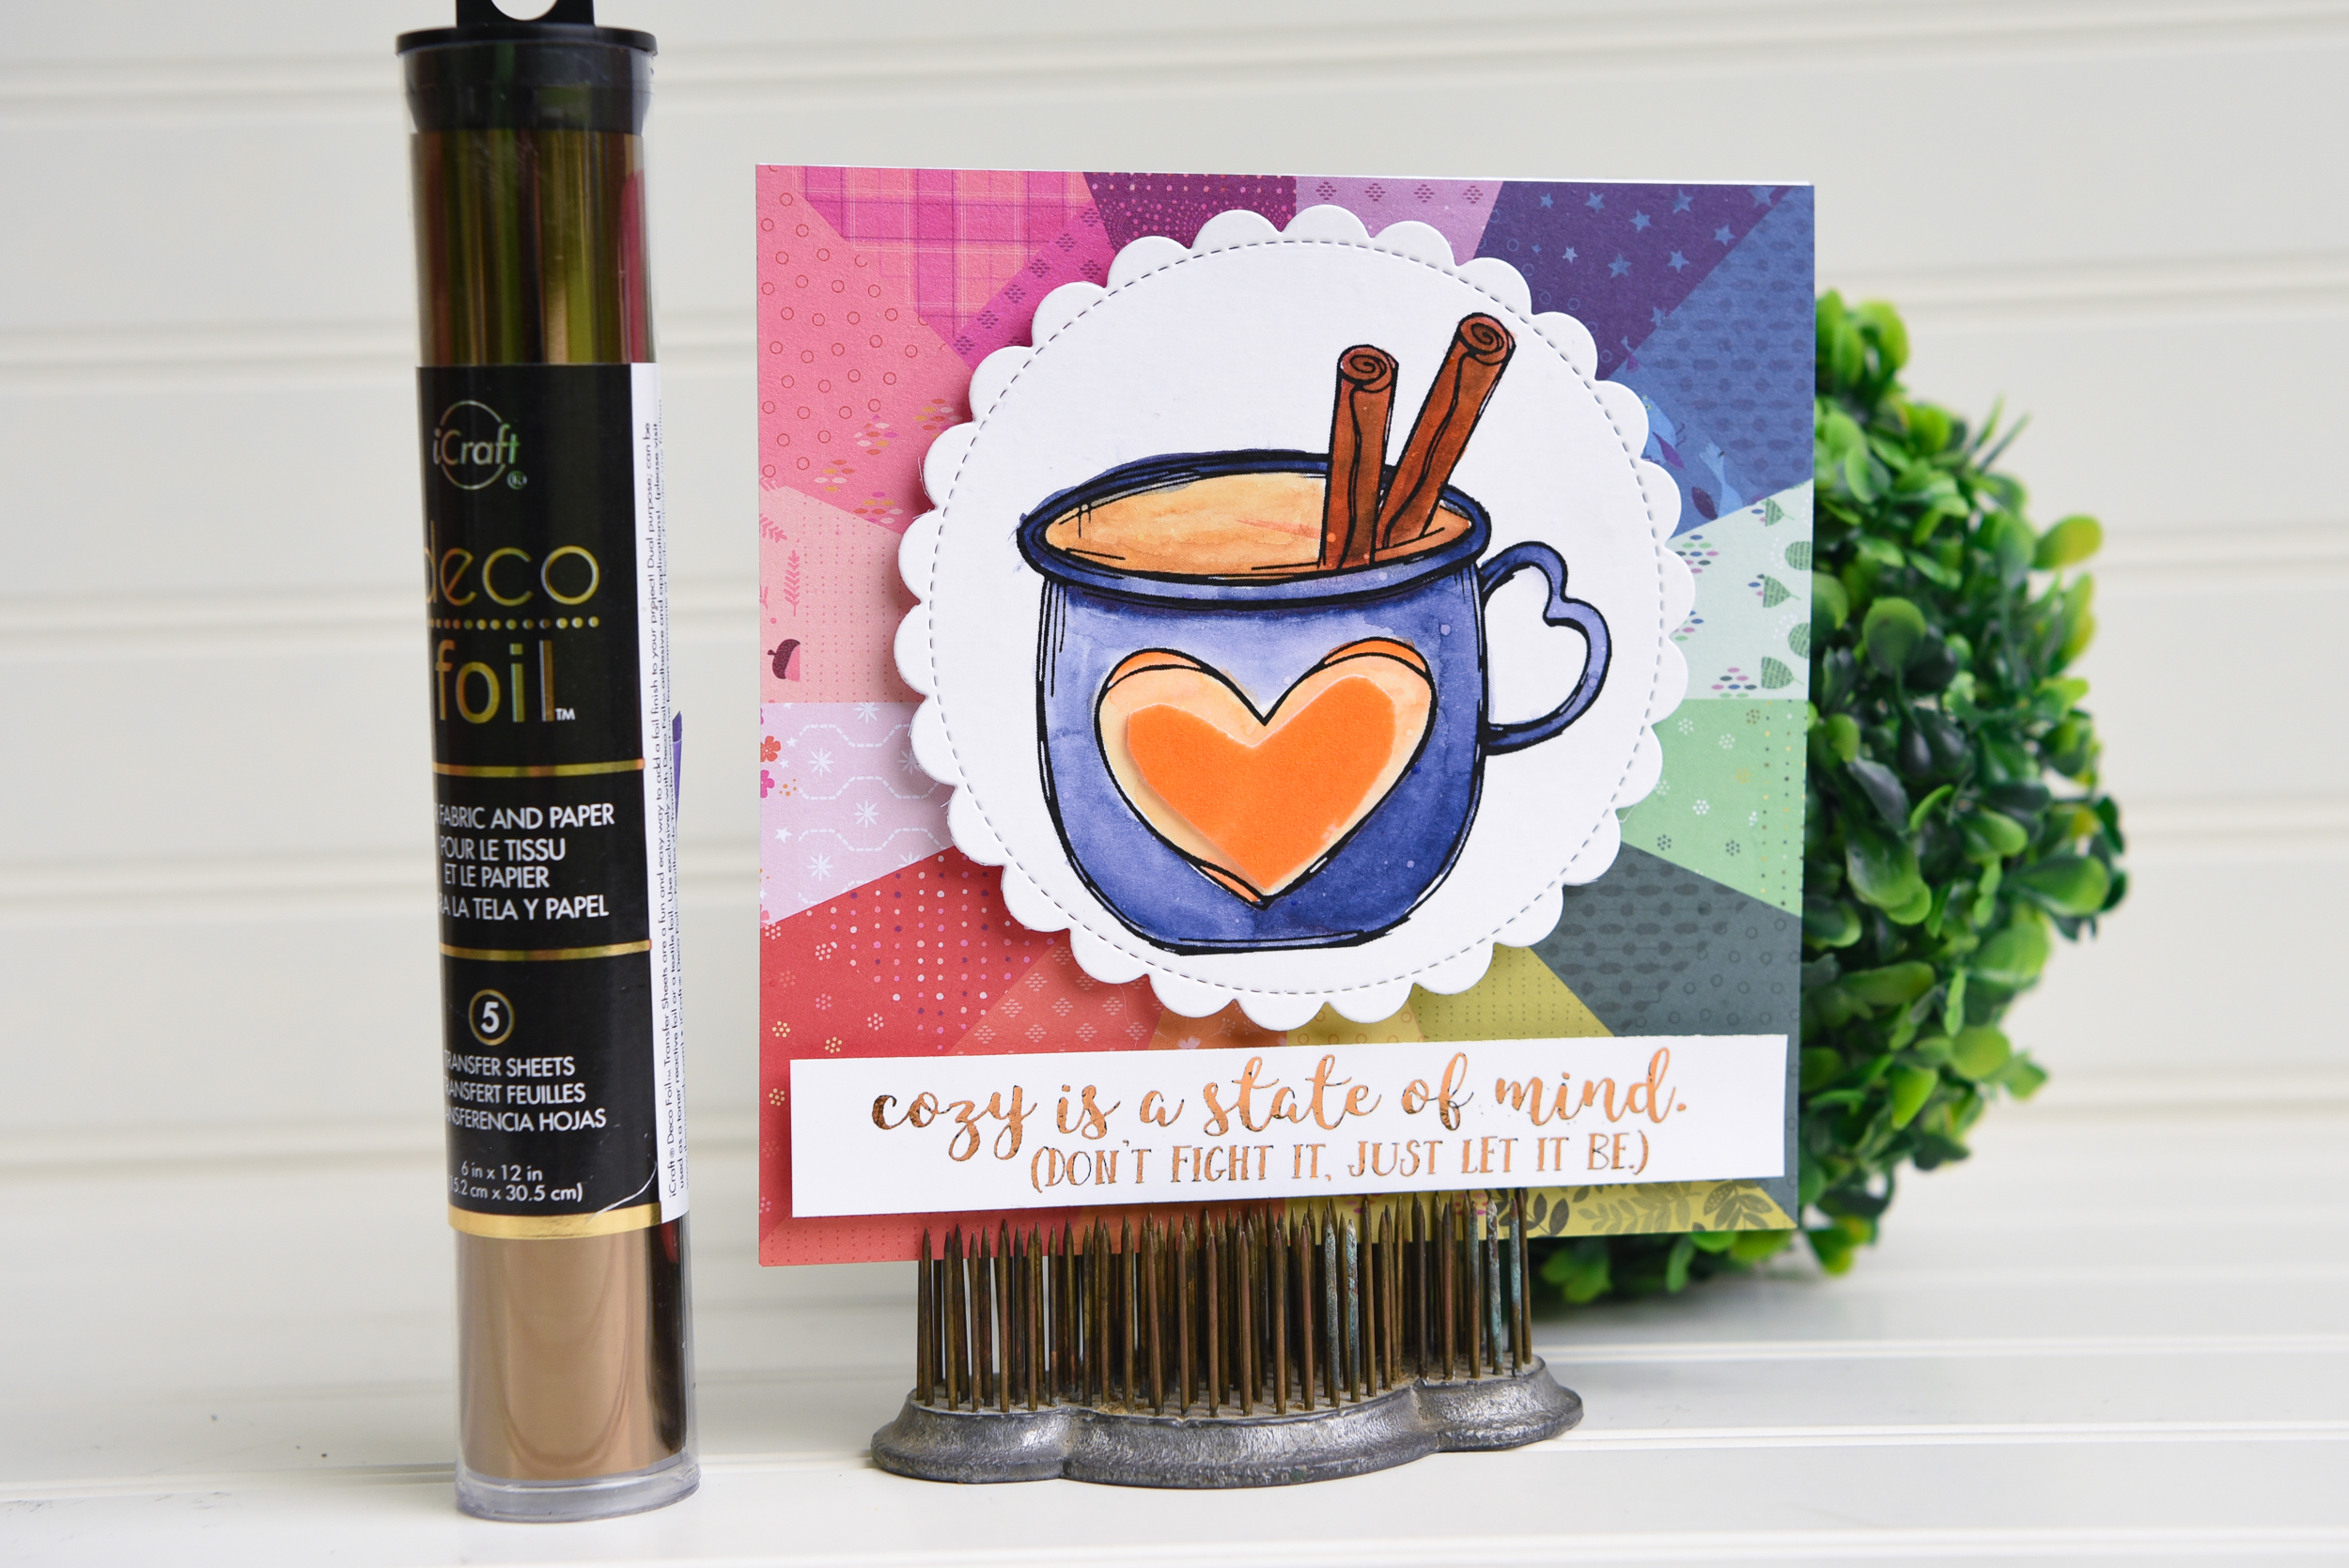
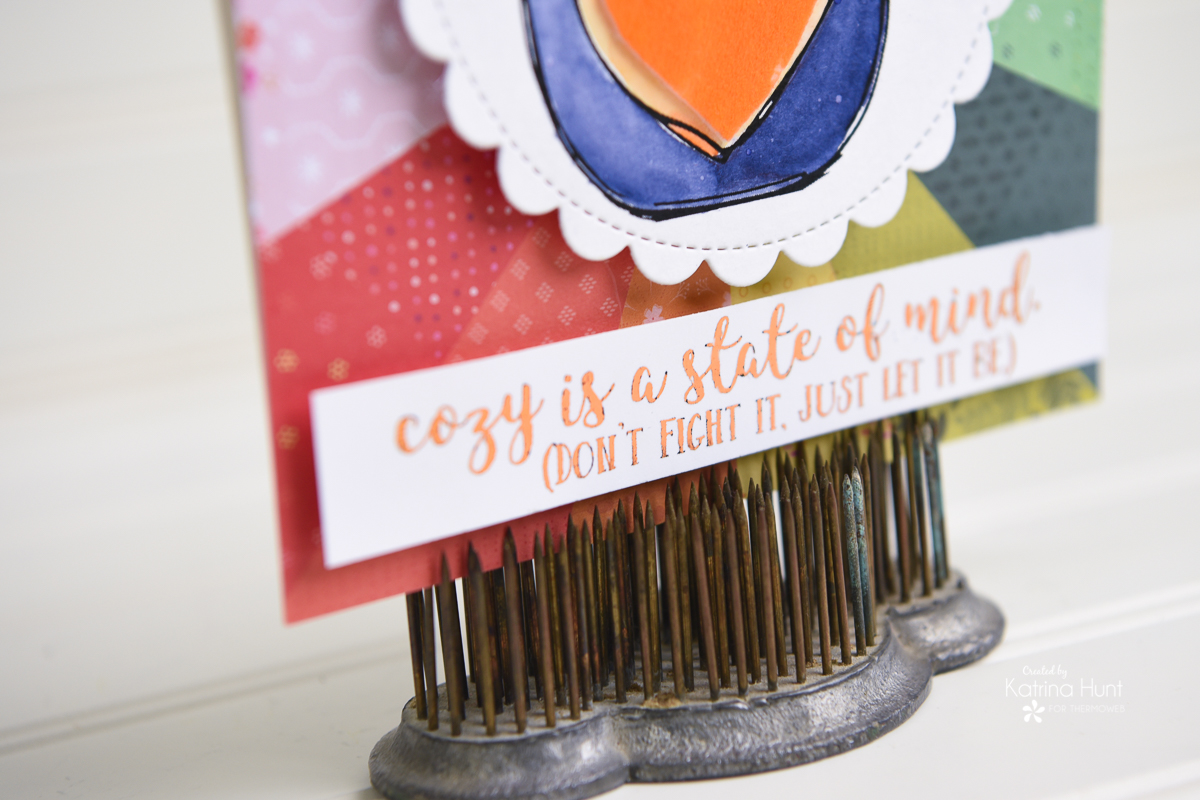
For the “Cozy” card I also printed out another image because I wanted to use the heart in the middle as a template to cut out Deco Foil Foam Adhesive and then apply the Deco Foil Flock Transfer Sheets in Orange Glow.
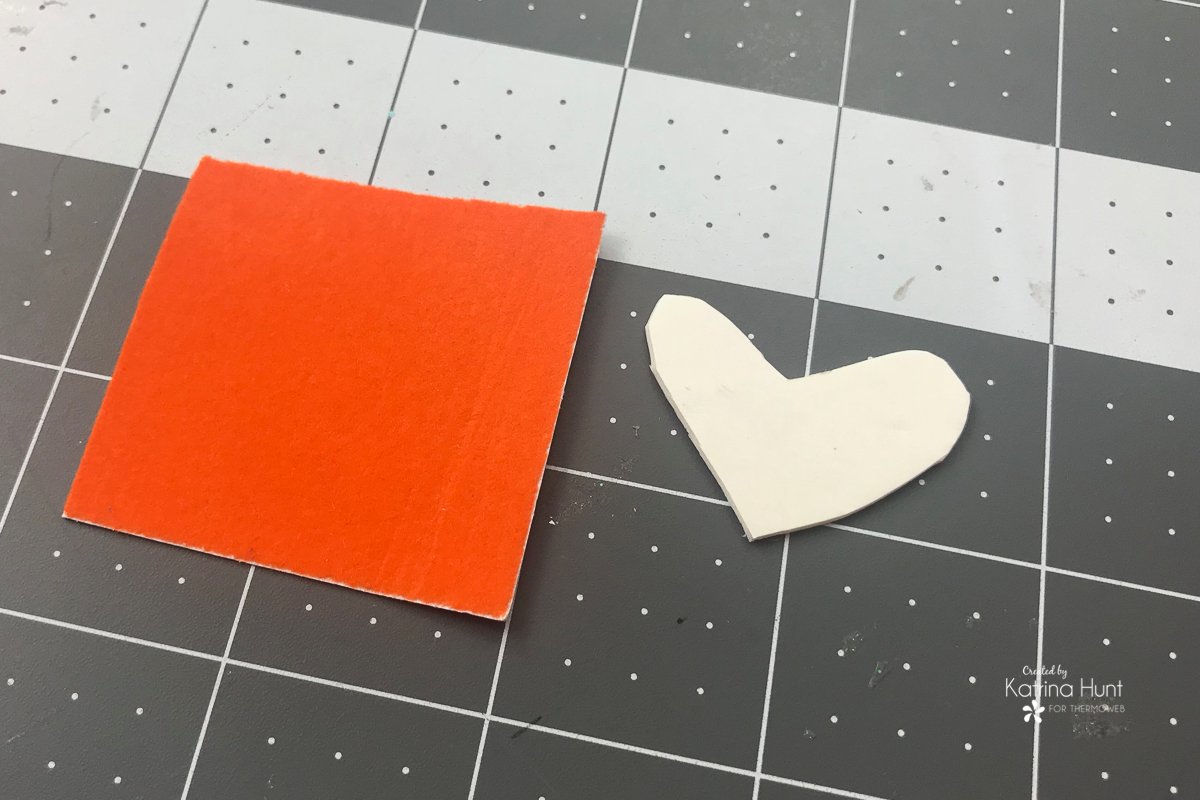
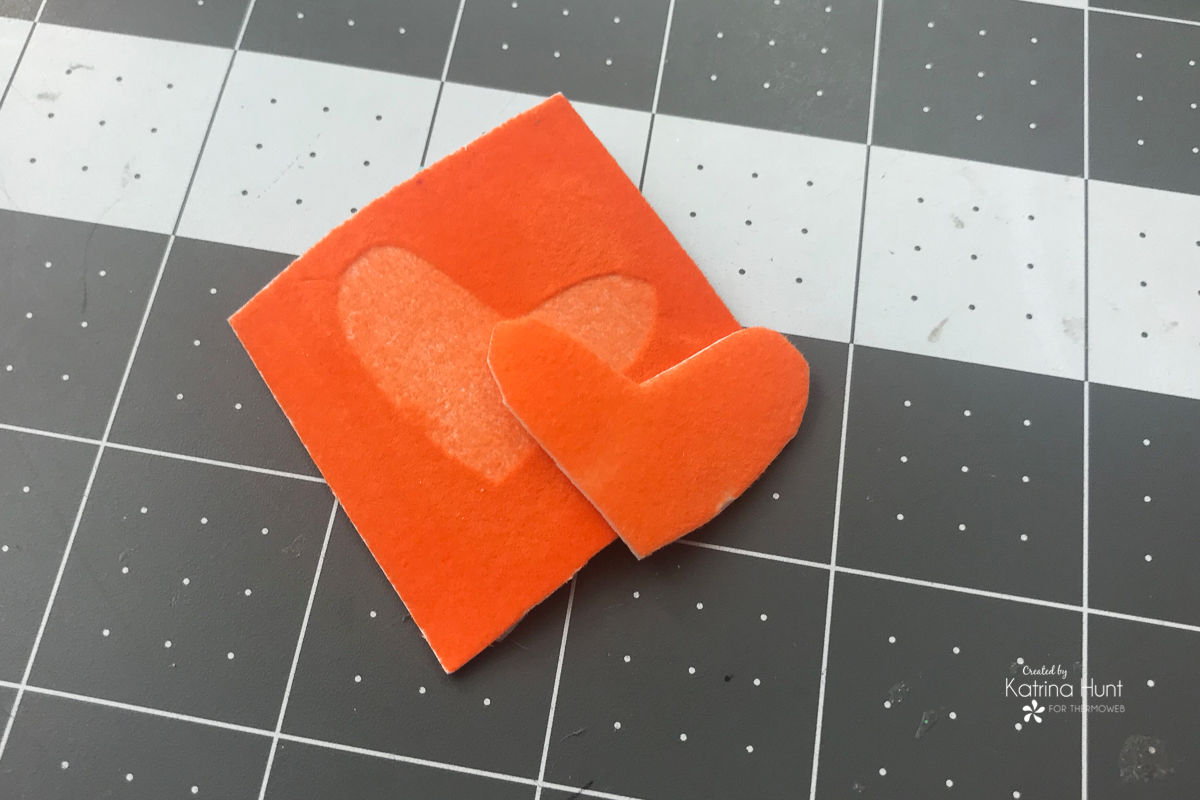
After trimming out the heart, I removed one side of the adhesive protective covering and then laid the foam sticky side down on top of the flock sheet. You can run thru a die machine for the pressure, or you can just rub really hard with your finger, which is what i did here. You may get a softer color doing it this way, but it worked with my project.
Next, remove the protective backing and just apply to your stamped and colored image! It’s like a little extra touch to a stamped image!
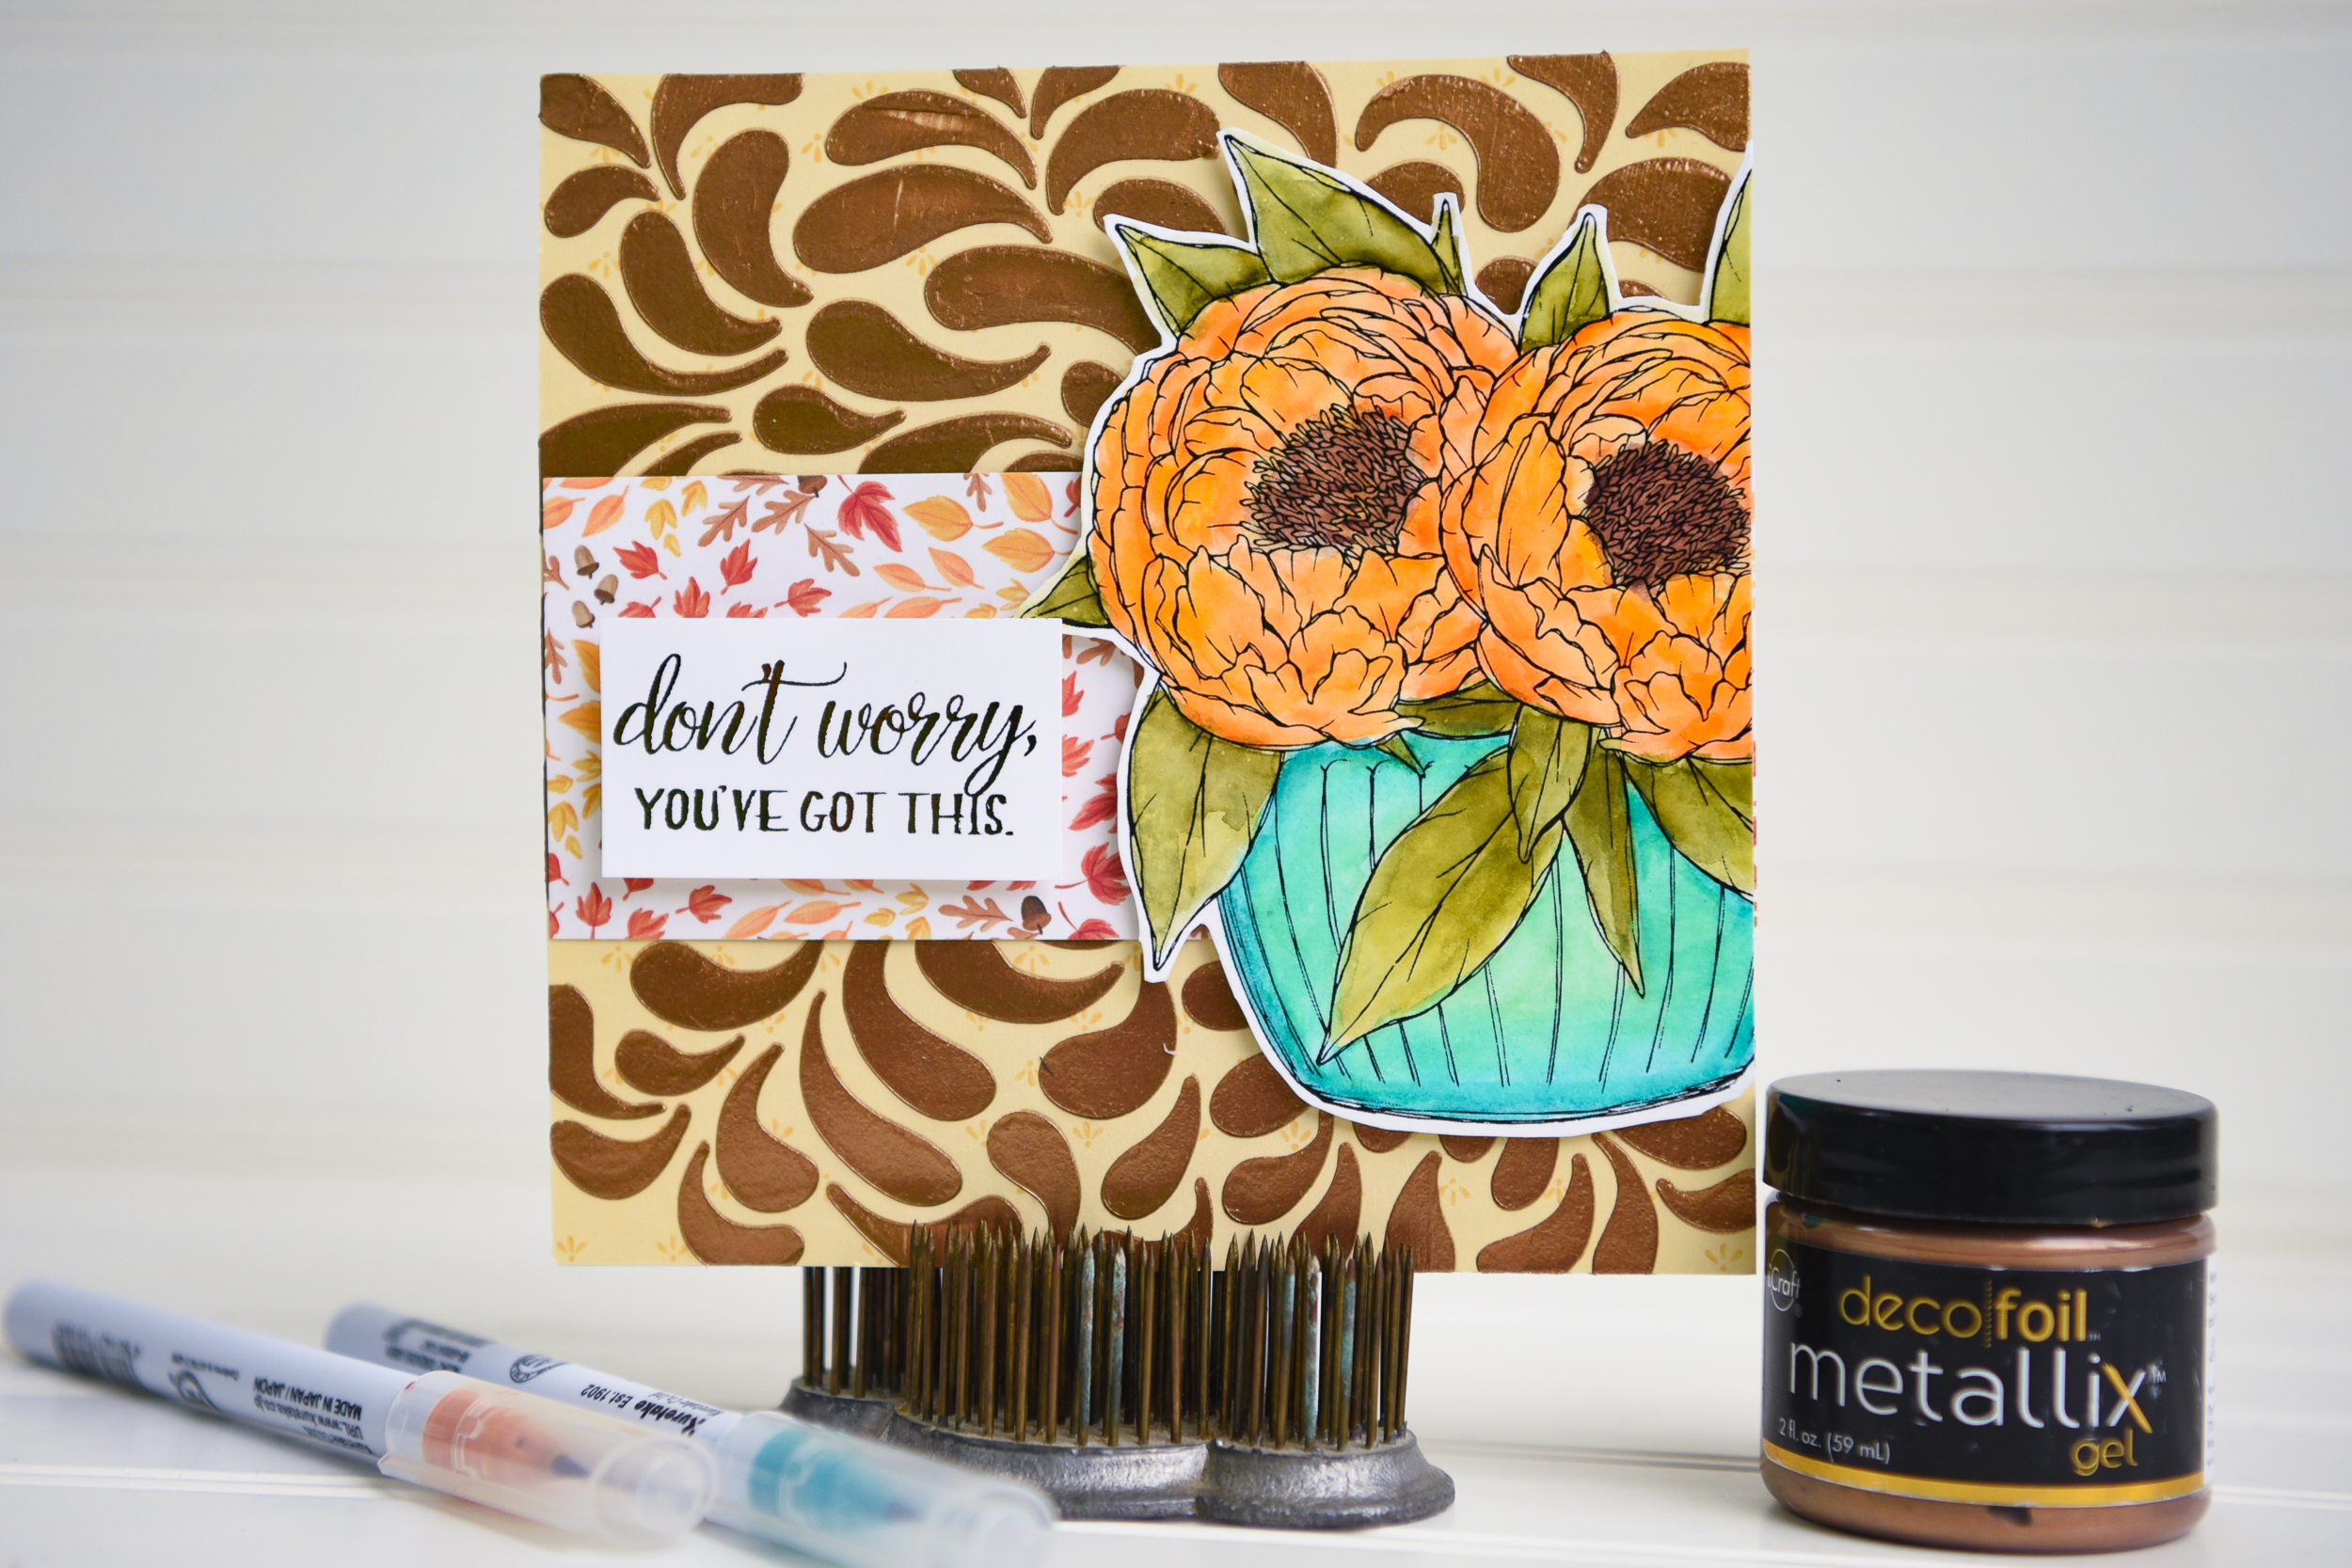
Deco Foil Metallix Background
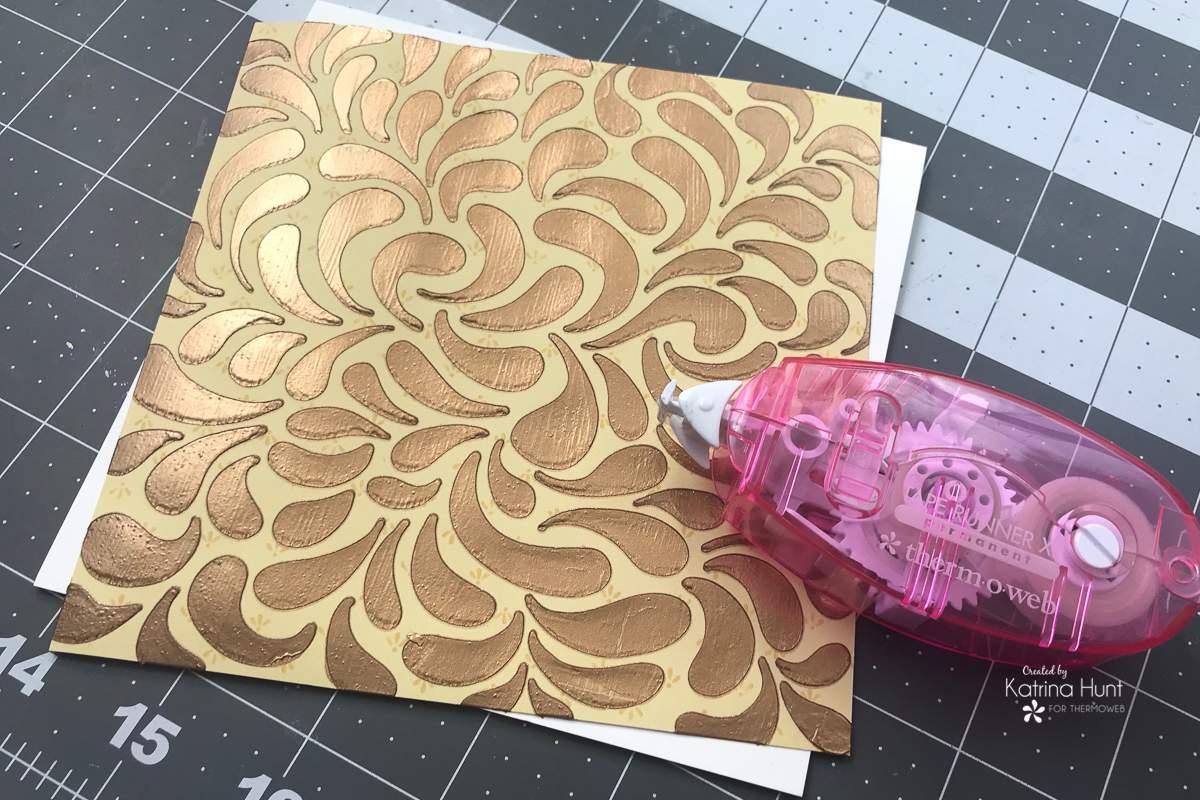
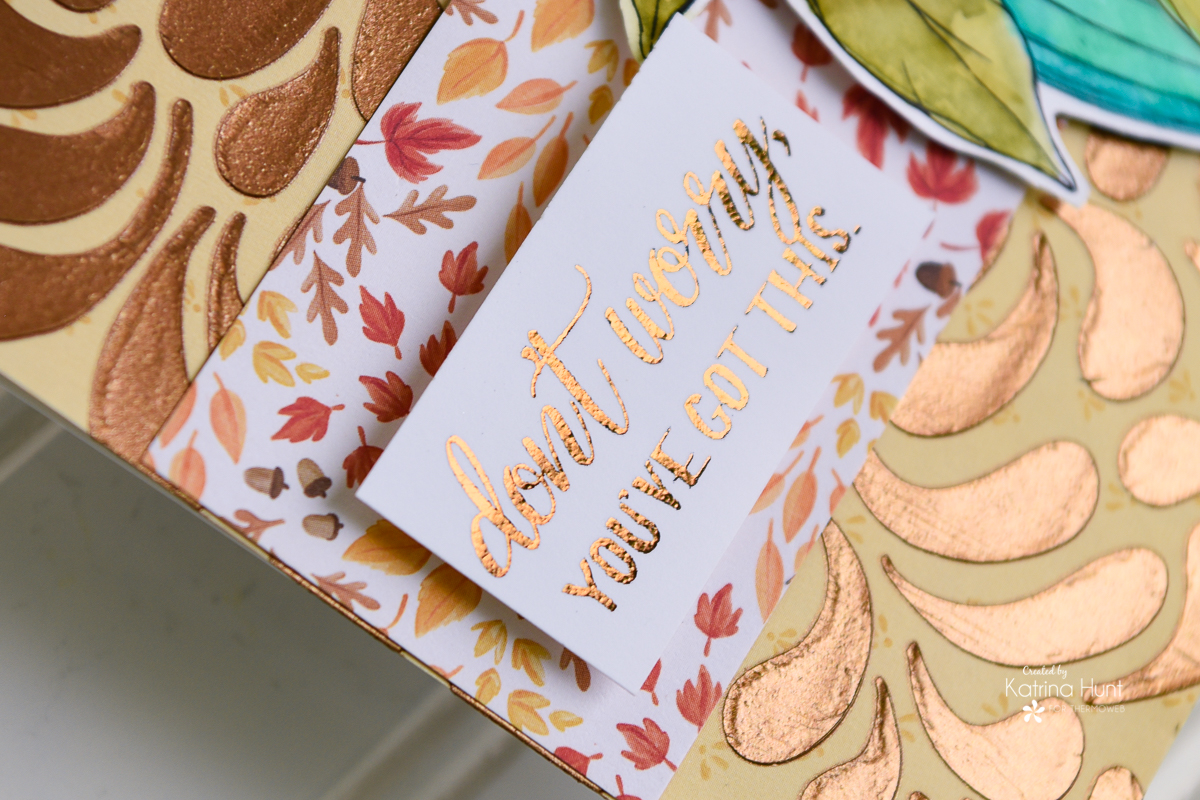
For the next card, I pulled out the Deco Foil Metallix gel to use as a background for my stamped image. The Aged Copper color was perfect to give my card a fall theme.
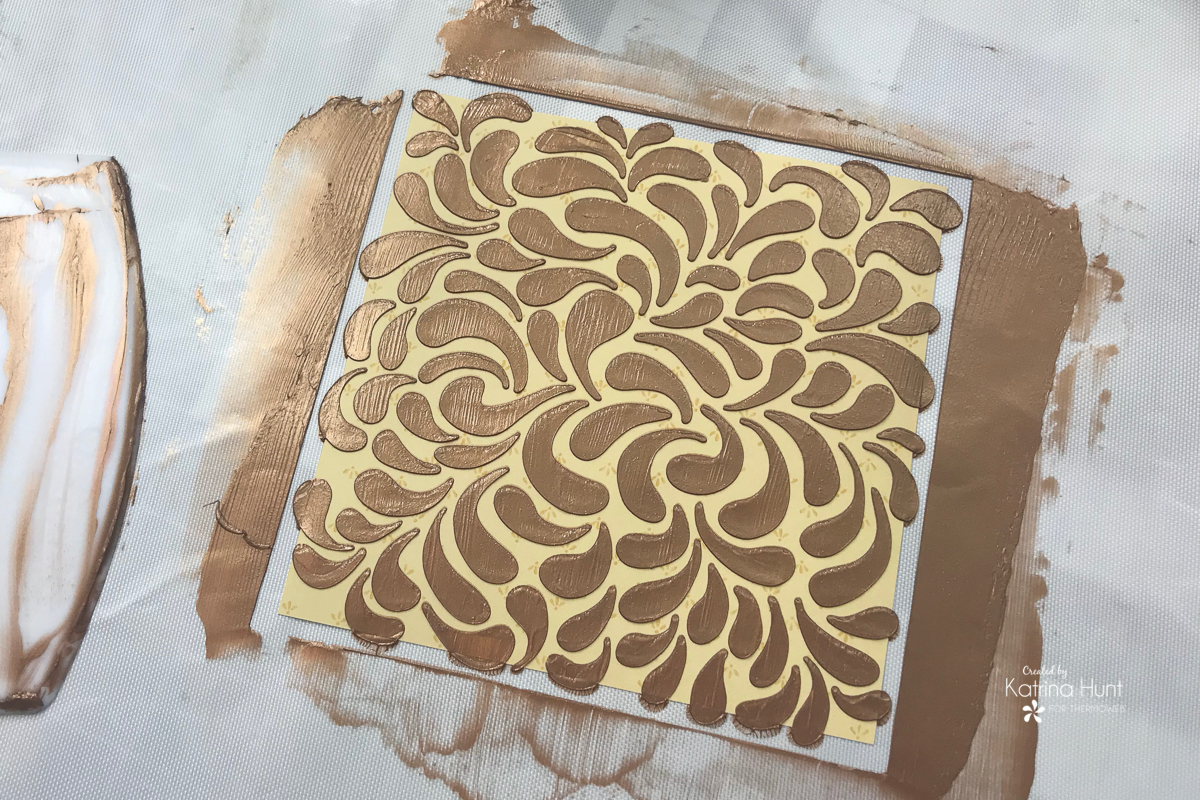
Begin the background by picking a pattern paper that is muted in design. You want it to highlight your stenciled image, not overwhelm it. Apply a small amount of Pixie Spray to the back of your pattern paper to hold it in place. Next, apply a light mist of Pixie Spray on the back of your stencil. Let both dry for a minute or so and then adhere the pattern paper to your mat and then apply the stencil on top of your pattern paper rubbing to adhere it to the paper.
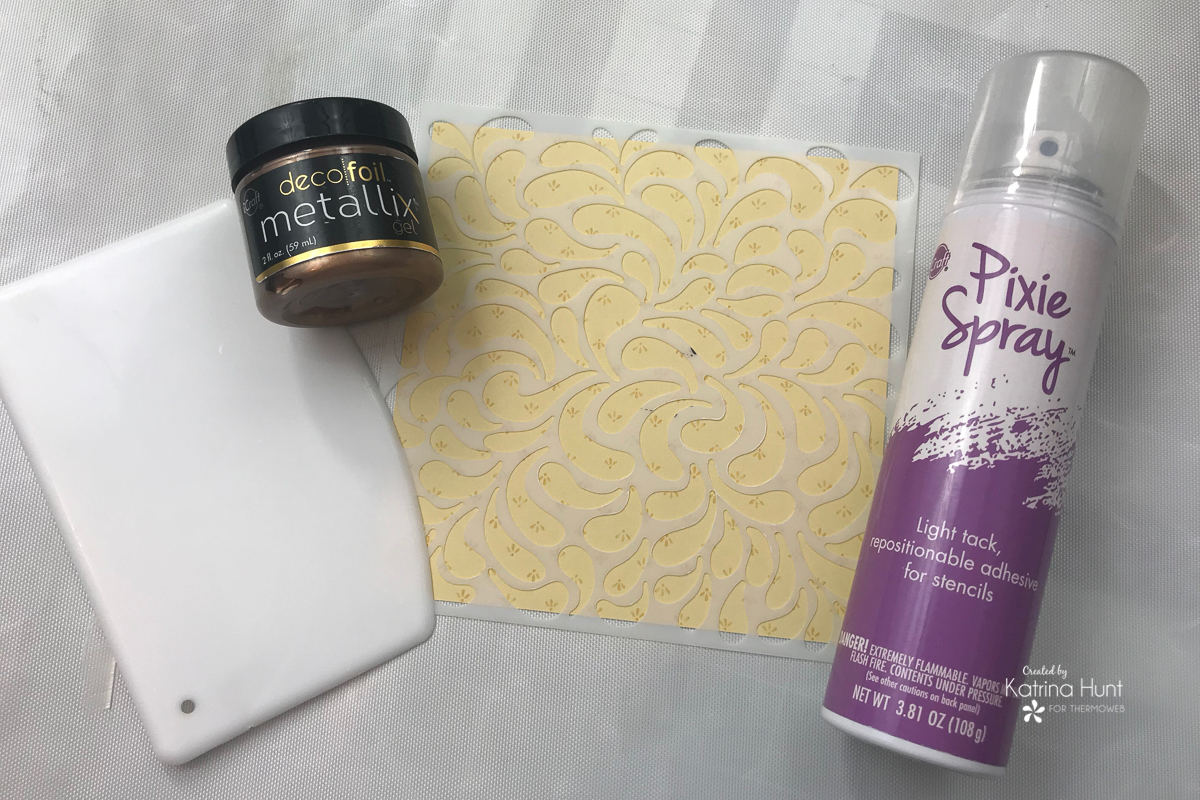
Apply the Metallix Gel using the Stencil Pal over the stencil. Carefully remove the stencil and then set pattern paper aside to dry.
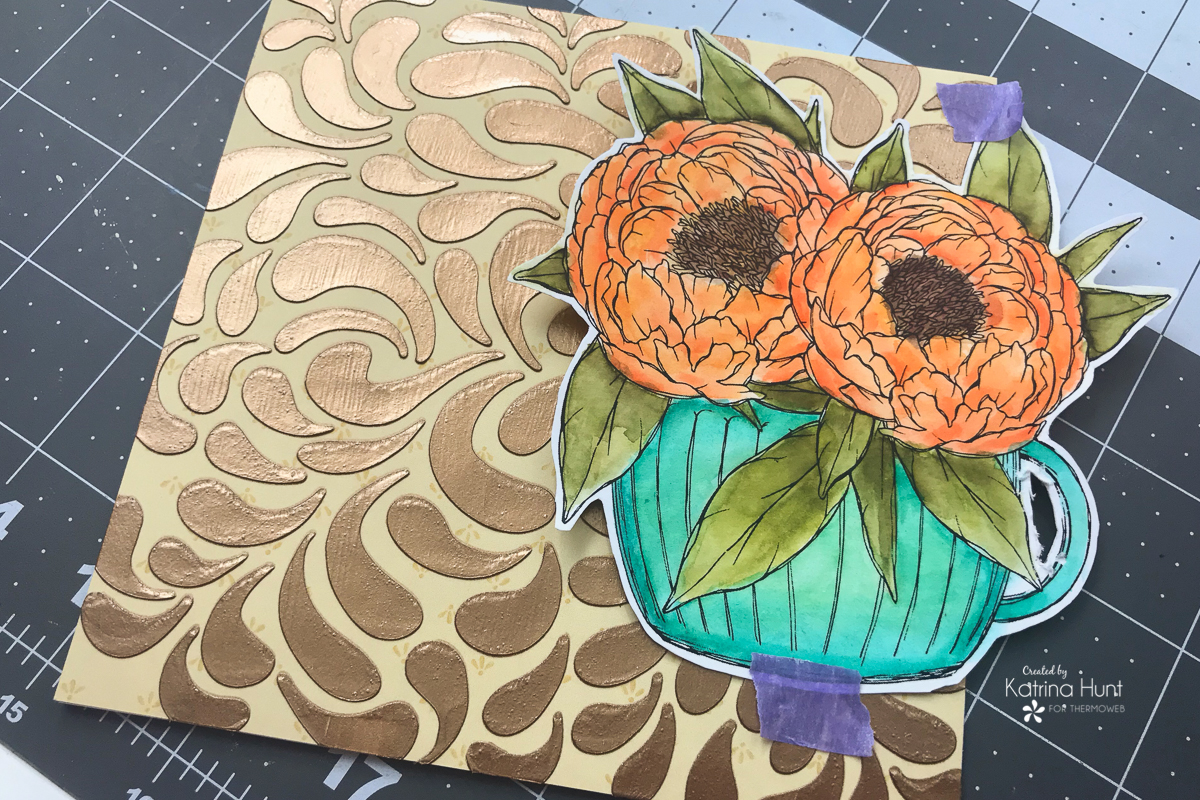
Once the background is completely dry attach to your card base using the Memory Runner XL. You could also use the 3D Foam Square if you wanted to raise the background for some dimension.
One way to add interest to your cards is to let the stamped images “hang” or cut off on the edge. After I had fussy cut my image, I decided I wanted to only show part of the flowers and cup. So I adhered the image down with some Purple Tape at the top and bottom in the position I wanted. This allowed me to trim the edge off even with the side of my card base. The Purple Tape removed easily from the Metallix Gel area, without leaving a trace of being there!
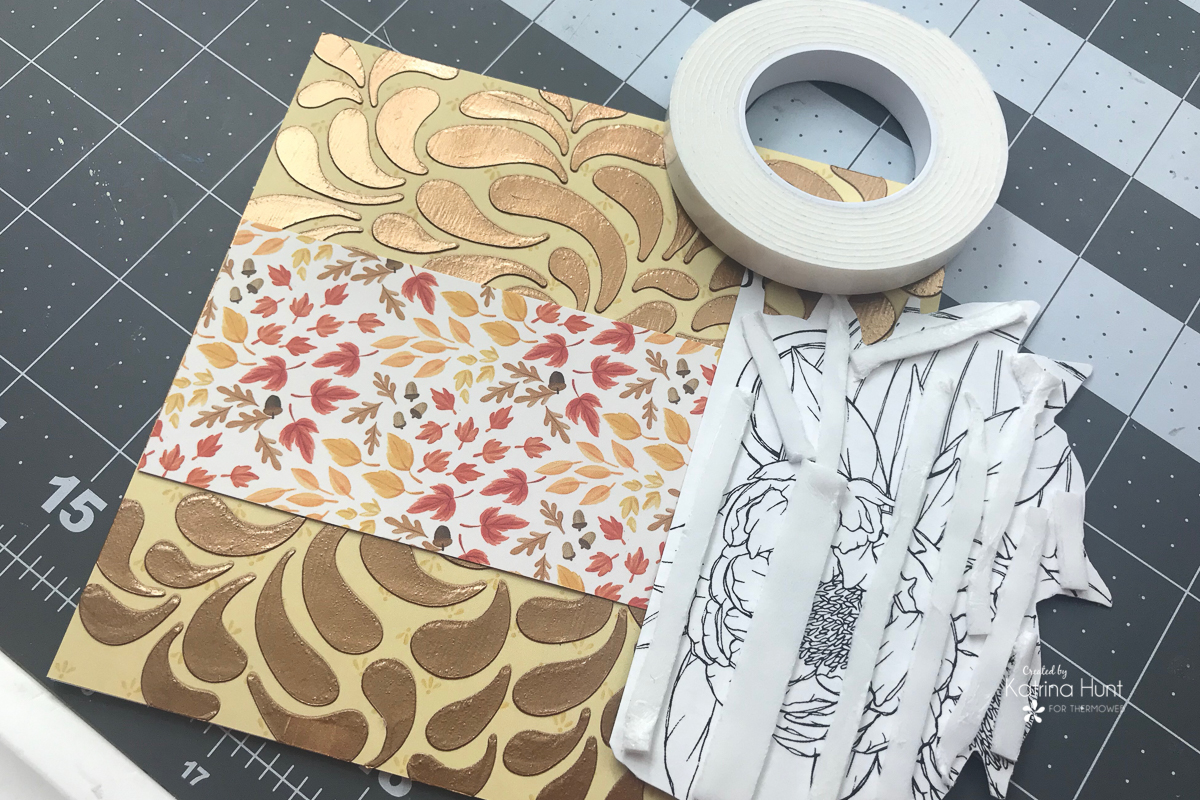
 Using some Gina K Designs Foam Tape or 3D Foam Squares adhere to the stamped image to your stenciled background. You can add a pattern paper strip underneath as a place to put your sentiment if you like.
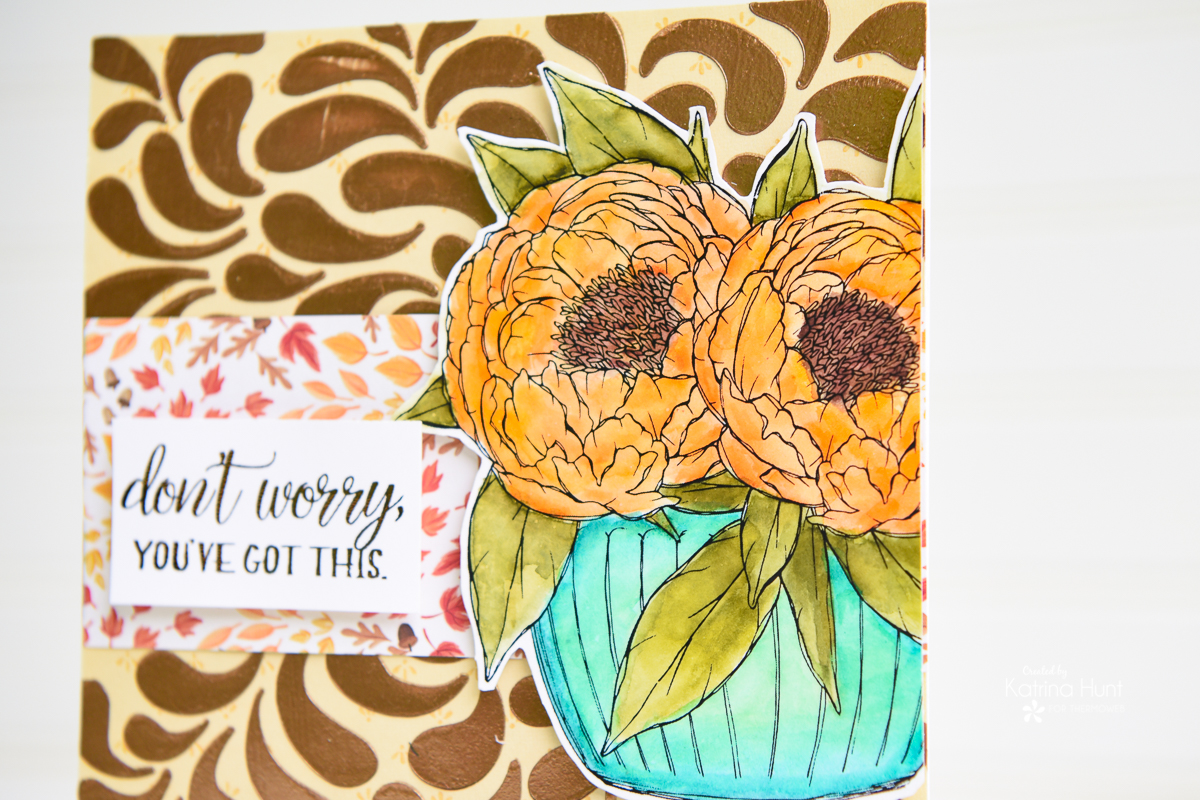
Moving on to the foil sentiments. Print sentiments using the method above for images and adjust for your card size. Heat laminator for 20 minutes on 5 mil to make sure it’s warmed up. Trim sentiments out and then foil with choice of color.
Once you have your sentiments foiled adhere to your card fronts and you are done!
Quick, easy, and elegant everyday cards for you to create are at your fingertips with Therm O Web and some digital stamps!
Thanks for stopping by the blog today!