


Hello!
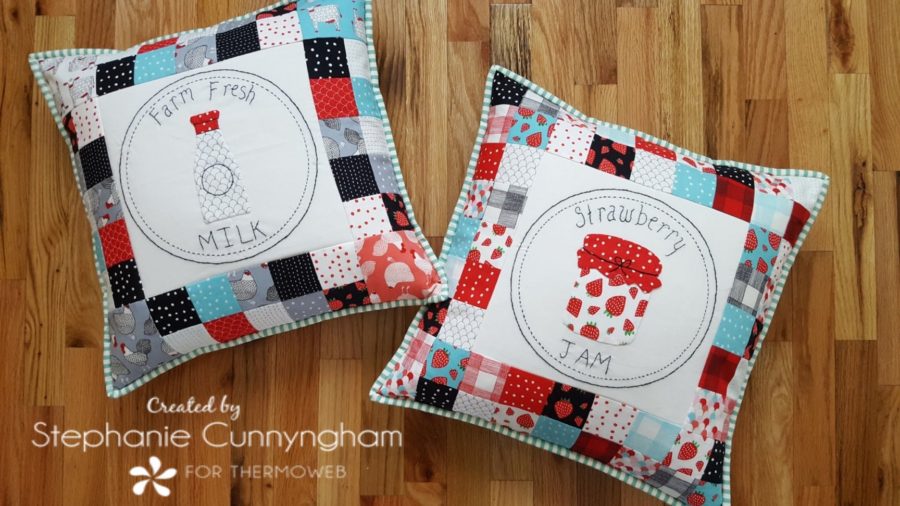
Today I am so excited to share with you my first project for Therm-O-Web, a pair of farmhouse pillows featuring Farm Fresh fabric by Gingiber for Moda Fabrics. These pillows are so fun to make and feature traditional piecing as well as hand stitching and applique. They are a great way to try out some new skills and techniques, and the end result is an eye-catching set of pillows sure to freshen up your home!
Farm Fresh Pillows
Supplies Needed for Two Pillows
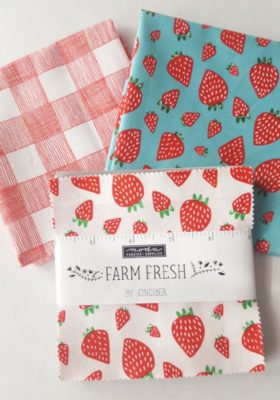
- Charm pack of your favorite fabric
- 2 fat quarters for backing
- 2 zippers, 20″ or longer
- 1/4 yard of binding fabric cut into 2 1/4″ x WOF strips.
- 2 – 10.5″ squares of white fabric for pillow centers
- 2 – 20″ squares of batting
- 2 – 20″ squares of lining fabric
- 2 – 20″ pillow forms
- Heat n Bond lightweight fusible interfacing or Heat n Bond EZ Print Lite Sheets
- Black embroidery floss or heavyweight thread
- FREE PATTERN HERE
Farm Fresh Pillow Instructions
First, decide which charm squares you will use for your applique pieces and set them aside. You will need two different charm squares for each pillow.
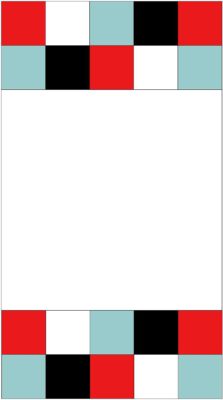
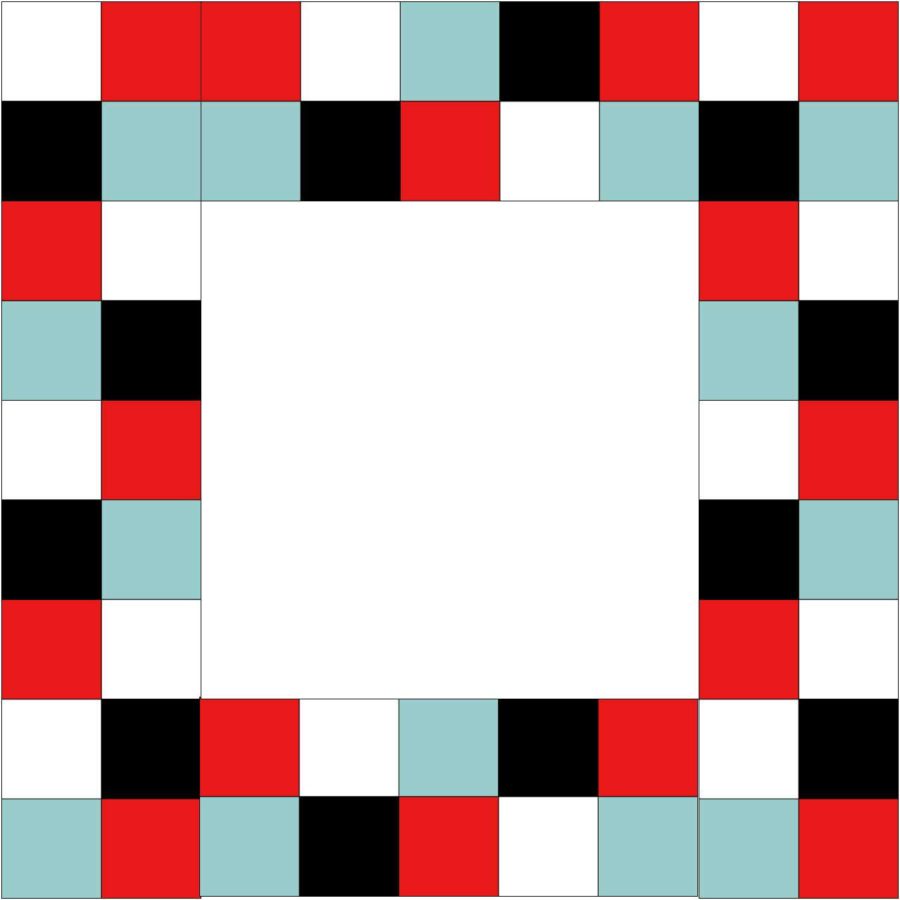
Cut the remainder of your charm squares into 2.5″ squares. You will need 56 of these smaller squares for each pillow.
Sew two sets of 10 squares for each pillow according to the diagram below.

Sew one of these strips to the top and bottom of the 10.5″ white square. Press away from the white.
Sew two sets of 18 squares together for each pillow.

Sew these strips to the sides of your pillow, completing the piecing part of your pillow front.
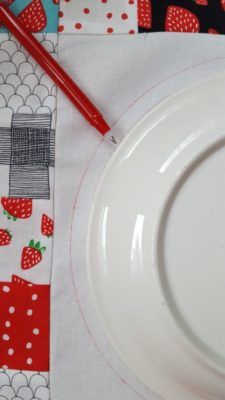
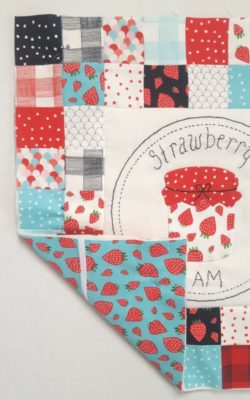
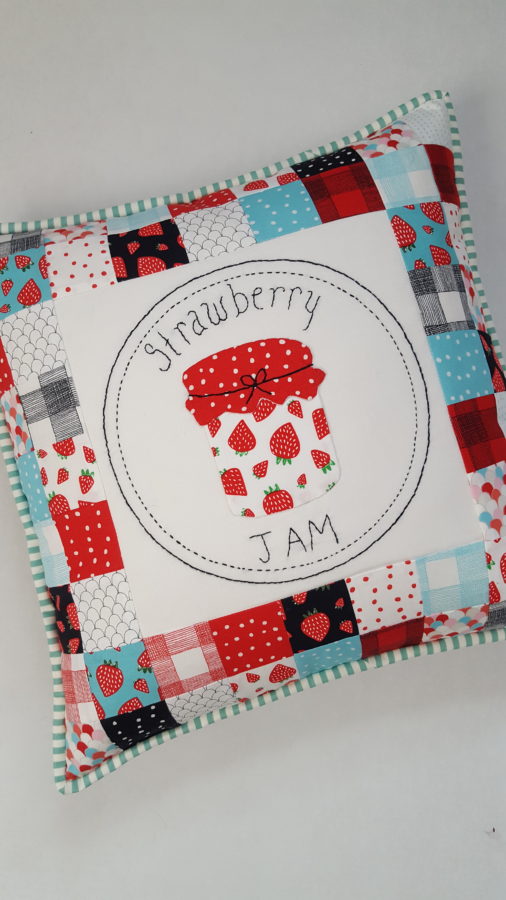
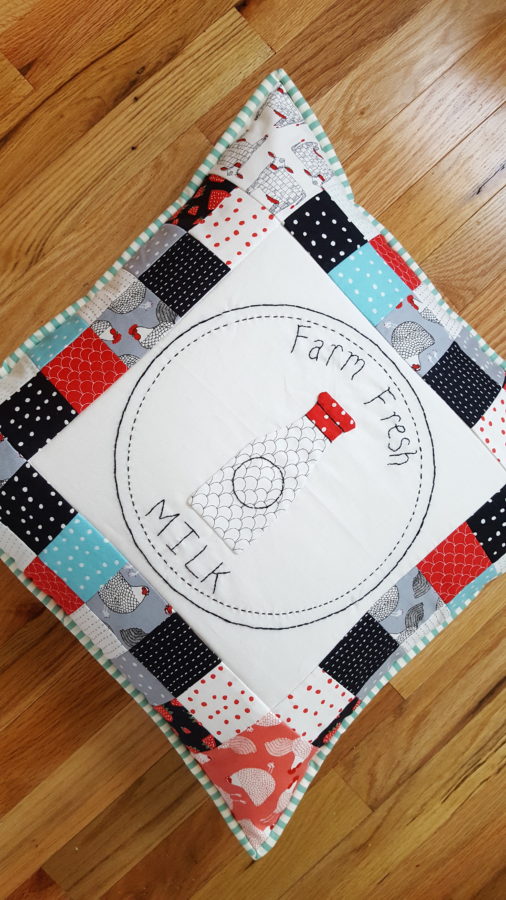
Draw two circles in the center of the white square. I used a Frixion Pen (they ink disappears when ironed) to trace two different size dinner plates! The outer circle is 9″ in diameter, and the inner circle is approximately 8″.
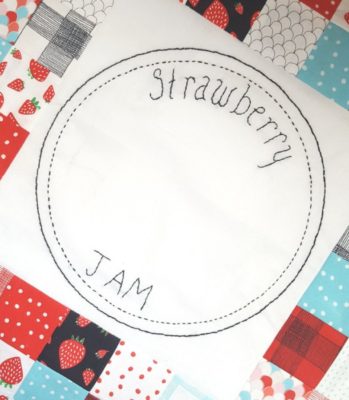
Hand stitch with a dark thread around these lines or sew along the lines using a dark thread on your sewing machine. I hand-stitched using three strands of embroidery floss and chose to make my outer circle solid and my inner one broken.
I also used my Frixion Pen to write the words “Strawberry Jam” on the inside of my circles for one pillow and “Farm Fresh Milk” on the other. I hand stitched these with two strands of embroidery floss. I am definitely not an expert in hand-embroidery, but I enjoy doing it and love the way it looks, imperfections and all!
Pillow Applique
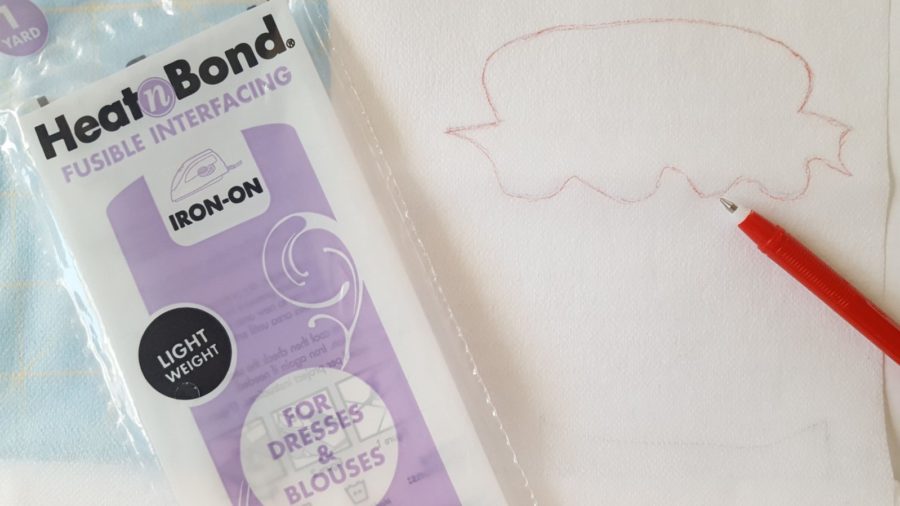
Next, you will need to prepare your applique. Use the template provided to print your shapes onto the EZ Lite paper or to trace on to the interfacing. I chose to trace mine on the non-bumpy side of the interfacing, and I used Heat n Bond light.
Roughly cut around your pattern piece, giving yourself a good seam allowance, and place your patterns on your fabric with the bumpy side of the interfacing touching the right side of the fabric.
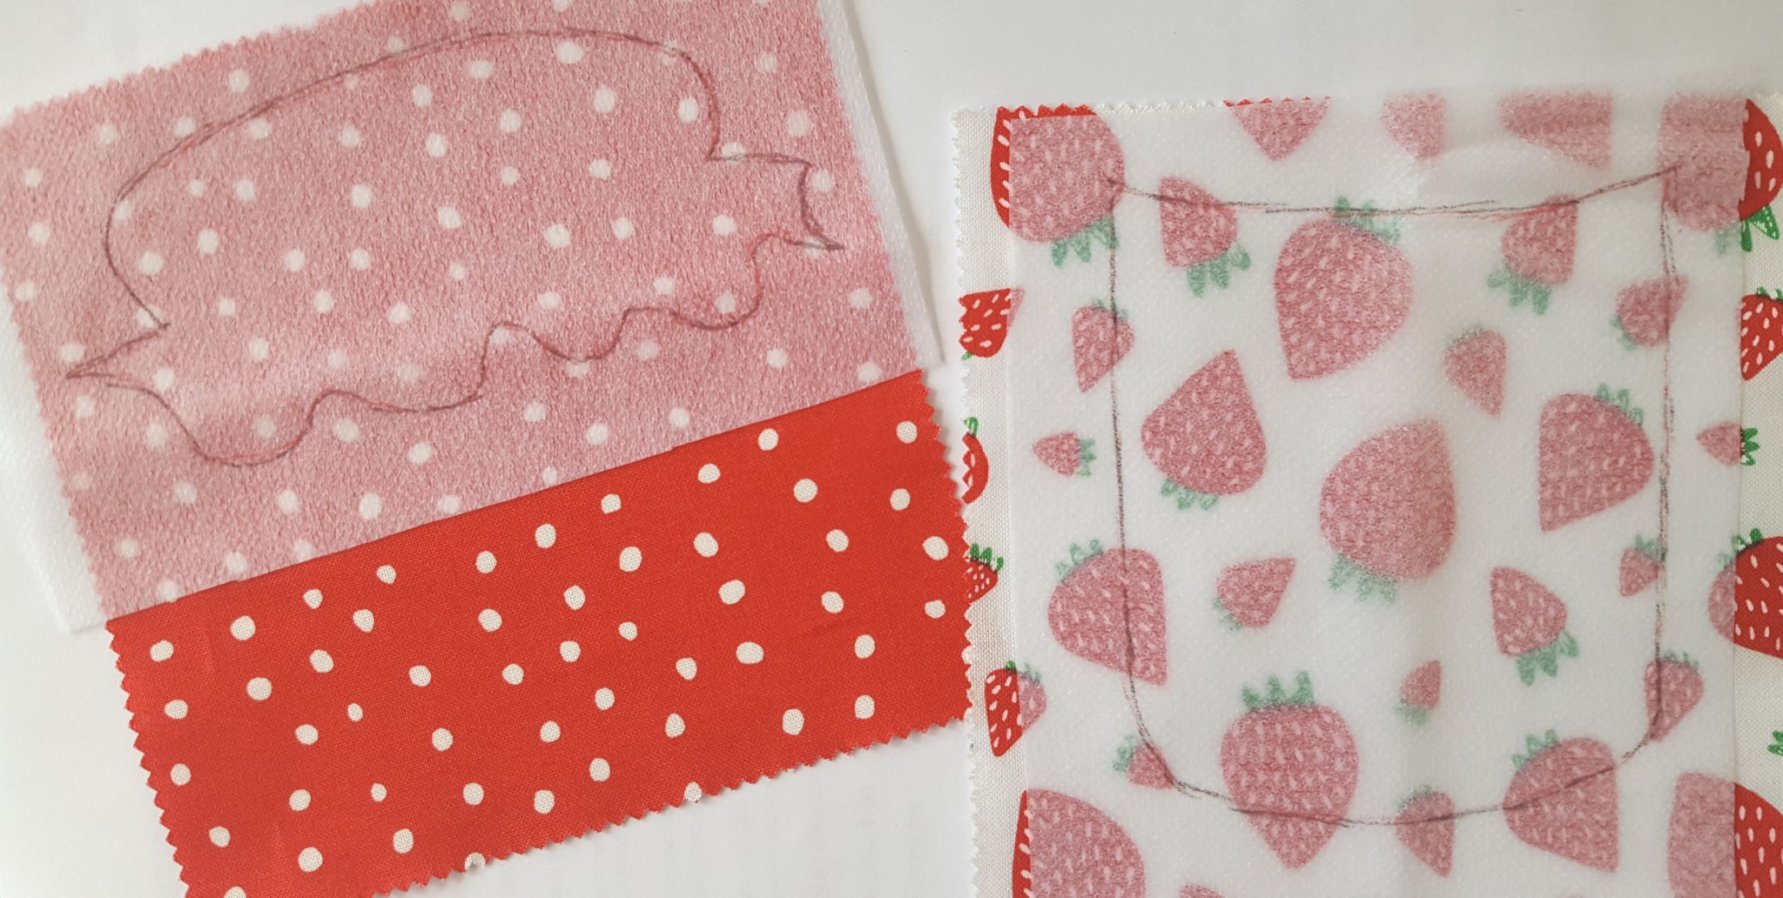
Sew ON the drawn line, all the way around.

For the milk bottle, first, sew your two charm squares together as below. The red strip will be the lid and the white square will be the bottle. Sew ON the line all the way around.
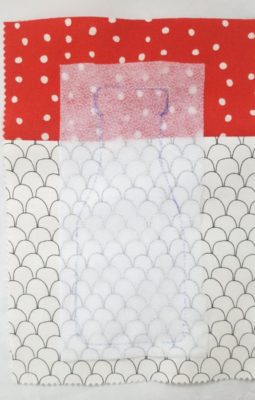
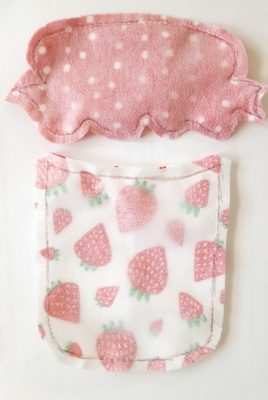
Trim off excess fabric and interfacing for all applique pieces, leaving a 1/4″ seam allowance. Clip corners and curves. See the example below.
Cut a small opening in the center the interfacing for each applique piece.
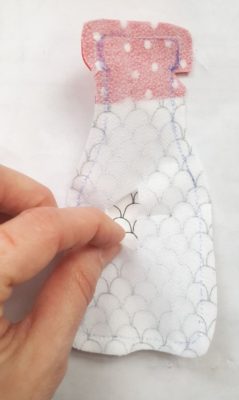
Turn your applique pieces right side out. The interfacing might tear a little, and that’s ok. Just try not to let it tear along the stitches.
Now comes the fun part! Center your applique pieces inside the circles on the pillow front and press. For the jelly jar, press the jar on first and the lid second.
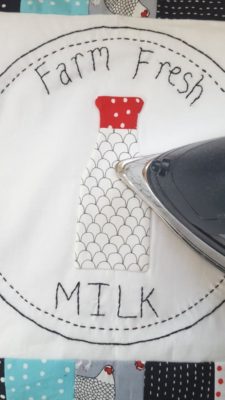
Stitch your applique pieces in place to reinforce. You can do this by hand or machine. I chose to stitch mine down by hand. My reason for doing the applique in this method was to make sure my applique pieces looked a little dimensional. I was afraid sewing down the edges with my machine would flatten them too much. I like how they pop off of the pillow this way!
Add any hand-stitched details that you desire! I stitched a bow on my jelly jar and a seal on my milk bottle.
Assembling the Pillow
For each pillow layer a lining square (wrong side up), a batting square, and a pillow front (right side up). Quilt as desired. Trim to 18″ inches.
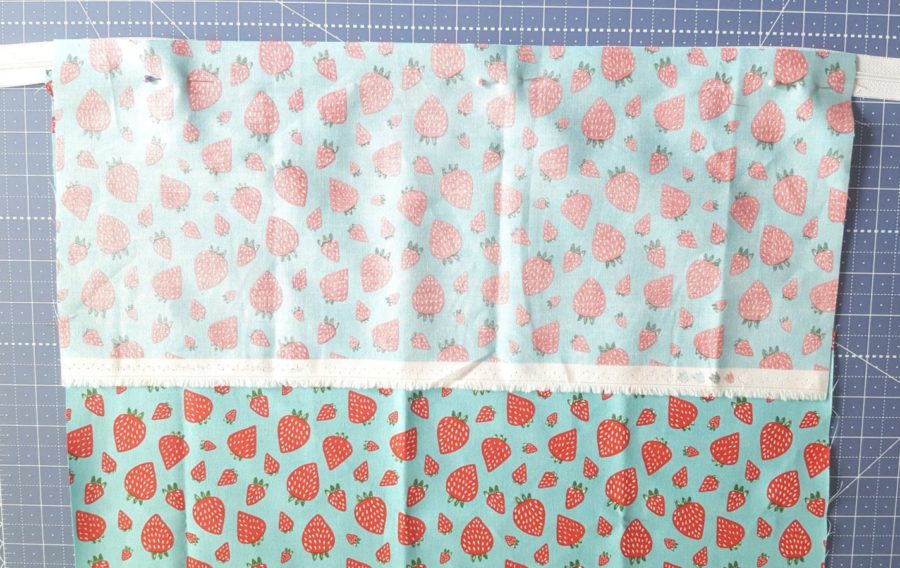
Cut each fat quarter into two pieces: 14″ x 18″, and 7″ x 18.”
Place the edge of the zipper along the 18″ edge of one of the backing pieces, right sides together, and stitch.
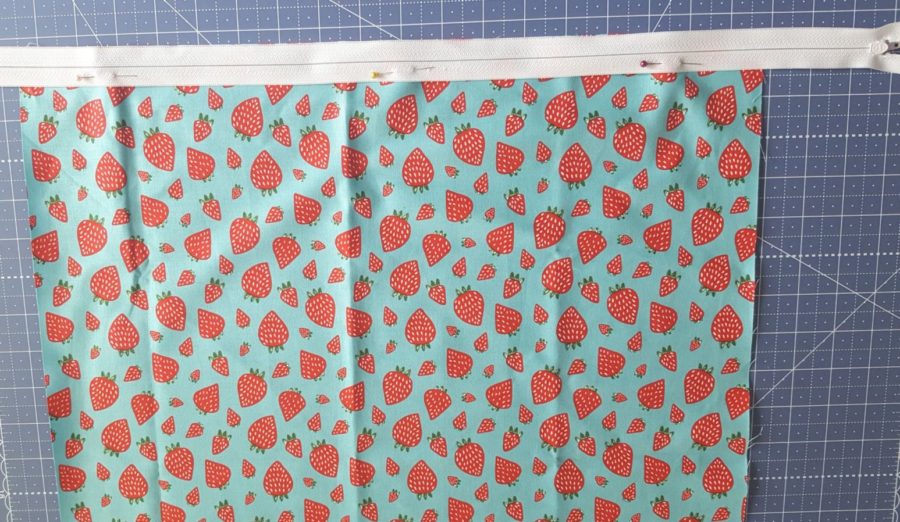
Press fabric away from zipper and top stitch close to the edge of the fabric.
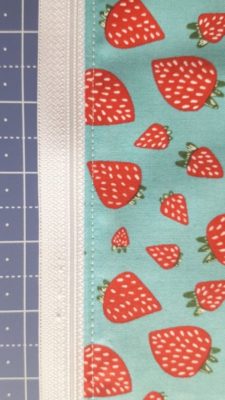
Repeat for the other side of the zipper and remaining backing piece.
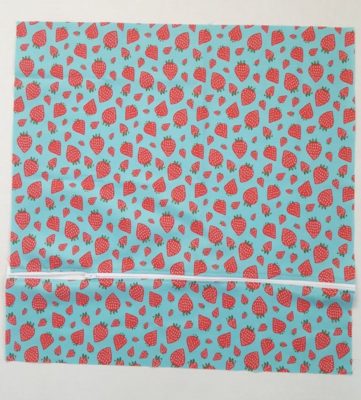
Open your zipper slightly and stay-stitch the open end. Trim pillow back to 18″ square. Layer pillow back and pillow front together, wrong sides together, and baste around the edges.
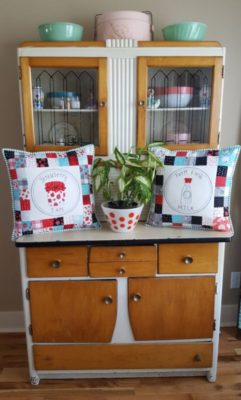
Bind using your binding strips and your favorite binding method. Insert your pillow forms and scatter your pillow throughout your home to enjoy!
Thanks for sewing along with me! I look forward to sharing with you again soon!
Stephanie