


Hello Crafty Friends!!
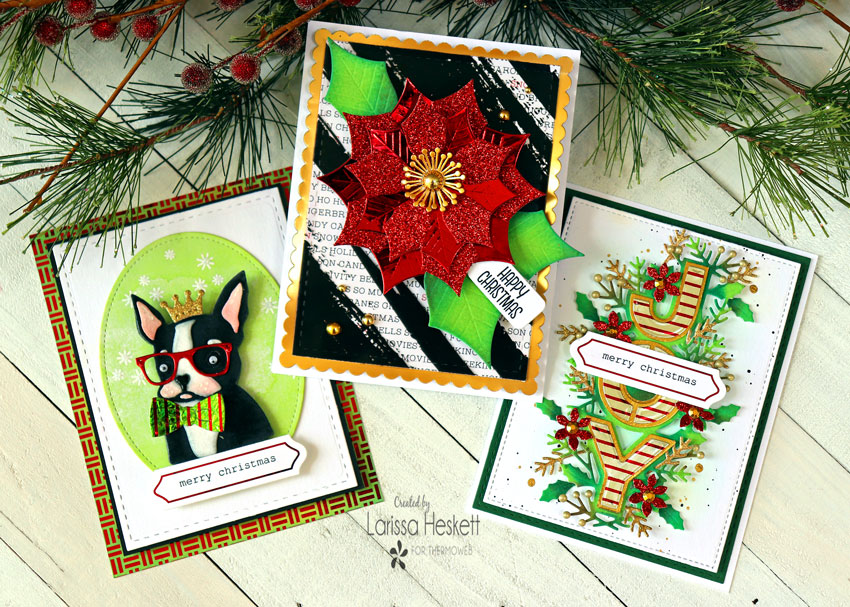
Larissa here today to share some STUNNING Christmas Cards using a combination of Therm O Web Products!! I LOVE being able to use a combination of Products together to create projects that are FULL of Dimension, Texture & Shine!! Anyway you use them, you’re SURE to create a Project that will leave a LASTING impression on the recipient!!
JOY Merry Christmas Card
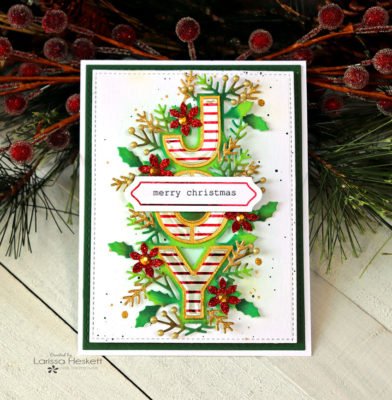
My First Card uses the Spellbinders Joy Die Set!! I LOVE sets like these for Holiday Cards because there are SO MANY options as far as how you decide to use them!! You can layer them or simply just Die Cut them out and the results will be AMAZING either way!! I’ve decided to pull out ALL the punches for my design today and I just LOVE the way it turned out!!
I started by Die Cutting the entire Main Image from some Green Envy Deco Foil Flock Sheets that I adhered to some Gina K Designs Luxury Cardstock using some Easy Cut Adhesive Sheets!! This not only makes the Flocking Stick to the Cardstock, but gives this delicate Die Cut some Weight so it can stand up to the Inking and layering of the other elements!!
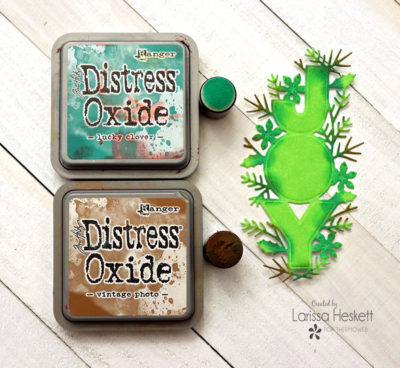
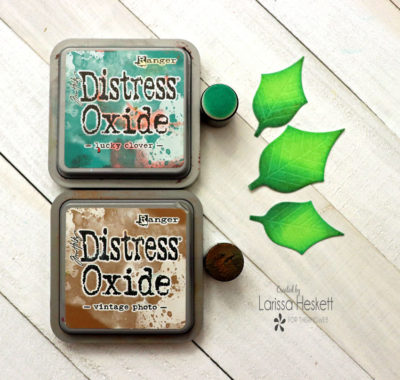
Once it was Die Cut I used Distress Oxide Inks in both Lucky Clover and Vintage Photo using Ink Daubers to add some dimension and even more color to help make the Image POP a little more!! You can totally skip this step and it would be just as BEAUTIFUL!! I just LOVE the contrast of colors and the added dimension the inking adds to the Image!!
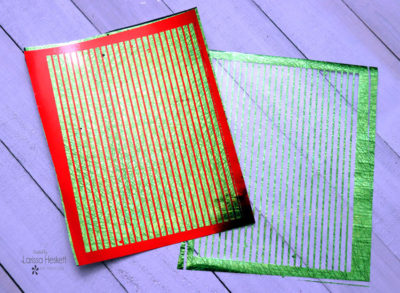
I wanted to Layer the Joy Letters and I thought a Candy Cane Strip would be PERFECT!! So I looked through my Negative Stash!! (I NEVER throw away my negative Foil pieces after Foiling any of the Foil-Mates, Designer Toner Sheets or Stenciled Designs) I decided to use the Red Strips and Foiled them to a piece of Deco Foil Toner Sheets by running it through my Laminating Machine!!
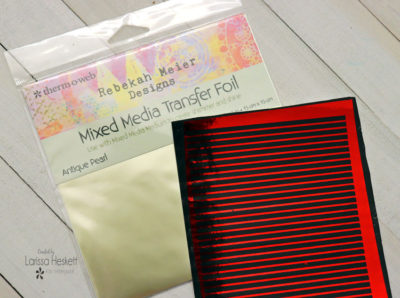
I then cut a Piece of Rebekah Meier Antique Pearl Transfer Foil and ran it through the Laminating Machine again!!
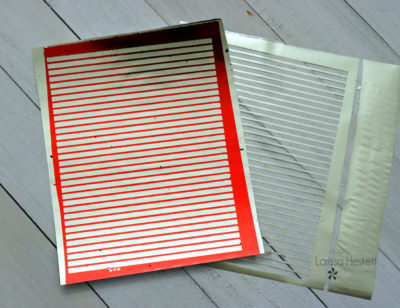
Candy Cane right!!?? I LOVE the way it turned out and you guessed it, I’m going to save that Negative piece for use on another project!!??

I Die Cut the “JOY” Letters from the Foiled Candy Cane Sheet and then decided I needed another layer to help them really POP against the Flocked Green Envy Base!!
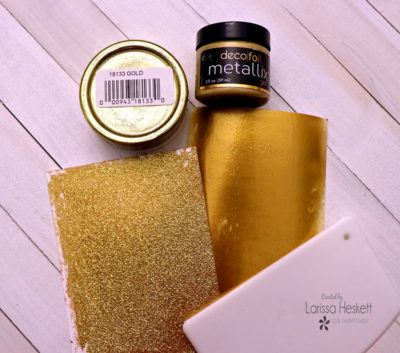
I LOVE using my Metallix Gel and Gina K Designs Glitz Glitter Gels to create my own Designer Papers to Die Cut images from!! So for the one on the left, I mixed both Pure Gold Metallix Gel and Gold Gina K Designs Glitz Glitter Gel and used the Stencil Pal to spread a thin layer across my Cardstock!! I repeated the process again this time just using the Pure Gold Metallix Gel onto another piece of Cardstock and set them aside to dry!! I also did the same process with the Red Glitz Glitter Gel, I just forgot to take a picture once it was dry!!
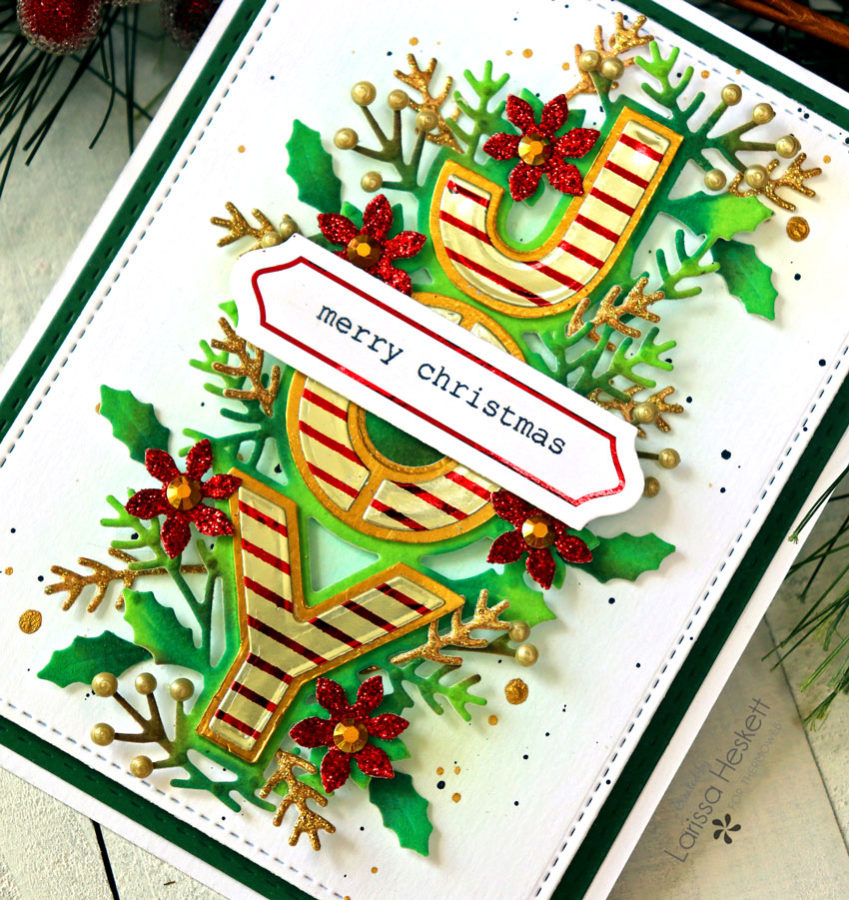
I ran the Pure Gold Metallix Cardstock through the Die Cutting machine and Fussy Cut along the outline of the “JOY” Letters to create the Layer and I REALLY LOVE the way they make the Candy Cane Strip Foil Letters POP!! Then I used the Pure Gold Metallix and Gold Glitz Glitter Cardstock to Die Cut several of Twig Images included in the set!! I Die Cut the Flowers from the Red Glitz Glitter Cardstock and then I Die Cut some of the Holly Leaves from the Green Envy Flock Sheets inking the edges again with both Lucky Clover and Vintage Photo Distress Oxide Inks!! I adhered everything together using some Ultra Bond Adhesive!! I adhered some Pretty Pink Jewels to the center of the Flowers using some Zots Bling Adhesive Dots and then I added some Nuvo Drops for the Berries on the Twigs!! I inked the center of the Card Panel with some Tumbled Glass and Cracked Pistachio Distress Oxide Inks and a few Black Soot Distress Paint and Gold Metallic Paint Splatters finishes off the Card Panel!! I adhered the JOY Panel using some Gina K Designs Foam Squares and then decided to add a Gina K Designs Foil-Mates Label Border and Foiling it with some Red Deco Foil then Stamped the Merry Christmas Sentiment and adhered it to the center of the “O” and the Card was done!!
Products Used:
Therm O Web:
Red Deco Foil
Rebekah Meier Antique Pearl Foil
Deco Foil Toner Sheets
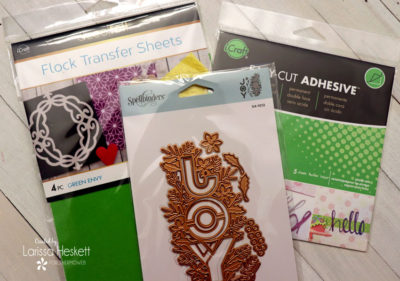
Deco Foil Flock Transfer Sheets in Green Envy
Deco Foil Pure Gold Metallix Gel
Gina K Designs Foil-Mates Background Blog Backgrounds
Gina K Designs Red & Gold Glitz Glitter Gel
Laminating Machine
Easy Cut Adhesive Sheets
Zots Bling Adhesive Dots
Memory Tape Runner XL
Gina K Designs Luxury White Cardstock
Gina K Designs Foam Squares
iCraft Ultra Bond Adhesive
Gina K Designs Foil-Mates Label Borders
Gina K Designs Nested Label Dies
Other:
Spellbinders Joy Die Set
MFT A2 Stitched Rectangle Die Set
Ellen Hutson Bear Ware 2 Stamp Set
Pretty Pink Posh Gold Jewels
Distress Oxide Inks in Tumbled Glass, Cracked Pistachio, Lucky Clover & Vintage Photo
Nuvo Drops
Black Soot Distress Paint
Metallic Gold Acrylic Paint
Paint Brush
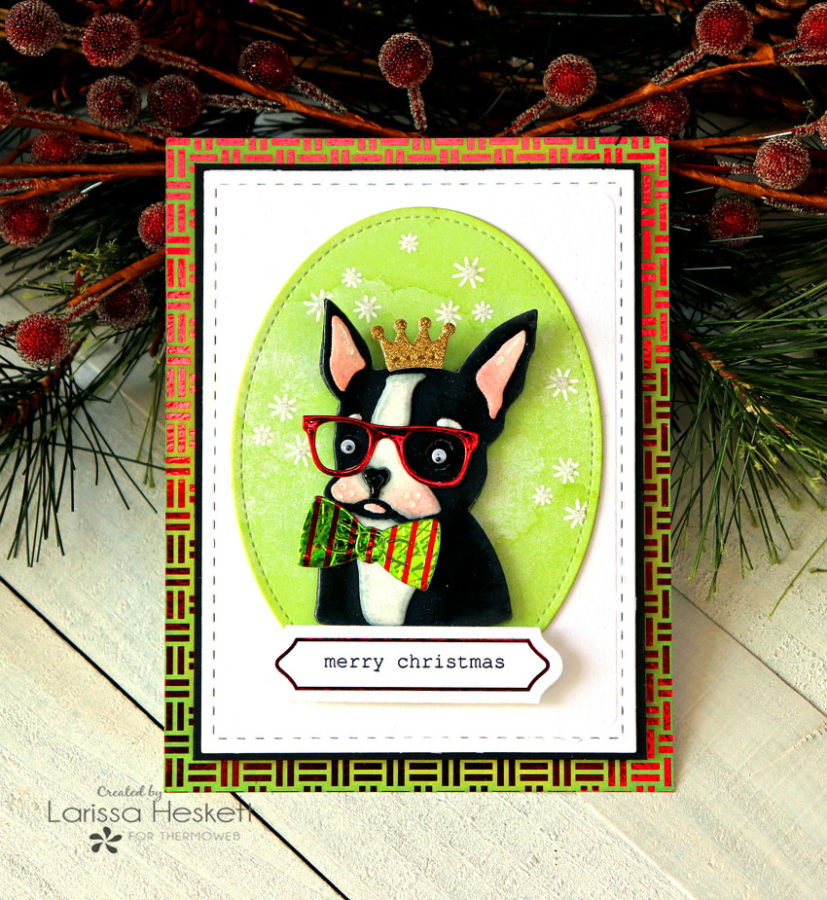
Boston Terrier Merry Christmas Card
My Second Card uses the Spellbinders Merry Hugs Die Set!! When I saw this Set, I KNEW I had to have it to create a Holiday Card specifically for a SWEET Friend!! I wanted to show how even when Paper Piecing you can use several Products to create an Image, unlike anything you can buy in a store!! The small details can really take a Scene Card from CUTE to AMAZING!! So worth the extra time in my opinion for those SPECIAL Cards!!
I started by creating the background Foiling the Gina K Designs Foil-Mates Backgrounds Harvest Texture in Red Deco Foil by running it through my Laminating Machine!! I wanted to ink the background to go along with the Holiday Theme I was going for so I used both Peeled Paint and Twisted Citron Distress Oxide Inks!! Then just took a plain paper Towel to burnish off any of the ink left behind on top of the Foil!!

Next, I needed to Die Cut the different Images to create the Pup!! I wanted to use both White Latte and Black Velvet Deco Foil Flock Sheets that I adhered to some Gina K Designs Luxury Cardstock using some Easy Cut Adhesive Sheets!! I just LOVE the way the Deco Foil Flock Sheets make Critters come to life with the addition of the Fuzzy Texture!! I also like to add inking to the Die Cuts to add even more texture and some added color!! I used Weathered Wood and Spun Sugar Distress Oxide Inks and then added some White Gel Pen details, some Black Nuvo Drops for the Nose and some Mini Studio Katia Wiggly Eyes that finish off the Pup!!
I Die Cut the Elements that give the Pup some character!! I Die Cut the Crown from some Cardstock that I applied a thin coat of Pure Gold Metallix Gel and Gina K Designs Gold Glitz Glitter Gel to create my own custom Color!! I LOVE being able to customize the colors I want and that you can die cut even small detailed Images with PERFECT results!! I Die Cut the Glasses from some Deco Foil Toner Sheet that I Foiled using Red Deco Foil!!
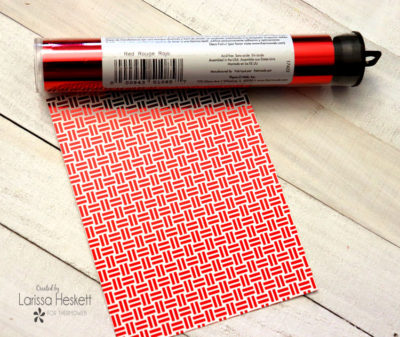
Last, the Bow was Die Cut from a Personalized Toner Sheet!! I started with the Negative piece of Red Deco Foil after I had Foiled another Project using the Gina K Designs Foil-Mates Bold Background Sheets!! (See why I NEVER throw any of my Negative Foil Sheets away)!! I cut a piece of Toner Sheet large enough to cover it and ran it through my Laminating Machine!!
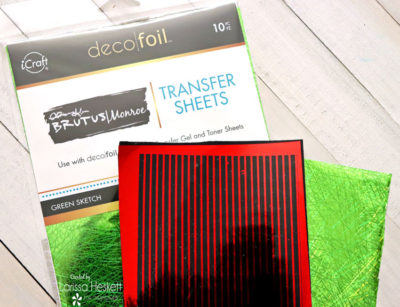
Once it was Foiled then I chose to use the Brutus Monroe Green Sketch Foil and I Cut a piece large enough to cover the Toner Sheet and ran it through my Laminating Machine again!! SWOON!! A two-toned striped patterned paper that we created specifically for this project!! I just LOVE it and think it adds SO much character to out little Pup!!

For the Base of the Image, I Die Cut some an Oval from some Watercolored Cardstock and then Stamped and Embossed some Snowflakes from the Ellen Hutson Bear 2 Stamp Set using WoW White Gloss Embossing Powder!! Glitter Nuvo Drops were added to the center of the Snowflakes for some Texture and Sparkle!! Then I added a Gina K Designs Foil-Mates Label Border after foiling it with some Red Deco Foil then Stamped the Merry Christmas Sentiment and adhered it to the bottom of the Oval Die Cut and the Card was done!!
Products Used:
Therm O Web:
Red Deco Foil
Brutus Monroe Green Sketch Foil
Deco Foil Toner Sheets
Pure Gold Metallix Gel
Gina K Designs Foil-Mates Backgrounds Harvest Texture
Gina K Designs Gold Glitz Glitter Gel
Laminating Machine
Easy Cut Adhesive Sheets
Zots Bling Adhesive Dots
Memory Tape Runner XL
Gina K Designs Luxury White & Black Cardstock
Gina K Design Black Onyx Cardstock
Gina K Designs Foam Squares
iCraft Ultra Bond Adhesive
Gina K Designs Foil-Mates Label Borders
Gina K Designs Nested Label Dies
Other:
Spellbinders Merry Hugs Die Set
Ellen Hutson Bear Ware 2 Stamp Set
MFT A2 Stitched Rectangle Die Set
Distress Oxide Inks in Peeled Paint, Twisted Citron, Weathered Wood & Spun Sugar
Glitter and Black Nuvo Drops
WoW White Gloss Embossing Powder
Studio Katia Mini Wiggly Eyes
White Gel Pen
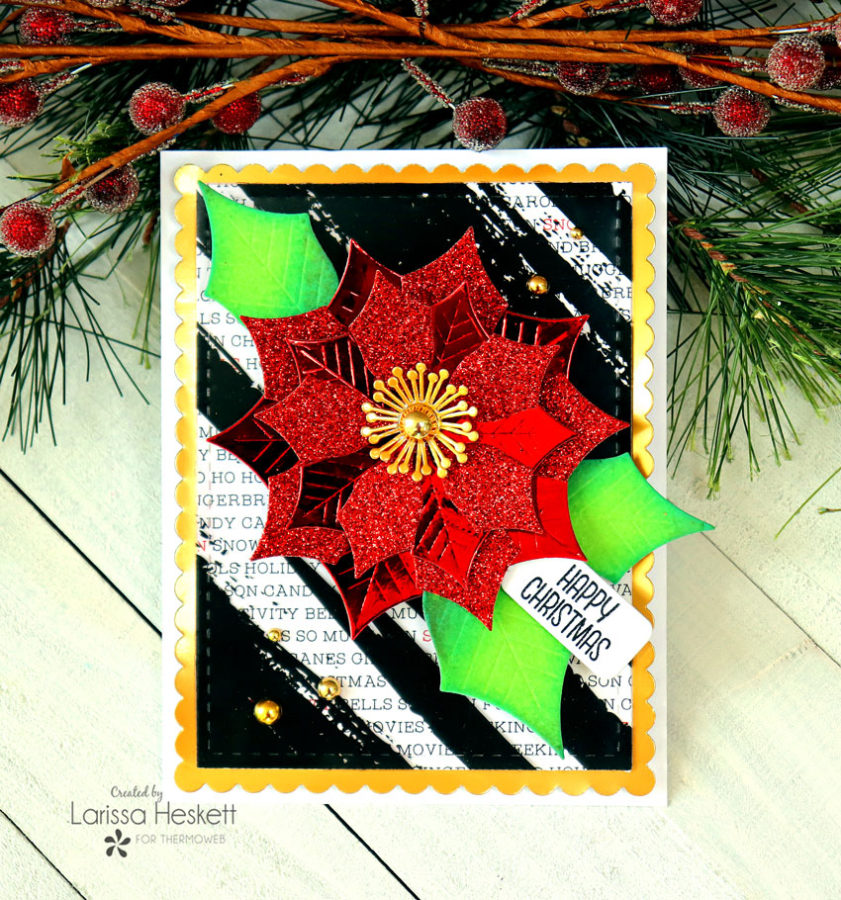
Poinsettia Happy Christmas Card
For my last Project, I went a little more Feminine with the Design!! I used an MFT Perfect Poinsettia Die Set and I REALLY LOVE the possibilities with this Design too!! There are SO MANY ways you could create this Poinsettia to either use up some of those scraps you may have laying around, or just to use some of your FAVORITE Colors!!

I like being able to use the Designer Toner Sheets un-foiled for some of my projects!! Especially if I’m using Deco Foil or Gels for other Elements!! I think it helps to round out the design, and let’s face it the Designer Toner Sheets are beautiful all on their own too!! So I started by Die Cutting the Brutus Monroe Designer Toner Sheets in Paint Brushed and Die Cutting it down for my Card front Panel!! Then Die Cut a Piece of Patterned Paper to go behind so the design would POP from behind the Toner Sheet!!
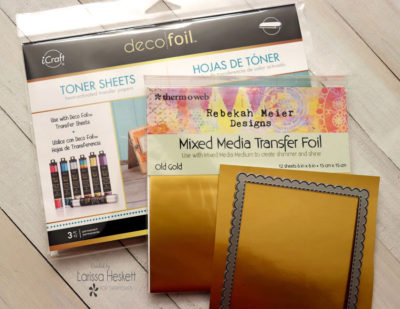
Next, I Foiled some Deco Foil Toner Sheet using some Rebekah Meier Old Gold Foil!! I LOVE the antique feel of this Foil and thought it paired nicely with the design I was going for!! (HINT this foil line if on SALE right now, so if you’re looking forward to making several Holiday Cards NOW would be a GREAT time to stock up on some) Then I Die Cut it using a Scalloped Frame Die!!
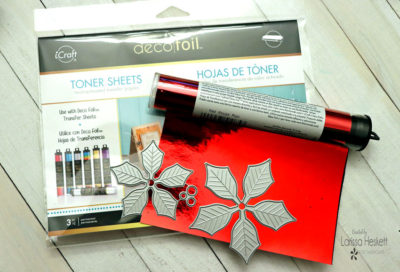
To create my Poinsettia Flower I decided to Layer two of each using both Deco Foil Toner Sheets Foiled with Red Deco Foil!!
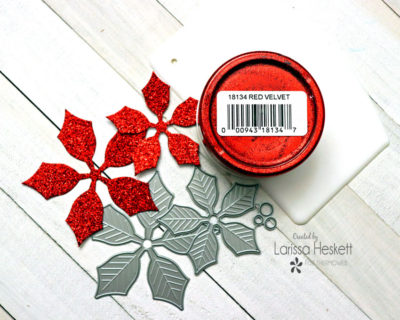
And the Red Glitz Glitter Cardstock I created by applying it to some Gina K Designs Luxury Cardstock using a Stencil Pal to apply a thin layer to the Cardstock and let it dry then Die Cut the Poinsettia Images!! I layered one on top of the other alternating both the Foiled and Glitz Die Cuts to create a STUNNING Poinsettia!!
I adhered the Die Cut Green Envy Flocked Leaves that I inked with Lucky Clover and Vintage Photo Distress Oxide Inks and then Die Cut the Poinsettia Centers also from some Old Gold Foiled Toner Sheets that I created above!! A Large Gold Metallic Pearl was added to the center of the Poinsettia and a few more sprinkled around for some extra touches of Sparkle!! I used the Gina K Designs Tags Die Set to Stamp and Emboss the Sentiment using an MFT Stamp Set!!
Products Used:
Therm O Web:
Red Deco Foil
Deco Foil Toner Sheets
Deco Foil Flock Sheets in Green Envy
Rebekah Meier Old Gold Foil
Brutus Monroe Designer Toner Sheets in Paint Brushed
Gina K Designs Red Glitz Glitter Gel
Laminating Machine
Easy-Cut Adhesive Sheets
Zots Bling Adhesive Dots
Memory Tape Runner XL
Gina K Designs Luxury White Cardstock
Gina K Designs Foam Squares
iCraft Ultrabond Adhesive
Gina K Designs Nested Tags Dies
Other:
MFT Perfect Poinsettia Die Set
MFT A2 Stitched Rectangle Die Set
MGT Snow Globe Sentiments Stamp Set
NND Frames & Flags Die Set
Studio Katia Gold Jewels
Distress Oxide Inks in Lucky Clover & Vintage Photo
So there you have it some STUNNING Christmas Card Ideas that Pack a Punch in Dimension, Texture, and Shine!! I hope you feel INSPIRED and that you CAN’T WAIT to combine products from your stash to get those AMAZING Christmas Cards Started!!
THANKS SO MUCH for stopping by today and STAY TUNED for LOTS of AWESOME X-Mas in August Inspiration as we SHARE LOTS of ideas this week on the Blog!!
Have a FABULOUS Week!!
We would love to see what YOU create with the Deco Foil Products – be sure to use #decofoil and #thermoweb on Social Media!!
Marion Muir
November 20, 2020 at 9:24 am (3 years ago)Please add me to your mailing list. I am loving your site!