


Hi! It’s Gracie Chavez from Graciellie Design. Today I’m sharing part 2 of my foil resist coloring tutorials. Last time I used Deco Foil™ and pigment inks (here) but today I will be using watercolor markers as my coloring medium to show you how quick and easy you can create a card with this foil resist technique.

Therm O Web Supplies:
Deco Foil™ Transfer Sheets • Gold
12″ Foil Laminator
3D White Foam Sticky Strips • 1/2 in
iCraft Adhesive™ Tape • 1/2 in
Memory Tape Runner XL™
Other Supplies:
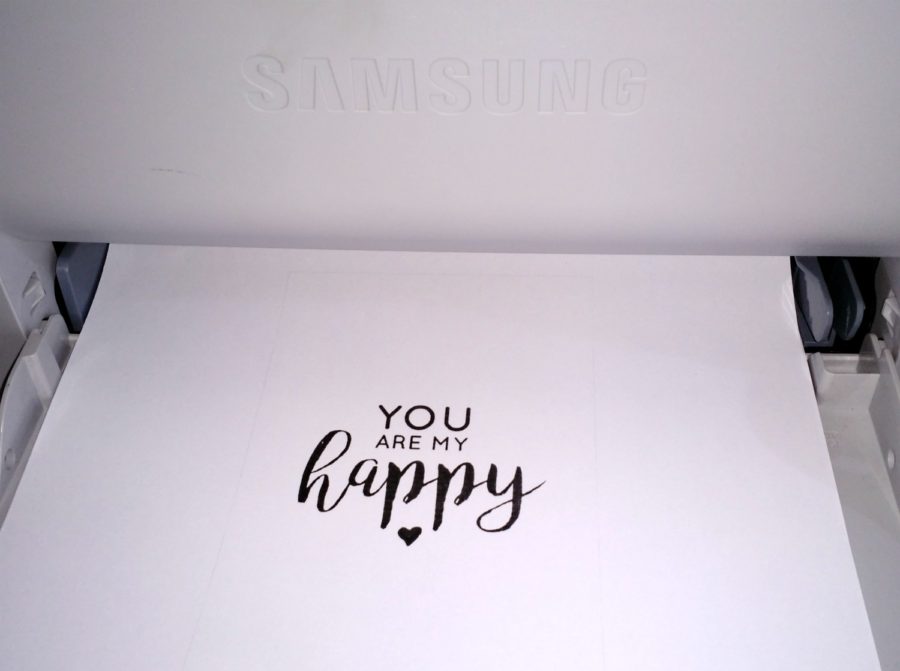
Free Journaling Card Printable
Watercolor Markers
Acetate
Water mister
Cardstock in white, hot pink and aqua
Small paper trimmer
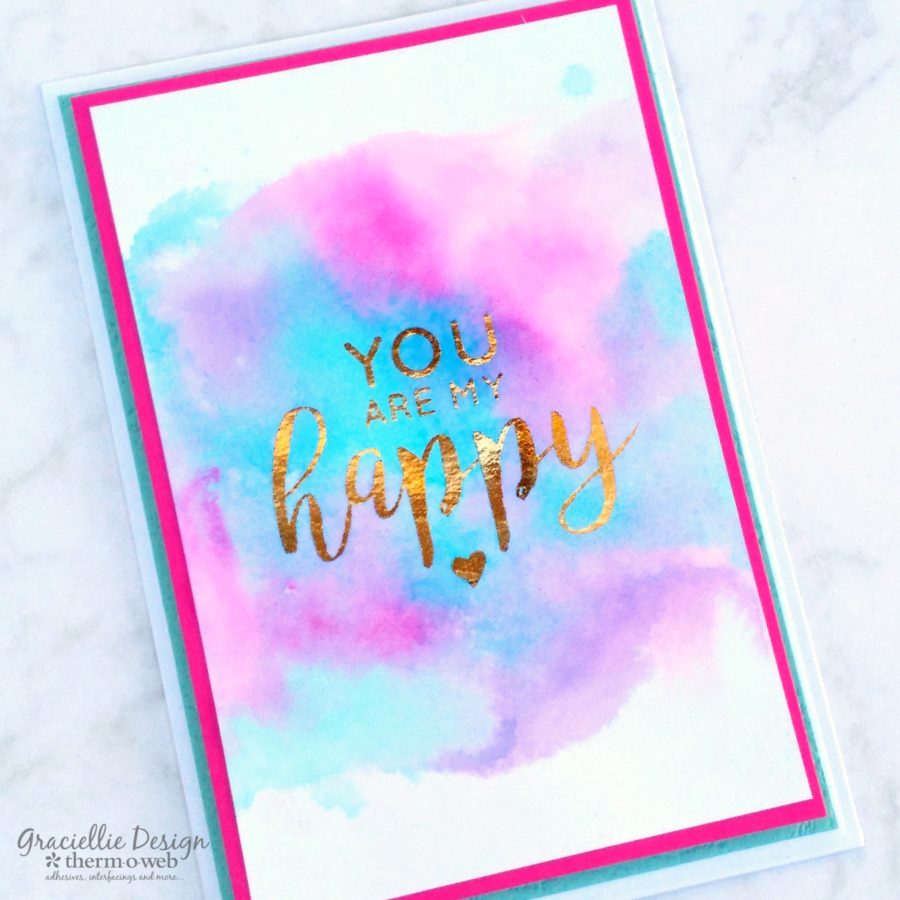
Foil Resist Watercoloring with Deco Foil™
This card will take you minutes to make! You can try out different color combinations to customize it! This tutorial also comes with a free download printable so you can try out this technique at home and print as many times as you like! So let’s get started…
Step 1. Print the free journaling card in toner using a laser printer.
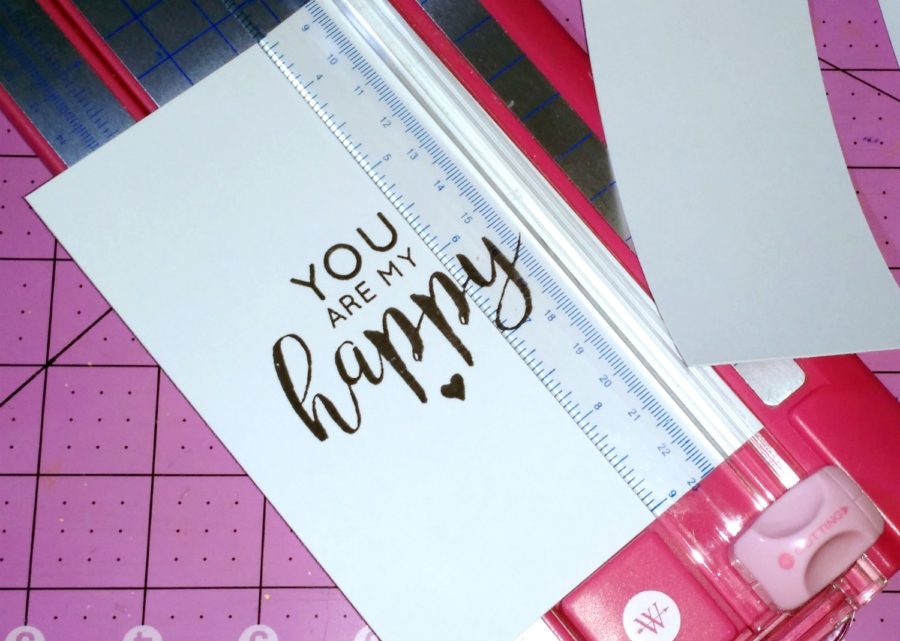
 Step 2. Cut the journaling card following the gray guidelines
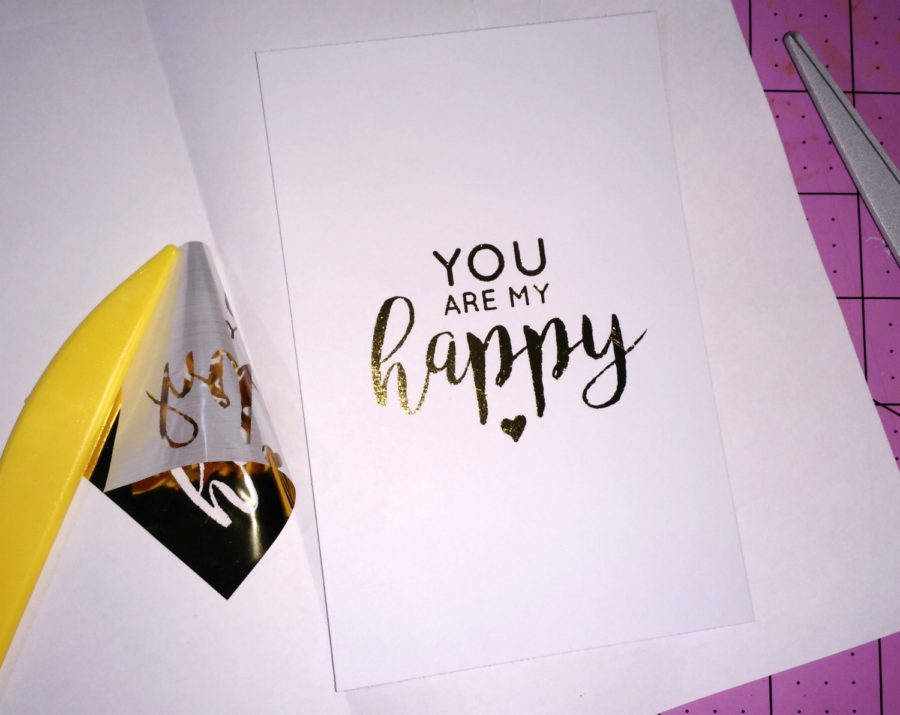
Step 3. Cover the printed card and cover the the sentiment with a piece of Deco Foil™ Transfer Sheets • Gold and run it through a Laminator. Remove the remaining foil sheet.
Step 4. Scribble different colors of watercolor markers on a piece of acetate.
Step 5. Mist some water to the acetate until the colors start to move and blend together.
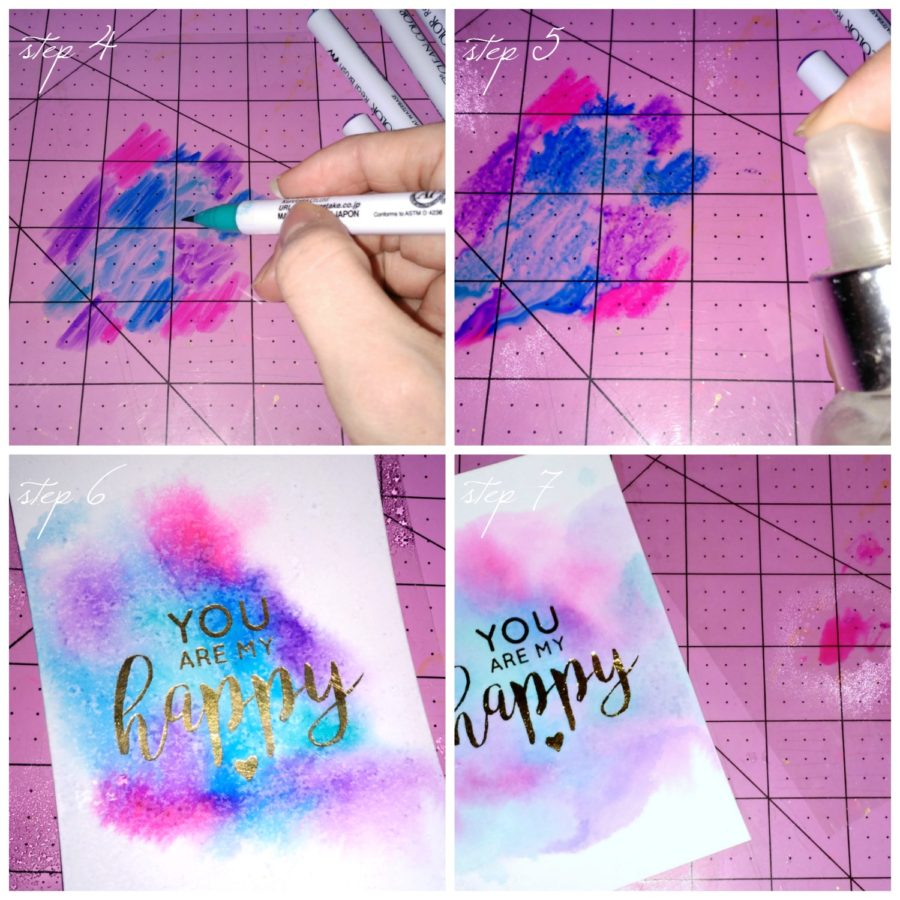
Step 6. Pick the acetate and press it on the printed card to apply the color.
Step 7. Continue to layer color as you wish.
This is by far one of the simplest watercolor techniques but it sure makes your foiled sentiment the focal point! Now let’s put together our card. You will need a few pieces of cardstock to layer your card…
Step 8. Use iCraft Adhesive™ Tape • 1/2 in Easy Tear Tape to attach the watercolored piece onto a pink mat.
Step 9. Optional: Cut a second mat in aqua.
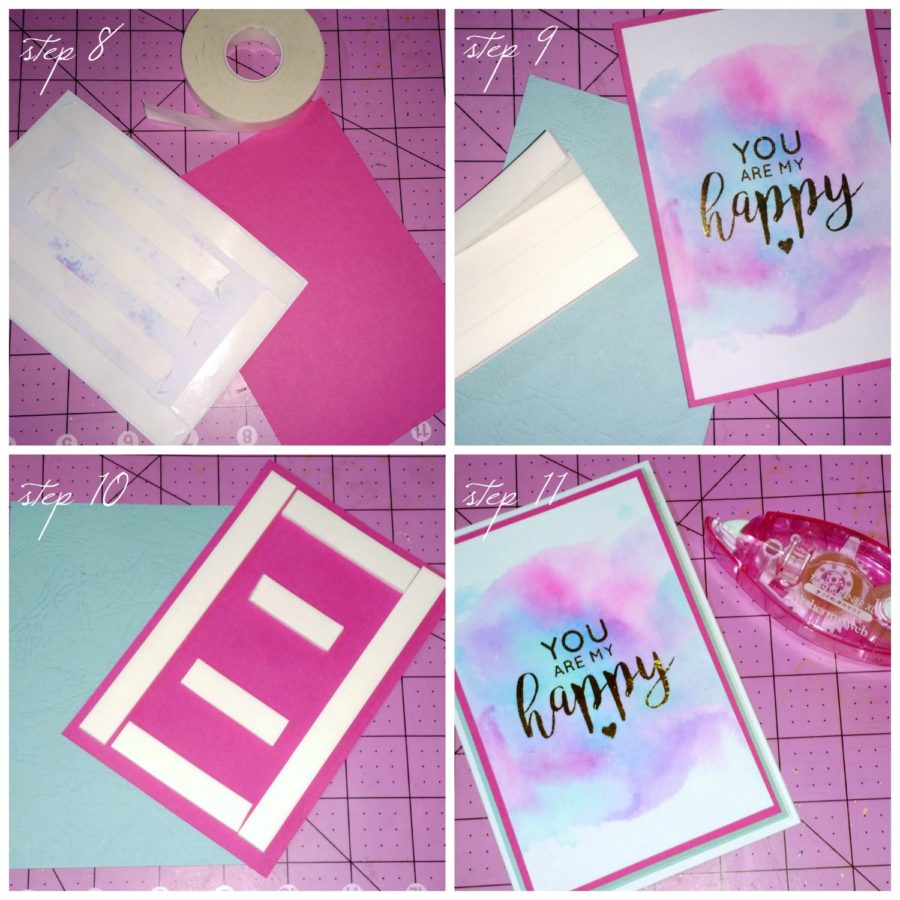
Step 10. To add dimension use 3D White Foam Sticky Strips • 1/2 in to adhere the previous layer onto the aqua mat.
Step 11. Finally add the layered card front to a white card base using Memory Tape Runner XL™
As you can see Foil Resist can be so much fun. I invite you to try out this technique using different mediums from your stash and Deco Foil in different colors too! I hope you enjoyed this two part series. If you try out this idea make sure to tag us on social media using #decofoil #thermoweb #foilicious as we would love to see what you create! For more project ideas and inspiration we invite you to subscribe to our blog today.


Before you go, remember to click here to download and save the image used today! You can use it as a journaling card or as a card front like I did. Enjoy!