


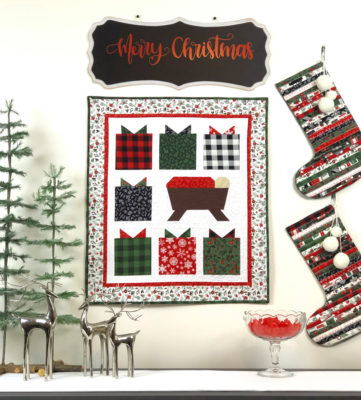
I absolutely love the look of quilts put together using the Foundation Paper Piecing method! It’s such a fun technique that lets you get crisp corners and points, plus it opens up so many possibilities for different shapes and projects. If you’ve never done FPP before, I’m here to help!! Once you start using this technique, you won’t want to stop! I will walk you through the basics of FPP and you’ll see just how easy it is, especially with ThermOWeb’s StitchnSew EZ-print Quilt Block Sheets!
Foundation Paper Piecing Basics
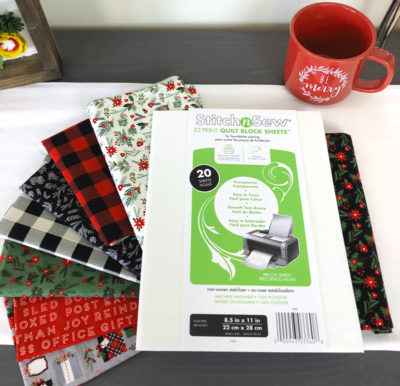
To begin you will need to gather your supplies:
StitchnSew EZ-print Quilt Block Sheets
Foundation Paper Piecing pattern- you can find the pattern shown in my Craftsy shop here, or you can find lots of different patterns online.
You will also need fabric for your project- I am using Christmas Delivery by Carta Bella for Riley Blake Designs
And of course your sewing machine, rotary cutter and iron
Let’s start Foundation Paper Piecing!
The most important step of any pattern is to read ALL the directions first! This is especially important with FPP. You need to find out if there are any tricks you might need to know, and you need to know if the seam allowance has already been added to your block or not. This is a critical piece of information!
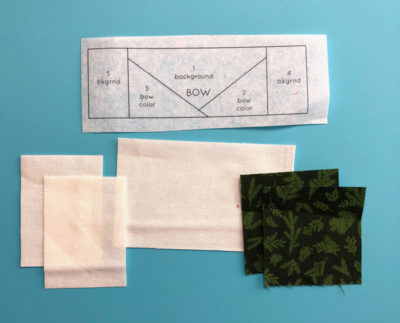
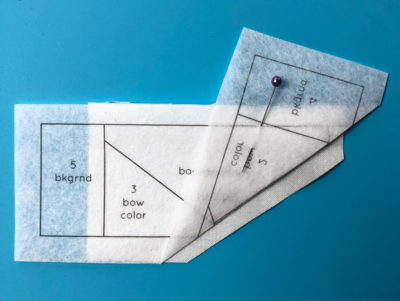
Print your patterns for your FPP blocks on your EZ-print Quilt block sheets. These are my favorite for FPP because they are semi-transparent, making placing your fabrics so much easier! They are easy to tear away and make the whole process of FPP easy and fun.
Cut out each of your blocks- this is where finding out if the seam allowance has been added or not is critical! If the seam allowance has NOT been added, make sure you leave AT LEAST 1/4″+ border around each of your blocks. If it has been added, you will still leave a border around your blocks, but it does not have to be quite as wide.
Your pattern may suggest the sizes to cut your fabrics for the pattern, or it may not. At a minimum, gather all of the fabrics you will need for your block. The fabric pieces must be at least as big as the area they are covering in the block, plus a 1/4″ seam allowance around all edges.
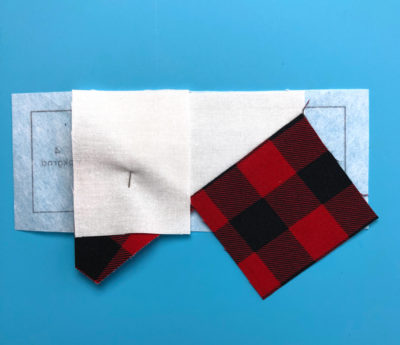
FPP is essentially coloring in the shapes of the block pattern with fabric. The final block will be the mirror image of the block you see on the pattern. You will be filling in the pieces of your block in order. Take the fabric that corresponds to the first space in your block and place it wrong side up in front of you. Center your pattern piece on top of the fabric. Make sure you have at least 1/4″ around all sides of your pattern piece.
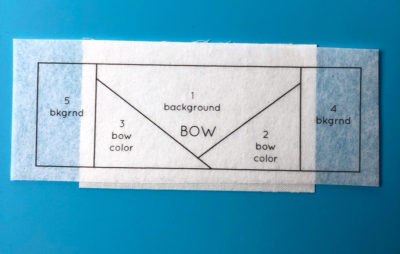
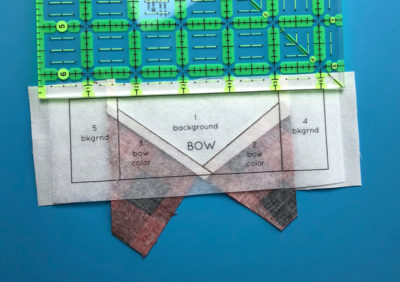
Fold back the pattern piece along the line between pieces 1 and 2. Use a ruler and a rotary blade to trim 1/4″ away from the fold line.
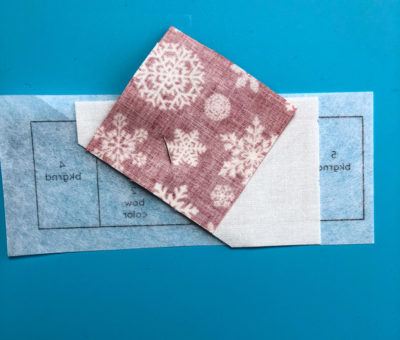
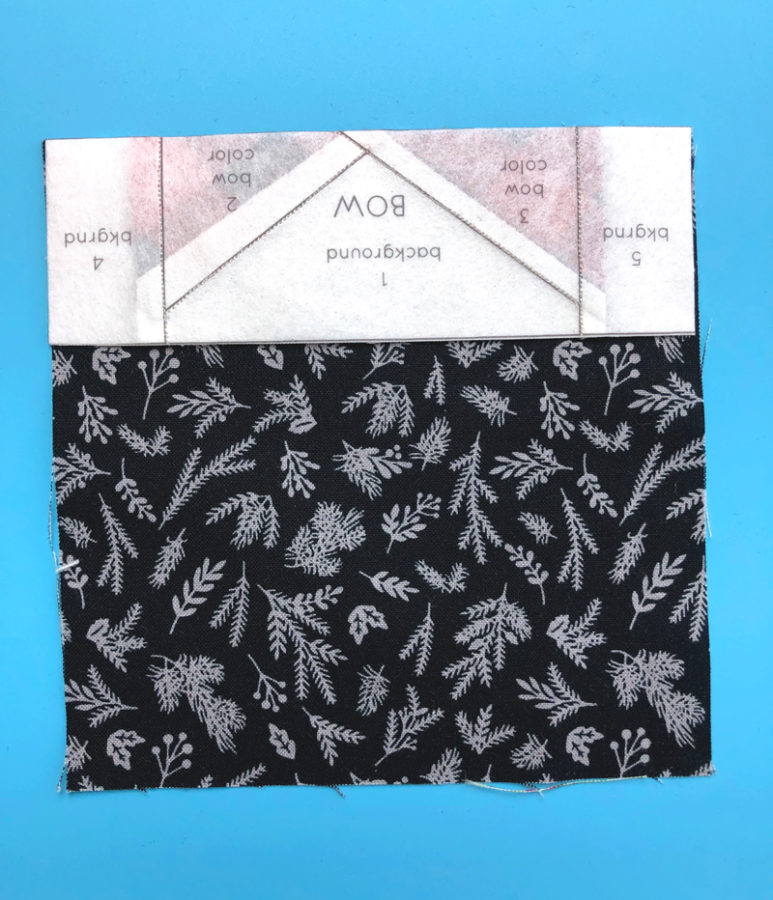
Flip your pattern and fabric piece over, you may want to pin them together before flipping to make sure your fabric does not shift. Take the fabric for piece #2 and center it along the edge of the fabric you just cut, right side down. Make sure the fabric overlaps the edges of the pattern piece by at least 1/4″ on both sides. Flip back over and pin all three layers in place. Shorten the stitch length on your sewing machine to a very short stitch. Sew along the line between pieces 1 and 2. You may want to backstitch at the beginning and end of your stitching but DO NOT sew outside of the pieces into adjacent pieces.
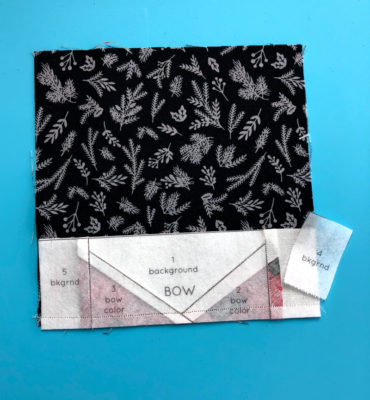
 Press the fabric for piece 2 away from the fabric for piece 1. Flip the pattern over so it is facing you and fold the paper on the line between pieces 1 and 3. Trim the fabric 1/4″ away from the fold.
Center the fabric for piece 3 along the line, again making sure the fabric overlaps the edges of the pattern piece. Sew along the line between 1 and 3 and press the fabric away from the middle piece.
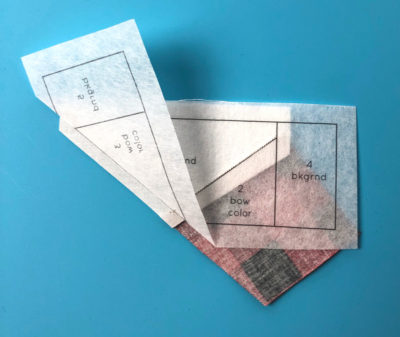
 Repeat the steps of folding back the pattern, trimming the fabric to 1/4″, centering the next fabric piece and stitching it down, then pressing the fabric away from the stitch line- until you have all the pieces of your pattern filled in.
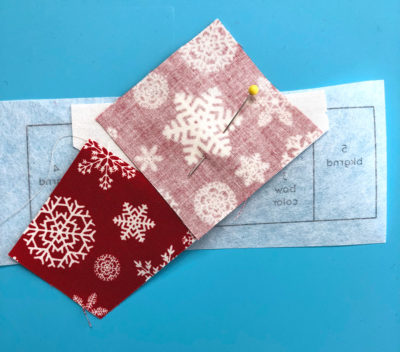
 Take your finished block and trim away the extra fabric. If your pattern calls for adding the seam allowances, trim 1/4″ away from the outside edge of your block, if your seam allowances are already added, trim along the block outline.
 Before tearing away your pattern, you may want to sew your FPP block into its final place, especially if it’s a narrow or small block like this bow is.
 Once your FPP block is where you want it, you will need to tear out the paper. Do your best to pull the pattern horizontally away from the stitches, not up where you will add extra tension to them. Shortening your stitch length helps perforate the paper to make tearing the paper out easier, still, you will want to take your time to make sure you aren’t adding any stress to your stitches.
Don’t miss this video with helpful tips on how to Foundation Paper Piece.
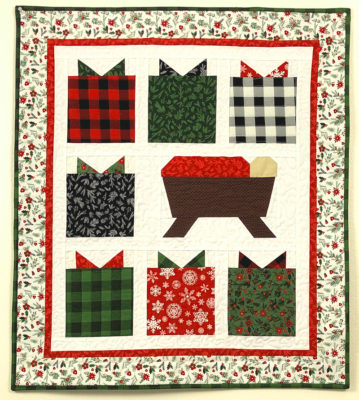 The results of FPP are crisp and intricate and lovely! I hope you will give this fun quilt piecing method a try soon!