


Hi this is Molly from Sew Wrong Sew Right. For my Pinterest inspiration post I searched for tablet covers as I was looking to make a new cover for the tablet I got for Christmas.
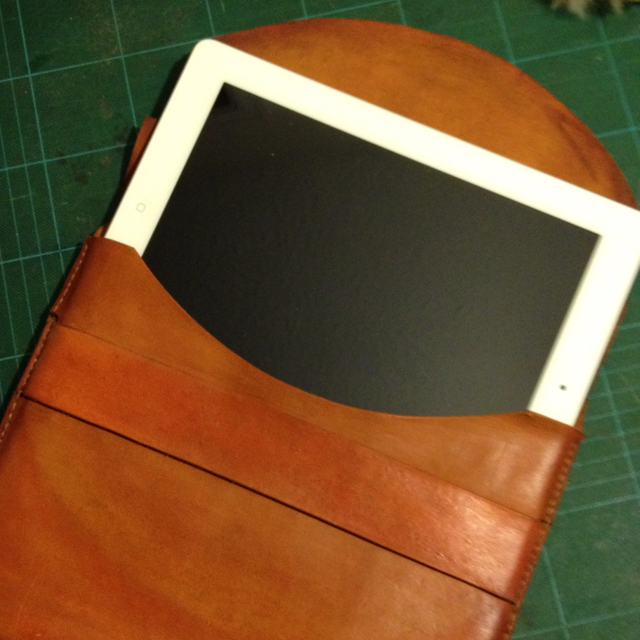
I have a cover already that converts to a stand, but it is bulky and I prefer to hold the tablet without a cover, so I just wanted a simple quilted sleeve to protect it in my bag and give me easy access to remove it when I needed it. I found a few I liked on pinterest, especially this one.
I wanted mine to be quilted though, to give it padding to protect the quilting, so I adapted the design to suit my needs. Here is how I made it. I am not going to give dimensions in this tutorial, rather teach you the technique I used to make it so you can customize yours to whatever size tablet or Ereader you have.
For this project you will need
2 fat quarters of quilting cotton fabric
Therm O Web HeatnBond® Fusible Fleece
Thermoweb SpraynBond® Basting Spray
2 buttons
1 ribbon -8-10″ in length
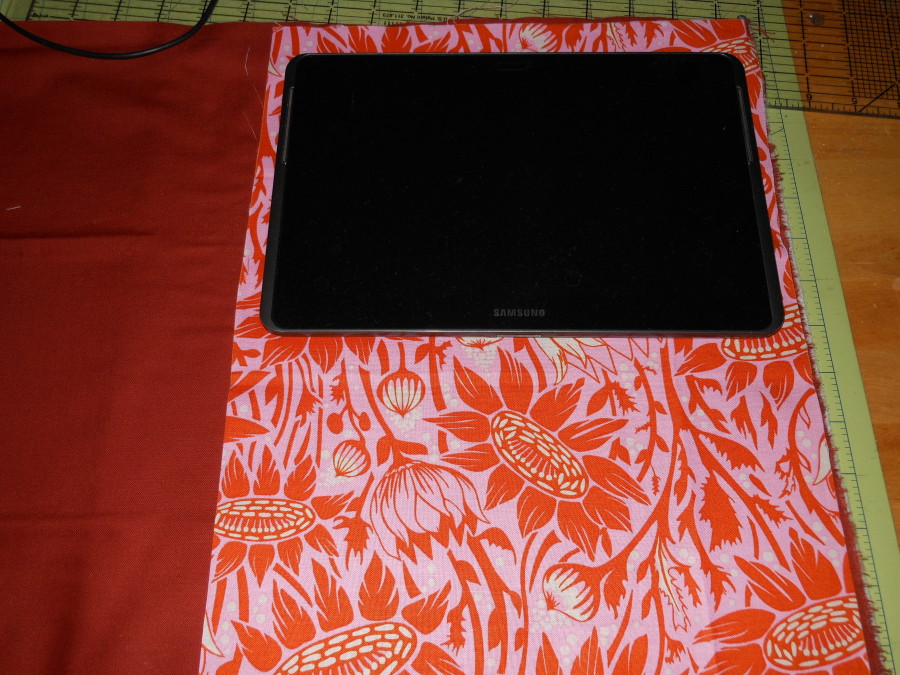
Step One: Measure your tablet and add an inch to both length and width. Cut out 2 pieces (one from each fabric) the size you just determined. Add another inch to the long side measurement and cut another 2 pieces (one of each fabric) to the size you just determined. Finally cut fusible fleece to fit both pieces.
Step Two
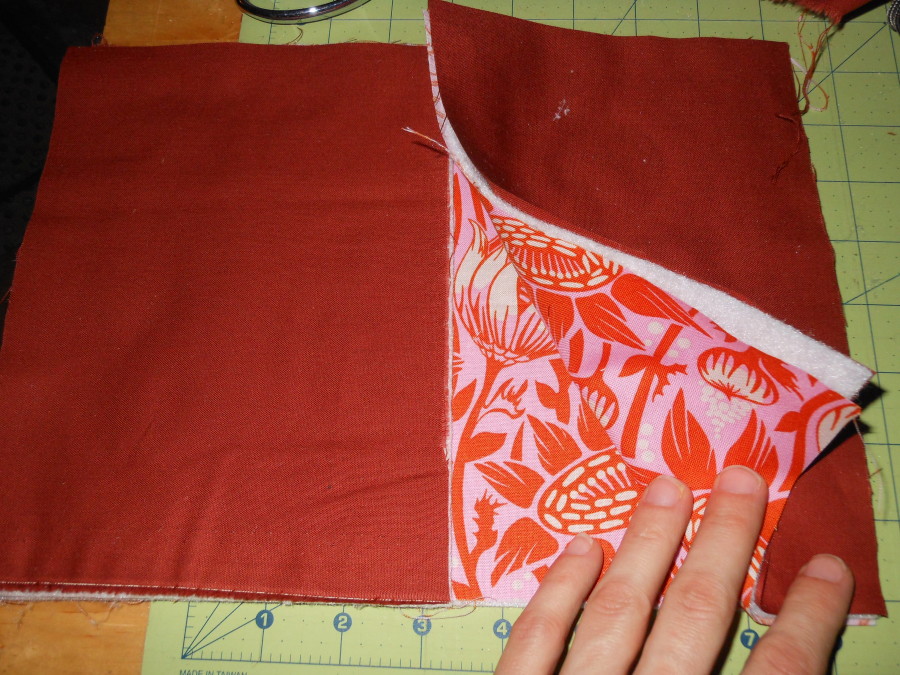
Fuse the fleece to the piece of fabric you want facing out on both the pieces- and spray baste the revesrse side of the fleece and baste the lining pieces to the fleece covered pieces. Cut the longer piece 1/3 of the way in- as shown
Step Three
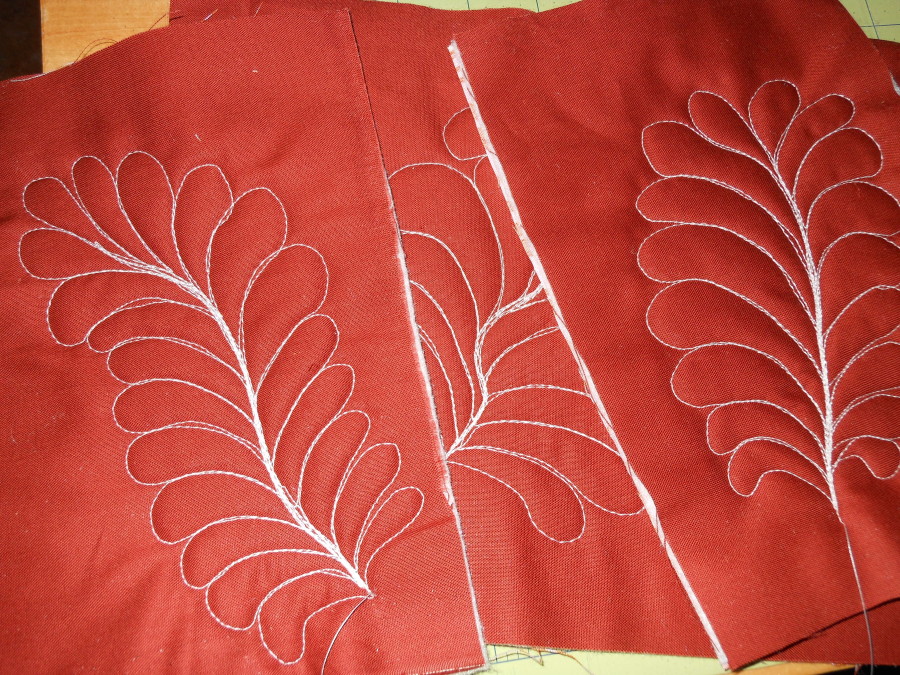
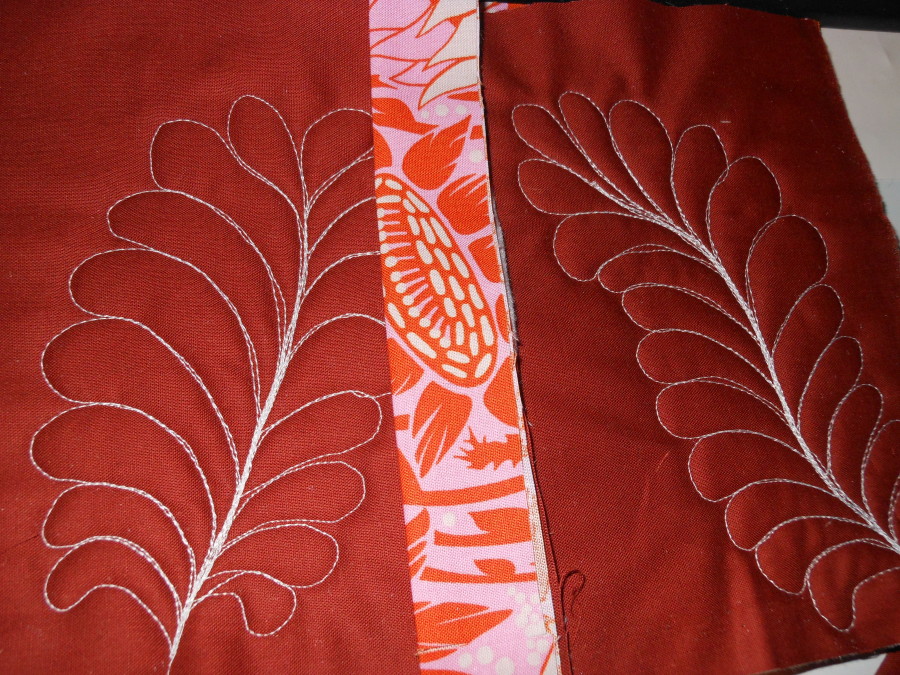
Quilt as Desired.
Step Four
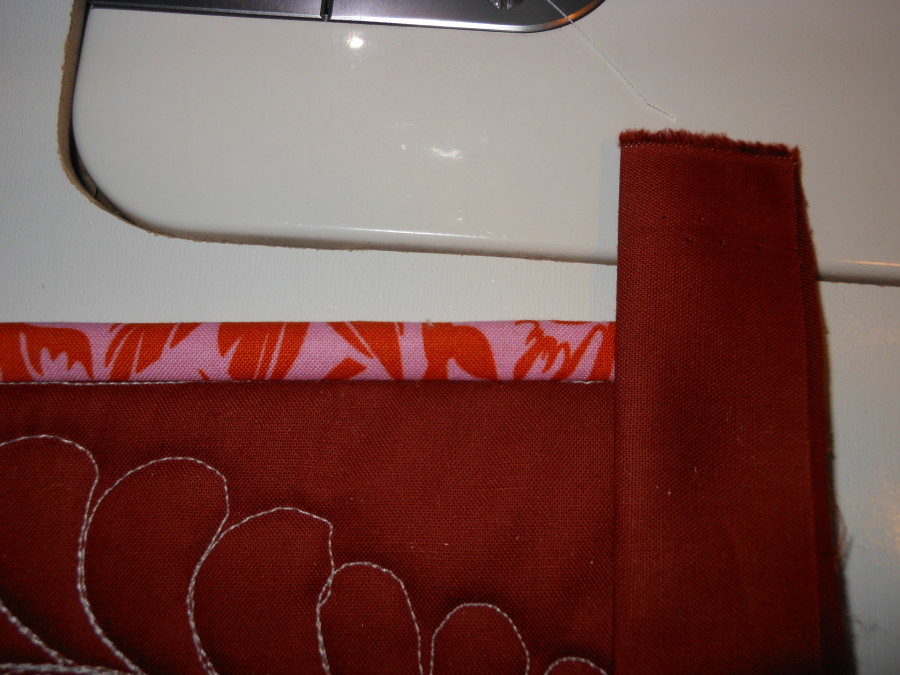
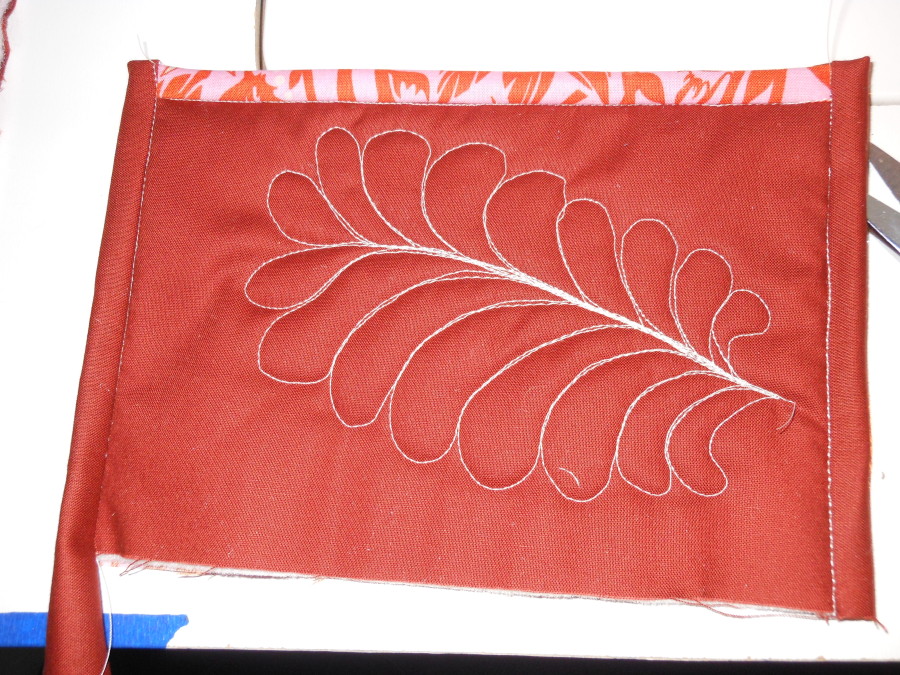
Cut out 2 strips of binding from the lining fabric long enough to bind both the short sides of top pieces. Lay your 3 quilted pieces out so you know which edges you want facing inwards and bind both of those two edges (one on each piece) with the lining fabric you just cut.


Step Five
Cut out enough binding to wrap all the way around the cover plus another 12″. Bind both the short sides of the flap piece (the one that is 1/3rd the length of the back cover). When you begin binding leave a 2 inch tail on the edge that butts up to the already bound edge. When the binding is sewn to the front wrap the tail to the back side and fold the edge over encasing the edge of the tail inside the binding. This wraps the binding around and binds the edge. Repeat for the other side of the flap.
Step Six
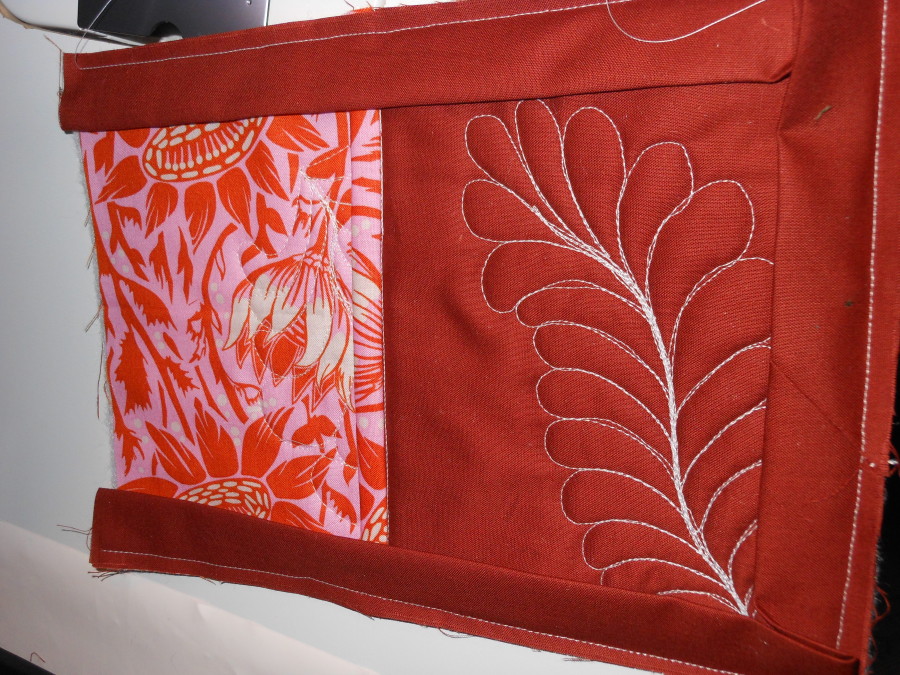
Sew the 2/3rd length piece to the back cover on all three sides with a scant quarter inch seam allowance. Bind all three sides. Sew the flap to the raw edge unbound side with a scant quarter inch seam. Leaving a 2″ tail and using the same method as we used to wrap the corners in step 5 bind the top wrapping both the corners with a 2″ tail on either side.
Step Seven
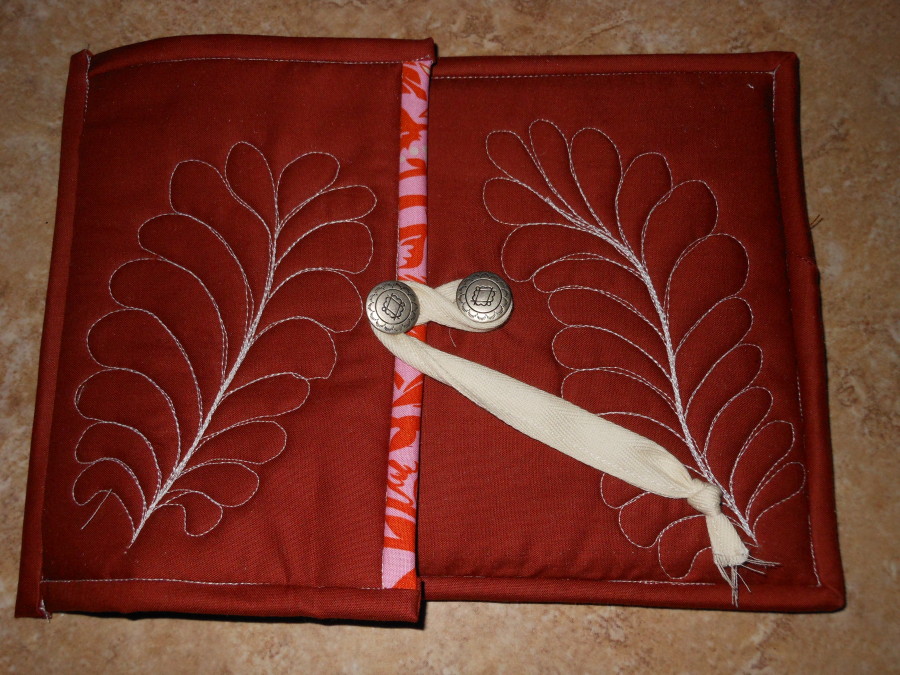
Sew on 2 buttons, one on the flap and one on the other side. Sew your ribbon around the button attached to the pocket side. Congratulations- all finished! Enjoy!

Join us as we celebrate National Craft Month! That means savings for you and chances to win prizes from some of your favorite companies and your favorite products of ours all month long!
To kick off the month enjoy savings all this week on your favorite SpraynBond® products and Zots™!


Macy Mae Rivers
March 10, 2014 at 4:39 am (10 years ago)That is such a pretty! I’ve been browsing through a lot of DIY stuff on the web, and luckily I found this very helpful post. It’s pretty nice to make and invent stuff such as this, since it makes you save more (rather than spending for a cover) plus it gives you the liberty of what design you want it to be. Not to mention, it draws out the creativity in you so I’m pretty sure you enjoyed while doing this. By the way, Hope you could also feature a fabric work that can be a good design for a centerpiece. Thanks and more power!
TracyM #6773
March 11, 2014 at 6:40 am (10 years ago)Pretty and practical 🙂
Lori Morton
March 11, 2014 at 11:23 pm (10 years ago)Have used alot of the Zots, and have used Heat N Bond few times, and the HeatNSpray only once so far.