


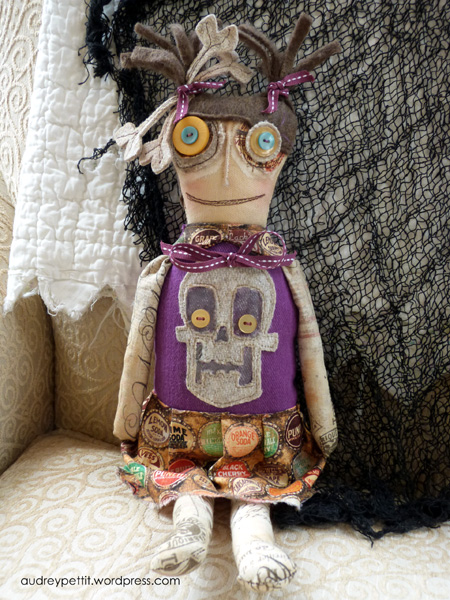
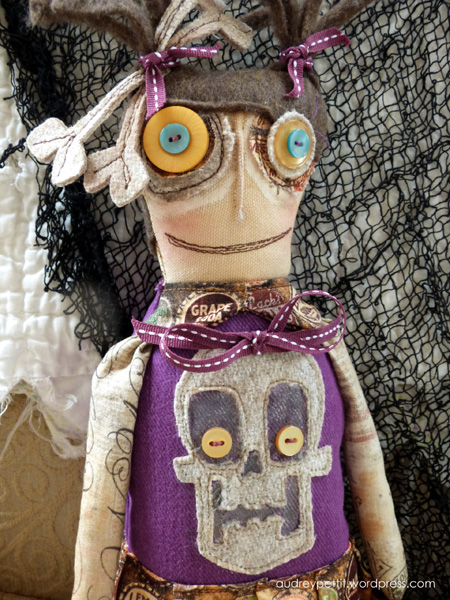
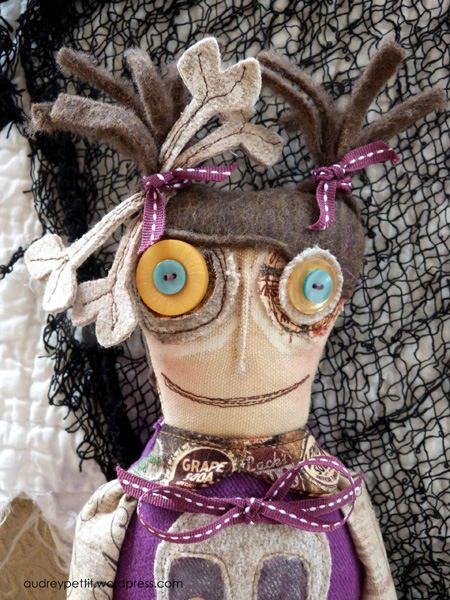
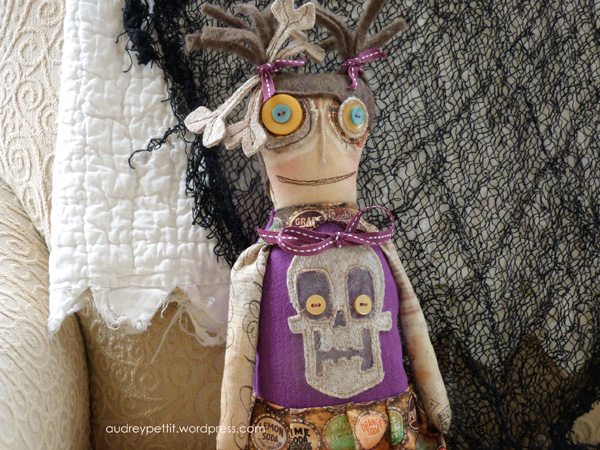
Those of you who have followed along on my crafty journey know that I love to make fabric primitives and folk art pieces, and recently I had the great fun of creating some fabric projects for the new Tim Holtz Sizzix Chapter 3 release. This cute and creepy little rag dolly was my first project and features some of my favorite things…. buttons and bows, Crossroads Denim and Tim Holtz Eclectic Elements fabric, and a big spooky Halloween skull emblem right on the front that was made with the new Skull & Crossbones Bigz Die.
Halloween Rag Doll with Fabric Fuse Adhesive
Because the Skull & Crossbones is a Bigz die, you can easily die-cut all sorts of thicker materials with it, making it perfect to use with fabric projects like this. Although I’m not going through the entire process of creating an art doll here today, I am going to share my tips and tricks for using fabric appliques with dies.with
Fabric Applique Die Cuts
Here’s how I do it.
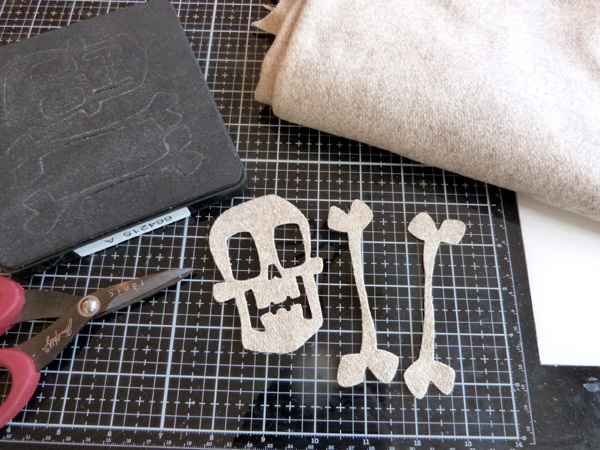
Begin by die cutting the bones from heavy wool or wool felt. You can use thinner materials, but something thicker really works best.
Distress Inks
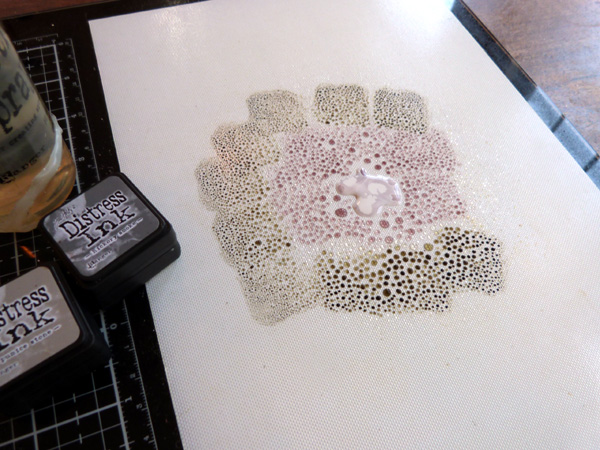
Just as you can use Distress Ink and Paint to add detail to paper projects, you can apply the same techniques to add depth, age, and dimension to fabric pieces, too.
Dab Distress Inks or Oxides onto a non-stick craft mat, and then spray the inks heavily with water using a Distress Sprayer. For this project, I used Pumice Stone and Hickory Smoke Distress Ink.
*Note: use this technique only on fabric projects that you don’t plan on washing… as just like with primitive style tea or coffee staining, Distress inks will wash out in the water.

Press the fabric die cuts into the ink mixture, twisting and swiping them through the inks to add color. Not dark enough? Let the fabric die and repeat the process again. Once you have the color where you like it, make sure to let the pieces dry completely.
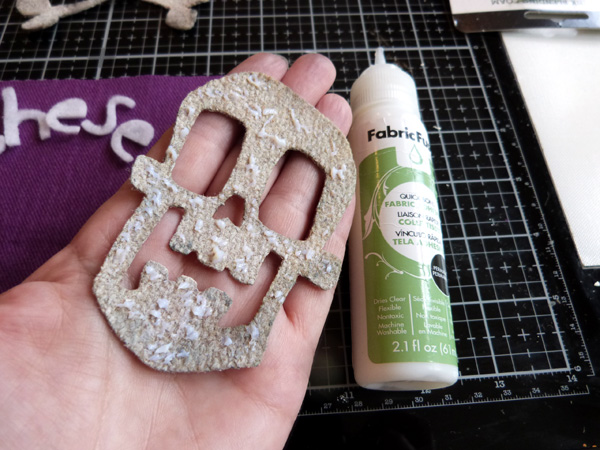
Adding Adhesive
When it comes to applying applique die cuts to fabric, I take a few shortcuts. The standard way would be to add iron-on fusible interfacing to the back or to attach the pieces with lots of pins. But I am hopeless with an iron, and often end up with pieces slipping or shifting with pins. So my trick is to stick my appliques down with Therm O Web Fabric Fuse adhesive. That way I can get the pieces exactly where I want them, and I know they’ll stay in place. And once it’s dry, you can go back and add stitching over the top if you wish. Love it.
Fabric Fuse adhesive is particularly helpful in attaching smaller, thinner, and more intricate appliques that would be rather difficult to sew around. If I’m using small pieces, like these die-cut letters, I make sure to cover the entire surface of the backside with the glue, so that the appliques will be secure without the need for stitching.
Here’s a peek at a second project I’ve made with this adorable skull & crossbones die. You can stop by my blog at Audrey Pettit Designs if you’d like to see the finished results.
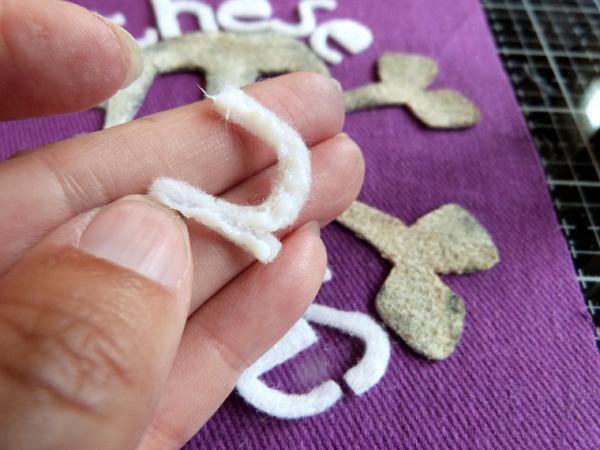
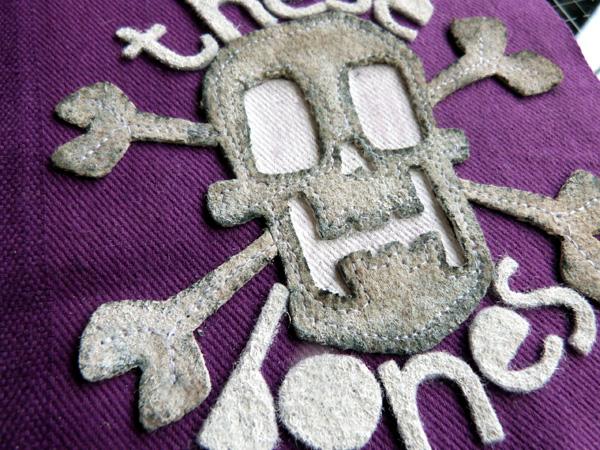
For bigger die cuts, like the skull, I do like to go around the edges with a bit of machine stitching, but with the glue, that step isn’t necessary. For thinner dies, like the crossbones, I stacked two wool pieces together and simply stitched down the center. The double thickness helps add structure to loose flappy pieces, like the hair bows. And finally, you can add further details to the fabric dies, like using Distress paint to highlight the negative opening. Or adding buttons for eyes. Or tying multiple shapes together with a bit of ribbon or twine.
Enjoy!
Yolande Bergeron
July 25, 2019 at 8:10 am (5 years ago)I laught so much when I saw this FUNNY SCARY POUPÉE.I love your immagination
Have a funny day
Yolande