


We’re back with another amazing project today featuring our Deco Foil Metallix Gel and some fun stamps from our friends at Sunny Studio.
Wendy is definitely thinking outside the box with this amazing dimensional Metallix Media Media Canvas! Whoa!! Talk about stunning… read on for all the scoop on this project!
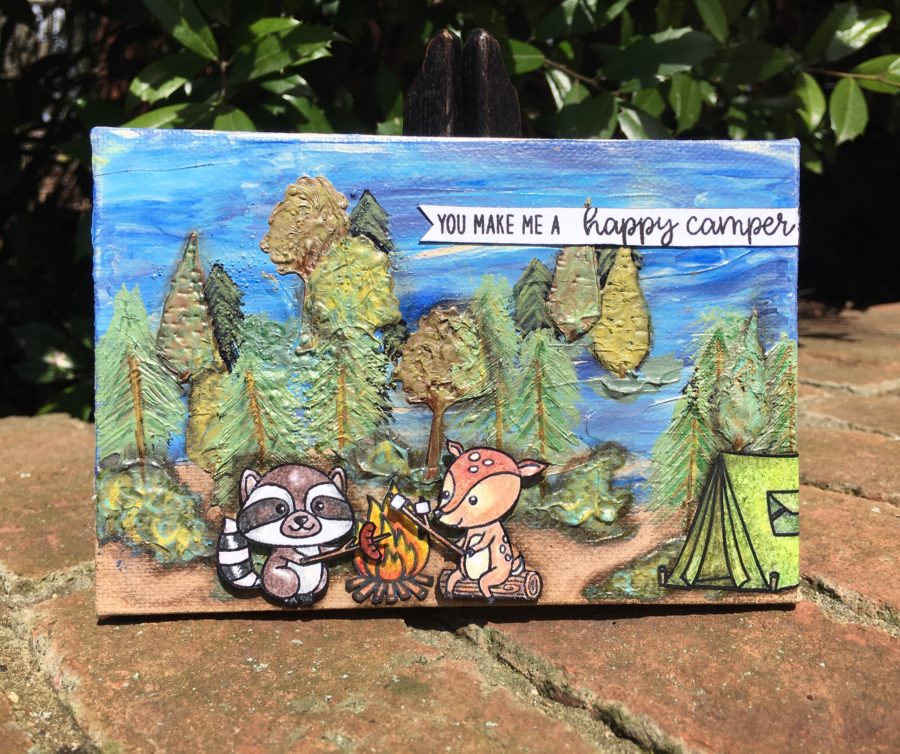
Happy Camper Mixed Media Canvas
Supplies:
iCraft Ultra Bond Liquid Adhesive
Sunny Studio Clear Stamps – Critter Campout
Other Supplies: 4×6 canvas, gesso, Distress Inks or paints, stencil, palette knife/spatula, black ink and stamping block, colored pencils or pens, brown and green alcohol markers, black marker, scissors, paintbrush and stamp platform.
Happy Camper Mixed Media Canvas
Step One:
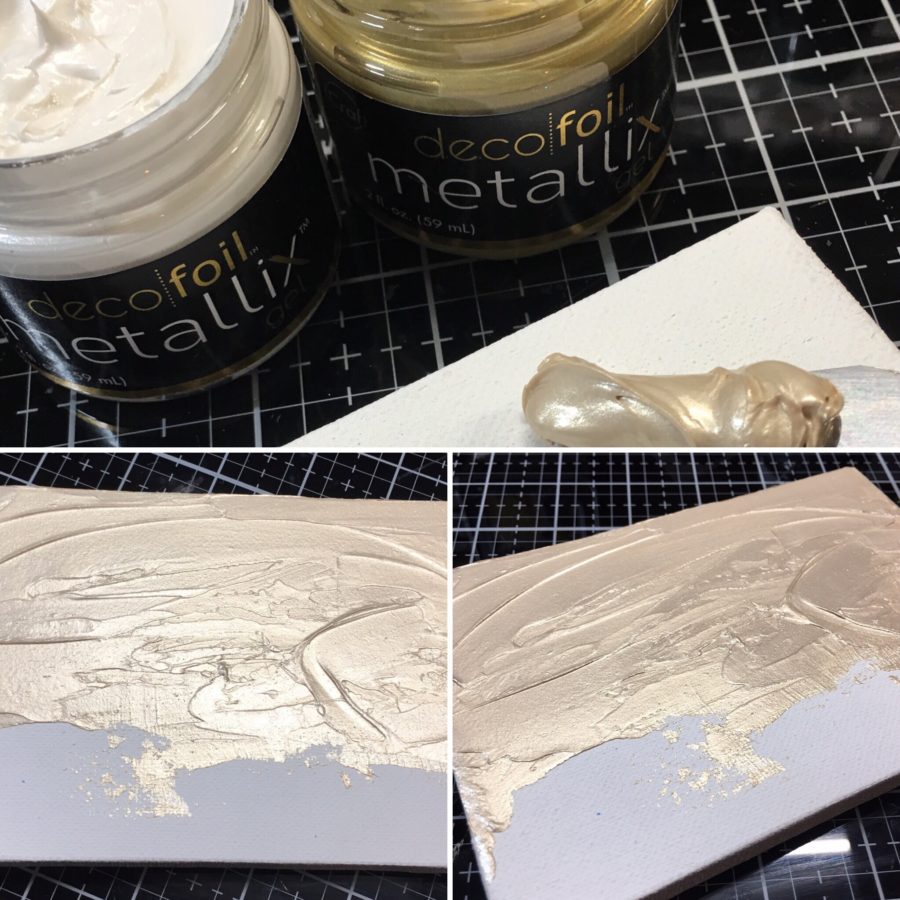
Prep your canvas by painting with a layer of gesso or white paint and allow to dry (or if you are impatient like me . . . use your heat tool). For the next step, you have a choice. I started with two Deco foil Metallix colors and blended them to get the color I wanted to start with (I knew it was going to show through my sky and wanted something not too dark but not too light). I added just a touch of the Pure Gold to the White Pearl and ended up with a champagne color. This is one of my new favorite products!
Once you have the desired shade (or start with one just as it is), spread it over the top two-thirds of your canvas using a palette knife/spatula.
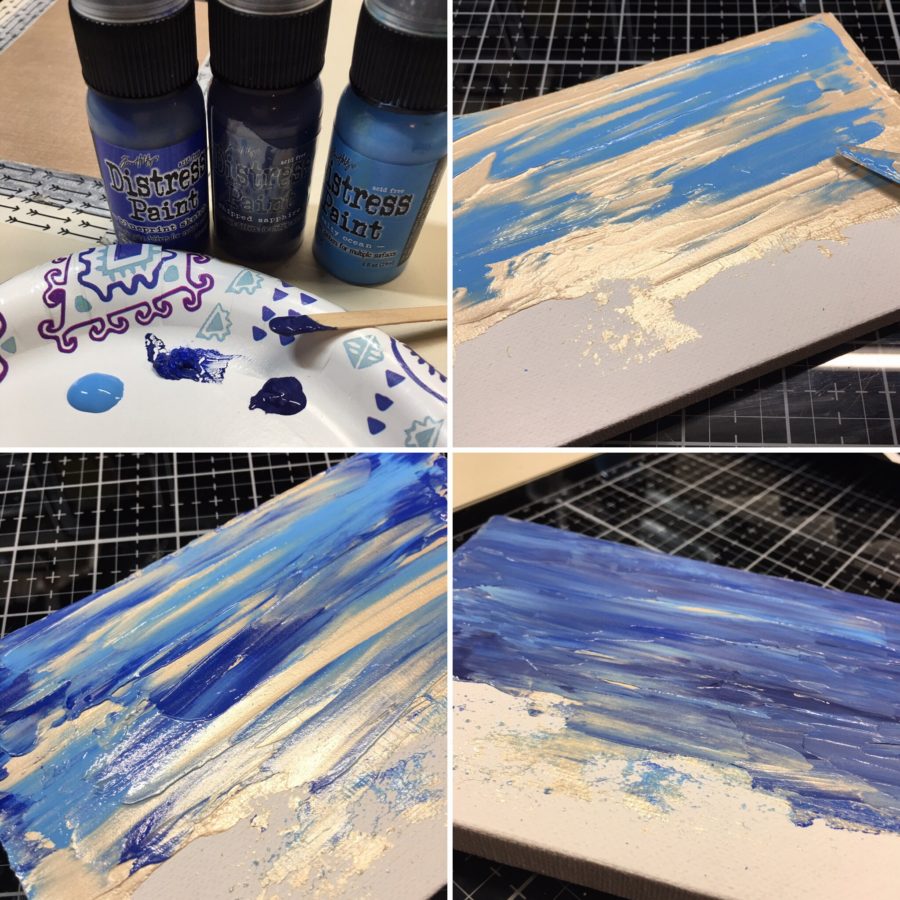
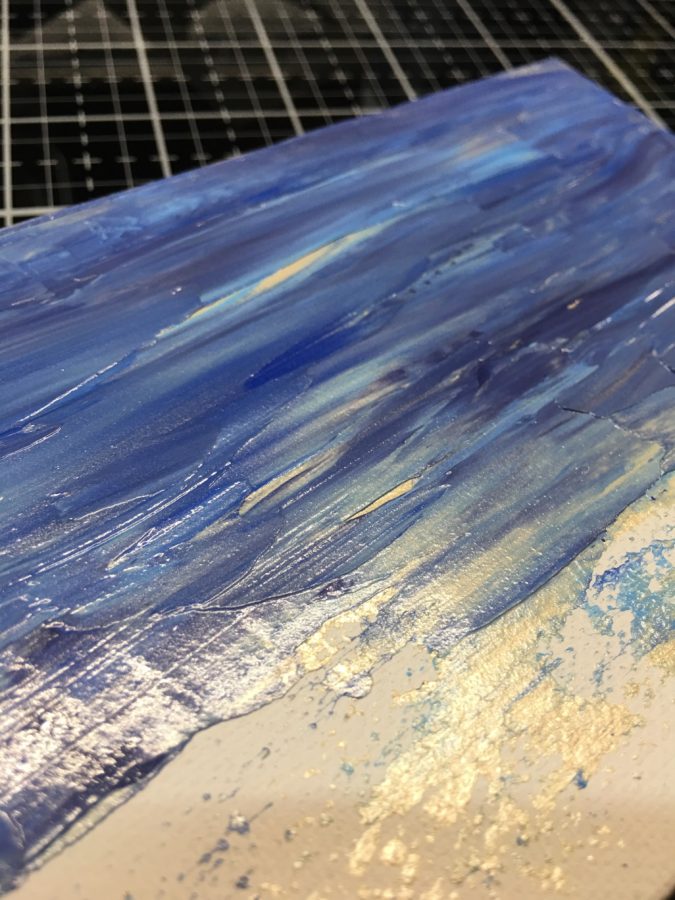
Okay . . . here is where the real fun begins. I decided to play around a bit with my Metallix and the result was uh-maz-ing! start by adding a bit of three different shades of blue to your palette (aka paper plate) and then, starting with the lightest shade, swipe it across the Metallix with your palette knife. Repeat this step with the next two colors as well. After each color is added, swipe the colors together lightly so as not to muddy them by too much blending. Set this aside to dry for several hours (Don’t use a heat tool unless you want it to bubble up).
What I absolutely LOVE about this is that the Metallix retains its shiny, metallic properties even with color added. I tried to catch it in the close-up but It doesn’t show how really beautiful it came out. It looks almost like an oil painting.
Hint: Even though there are only a few colors of Metallix, you can get so many more tones and shades by blending as we did in this step. For a true custom Metallix add Distress Re-inker (just a teeny tiny bit) in any color to the White Pearl. I tried this and it works beautifully!
STEP TWO:
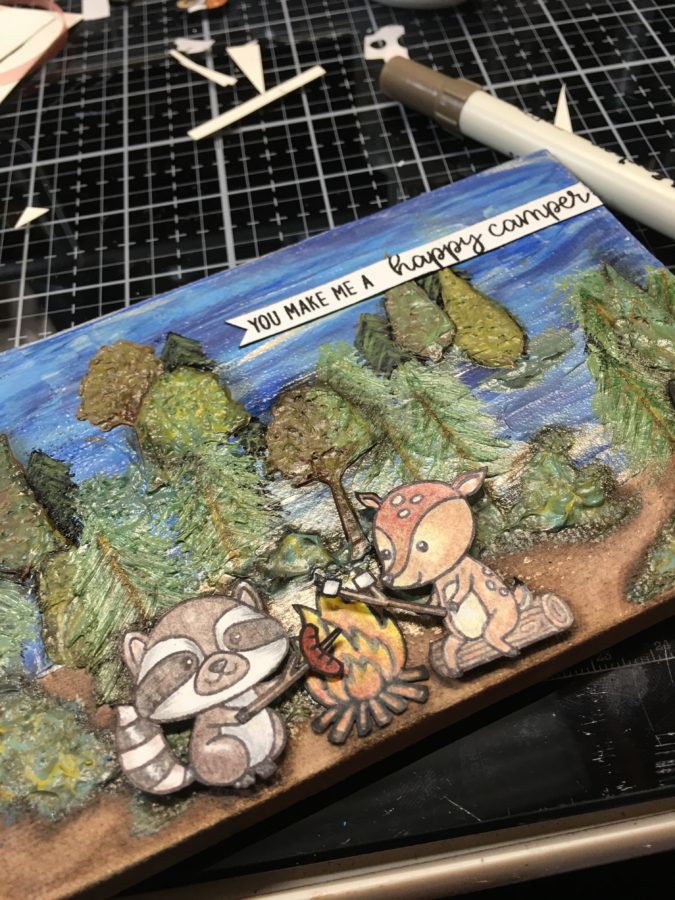
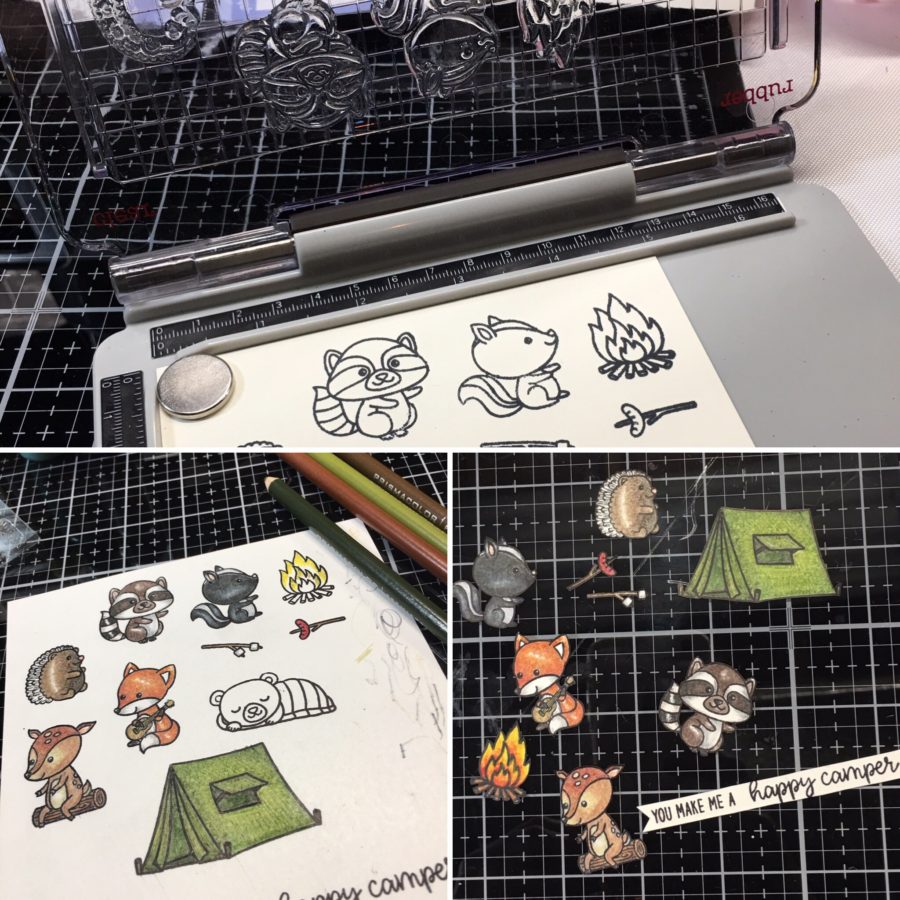
Use this time while your canvas is drying to stamp and color your images. I stamped way more than I used but I wanted to be sure I had choices when it came to placement. I used Prismacolor pencils to color my images. Once your images are colored fussy-cut them so that they have no white border. Cut out your sentiment using scissors as well.
Hint: Use a black marker to run along the edge of your fussy-cut pieces to color the edge. This will make them look flawless, hiding any fussy-cutting errors.
STEP THREE:
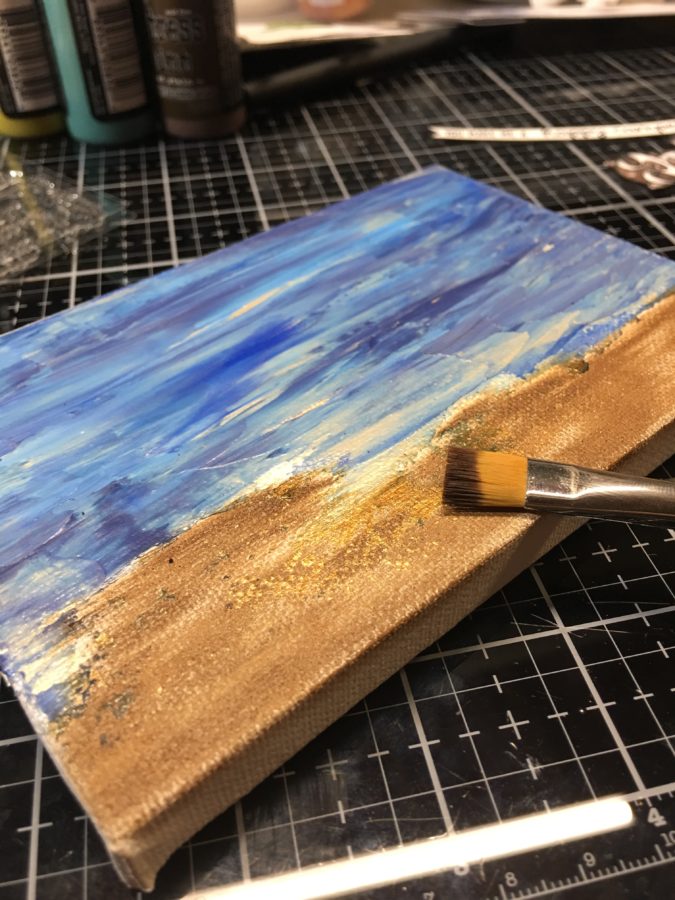
Using Distress Inks and a paintbrush, add a couple of brown tones to the bottom third of the canvas to be the dirt or campsite area.
Hint: If you don’t have Distress Inks try a bit of watered down paint.
Creating Layers with Deco Foil Metallix
STEP FOUR:
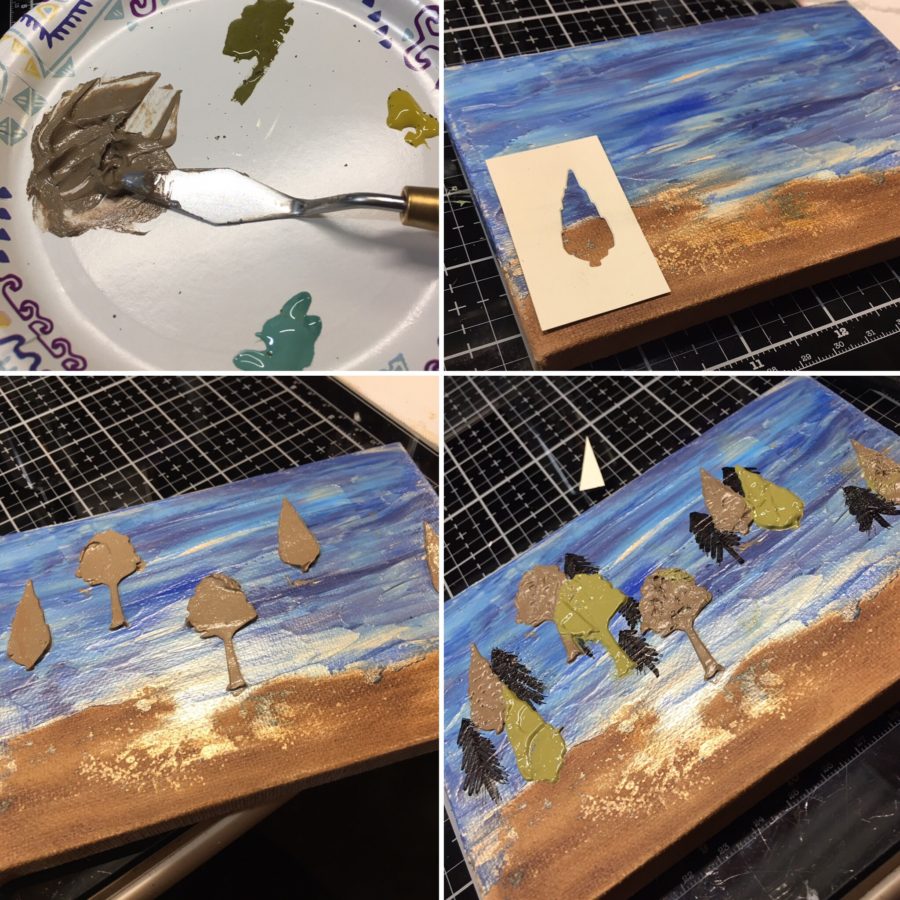
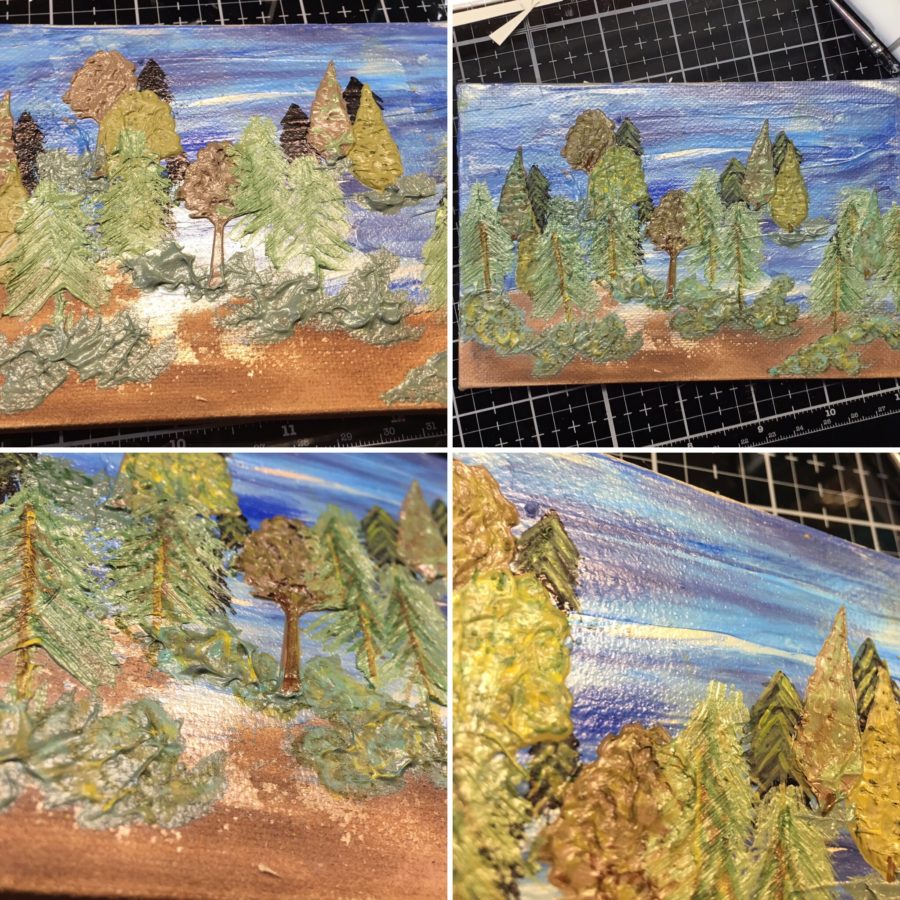
More fun . . . This time you will need three different shades of green to mix in. I created my own stencils by die-cutting trees and using the negative space, but there are many great stencils out there you can use.
Spray your stencil with Pixie Spray to ensure you have no Metallix bleeding under the stencil and add four or five trees in your first color. Allow to dry completely and repeat with the second color. After the second set is completely dry, add some background trees with a black marker. Add one more layer of stenciled trees and then some shrubbery using the tip of the palette knife (no stencil). Again, it’s hard to see in the photo, but the Metallix retains its shimmer even with paint mixed in (I’m sure if you add too much paint it might not, but I added very small amounts).
Hint: Before the Metallix is completely dry, you can pounce lightly with an old paintbrush to add texture as I did.
Mixed Media Canvas
Step Five:
Once all layers are completely dry, go back in with alcohol markers and add some dimension to your trees by adding a darker color to the trunks and drawing in some branches.
Lay out your stamped images to decide placement and then adhere using Ultra Bond liquid adhesive and 3D White Foam Squares. Add your sentiment at the top.
Hint: Go back in with a darker brown and shade around some of the trees and
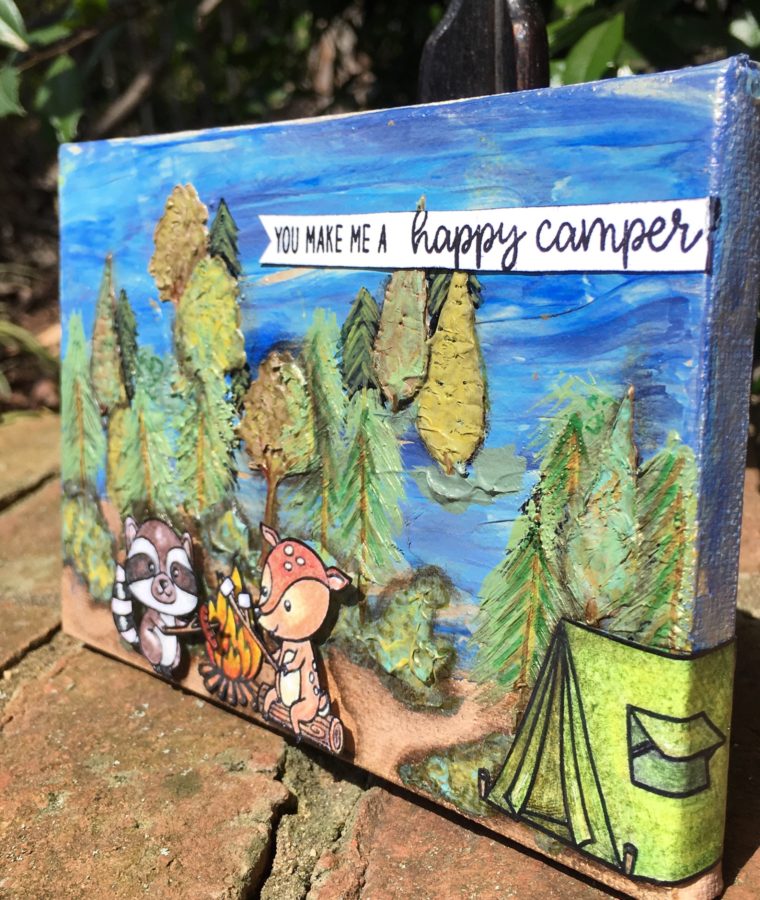
This project was so fun and will make a great addition to our new motorhome as we set off soon on our maiden voyage camping trip (yeah no more tents!). I hope this inspires you to play with the new Metallix and create something amazing.
Simply follow the Rafflecopter to get yourself entered to win and then GO to our friends at Sunny Studio to see their projects and enter their giveaway as well. If you’re not already following them on social…we hope you will! They have endless ideas and inspiration that we know you’ll love!
If you create something we hope you’ll share with us on Social Media using the #Hashtag #decofoil, #thermoweb, #sunnystudiostamps #brutusmonroe as we LOVE to see what you create
mjmarmo
April 4, 2019 at 3:14 pm (5 years ago)Simply gorgeous! So many wonderful details!
Amy Cooley
April 4, 2019 at 3:38 pm (5 years ago)I’m loving the inspired this week! Sunny Studios has some of the cutest stamps. I like the examples with deco foil.
Sue D
April 4, 2019 at 5:44 pm (5 years ago)Love this cute camping scene!
Carla Hundley
April 4, 2019 at 6:28 pm (5 years ago)This happy camper
scene makes me
happy! So darling.
Carla from Utah
Denise Bryant
April 4, 2019 at 7:30 pm (5 years ago)I love all that texture! Great scene!
Chrissie Kesler
April 5, 2019 at 7:23 am (5 years ago)Wow!!! This is a master piece!!!
hsmom24kids
April 5, 2019 at 7:56 am (5 years ago)What a great sky! The whole scene turned out fabulous!
beccab33324
April 5, 2019 at 11:41 am (5 years ago)Wow, this is a stunning masterpiece!! Gorgeous and I love it.
Sharon Gullikson
April 5, 2019 at 3:48 pm (5 years ago)What a great project. I just love the camping theme!
Helen Gullett
May 15, 2019 at 8:45 pm (5 years ago)This canvas is amazing! I love the texture with metallix gels.