


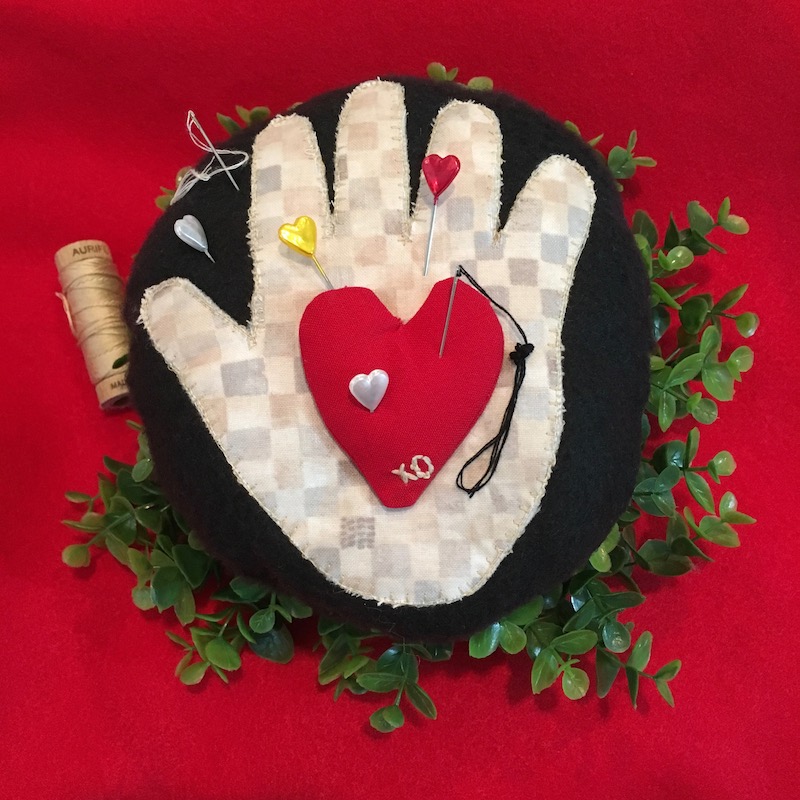
Heart in Hand Pin Cushion
Create this sweet pincushion by tracing the hand of a child you love or even your own hand.
There’s something almost magical about primitive folk art. Calming, sweet and often inspiring, this project would make a Wonderful Valentine Gift for Your Favorite Sewing Friend!
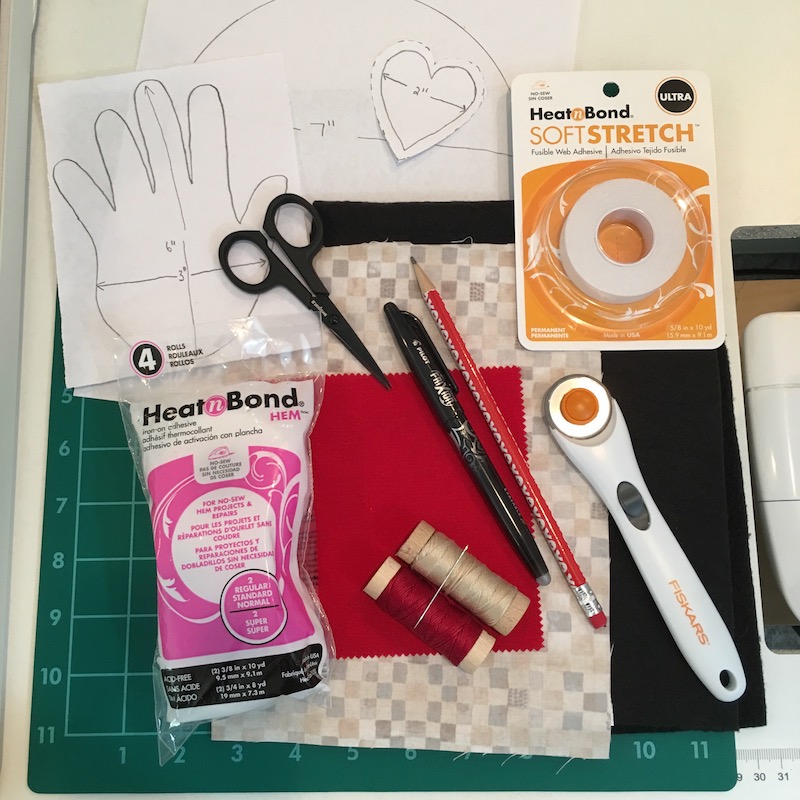
What you’ll need:
First read through all the instructions to get familiar with the project and send us a note by commenting below if you have any questions. We’re here to help!
Supplies:
- Heat n Bond Soft Stretch Lite Fusible Adhesive tape Iron-on
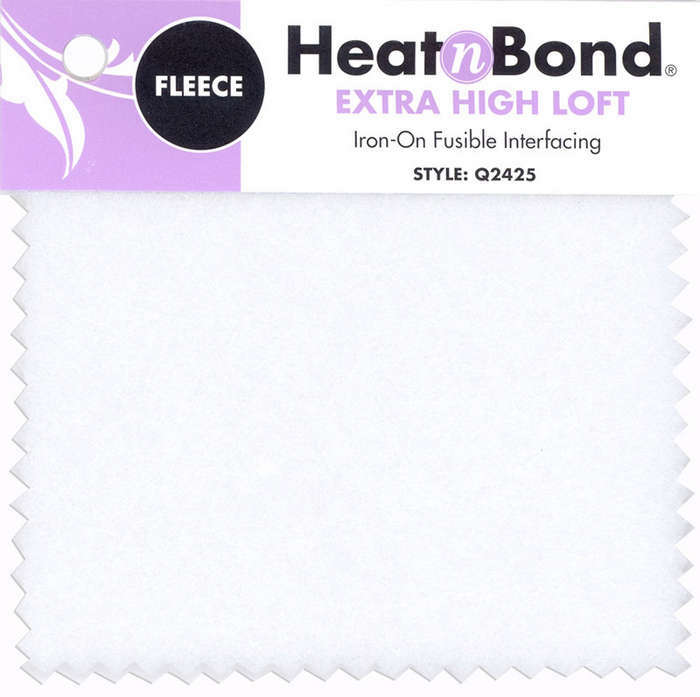
- Heat n Bond Fusible Fleece Iron-on Interfacing
- 2 8” squares of black fleece
- 1 5” charm fabric square in red
- 2 5”-8” squares of tan fabric for hand ( Cori Dantini “Good Beginning” fabric in Beige from the Merry Stitches collection)
- iron
- fabric pen
- Aurifil Floss #2312
- needle
- scissors
- rotary cutter and mat
- pins
- fiberfill
- Sewing machine
- Aurifil Cream and black threads
- pencil and paper
*Remember to keep the area safe if a child is nearby for tracing the hand.
Trace The Hand
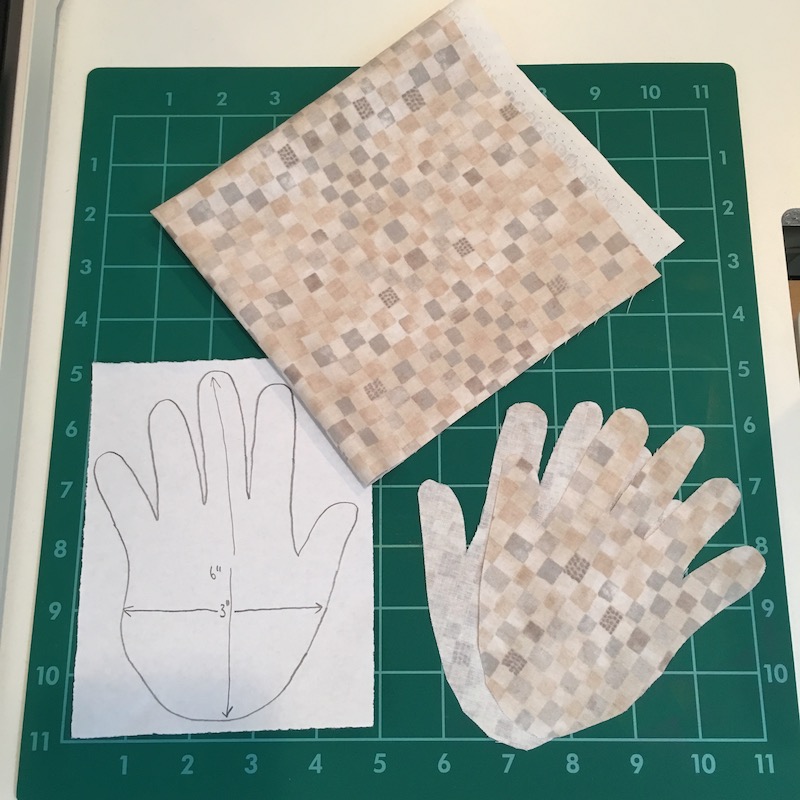
Step One:
Using the pencil and paper, trace the outline of the hand. Cut out the hand shape from the paper. Take the two tan pieces of fabric and place “wrong sides together”. Using the hand shape, trace onto the top piece of fabric (right side). Pin the fabric pieces together. Using either scissors or rotary cutter, cut the shape out of the fabric keeping both pieces together.
Step Two:
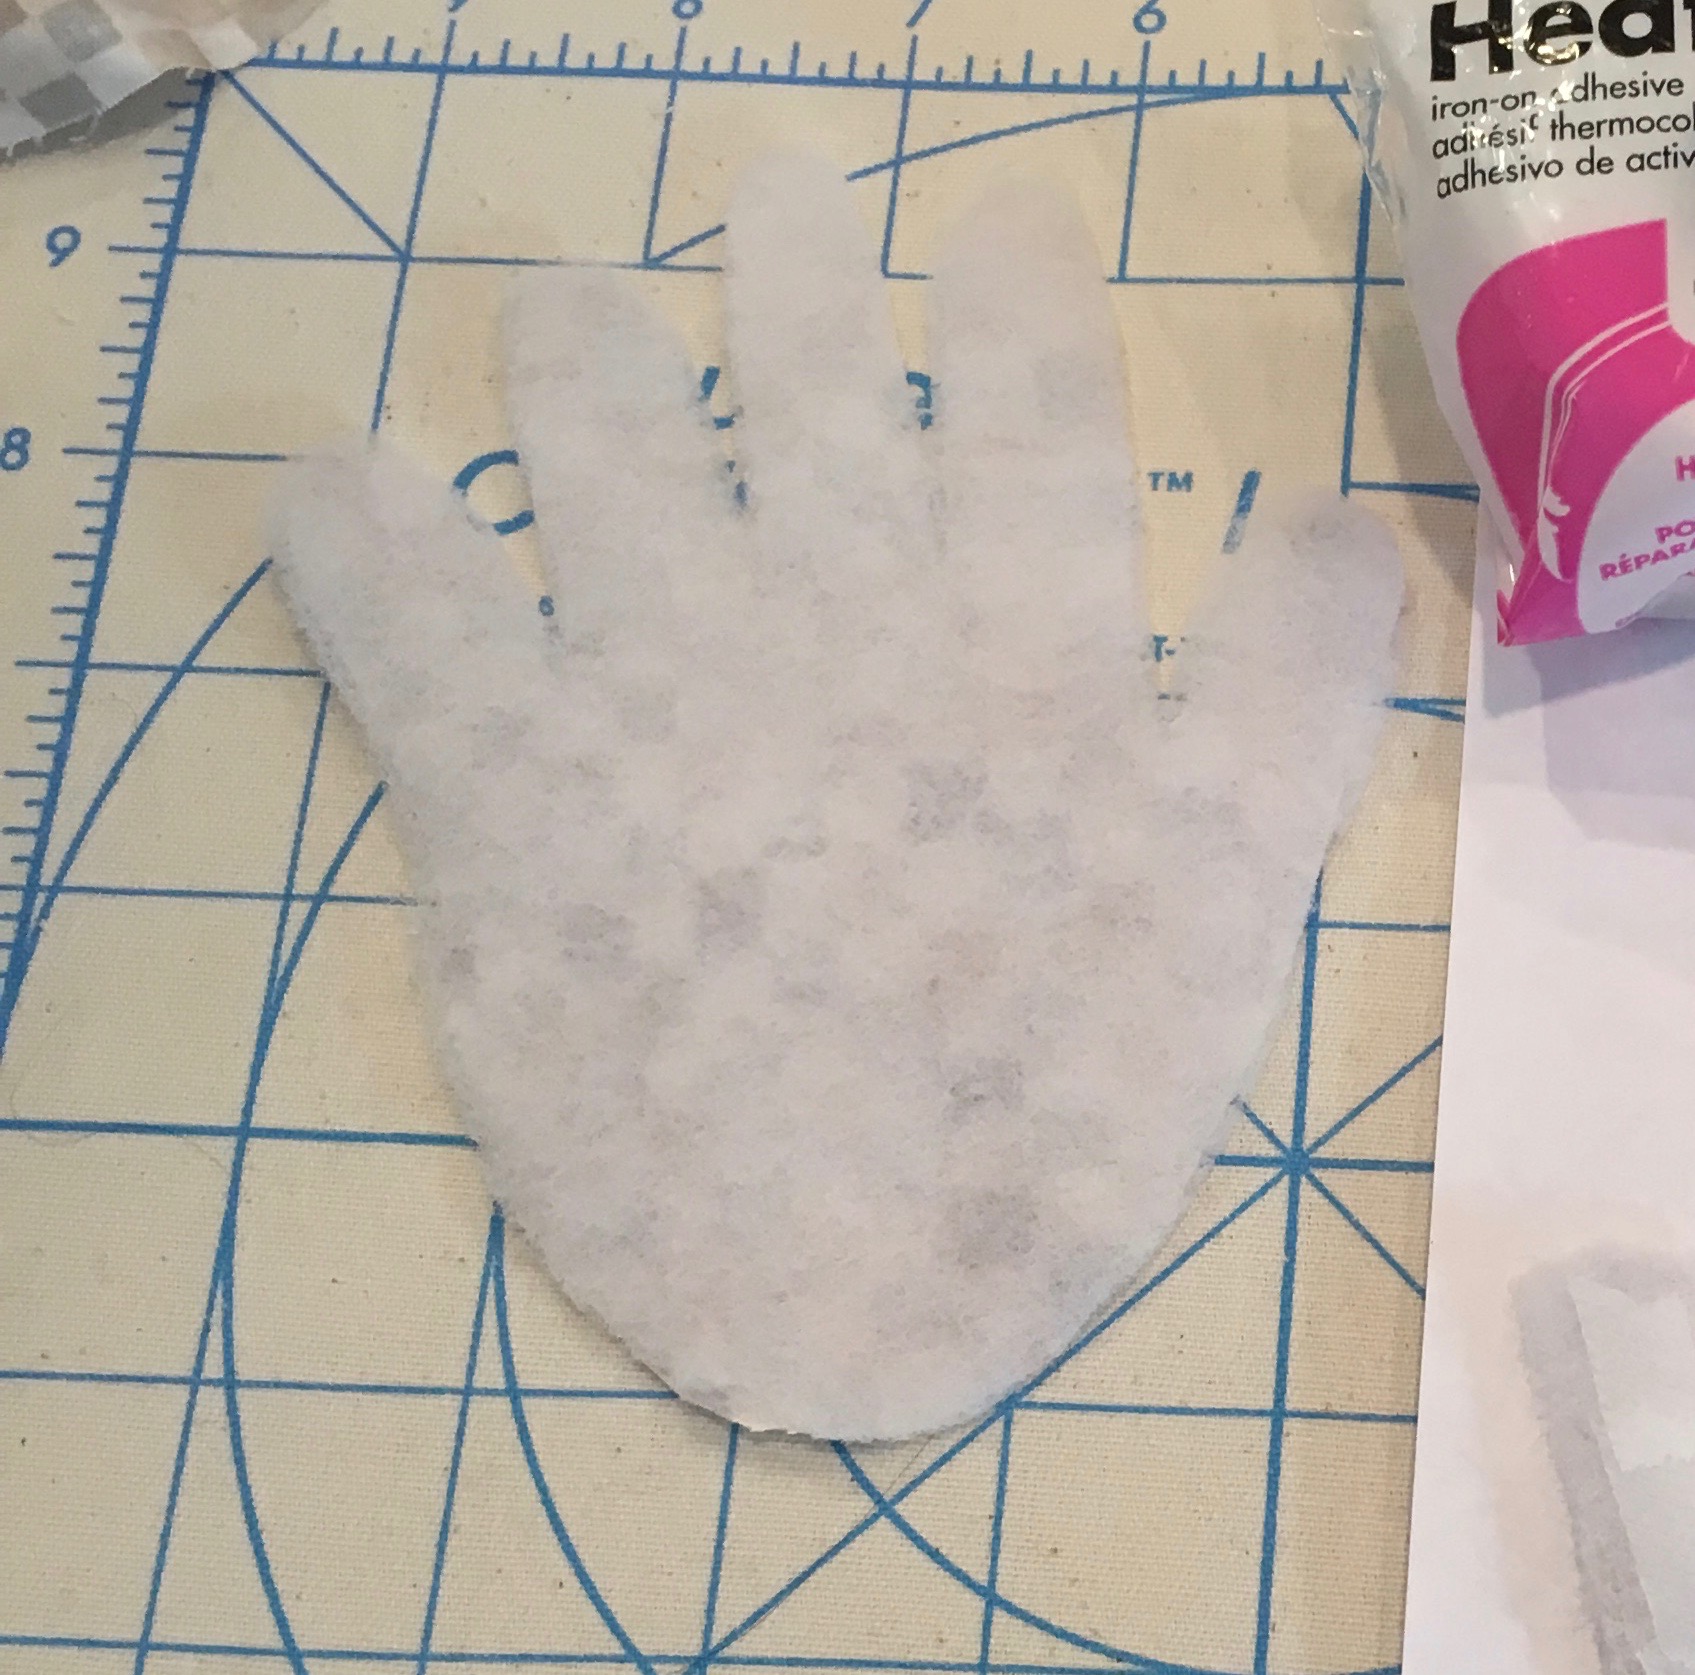
HeatnBond Fusible Fleece
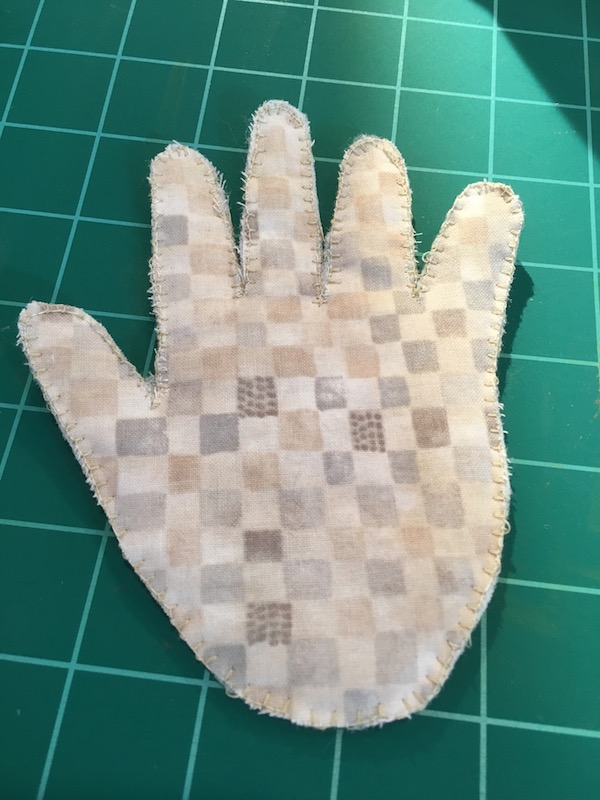
Following directions on the packaging, adhere the “wrong side” of both hand shapes to Heat n Bond Fusible Fleece Iron-on Interfacing. Trim away excess from the hand shapes. Place them together (with Fleece facing inward) and using a simple stitch on your sewing machine, follow the outline of the hands to attach together. A blanket stitch was used for the example. Remember this is a primitive project!
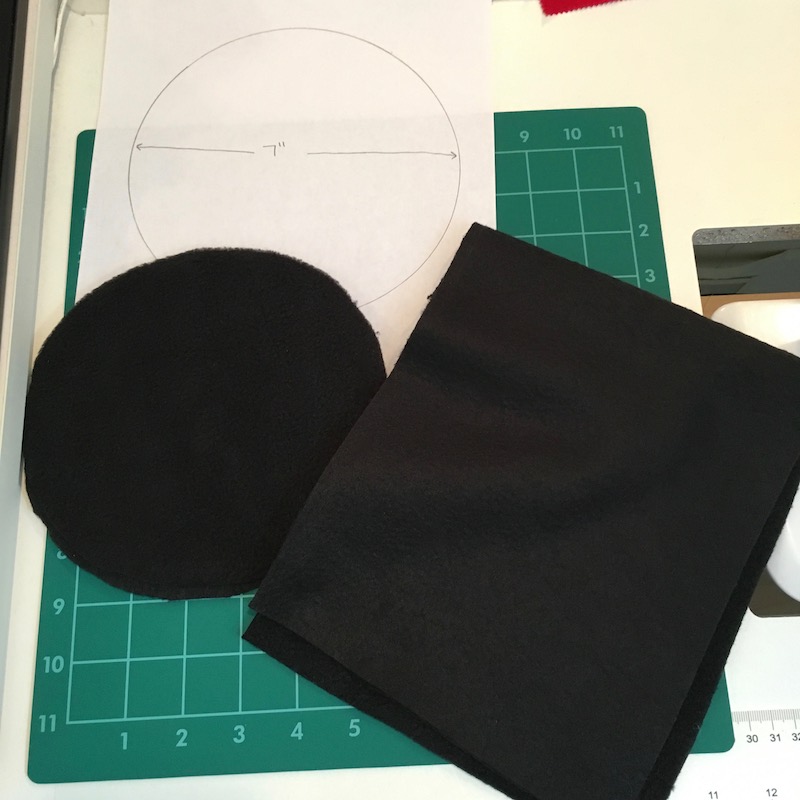
Step Three:
Using the pencil and paper, trace a 7” circle. On a cutting mat, take the two pieces of black fleece and place together then place the traced circle on top. Slowly and carefully, inch your rotary cutter around the circle, cutting through both pieces of fabric. When finished, if needed, trim any uneven parts.
Step Four:
Center the fabric hand on one of the pieces of black fleece and with a simple straight stitch on your sewing machine, sew around the outline of the hand to attach to the circle of black fleece.
Step Five:
With the “hand” facing up, place the other piece of black fleece on top of it and stitch around the 7” circle leaving a 2” section open for “turning”.
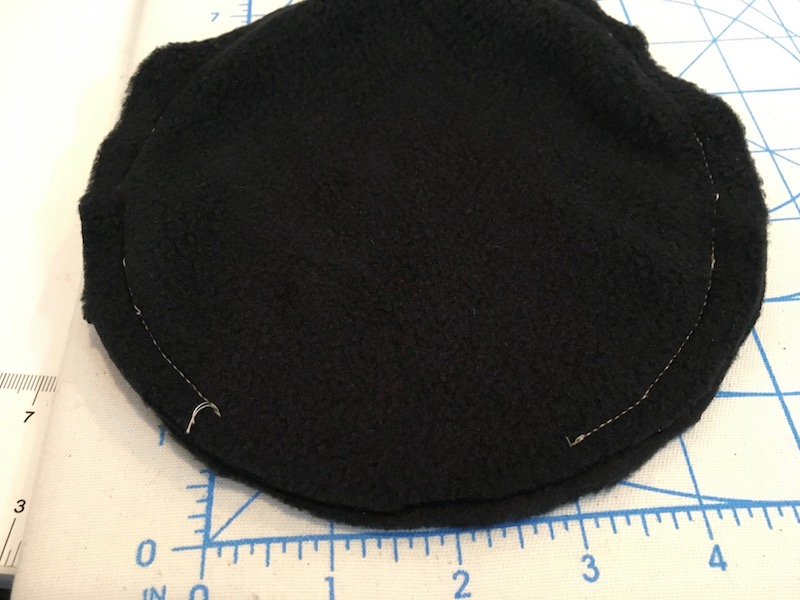
Step Six:
Carefully turn the circle “right side out” so the hand is facing outward, stuff the pincushion form with fiberfill and stitch the 2” section closed.
Step Seven:
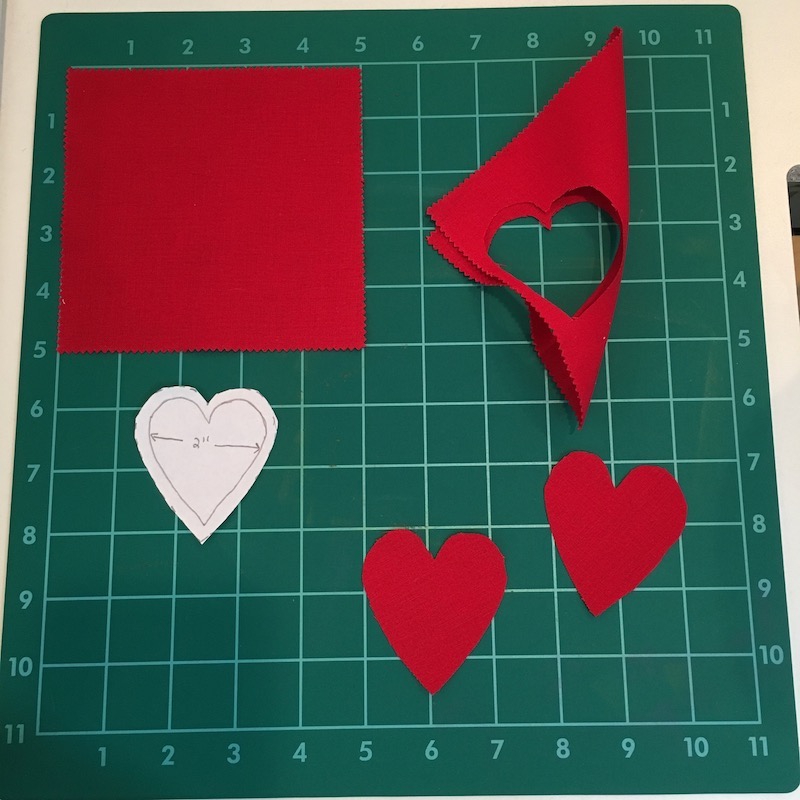
Using the pencil and paper, draw a heart about 2” across and cut out. With the 5” piece of red fabric, fold in half on the diagonal (as shown in the photo) you should be able to place paper heart on the folded piece and cut out heart. This will create 2 hearts in the same shape.
Step Eight:
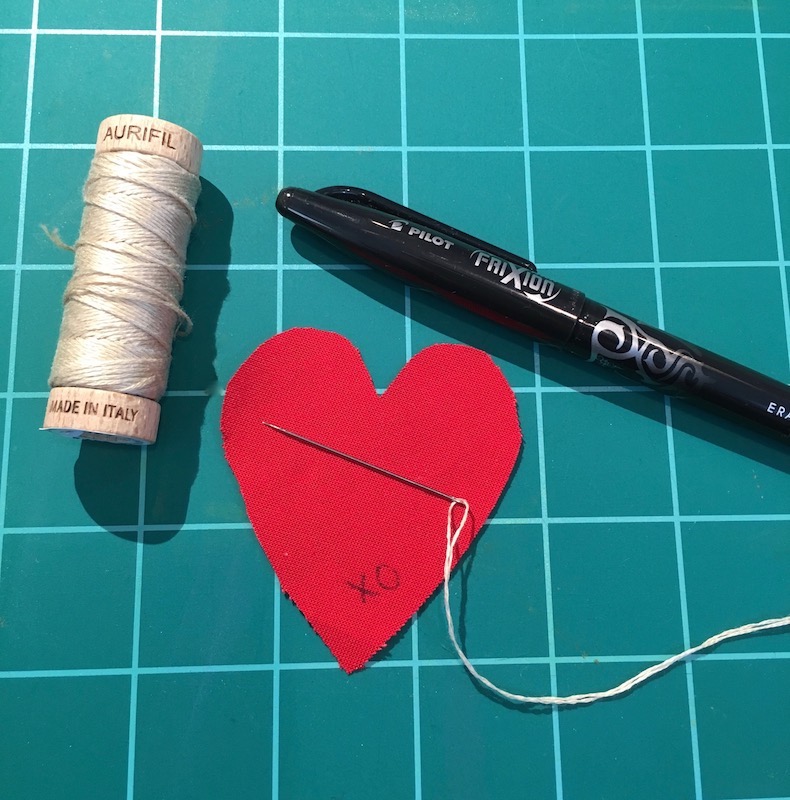
Frixion Fabric Pen
Using the fabric pen, draw an “x” and “o” about 3/4” up from the bottom corner on one heart. Using the Aurifil floss, stitch the “x” and “o” over the pen marks. Next, place the “right side” facing down on other heart shapes and using sewing machine, sew a 1/4” seam all the way around the heart shape.
Step Nine:
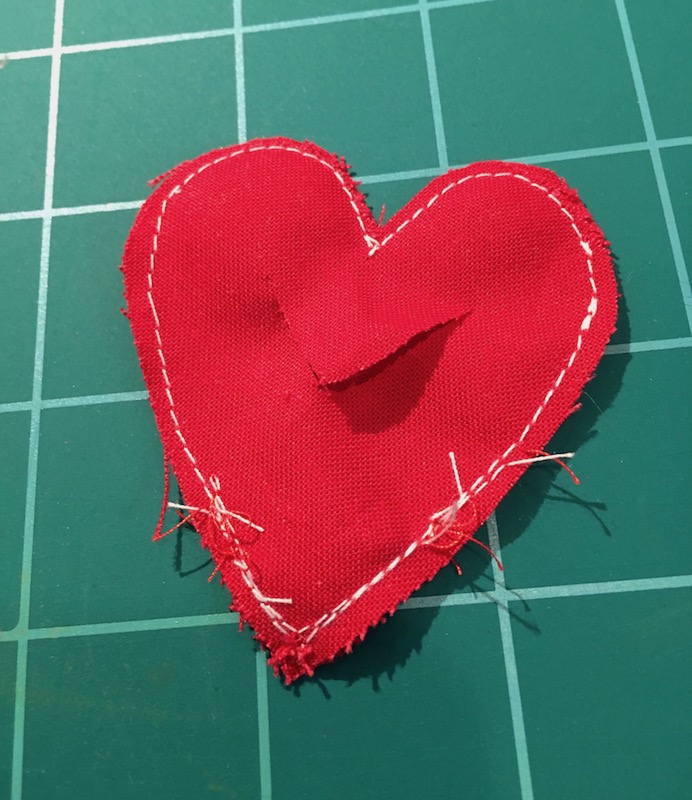
Carefully pinch the two layers of red fabric to separate the bottom and top layer. On the bottom layer only, cut a small “v” shape in the middle. See photo. Now turn the heart “right side out”. The “x” and “o” should show on the front.
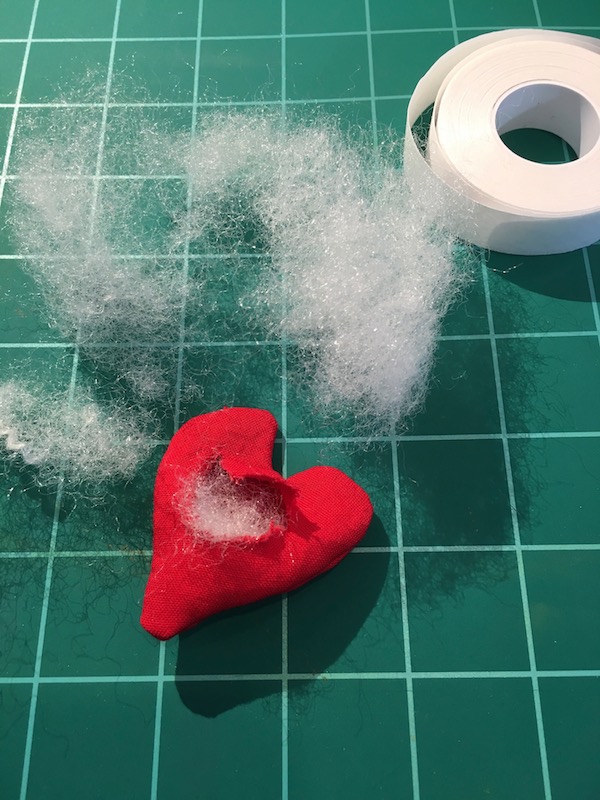
Using a small bit of fiberfill, stuff the heart.
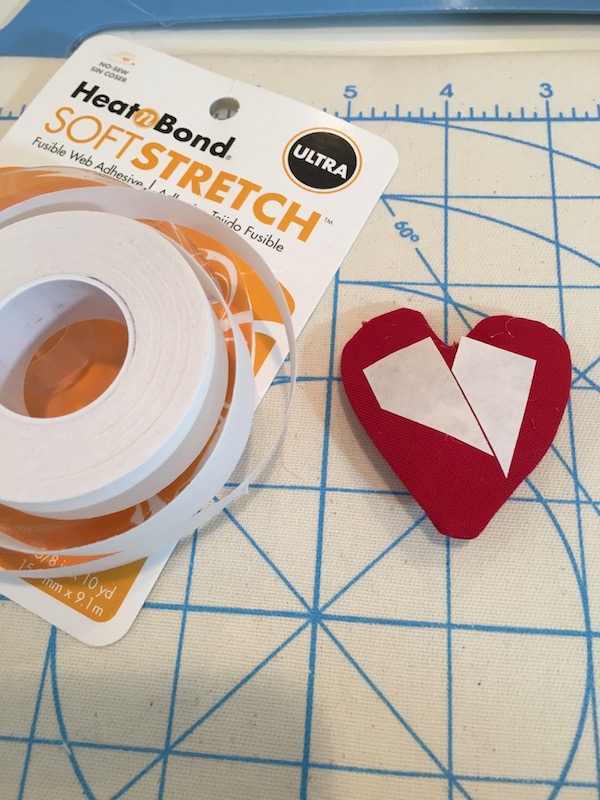
Following the directions on the packaging, adhere one or two pieces of Heat n Bond Soft Stretch adhesive tape iron-on over the “v” shape cut.
Step Ten:
Finish adhering the heart to the middle of the hand by removing the backing of the tape from the Soft Stretch adhesive and following directions.
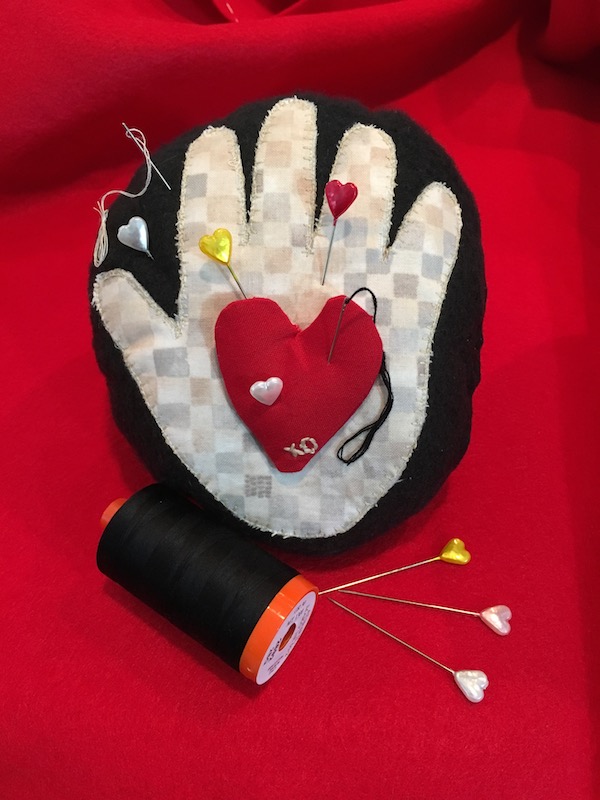
ALL DONE!!
Now you have a wonderful reminder of a special person or a loving gift to give!
Please let us know what you think, and we’d love to see photos of your pincushion!
Happy St. Valentine’s Day!
Jane xo