


It’s Circus Week at Thermoweb and Carla from Creatin’ in the Sticks is on the blog today with a fun circus themed sewing project.
![]()
Patchwork Elephant Parade Pillow
by Carla at Creatin’ in the Sticks
Finished Size: 12” x 12”
Patchwork Elephant Parade Pillow Instructions
Please read through the complete instructions before beginning your project.
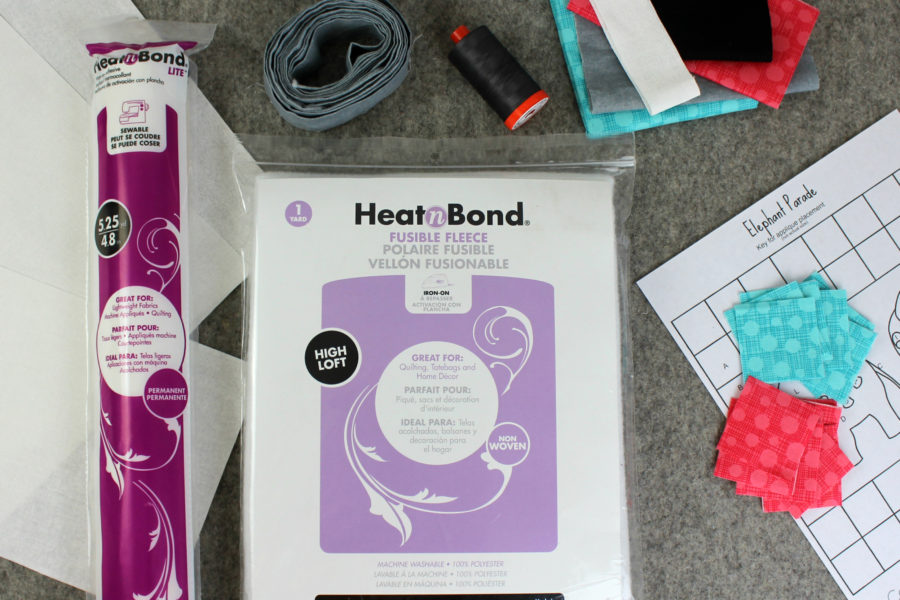
Supplies
Elephant Parade Patchwork Pillow PATTERN by Carla at Creatin in the Sticks for Thermoweb
HEATNBond® Lite Iron-on Adhesive
Fabric:
(A)- 32 assorted colors of 2” squares of cotton fabric
(B)- 1 – 6 ½” x 12 ½” rectangle of white cotton fabric
Assorted colors of fabric scraps for elephant appliques (Grey, White, Black, Red, and Teal)
2 rectangles – 12 ½” x 9 ½” for pillow back
2 – 2 ¼” x WOF for binding
Other supplies:
Aurifil Thread 50 wt. thread #2630, Iron (I love my pink Oliso) and ironing surface, permanent marker, 12” pillow form, sewing machine, and general sewing supplies: rotary cutter, cutting mat, scissors, pins, etc.
Sewing Instructions:
*1/4” seams are used throughout
Step 1:
Layout the 32 (A) – 2” fabric squares in 2 groups of 2 square x 8 square grid.
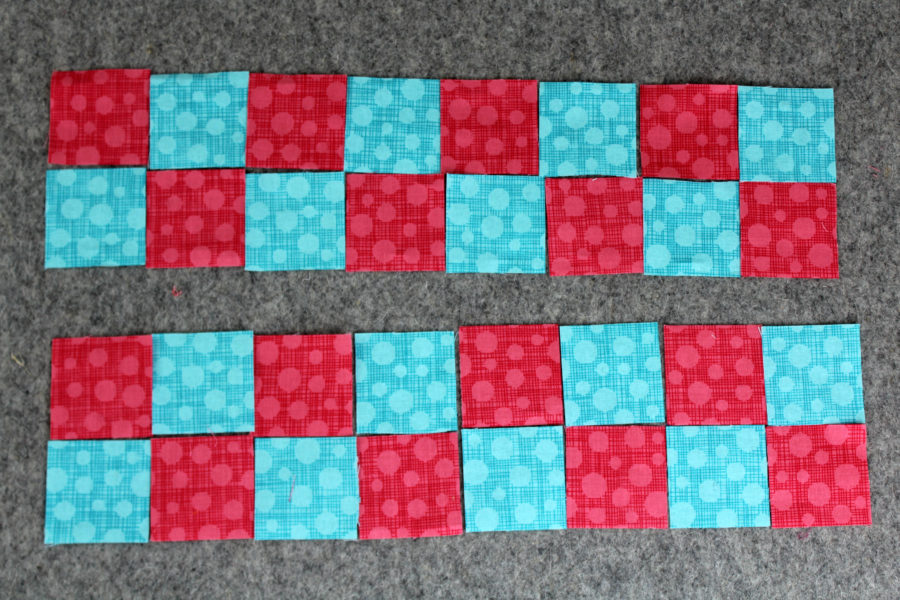
Stitch the squares as laid out with right sides together and ¼” seams to make two 3 ½” x 12 ½” rectangles.
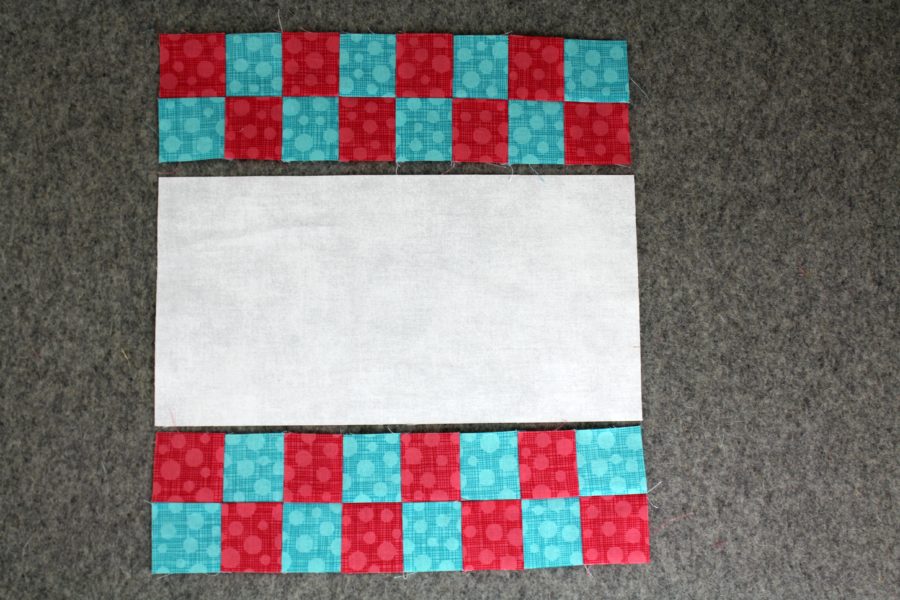
Stitch the patchwork rectangles to the top and bottom of the white rectangle (B) with ¼” seams and press to make the pillow top background. The background for the pillow top measures 12 ½” x 12 ½”.
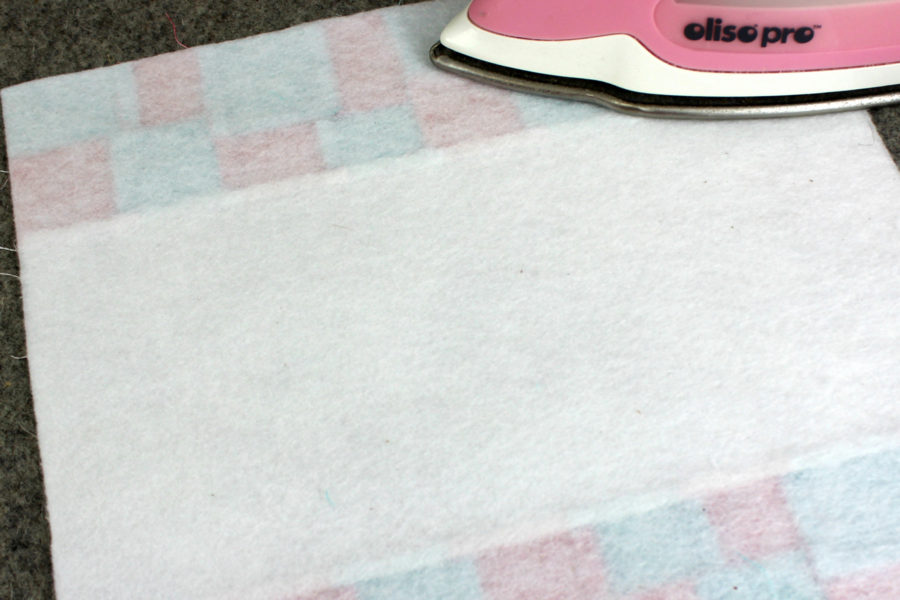
Cut one piece of fleece 12 ½” x 12 ½”. Follow the package instructions and fuse the fleece to the wrong side of the patchwork. Stitch around the square 1/8” from the edge to stabilize the edges.
Step 2:
Prepare the Elephant applique pieces. Trace the elephant templates on the paper side of the HeatNBond Lite adhesive with the permanent marker. The templates have already been reversed for you.
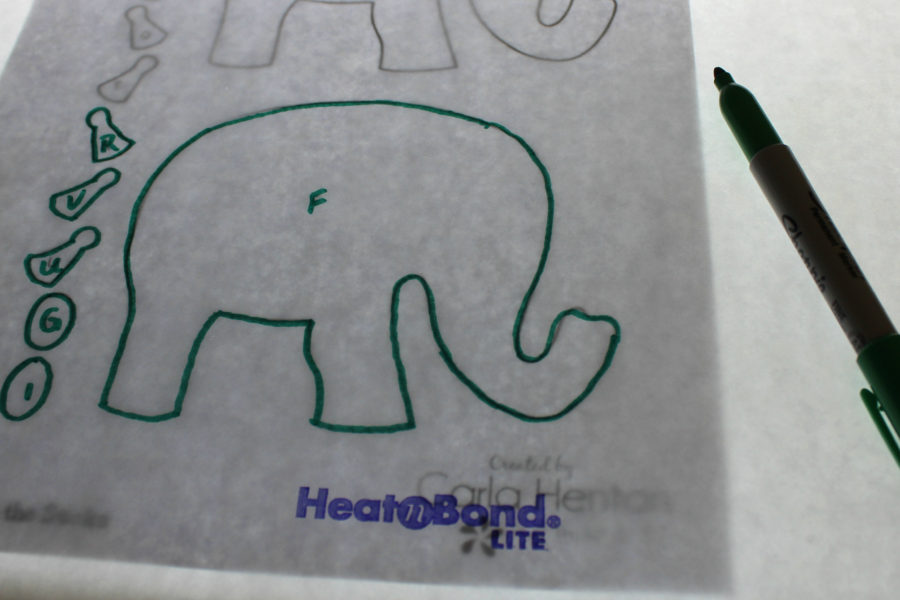
Follow the manufacturer’s instructions for tracing the patterns and bonding
to the wrong side of the fabrics. Cut out the applique pieces on the solid black lines, peel off the backing paper, and place the appliques with the adhesive side down on the right side of the white fabric (B), according to the key.
.Following the package instructions, bond the appliques to the fabric.
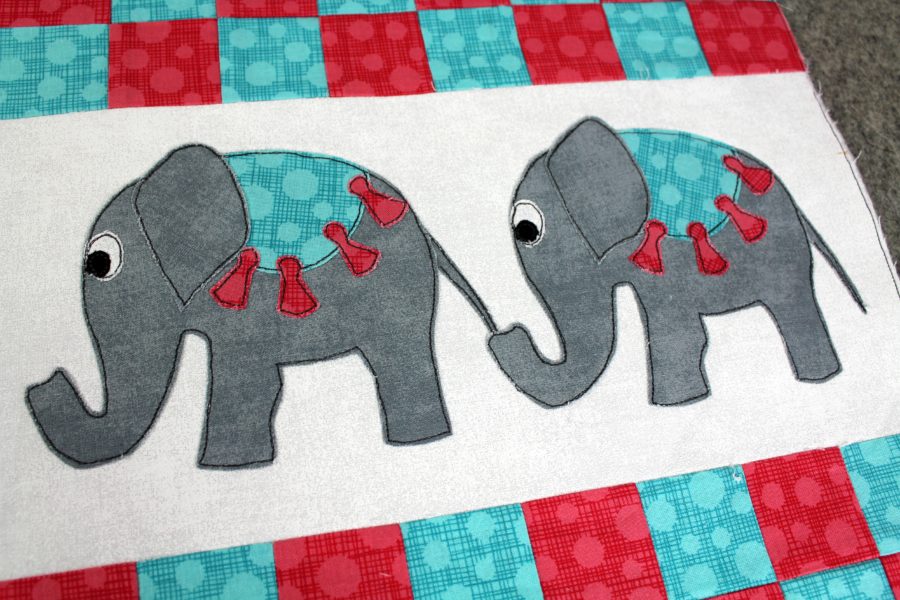
Use a straight, zigzag, or blanket stitch with Aurifil thread to stitch around each applique piece.
Step 3:
Prepare the back of the pillow.
The last steps to finishing the pillow cover are to make the back envelope and bind. The back is made by hemming one 12 ½” side on each of the pillow backing pieces. Place both hems in the middle of the back of the pillow, lining up the raw edges with the pillow top’s fleece back. Pin and baste around the pillow cover 1/8” from the edge.
![]()
Apply the binding with the desired method and stuff with the 12” pillow form.
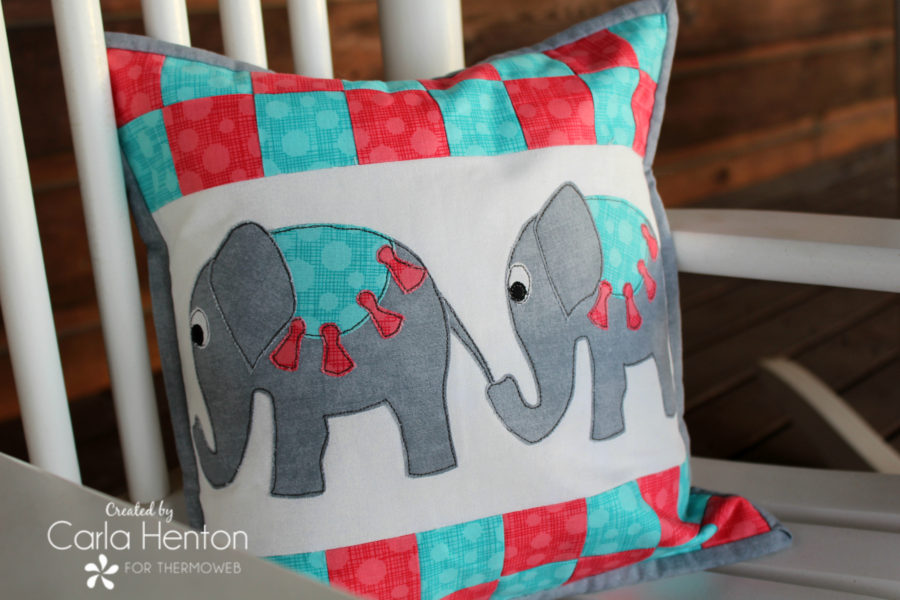
When I think of a circus the first thing I think of is elephants. I couldn’t wait to make my Elephant Parade pillow and I hope you enjoy it too.
Carla
Connie
February 10, 2020 at 7:45 pm (4 years ago)This is so dang cute! Love the color choices too…thank you!!