


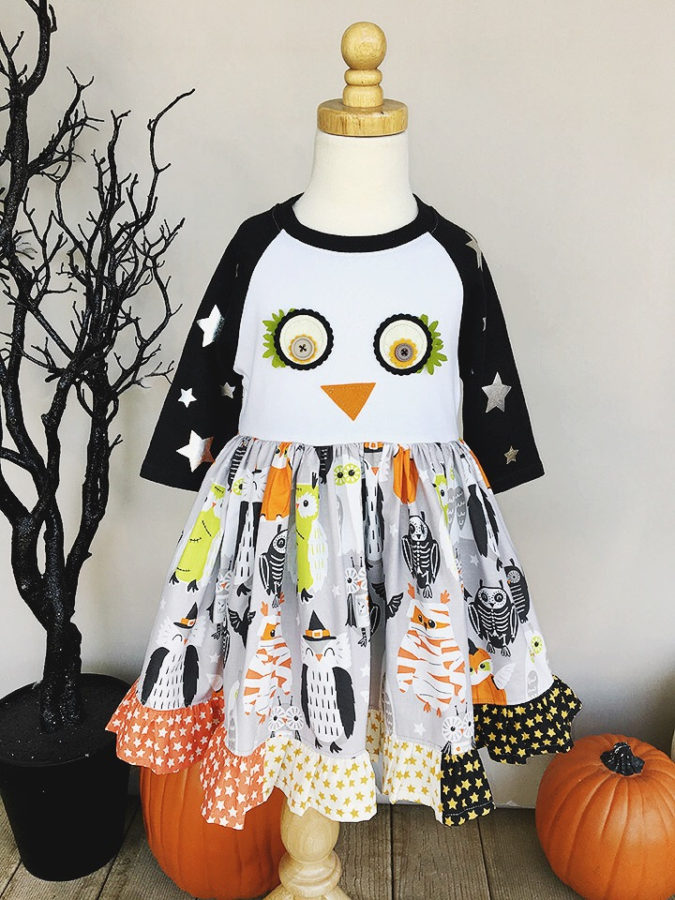
HeatnBond Halloween Owl Shirt Dress by Tamara Tripodi
It’s my FAVORITE time of year for crafting! I love the fall and Halloween season so much! One of my favorite things to do is make my youngest daughter cute little seasonal outfits. I used the faBOOlous ‘Boo Crew’ fabric collection by Blend to create this one-of-a-kind spooky owl dress. I can’t even begin to tell you how thrilled I am with how this turned out! The muted tones in this fabric collection are right up my alley. I took inspiration from the owls to create an owl face for the shirt design. This was originally supposed to be a shirt and skirt design.. then I decided to chop off the bottom of the shirt and make it a comfy twirly dress.
To create your own Halloween Owl Dress (or similar) you’ll need:
A blank shirt
Felt in coordinating colors
Die cutter and dies to create the owl face. You could also hand cut your own with good scissors. I list the exact dies below.
Two mismatched buttons
Sewing machine and thread ( I used Aurifil gray #2620)
Fabric (Blend Fabrics Boo Crew is shown)
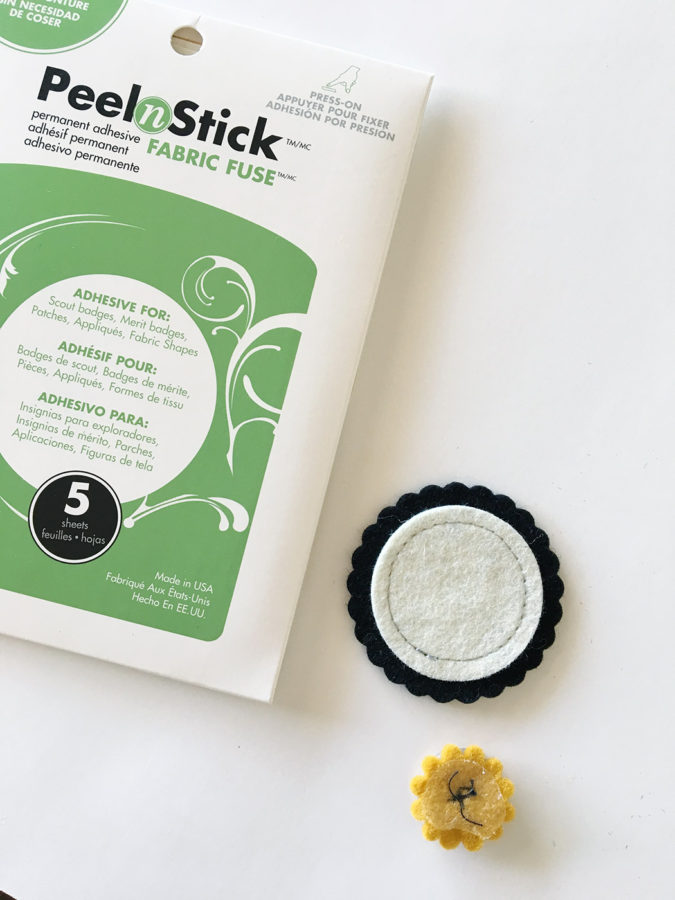
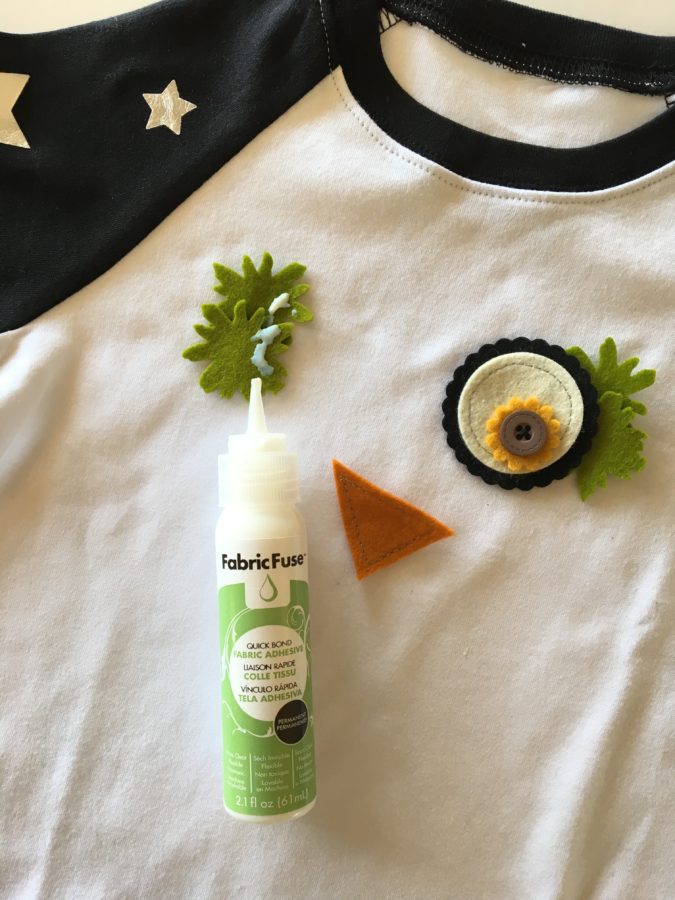
Therm o Web Fabric Fuse Permanent Quick Bond
Therm o Web PeelnStick Permanent Fabric Adhesive
Therm o Web HeatnBond Medium Weight Iron-On Interfacing
Pumpkin Spice Latte (Optional)
HeatnBond Halloween Owl Shirt Dress Instructions:
To create the dress you’ll need to start with a shirt that fits the person you’re making it for. In this case, mine is a 3t. If the shirt is several sizes bigger, the sized dies I used may be too small, so adjust your design if needed.
To create the dress you’ll need to start with a shirt that fits the person you’re making it for. In this case, mine is a 3t. If the shirt is several sizes bigger, the sized dies I used may be too small, so adjust your design if needed.
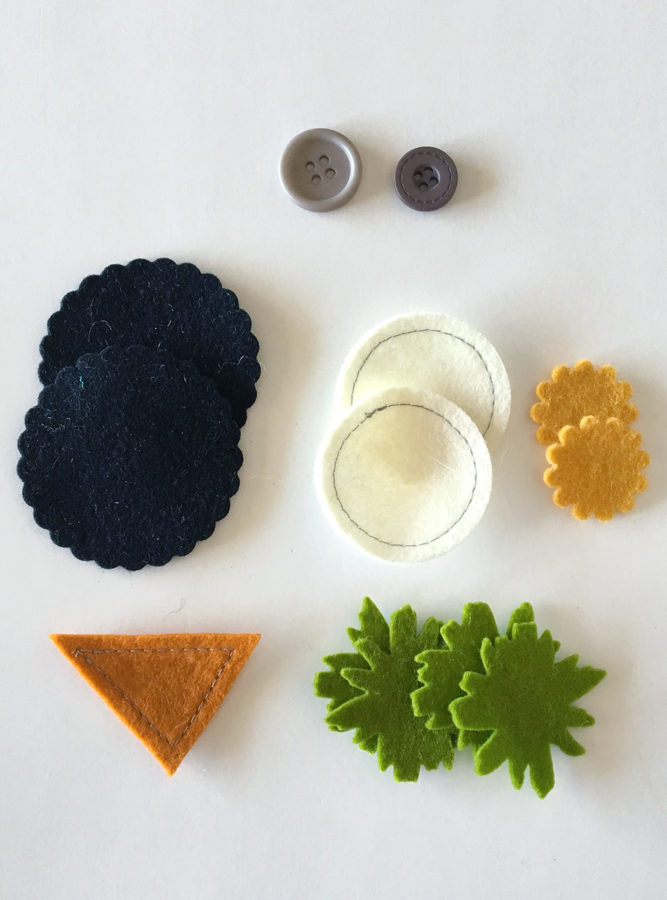
Two black felt scalloped circles about 2″ diameter and two deep golden yellow about 1″ diameter. Two ivory circles just over 1.5″ diameter. Both of these dies are Sizzix framelits brand that I used. The four green pieces are a Sizzix flower die (#658229). The beak in rusty orange was hand cut. Roughly 1.75″ wide.
To layer the pieces for the eyes you’ll need the Fabric Fuse glue and the PeelnStick.. guys and gals.. the peel n stick is one of my new favorite products to use! This stuff STICKS.
First, sew the buttons on to the gold scallop circles. Cut a piece of the PeelnStick Fabric Fuse Adhesive Sheet and put it on the back of the gold scallop circle after you secure your button. Do the same to the ivory pieces. Stick the ivory pieces to the black, and the gold to the ivory. Then you’ll have an eye!
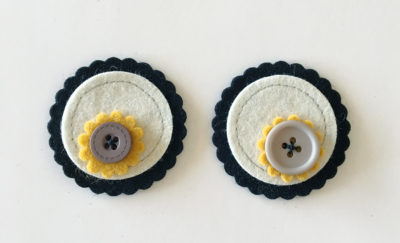
Yes, those are some owl peepers!
I used the Fabric Fuse to glue the green ‘eyelashes’ on to the back of the black scallops. Once dried I put some Peel n Stick on the back of the black scalloped circles and stuck them on to the shirt. Then you’ll adhere the beak to the shirt with Peel n Stick.

If you want to create a shirt dress as I did, cut the bottom off of the shirt. To prevent stretching and shifting while sewing, as knits like to do, I cut about a 1/2″ strip of HeatnBond Fusible Interfacing and ironed it around the bottom of the shirt. This REALLY helped it keep it’s shaping as I stitched the skirt part of the dress on.
Halloween Owl Dress Instructions:
I don’t have a pattern for this project to create the base of the dress. My main focus for this was showing you how to create the owl face. But what I did was simply measure a current dress that fit my daughter and used that as a guide. It’s pretty basic and just cutting large/long rectangles. For example. Her dress I measured was 22″ long. The shirt length that I was making into a dress after cutting it was about 9.5″ (10″ with seam allowance). I wanted a 2.5″ ruffle so I added that into the measurements. That left me with 10″ length that I used for the
I don’t have a pattern for this project to create the base of the dress. My main focus for this was showing you how to create the owl face. But what I did was simply measure a current dress that fit my daughter and used that as a guide. It’s pretty basic and just cutting large/long rectangles. For example. Her dress I measured was 22″ long. The shirt length that I wasmaking into a dress after cutting it was about 9.5″ (10″ with seam allowance). I wanted a 2.5″ ruffle so I added that into the measurements. That left me with 10″ length that I used for the grey panel. Just remember to add in seam allowances! I cut two large panels of the grey owl print. Stitched them together. Then cut a total of 6 strips that were all stitched together, seamed, and gathered to create the ruffle trim.
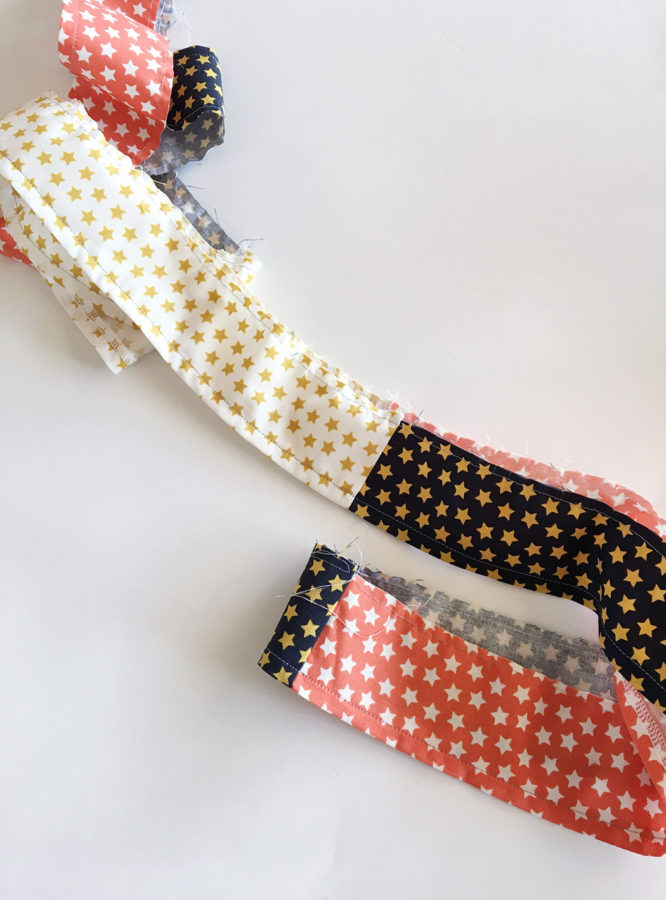
Once the ruffle was sewn on I a ran a gathering stitch and gathered it to the width of the base of the shirt. Pin in place then sew it on and you’re done.


I hope you have enjoyed my project and have found some inspiration. Happy crafting, everyone!
kajunhunnie
September 15, 2017 at 9:00 am (7 years ago)Absolutely adorable!