


It’s a week of winter and snow globes on the Thermoweb blog and I’m so happy to share a fun project. Hi everyone! I’m Carla from Creatin’ in the Sticks and I have the cutest little zipper pouches featuring a reverse applique snow globe tutorial to share. Team HeatNBond Lite with a fabric collection like Michael Miller Fabrics’ Curiosity by Sandra Clemons to make sweet little fabric snow globes. They make sweet gifts for a snow globe collector or anyone.
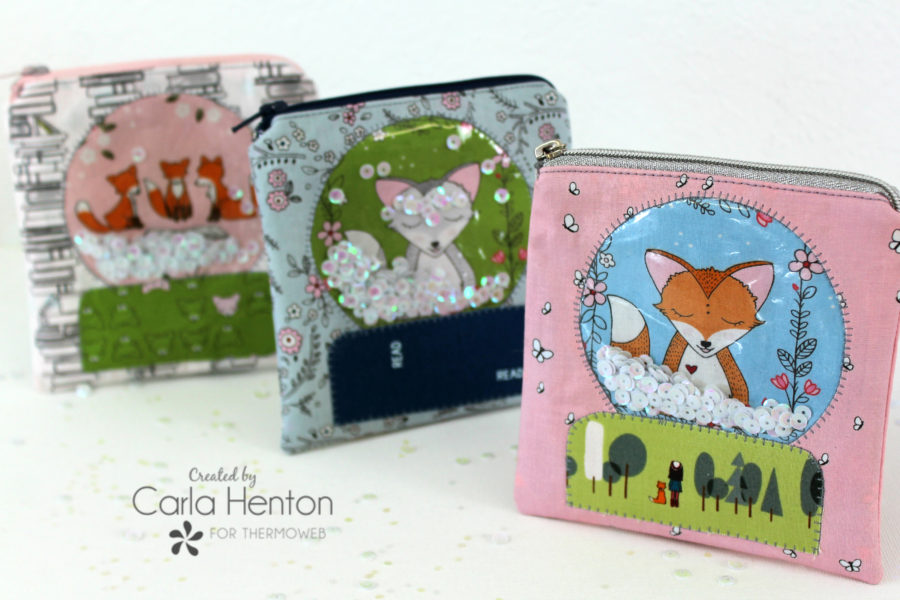
HeatNBond Snow Globe Zipper Pouch
by Carla at Creatin’ in the Sticks
![]()
Please read through all instructions before starting.
All seams are stitched at ¼” unless otherwise stated.
Supplies:
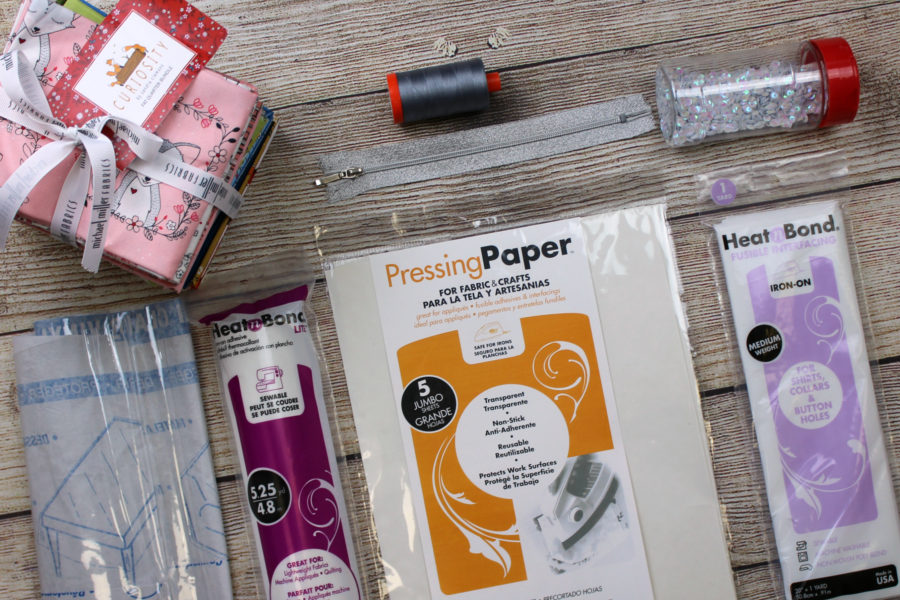
CLICK HERE FOR THE HeatNBond Snow Globe Zipper Pouch PATTERN by Carla at Creatin in the Sticks
HeatnBond® Lite
Pressing paper
HeatNBond Fusible Interfacing – Medium Weight Non-woven
Fabric:
1 – Fat Quarter for fussy cutting a 5 ½” Square (blue)
2 – 5 ½” squares for outside of pouch (pink)
2 – 5 ½” squares for the lining of the pouch (green)
1 – scrap piece for the base of snow globe (green)
1 – 5” square piece of clear vinyl
Other supplies:
Aurifil Thread: 50wt #2605
Iron – I love my Oliso Pro
5mm sequins, permanent marker, 7” zipper, scissors, chopstick, sewing machine with a zipper foot, and other basic sewing supplies
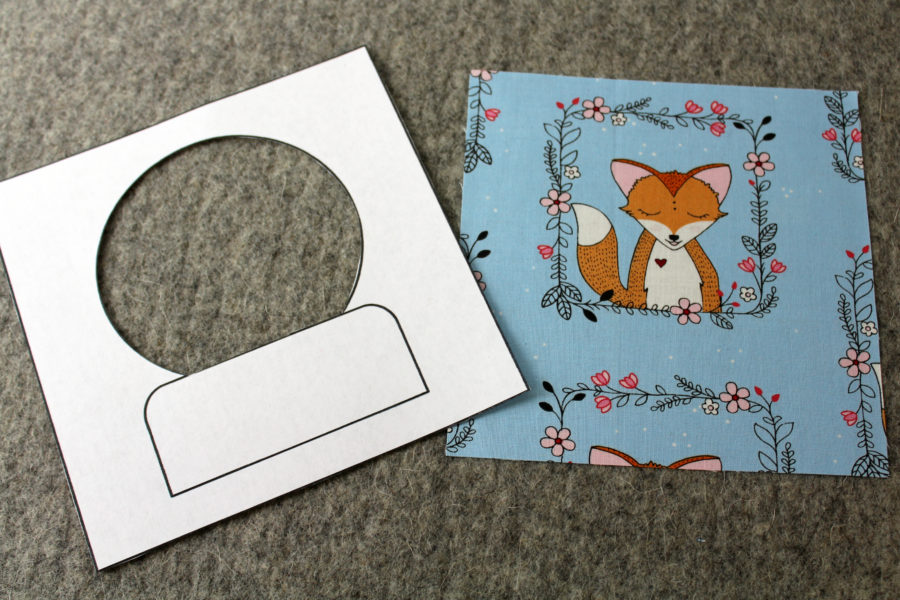
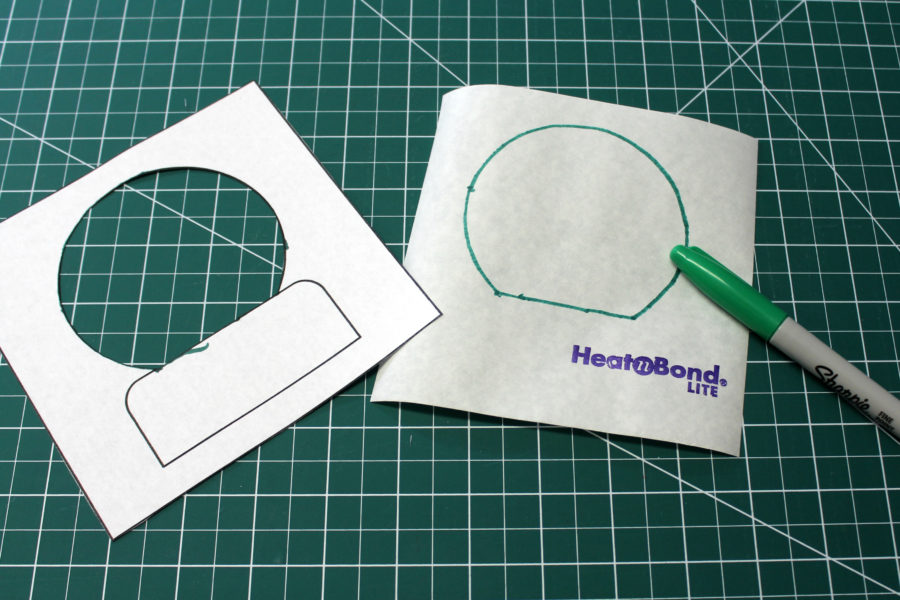
Step 1 – Fussy cut the Snow Globe
Cut out the Snow Globe pattern around the square. Next, cut out the circular shape of the paper pattern, as shown in the picture below. Lay the paper pattern on the fabric (blue) centering the design on the fabric in the globe part. Cut the fabric square around the pattern.
Step 2 – HeatNBond Medium Weight Interfacing
Cut 2 pieces of the interfacing 5 ½” square. Fuse the interfacing squares to the wrong side of 1 pink fabric square and then fussy cut (blue) square from step 1. Set these fabric squares aside.
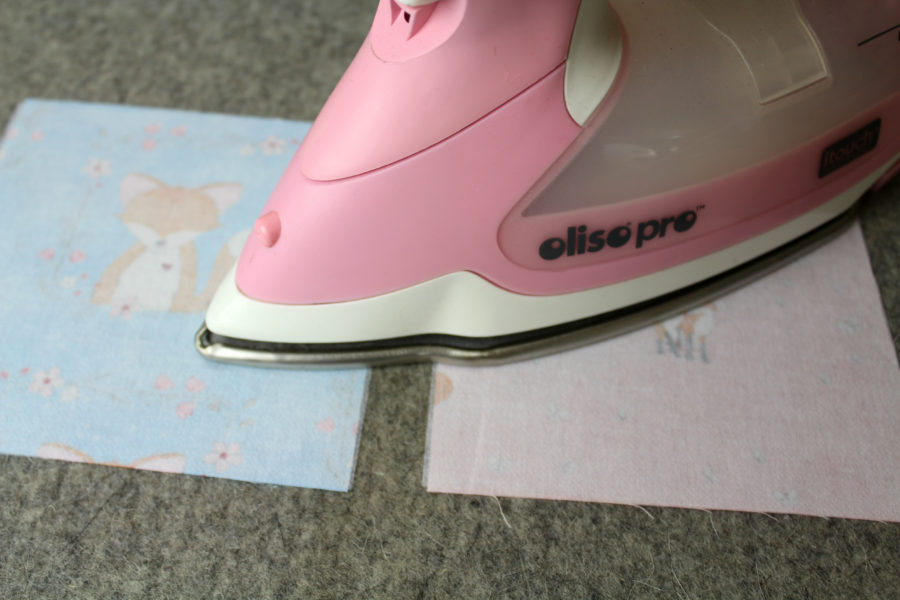
Step 3 – HeatNBond Lite
Cut one 5 ½” square on HeatNBond Lite. Lay the HeatNBond Lite on a hard writing surface with the paper side up. Place the Snow Globe pattern on top of the HeatNBond Lite and trace the cut-out circle shape on the paper with a permanent marker.
Cover the ironing surface with pressing paper to protect it. Next, place the remaining 5 ½” pink fabric square on the pressing paper right side down. Following the package instructions, bond the HeatNBond Lite square to the fabric square. Let it cool, then cut on the drawn line to remove the round shape of the snow globe. Set this pink fabric square aside while the base of the globe is prepared.
Trace the base template from the Snow Globe Template sheet on the paper side of HeatNBond Lite. Cut the base shape from the HeatNBond Lite leaving about ¼” around the outside of the base. Follow the package instructions to bond the HeatNBond Lite to the wrong side of the fabric (green). Cut the fabric base out on the traced line.

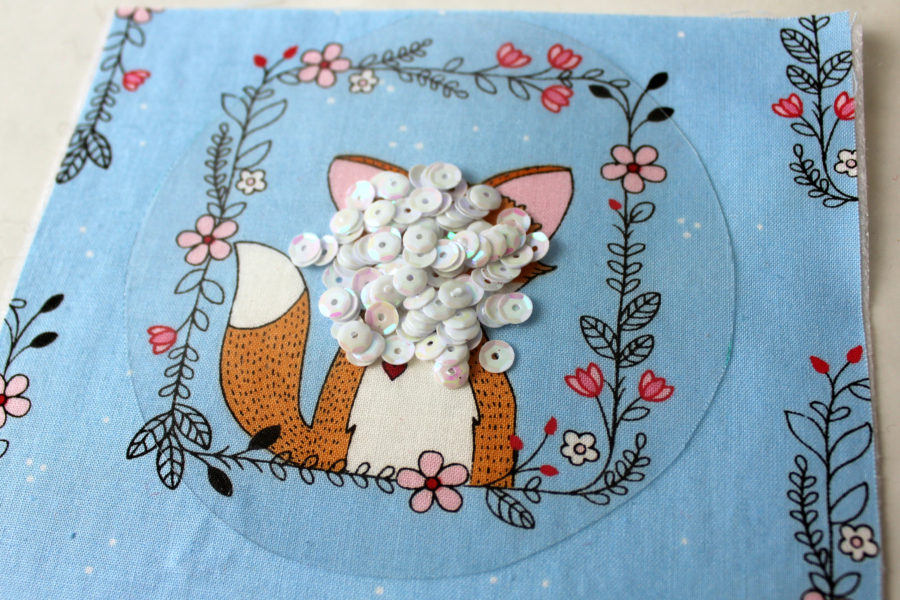
Step 4 – Make the Snow Globe
Firstly, trace the circle template on the cutting line from the template sheet on the vinyl square with a permanent marker. Cut the circle out with scissors.
Tip: if the vinyl is wrinkled, it can be pressed by sandwiching it between pieced of pressing paper and lightly pressing. Then let it cool.
Next, place the fussy cut (blue) square right side up on the pressing paper that is on the ironing surface. Place ½ teaspoon of sequins in the middle of the design. Now, center the vinyl circle over the sequins and design leaving the sequins in a pile.
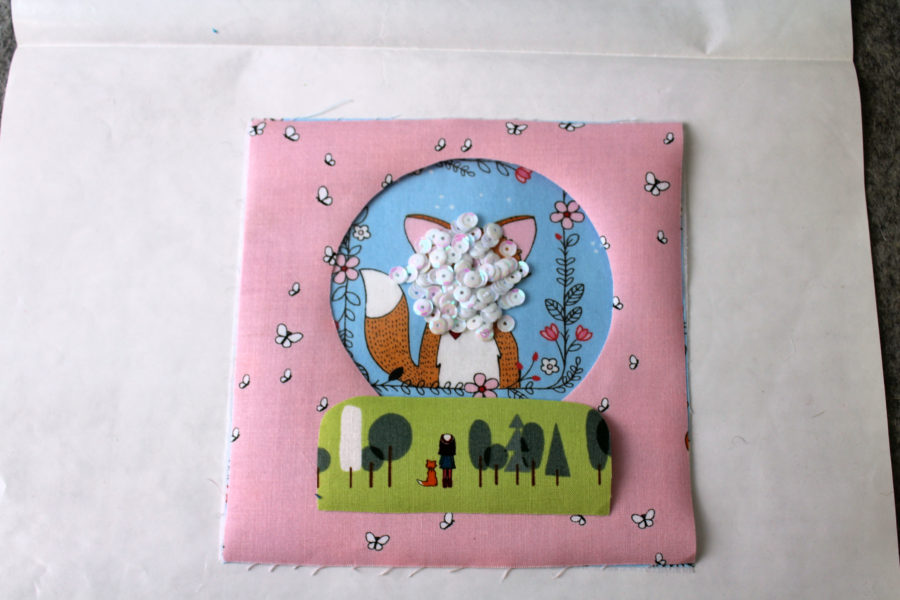
Peel the paper off the HeatNBond Lite backed pink square and place it over the blue square adhesive side down. The vinyl should be sandwiched between the fabric and the HeatNBond Lite backed fabric. Slide the vinyl around if any edges of it are exposed. Next, peel the backing paper from the base and place it at the bottom of the snow globe vinyl.
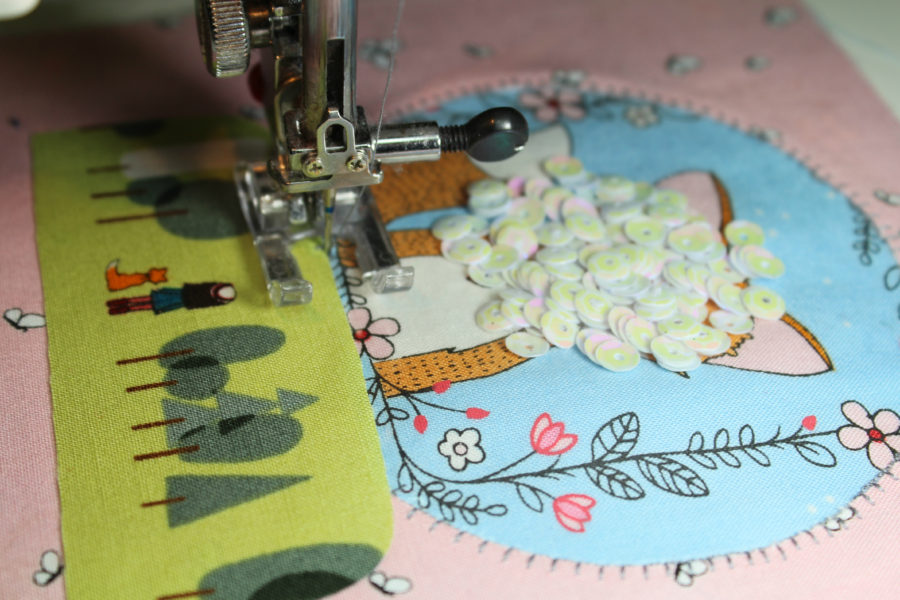
Place a piece of pressing paper on top of the square and bond the parts together. Bond the pieces by heating sections around the square with the iron about 8 seconds at a time. Try to avoid placing the iron directly over the sequins. Let the square cool, then carefully move it to the sewing machine and blanket stitch around the snow globe and base with Aurifil thread #2605.
Step 5- Make the zipper pouch
Follow the instructions included in the PDF pattern to finish the zipper pouch and you’ve got a super sweet little zipper pouch with a sequin shaker snow globe.
![]()
Danette
January 9, 2020 at 8:30 am (4 years ago)This is just too cute and very creative!
Elizabeth Kelbaugh
January 11, 2020 at 6:13 am (4 years ago)I bet there are many little girls who would love this little pouch; maybe even big girls. Thanks for the cute idea and great tutorial.
lynn bourgeois
January 11, 2020 at 8:25 pm (4 years ago)Love this.
timpson77
January 22, 2020 at 7:40 pm (4 years ago)Where are the templates for this project? Please advise. Thanks.
admin
February 20, 2020 at 10:12 am (4 years ago)Hi! The templates are found in the supply list here on the project post.
Kathy
January 31, 2020 at 10:08 am (4 years ago)Thank you for the great pattern.
debw1954
November 13, 2021 at 9:49 am (2 years ago)Than you so much for this fun pattern and very helpful tutorial. Especially like the download tutorial. Merry Christmas!!