


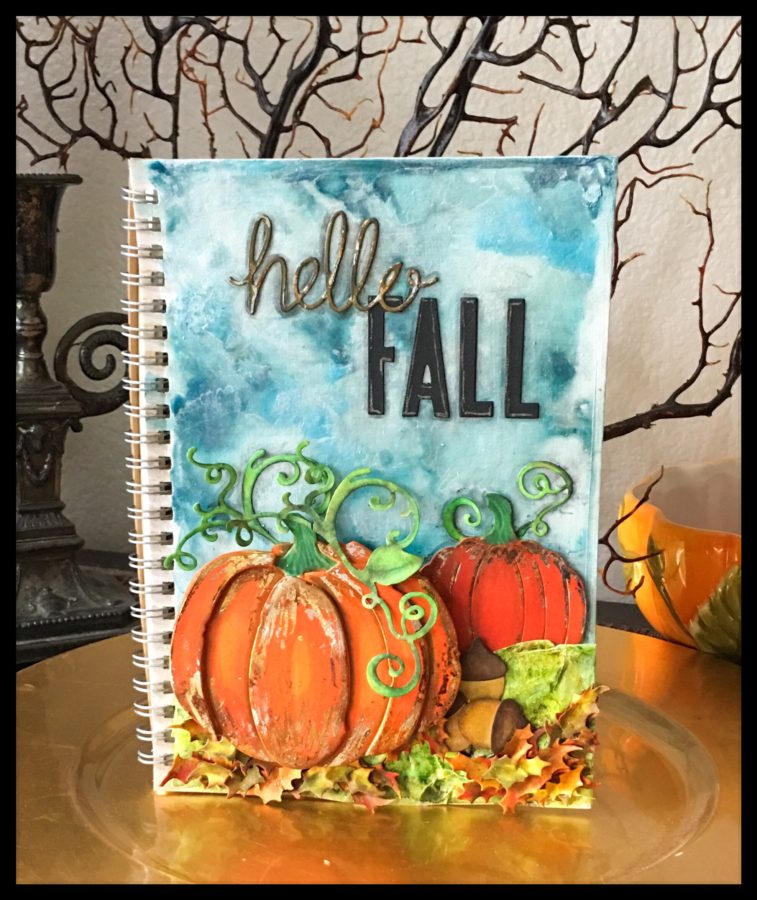
Hi all, Wendy here with a mixed media journal inspired by my need to get into a fall frame of mind. Here in Southern California, we’ve had 90 degrees and 95% humidity this week (which is not typical for us at all) so I needed a kick in the pants to get into the spirit and now I’m ready. . . Hello Fall.
Hello Fall Mixed Media Deco Foil Journal
iCraft Mixed Media Adhesive
iCraft Deco Foil Adhesive Pen
Rebekah Meier Designs Mixed Media Transfer Foil – Amber Watercolor
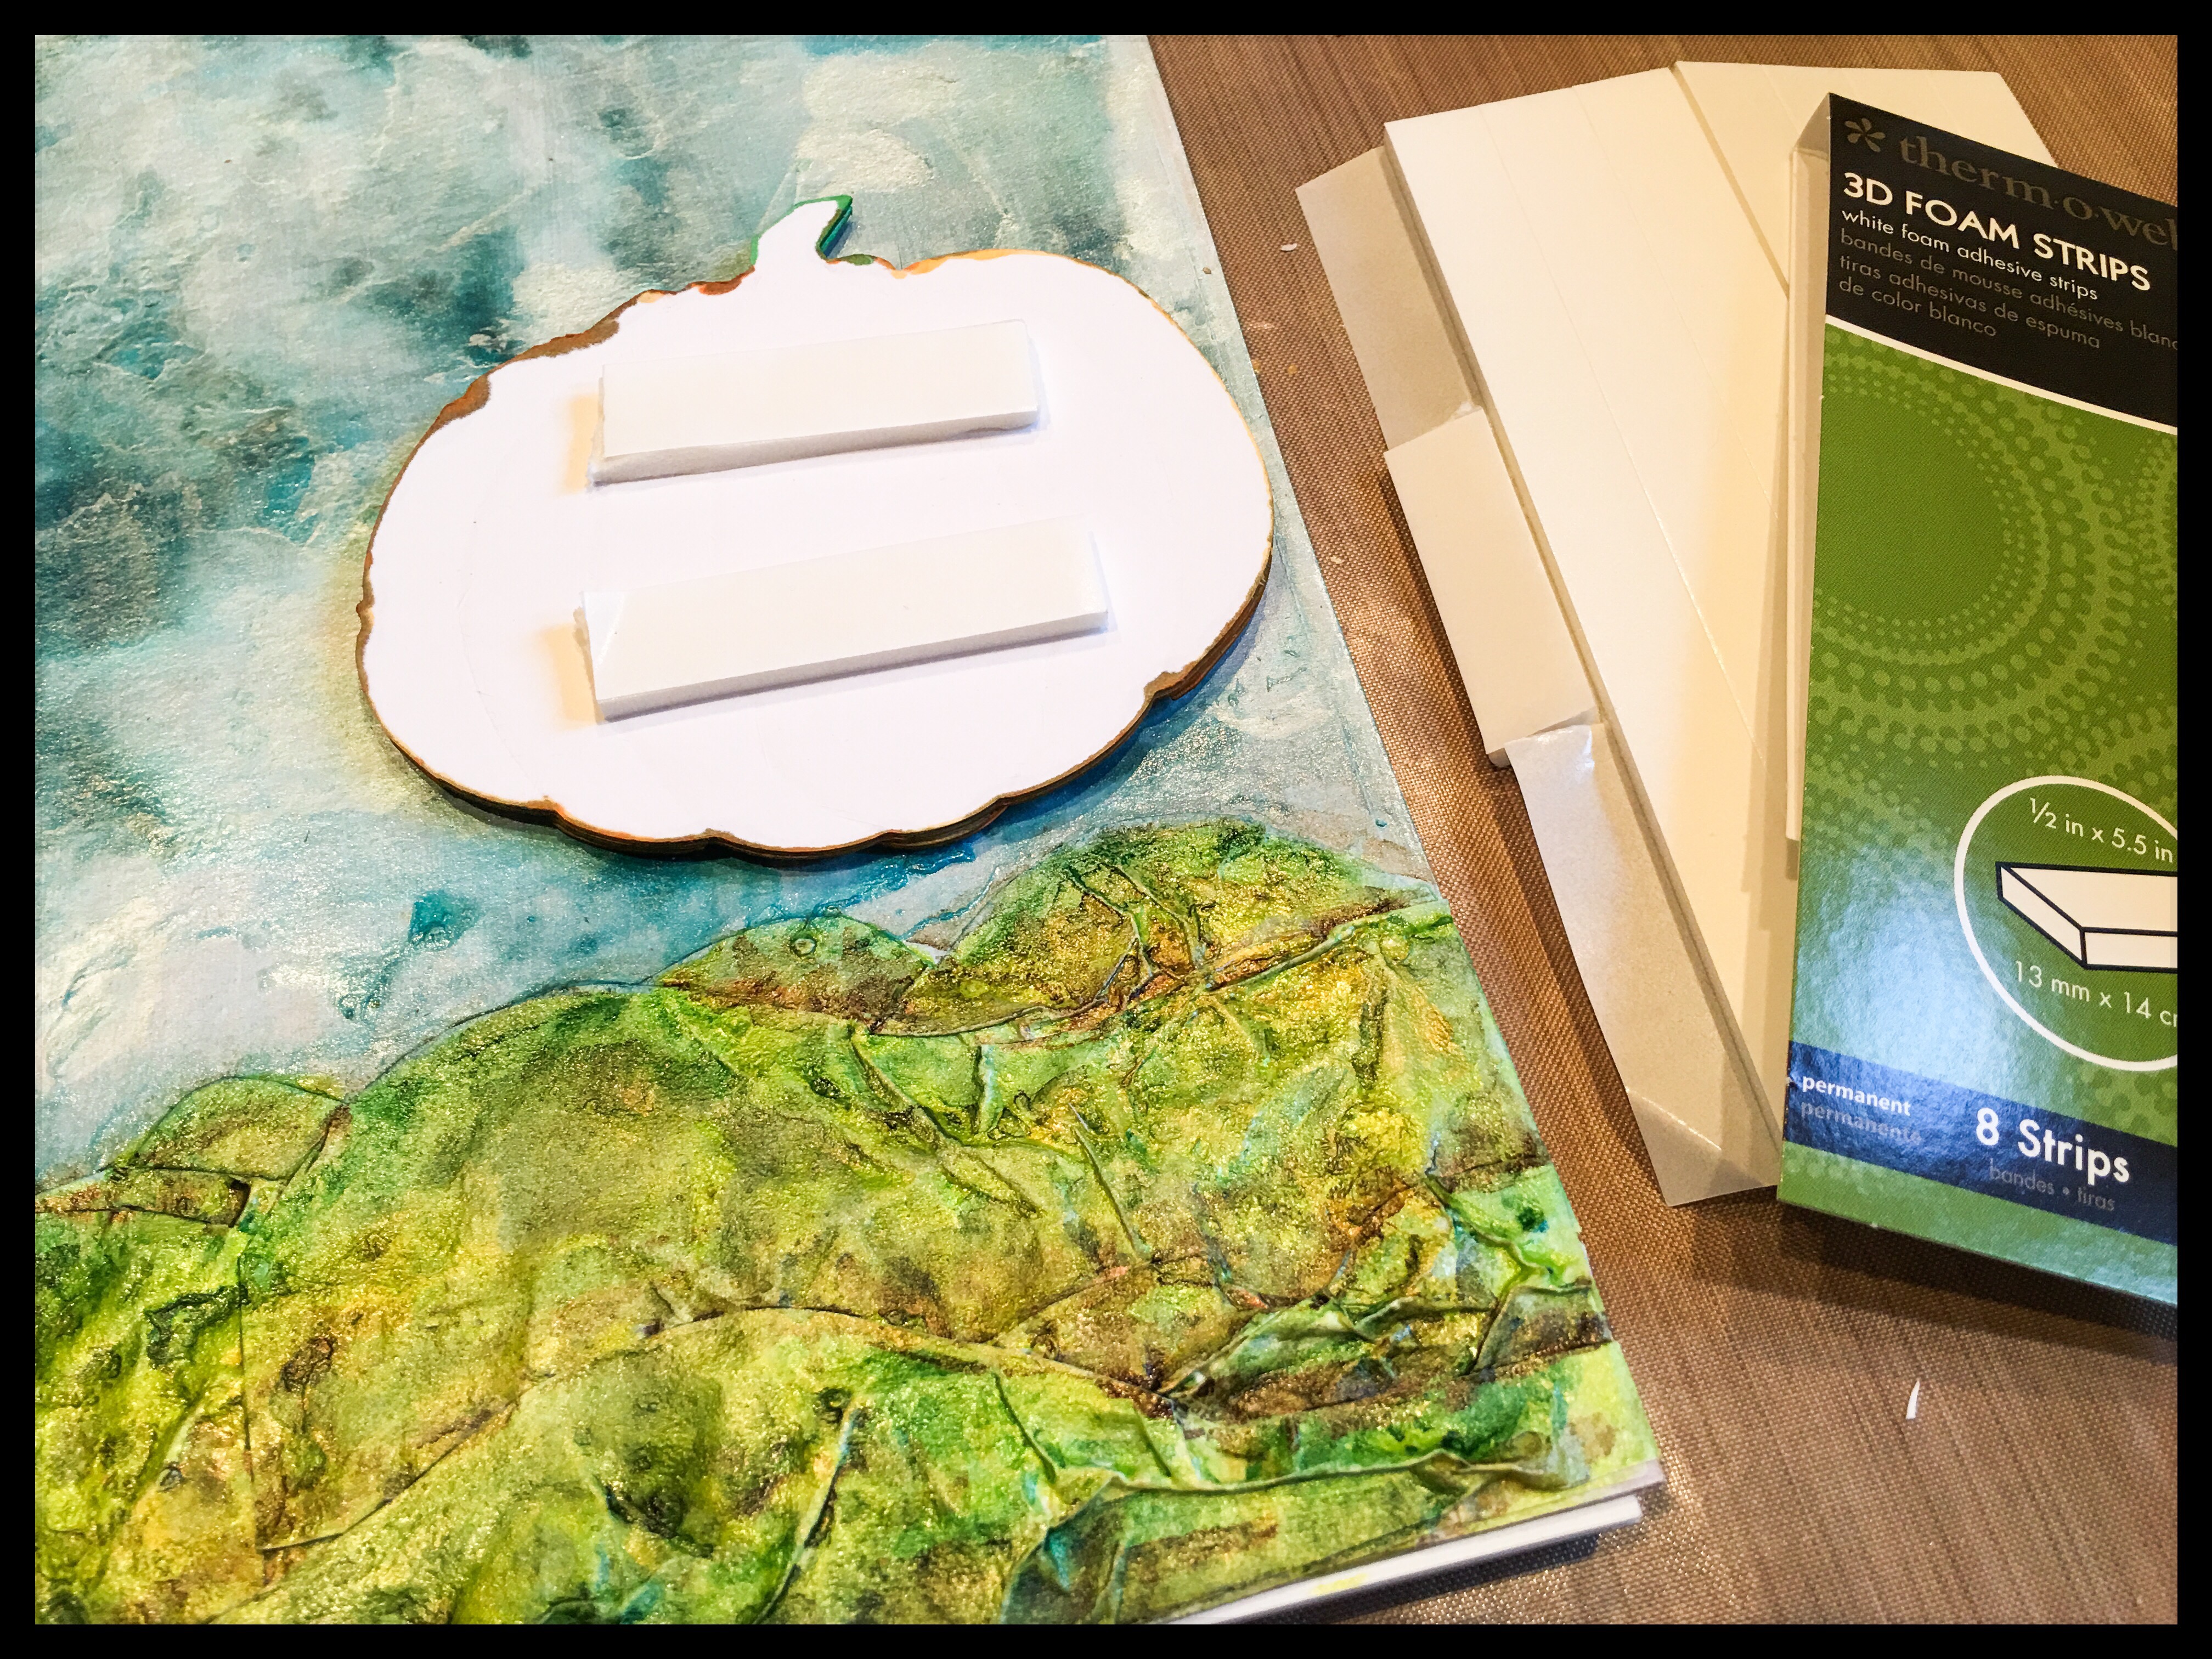
iCraft 3D White Foam Squares
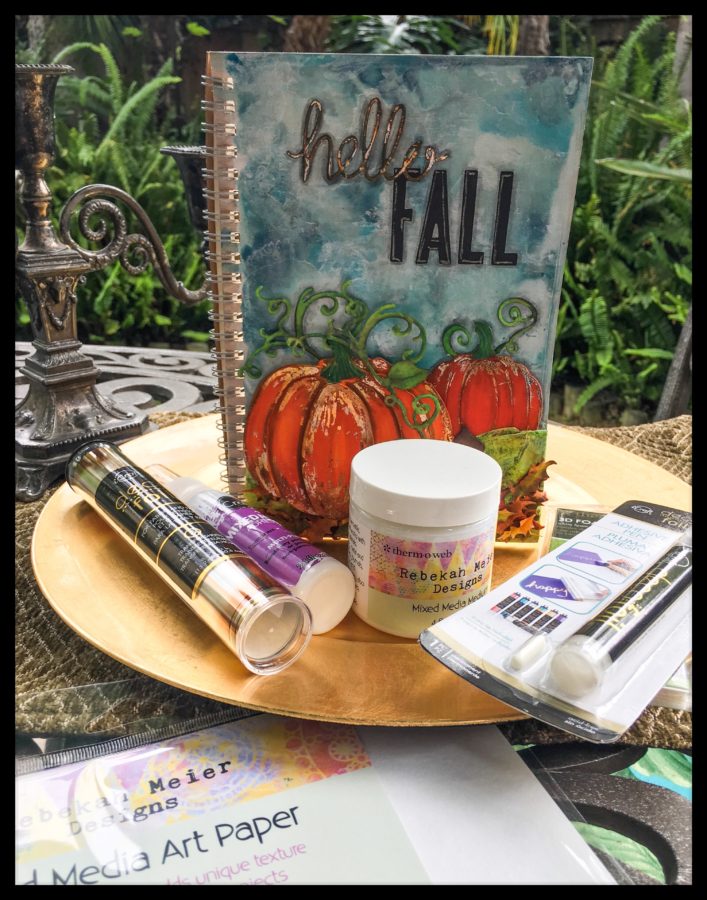
Other Supplies Used:
Sizzix Big Shot Die-Cutting Machine
Sizzix Bigz Die Pumpkin Parts by Tim Holtz
Sizzix Thinlits Die Set Holiday Greens by Tim Holtz
Sizzix Framelits Die Set Pumpkins
Sizzix 3-D Drop-ins Happy Thanksgiving by Stephanie Barnard
Sizzix Thinlits Die Set Butterflies and Flower Vine
Sizzix Framelits Mini Step-Up Die Set Oh Happy Day by Stephanie Barnard
Sizzix Thinlits Die Set Alphanumeric by Tim Holtz
Journal
White Gesso
Watercolor or Acrylic Paints / Brushes
Perfect Pearls
Alcohol Markers
Distress Marker – Hickory Smoke
Distress Ink – Rusty Hinge and Walnut Stain
Heat Tool
Spritzer
Scissors
Craft Mat
Hello Fall Mixed Media Journal Instructions
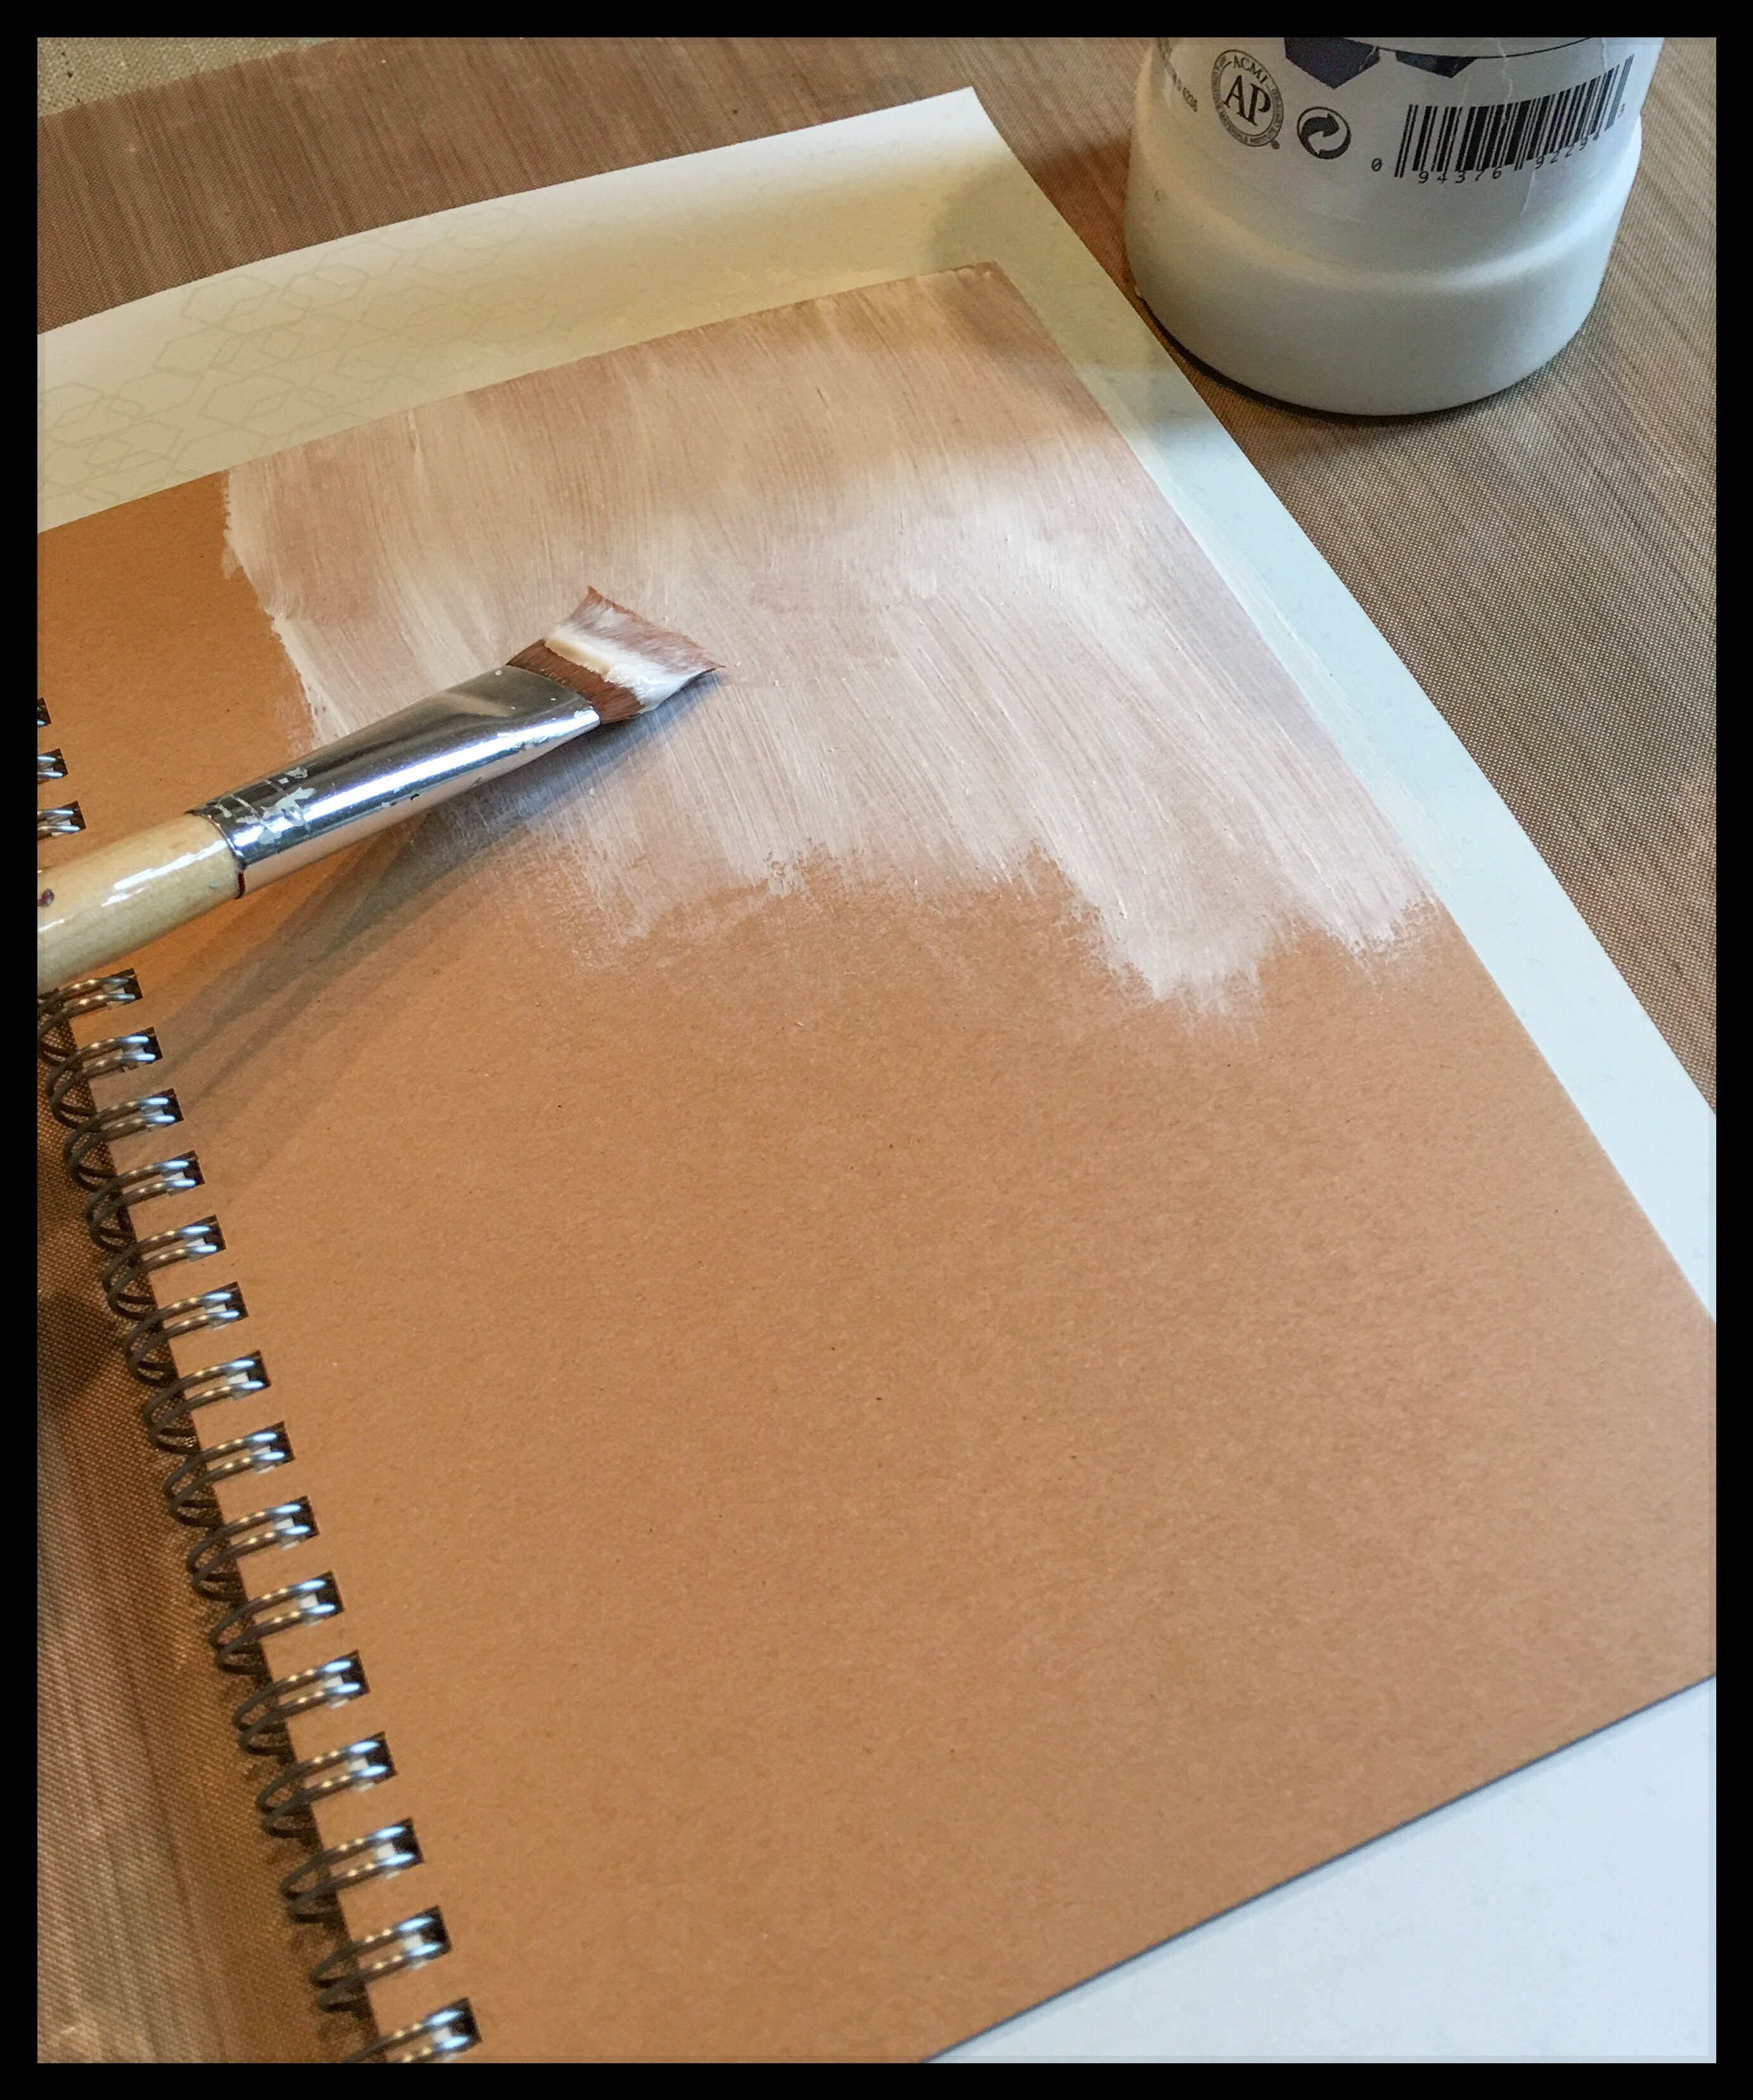
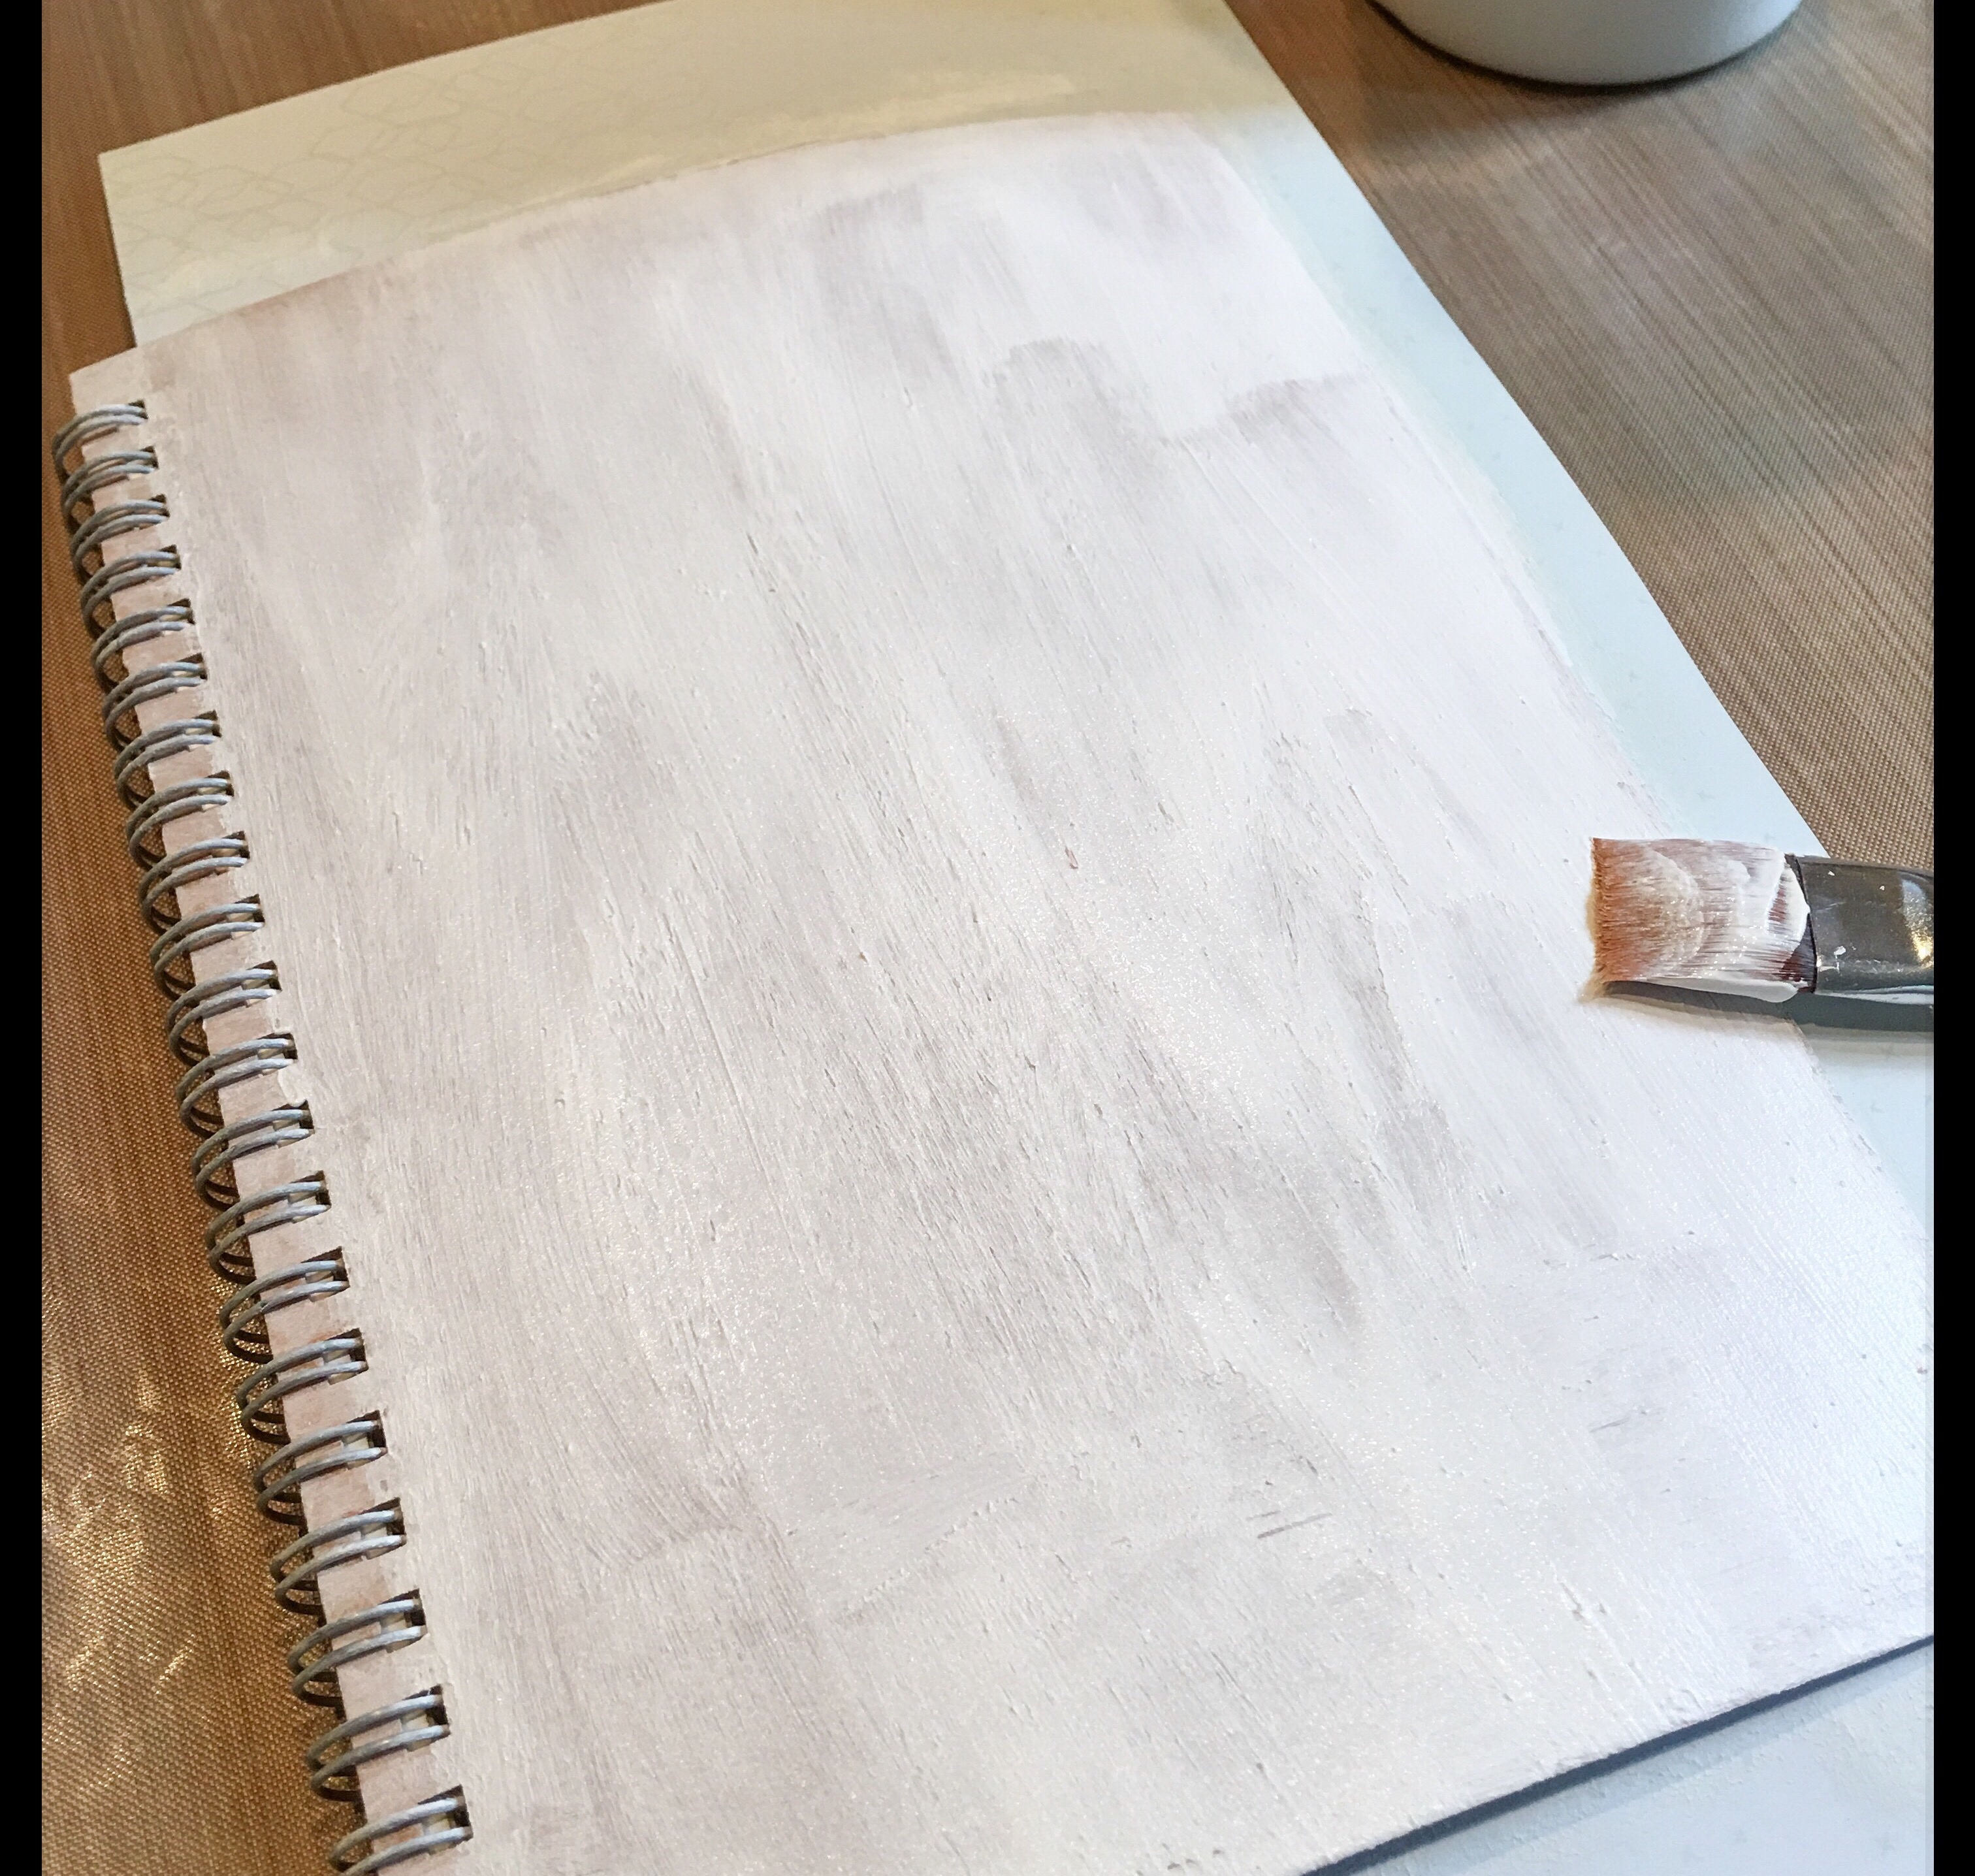
Begin by applying a coat of white gesso to your journal cover. I ended up applying two coats so that it was fairly opaque.
Hint: If you don’t have any gesso on-hand, use white acrylic paint.
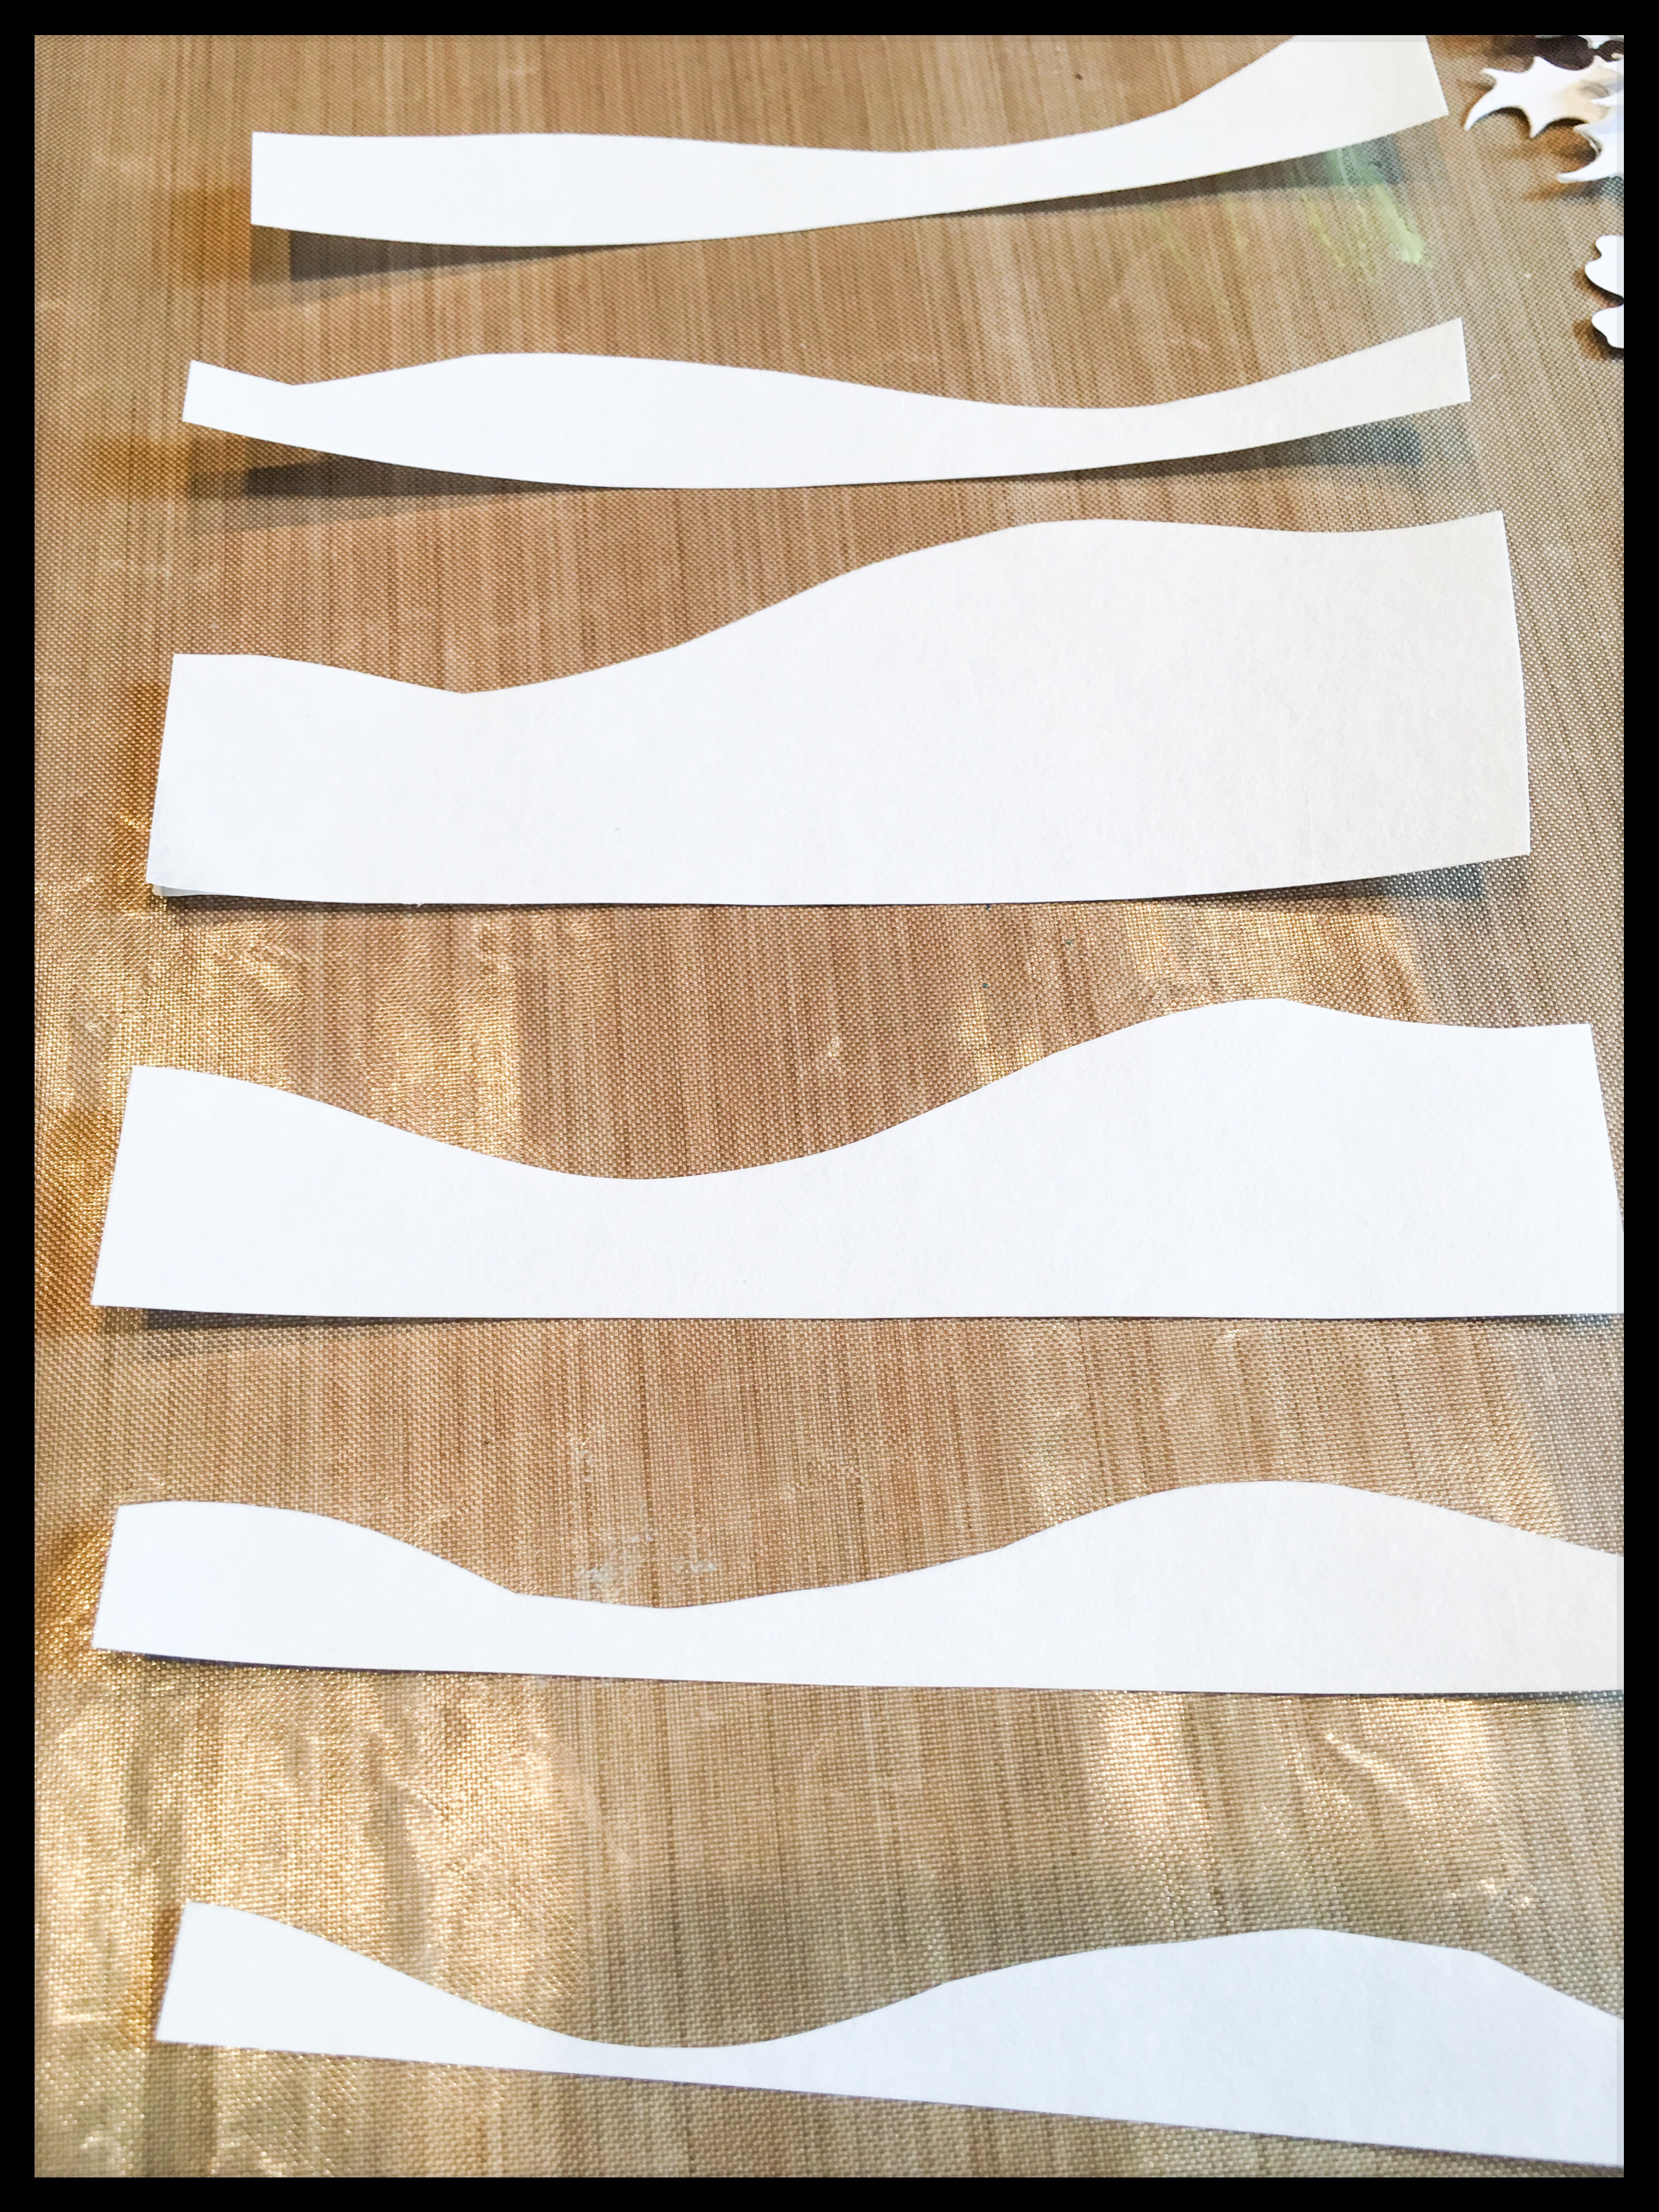
Create hills from Mixed Media Sheets – Light Weight by cutting strips and then trimming the top of each strip into a hillside-ish shape.
Hint: Use a hillside die for this step if you have one in your stash
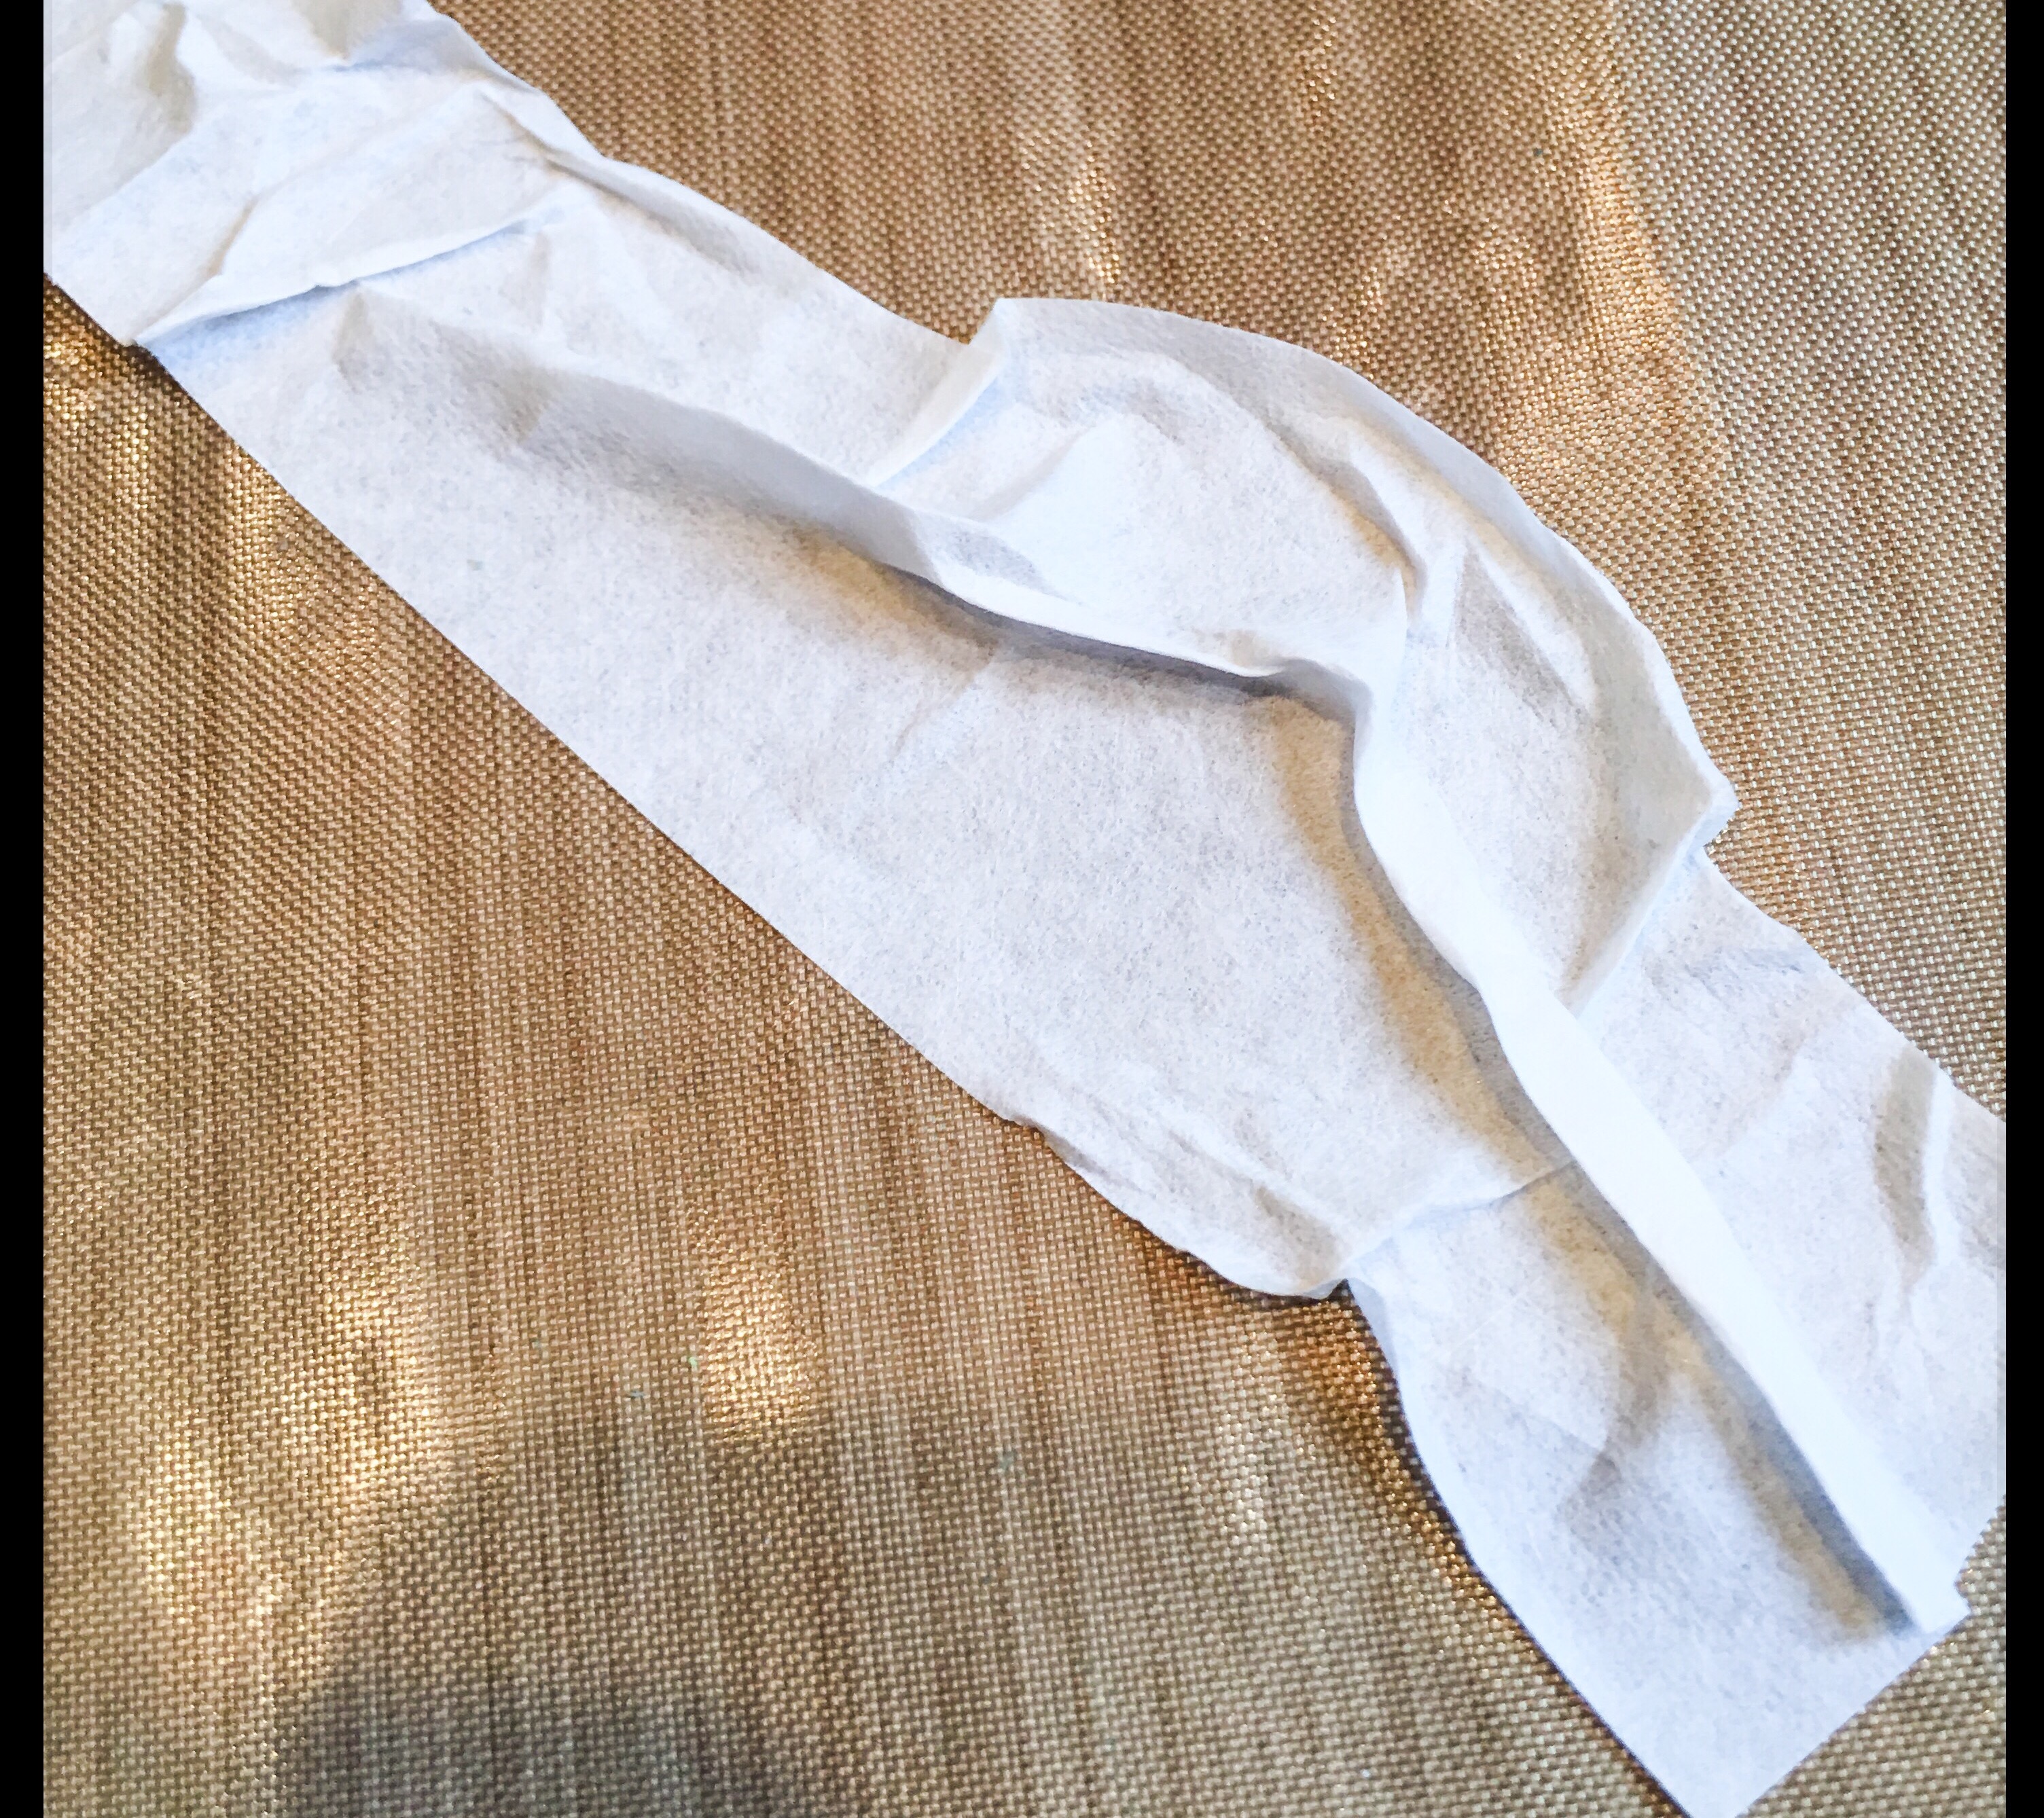
Peel the release paper from the Mixed Media Sheet strips to reveal the self-adhesive backing. Stick the hill side pieces to your craft mat and crinkle them up a bit. Once you have given the hillsides a bit of a shape, remove them from the craft mat and layer them onto your journal cover.
Hint: If you do not have a craft mat or other non-stick surface, you may want to do this step directly on the journal front.
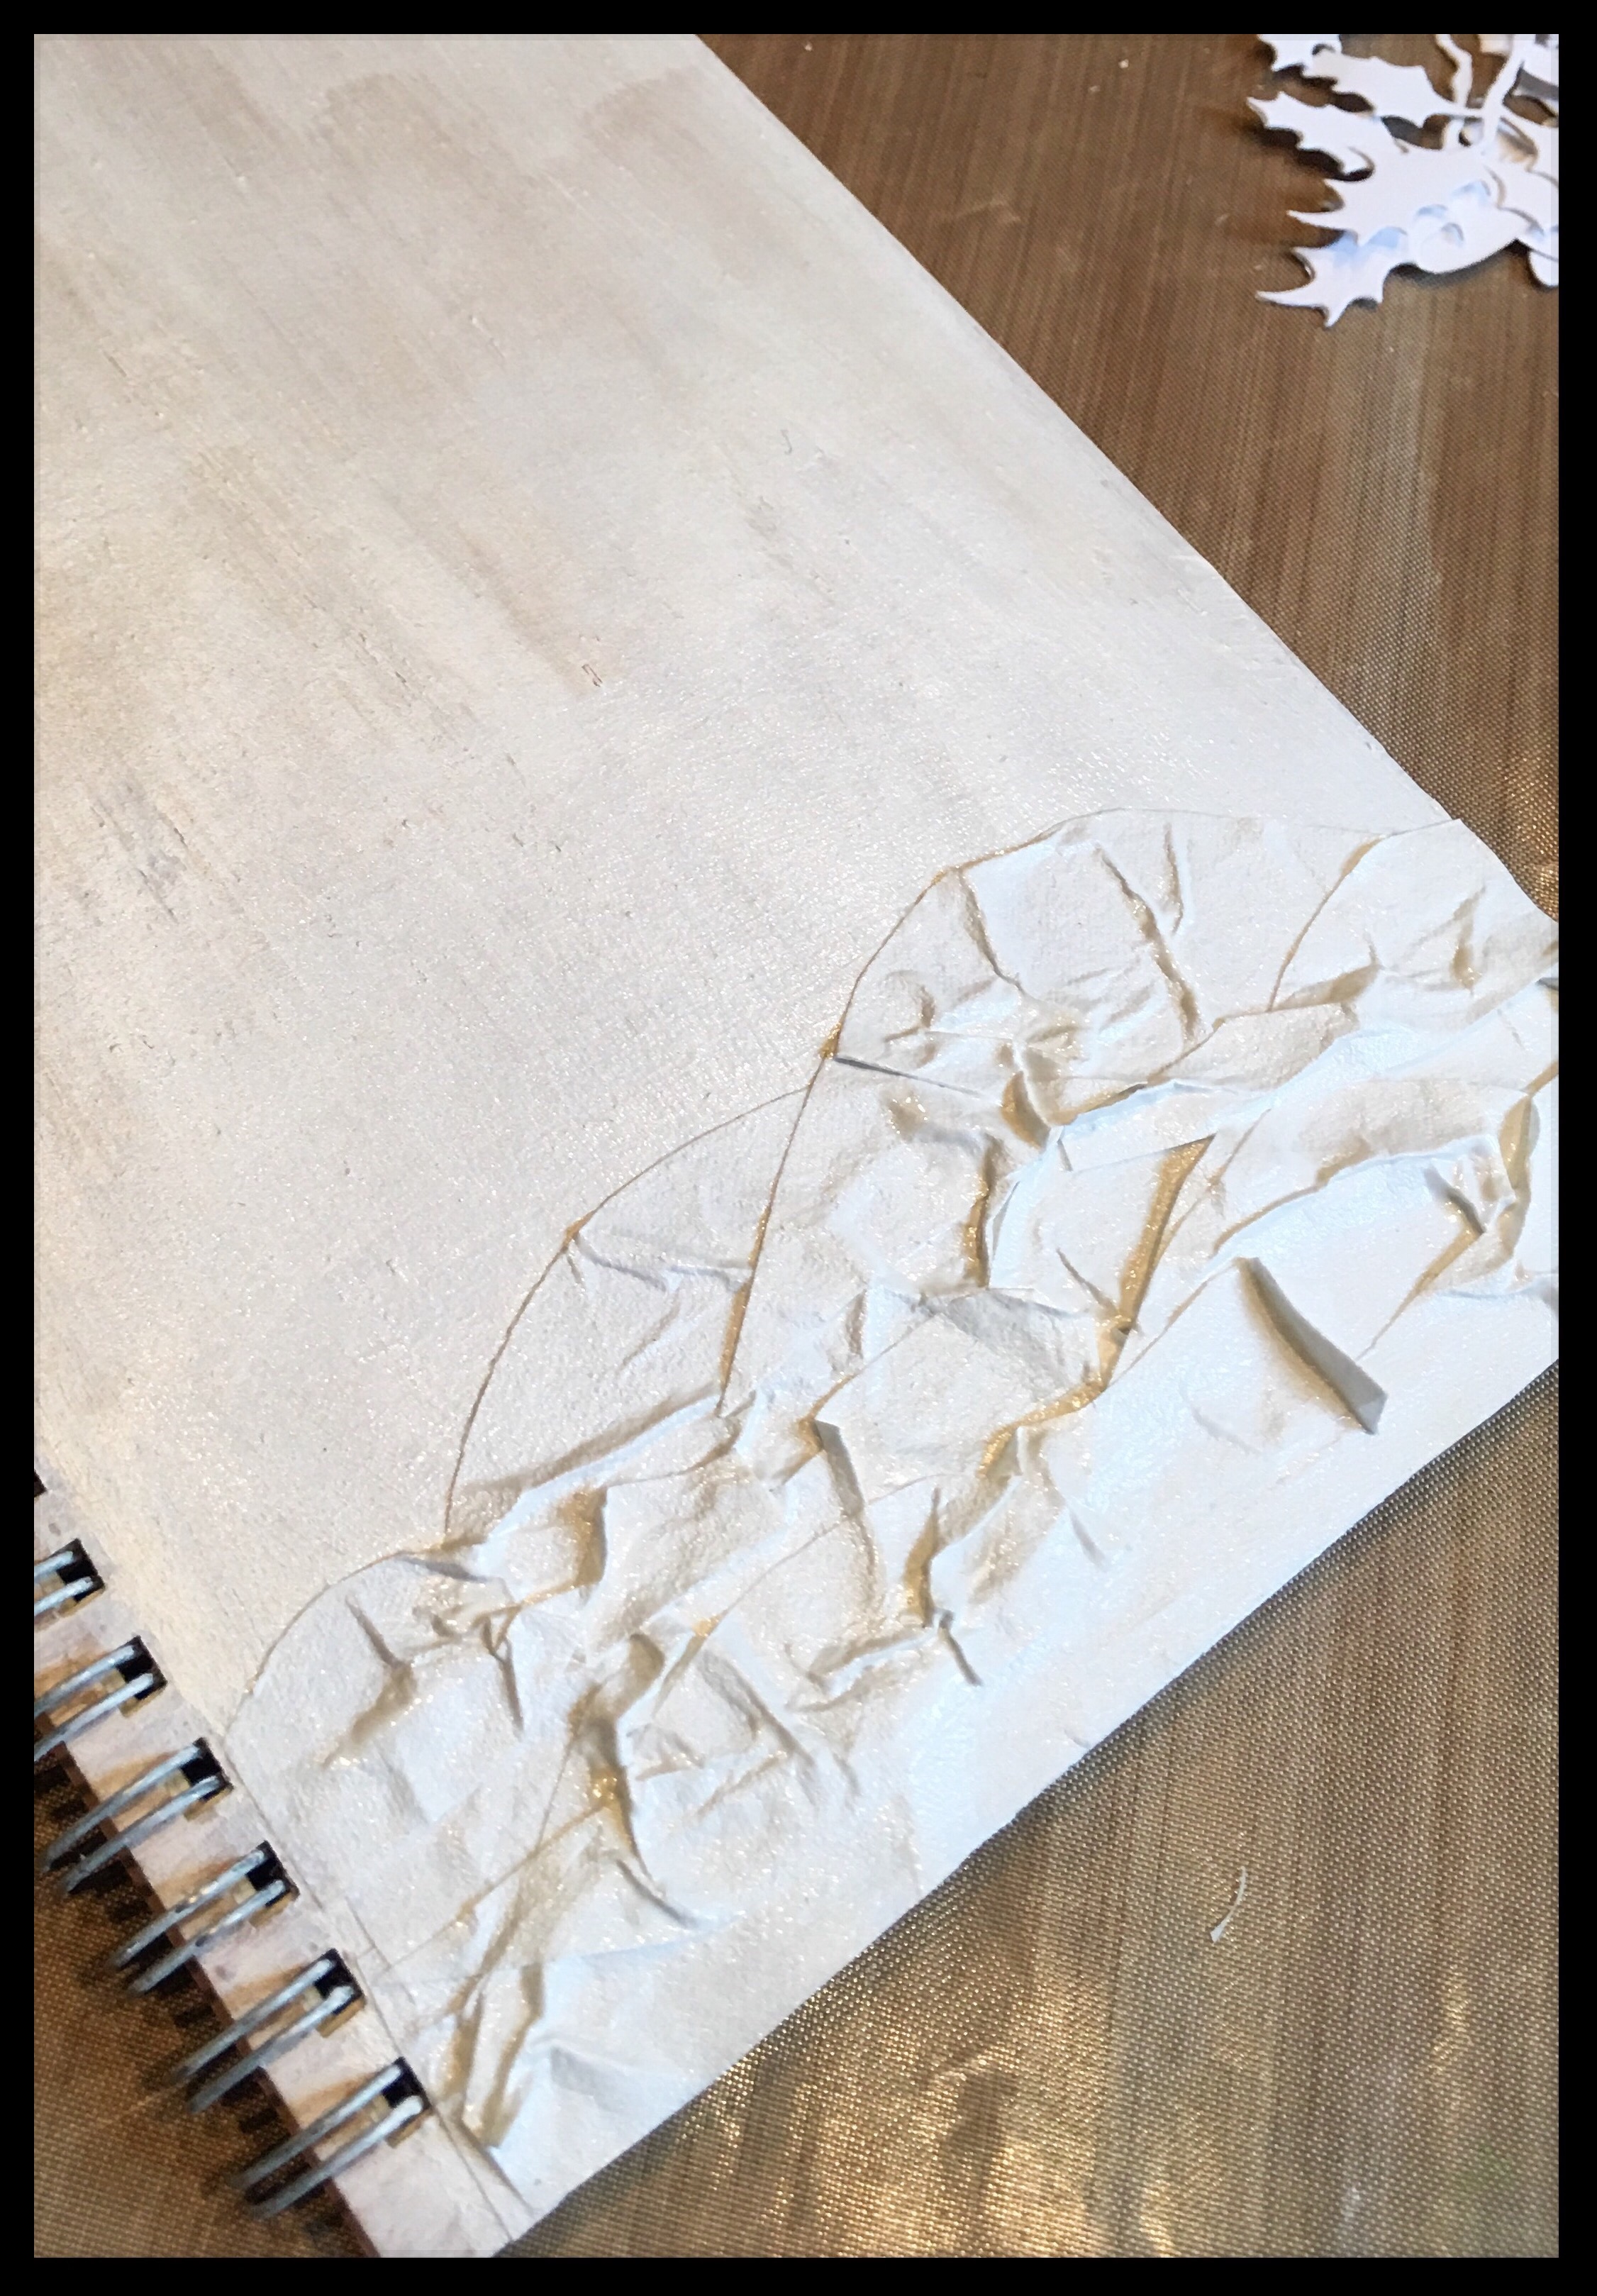
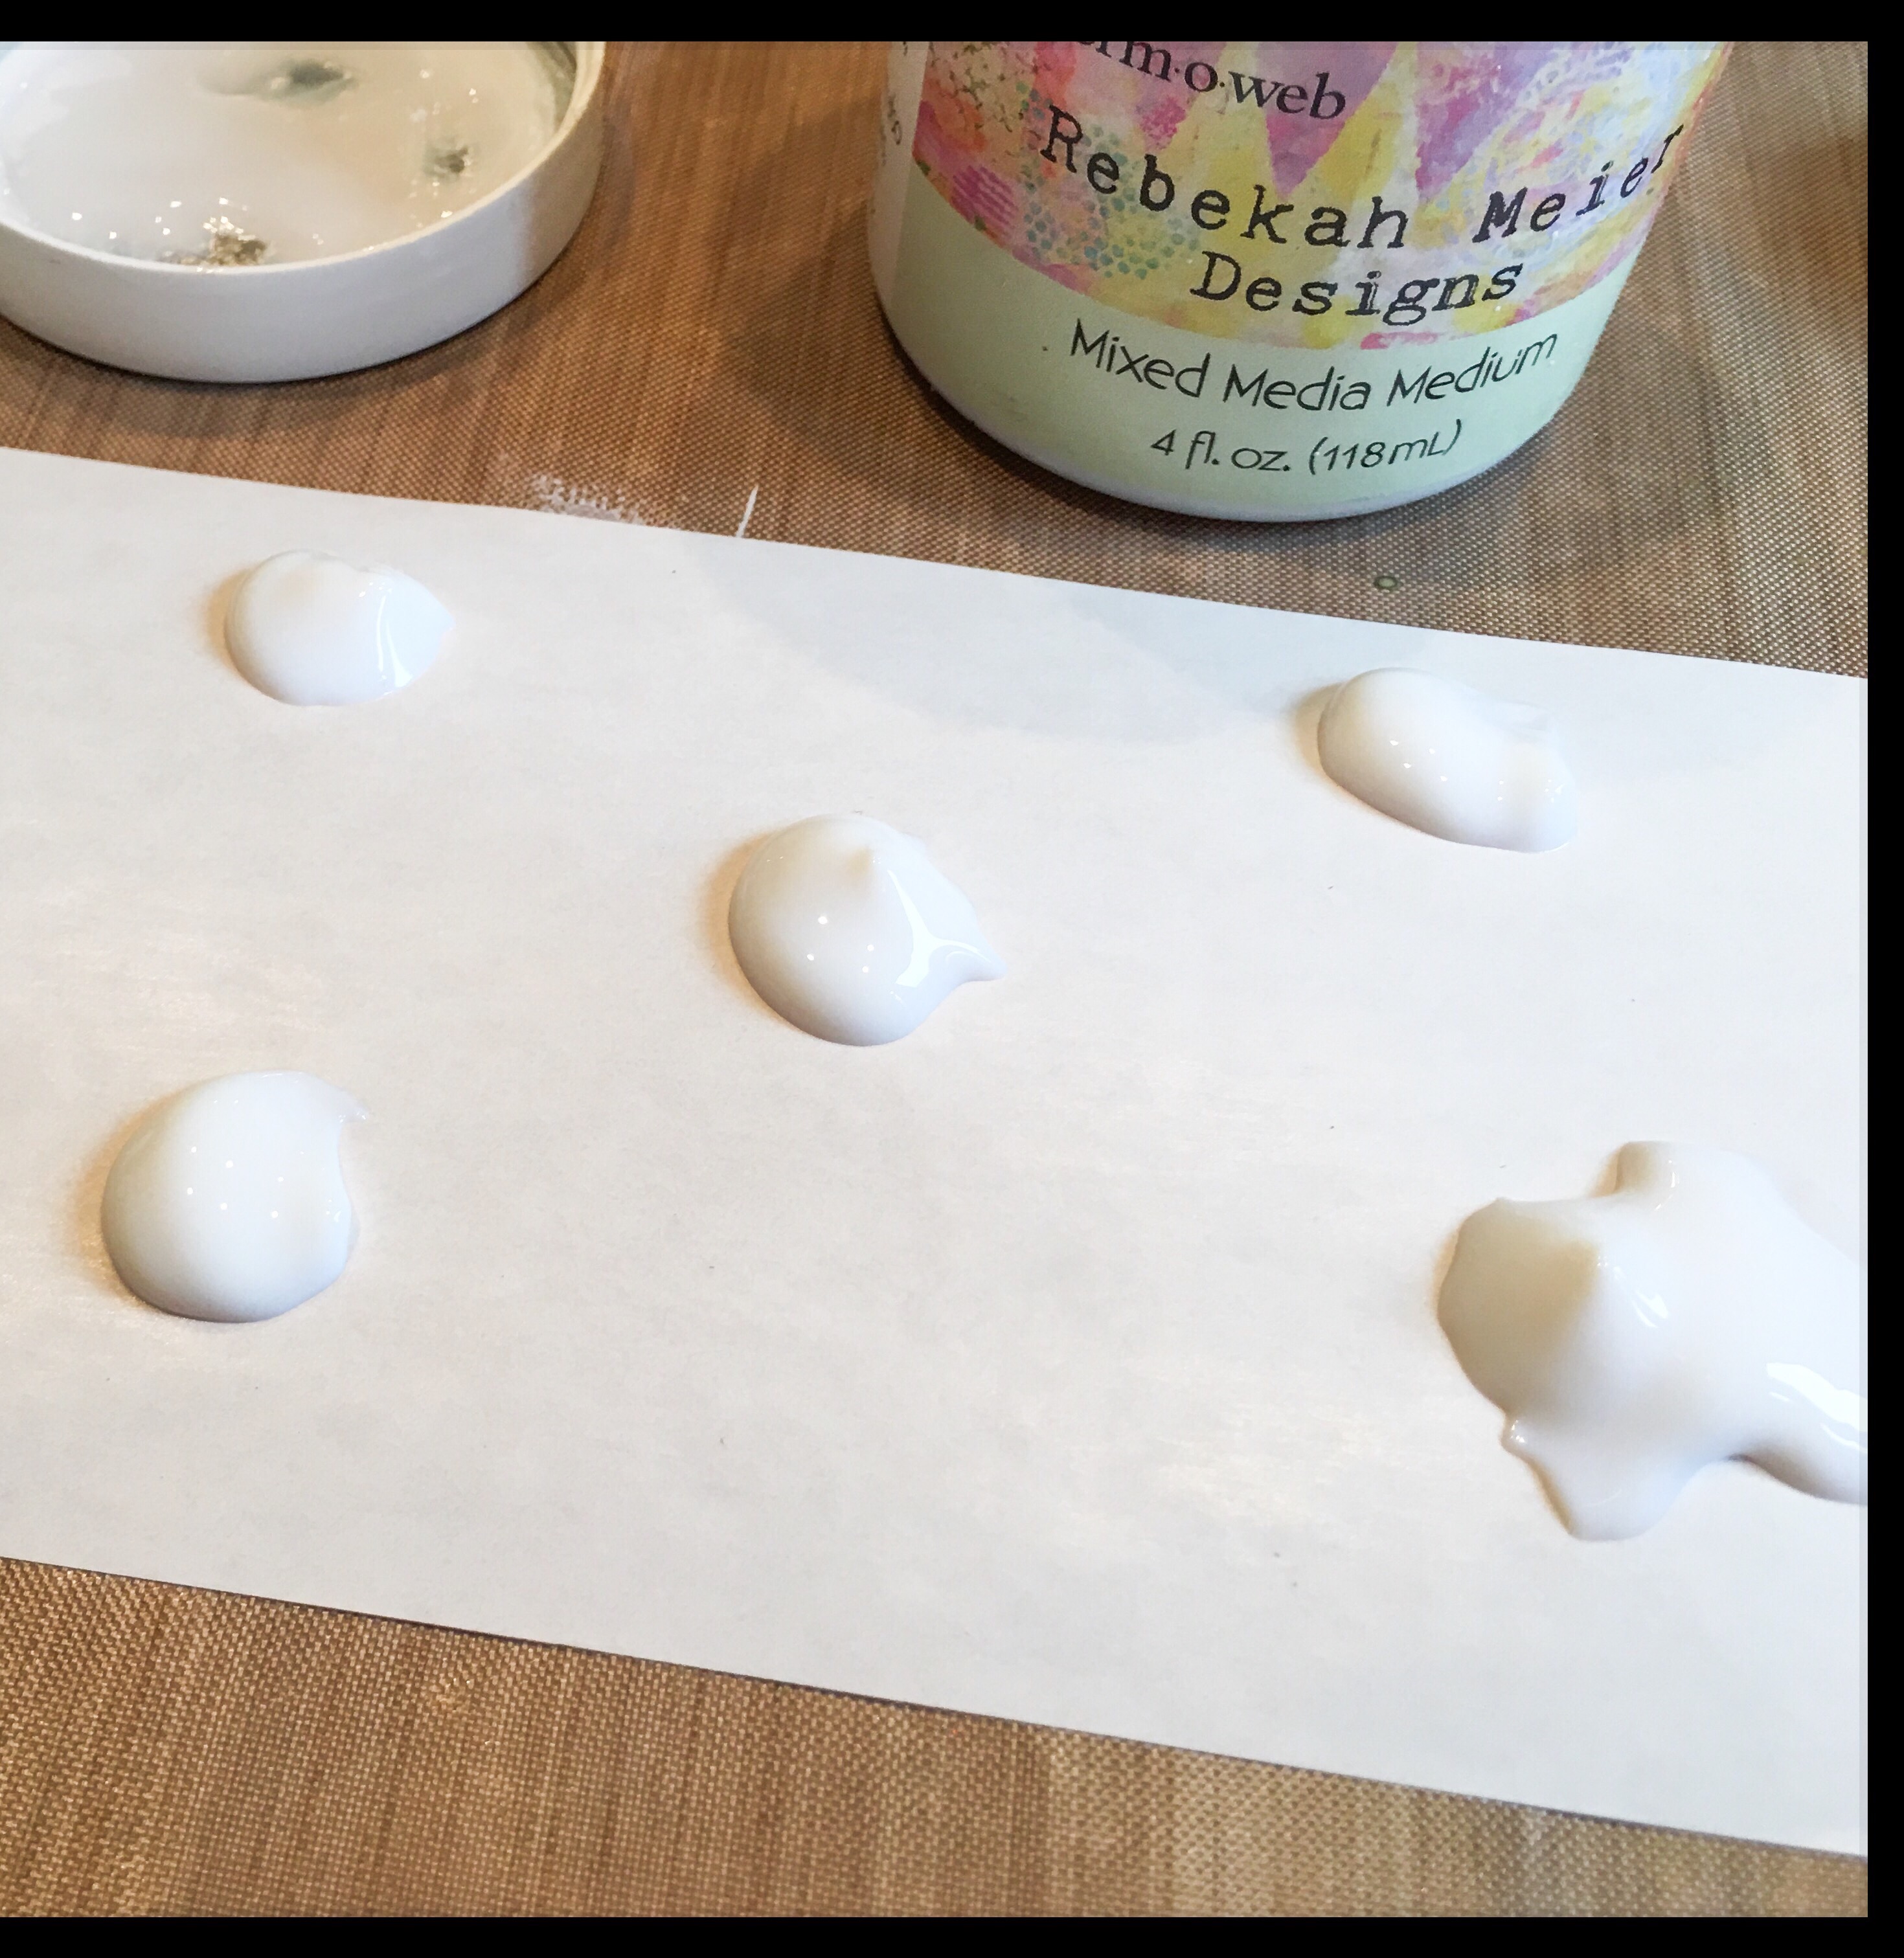
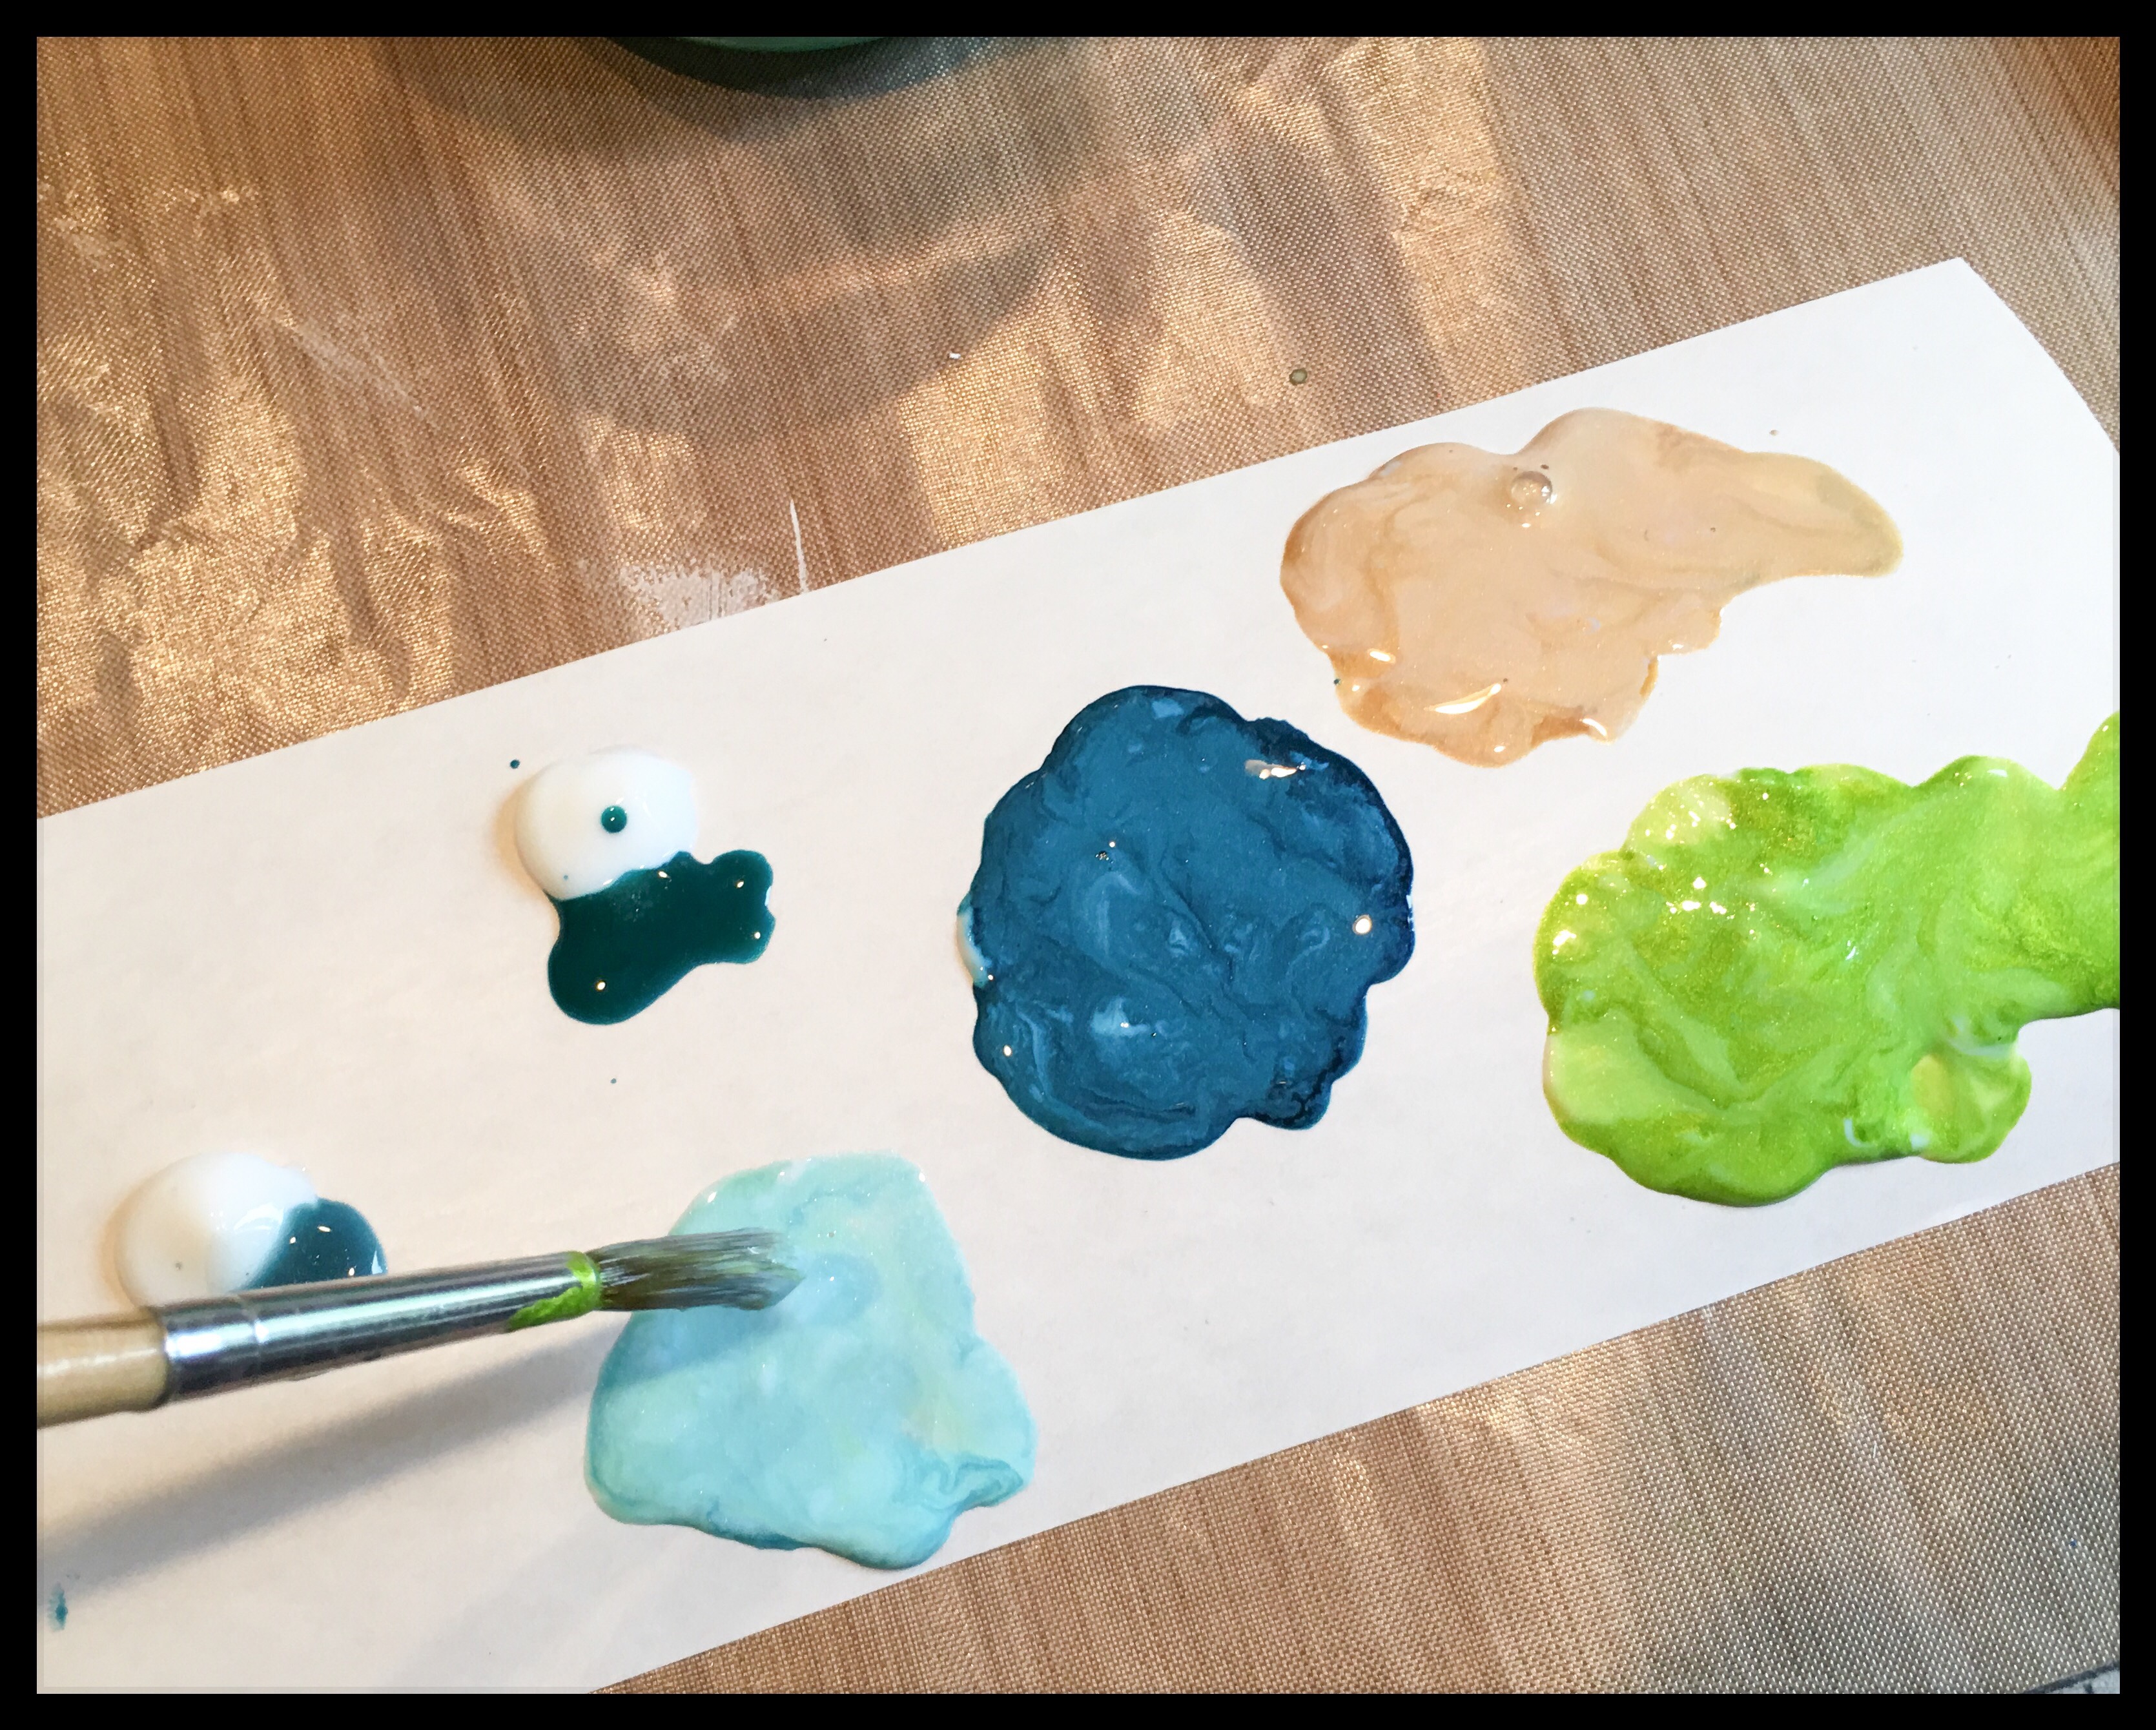
Next, we are going to add some color to our journal cover. I find that the mediums I enjoy work with the most tend to be water soluble and therefore difficult to use as a base in a mixed media project because when you apply your next layer, the first layer bleeds or smears. To get around this without having to apply a sealer between each layer, I mixed my color into the Mixed Media Medium. Once the color is dry it becomes waterproof, but while you are using it there is still plenty of movement.
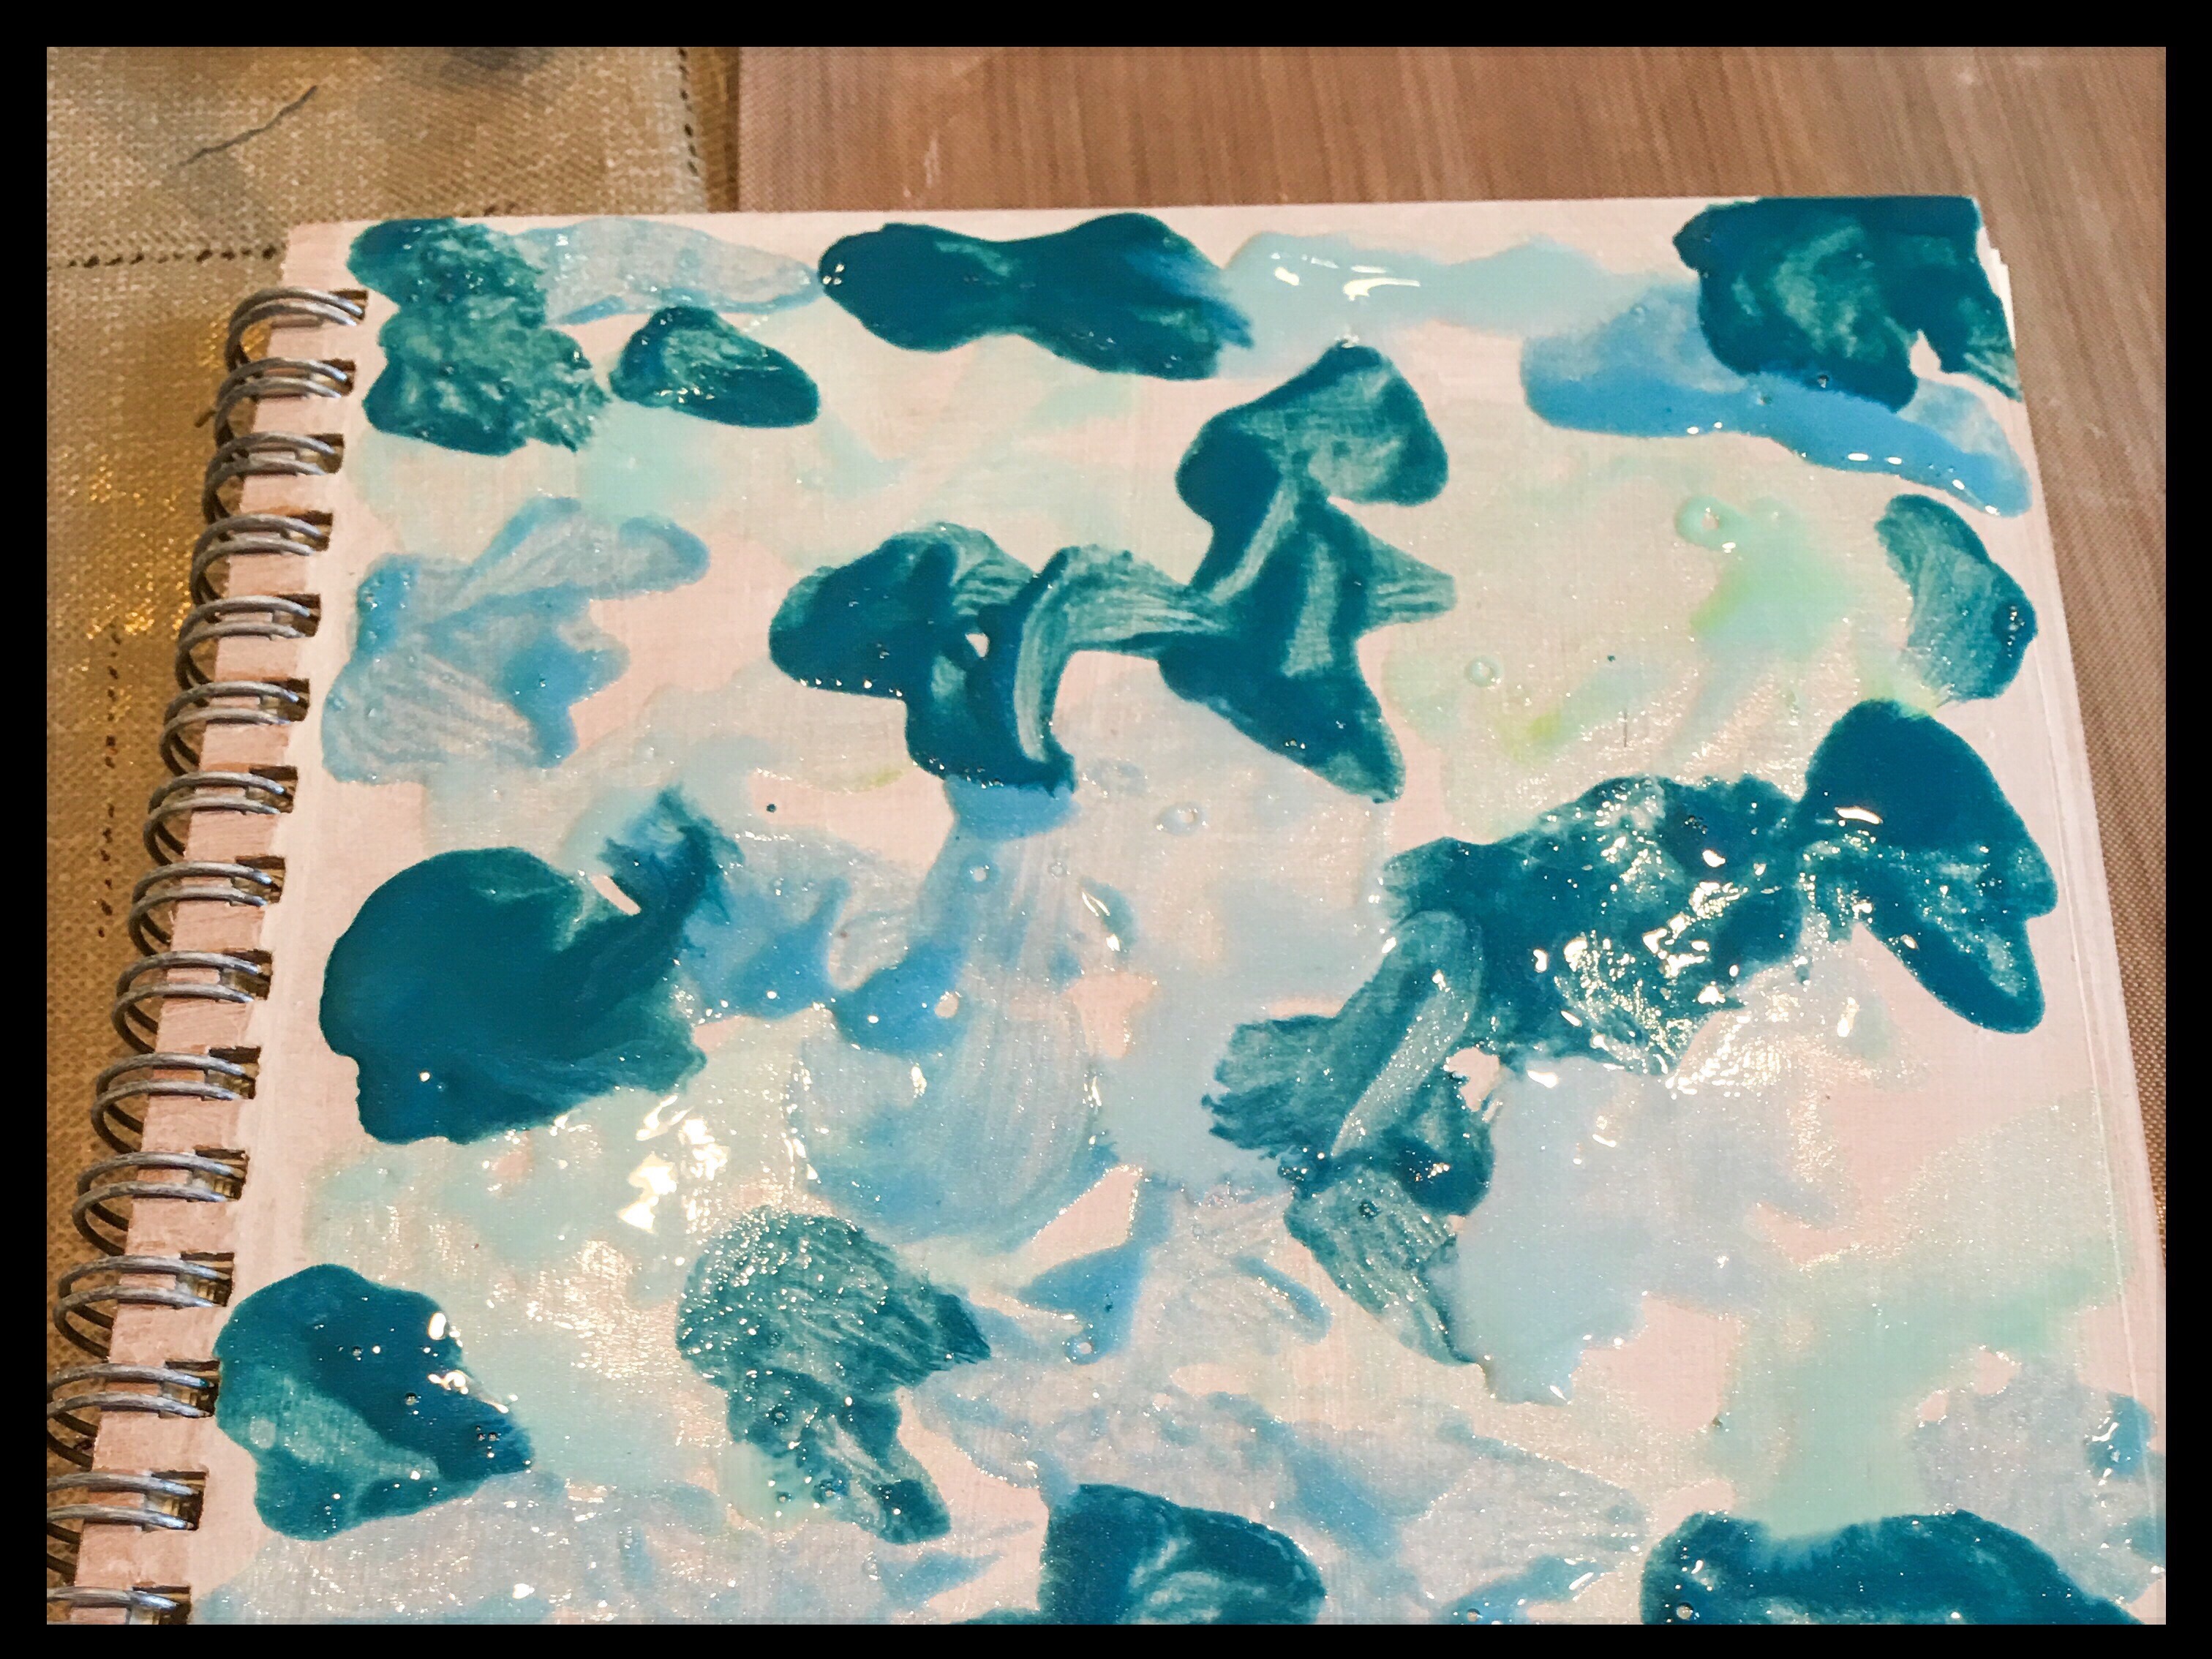
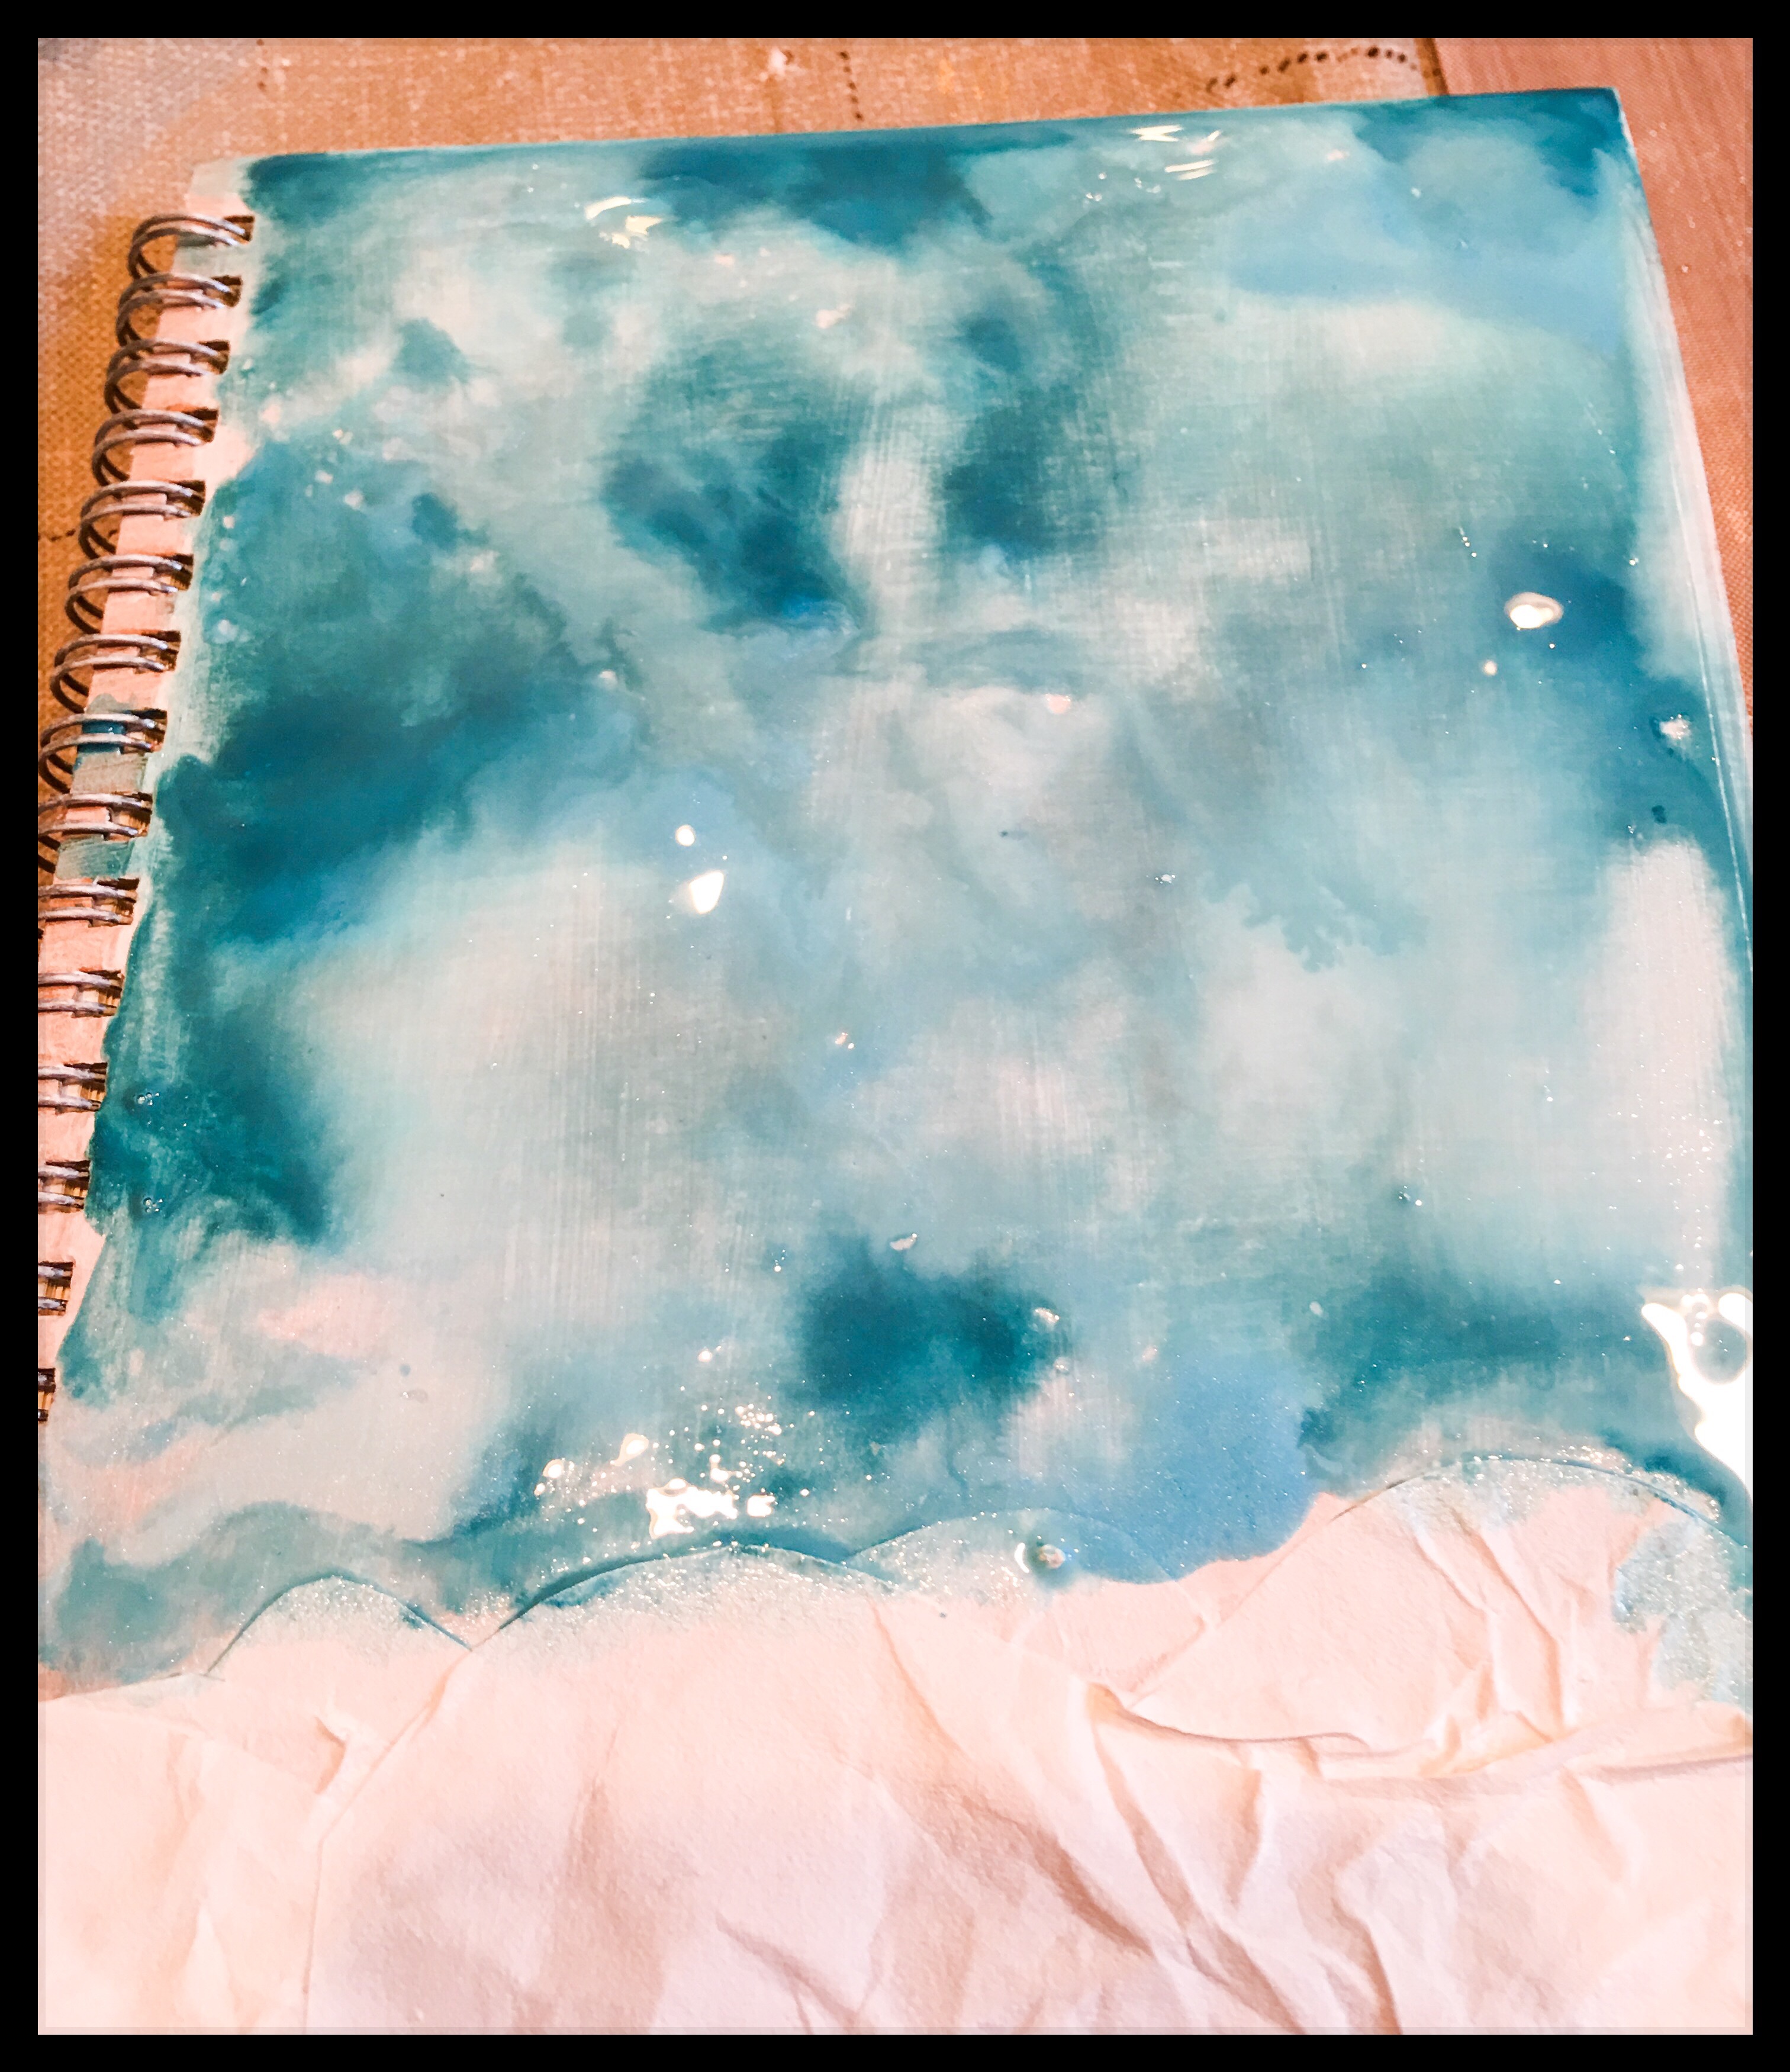
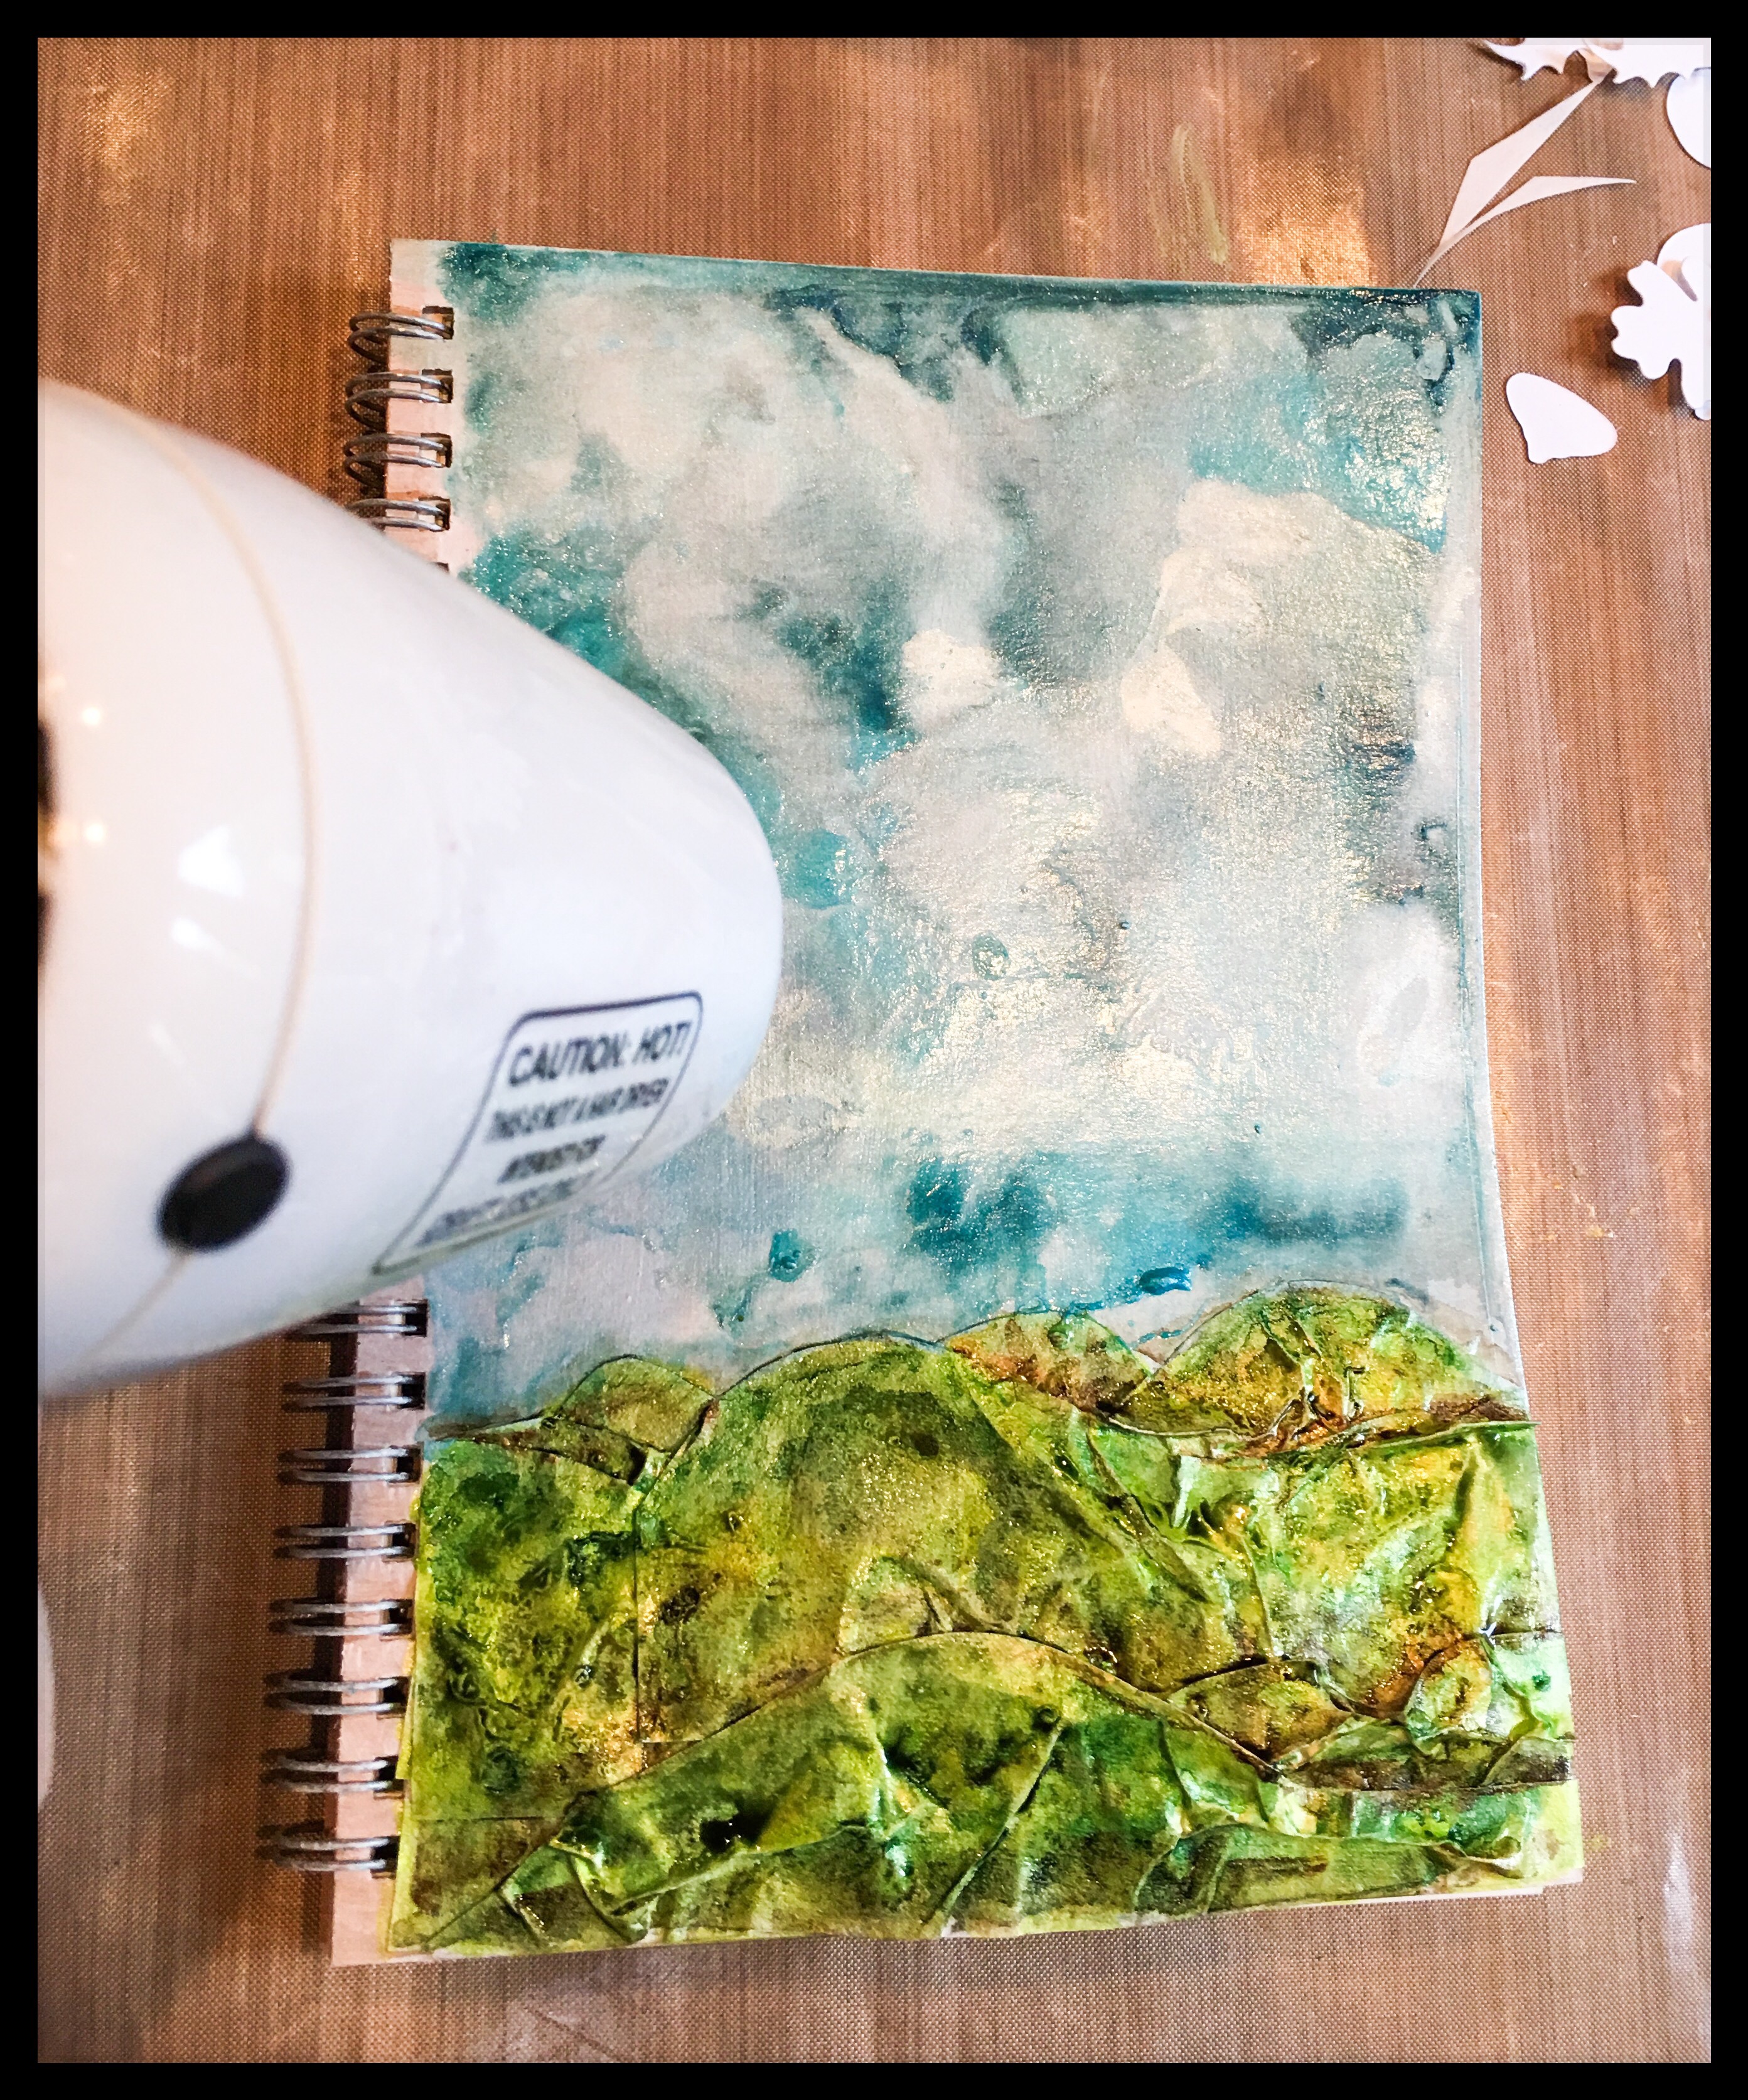
Apply splotches of color to the sky area of your journal cover (I used varying shades of blue). Once you have covered the area, spritz the paint with water and tip the journal to create a bit of movement. Once you are happy with your sky, set the color with a heat tool or allow to dry completely. Repeat this process using greens and browns for your hillsides.
Hint: Create a small palette on a piece of release paper or craft mat and mix in drops of color. I mixed a bit of Perfect Pearls into my paint as well to give it a shimmer.
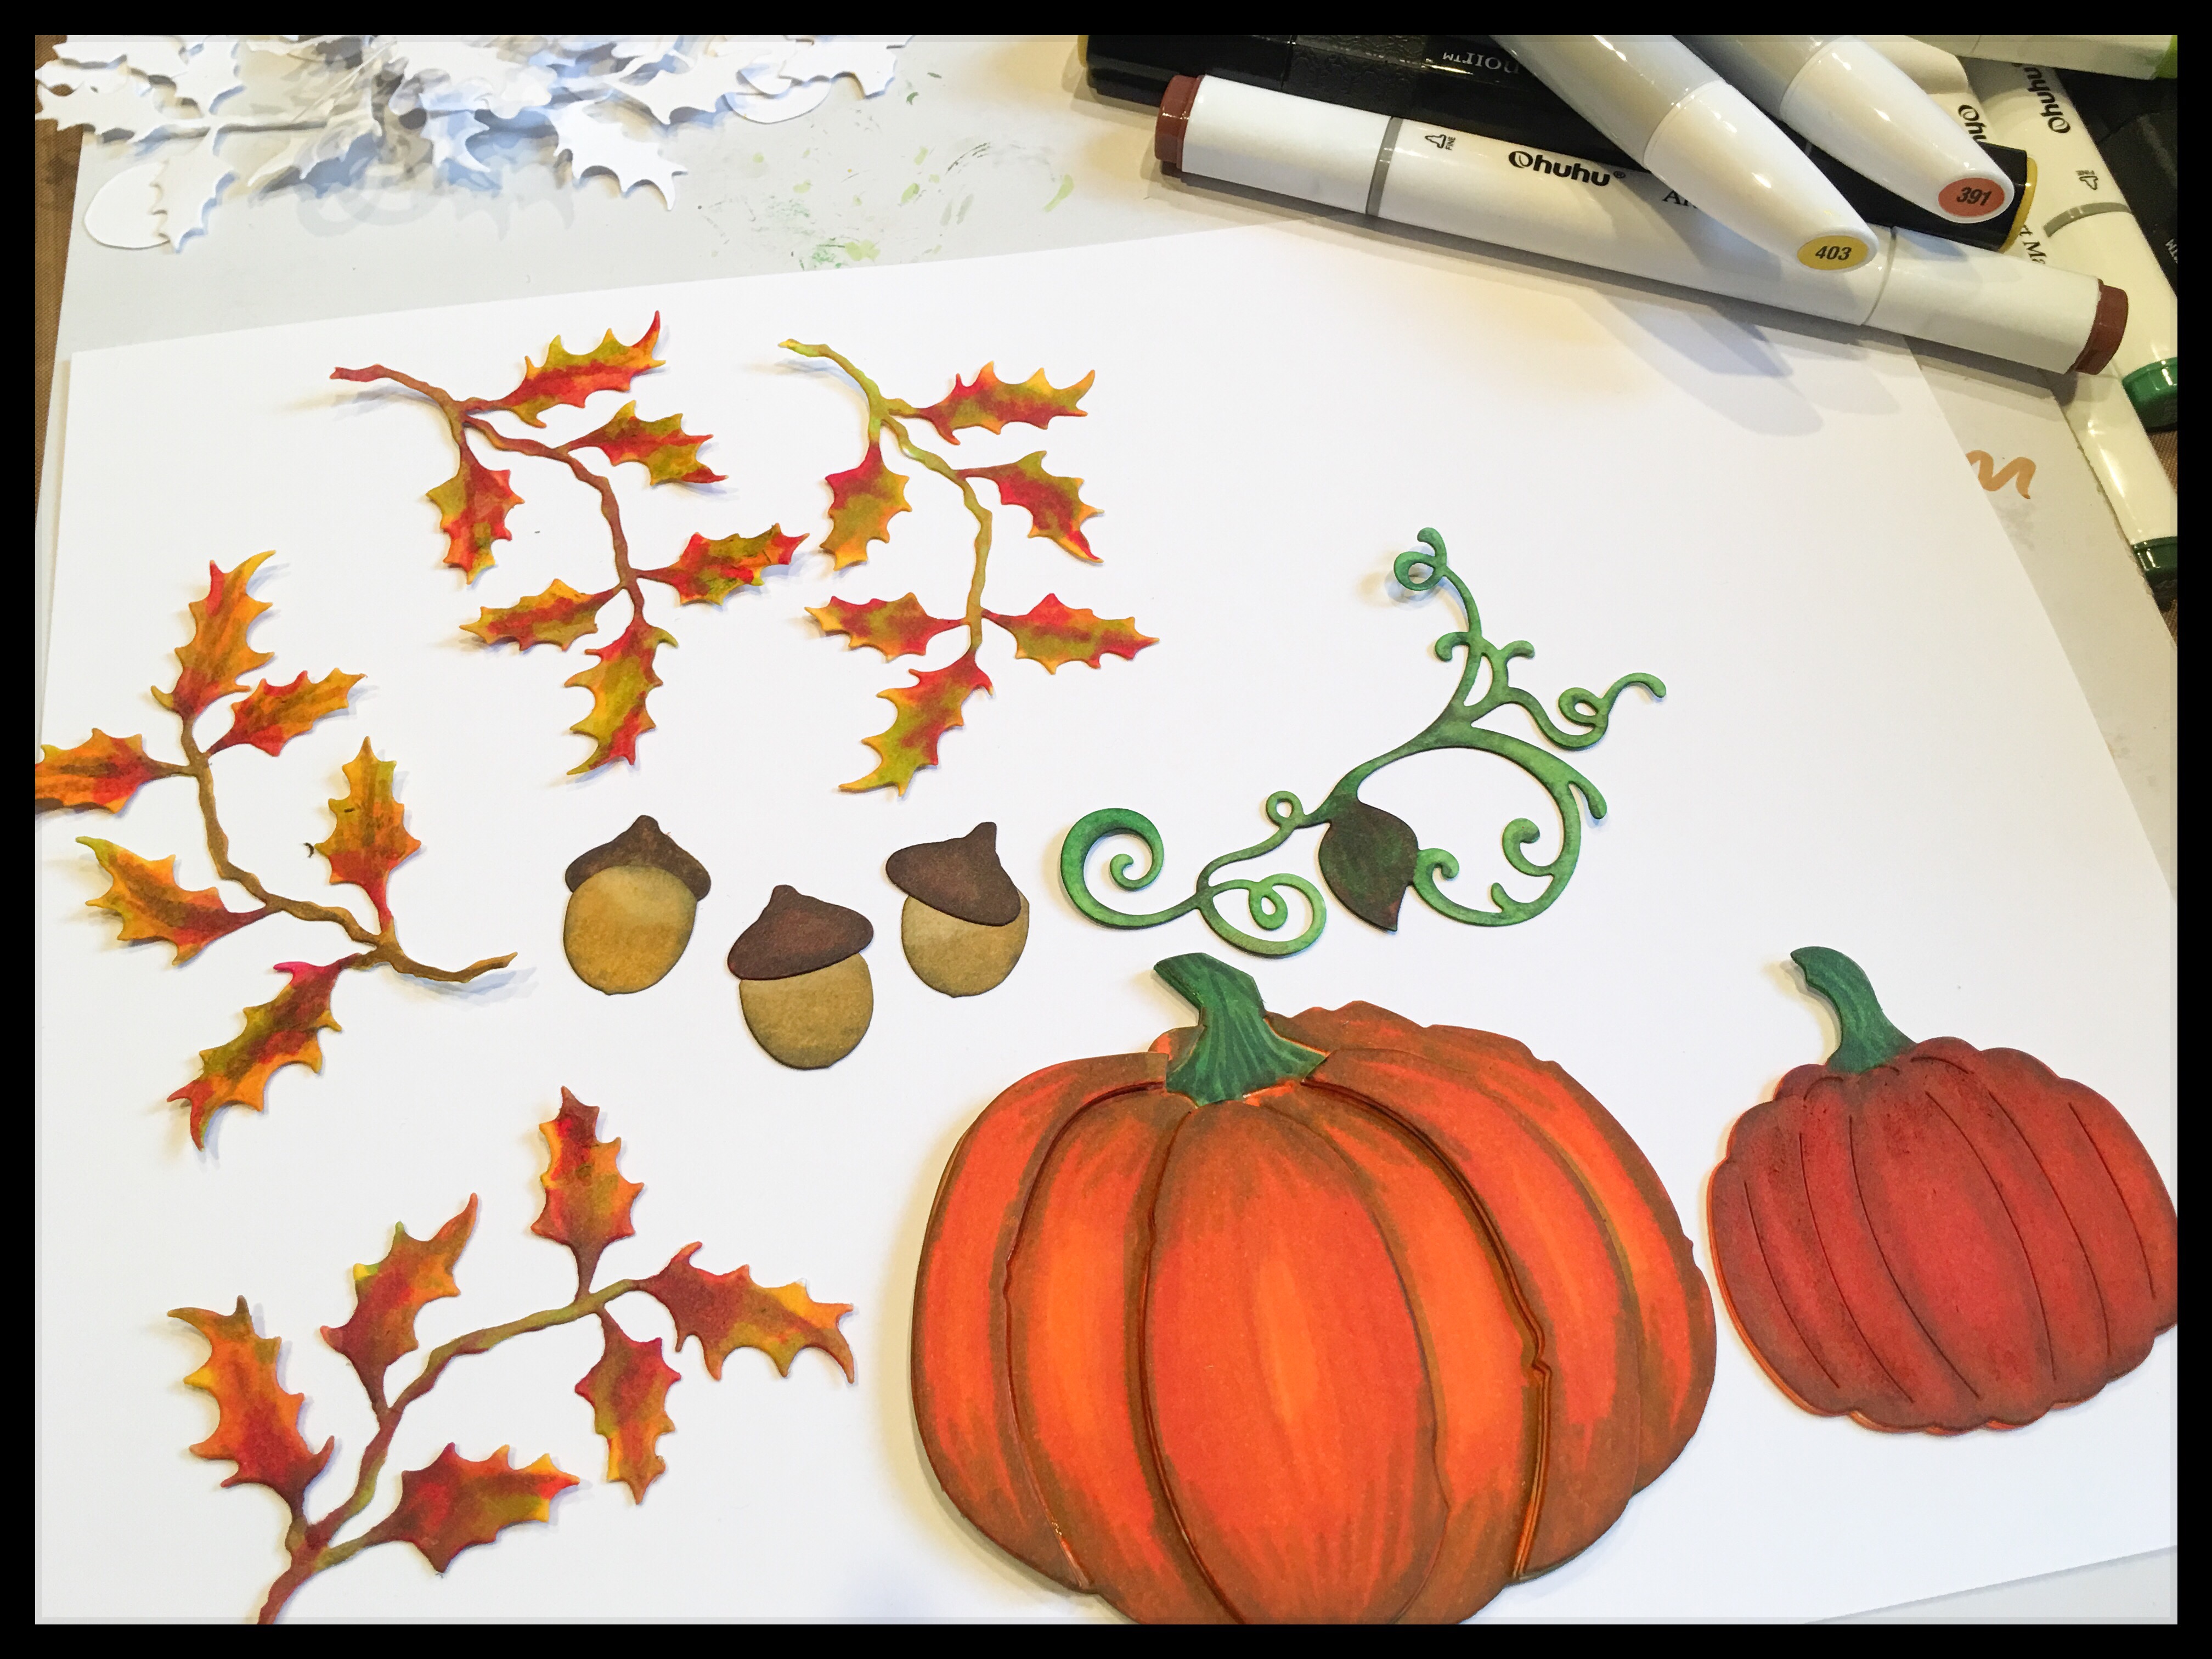
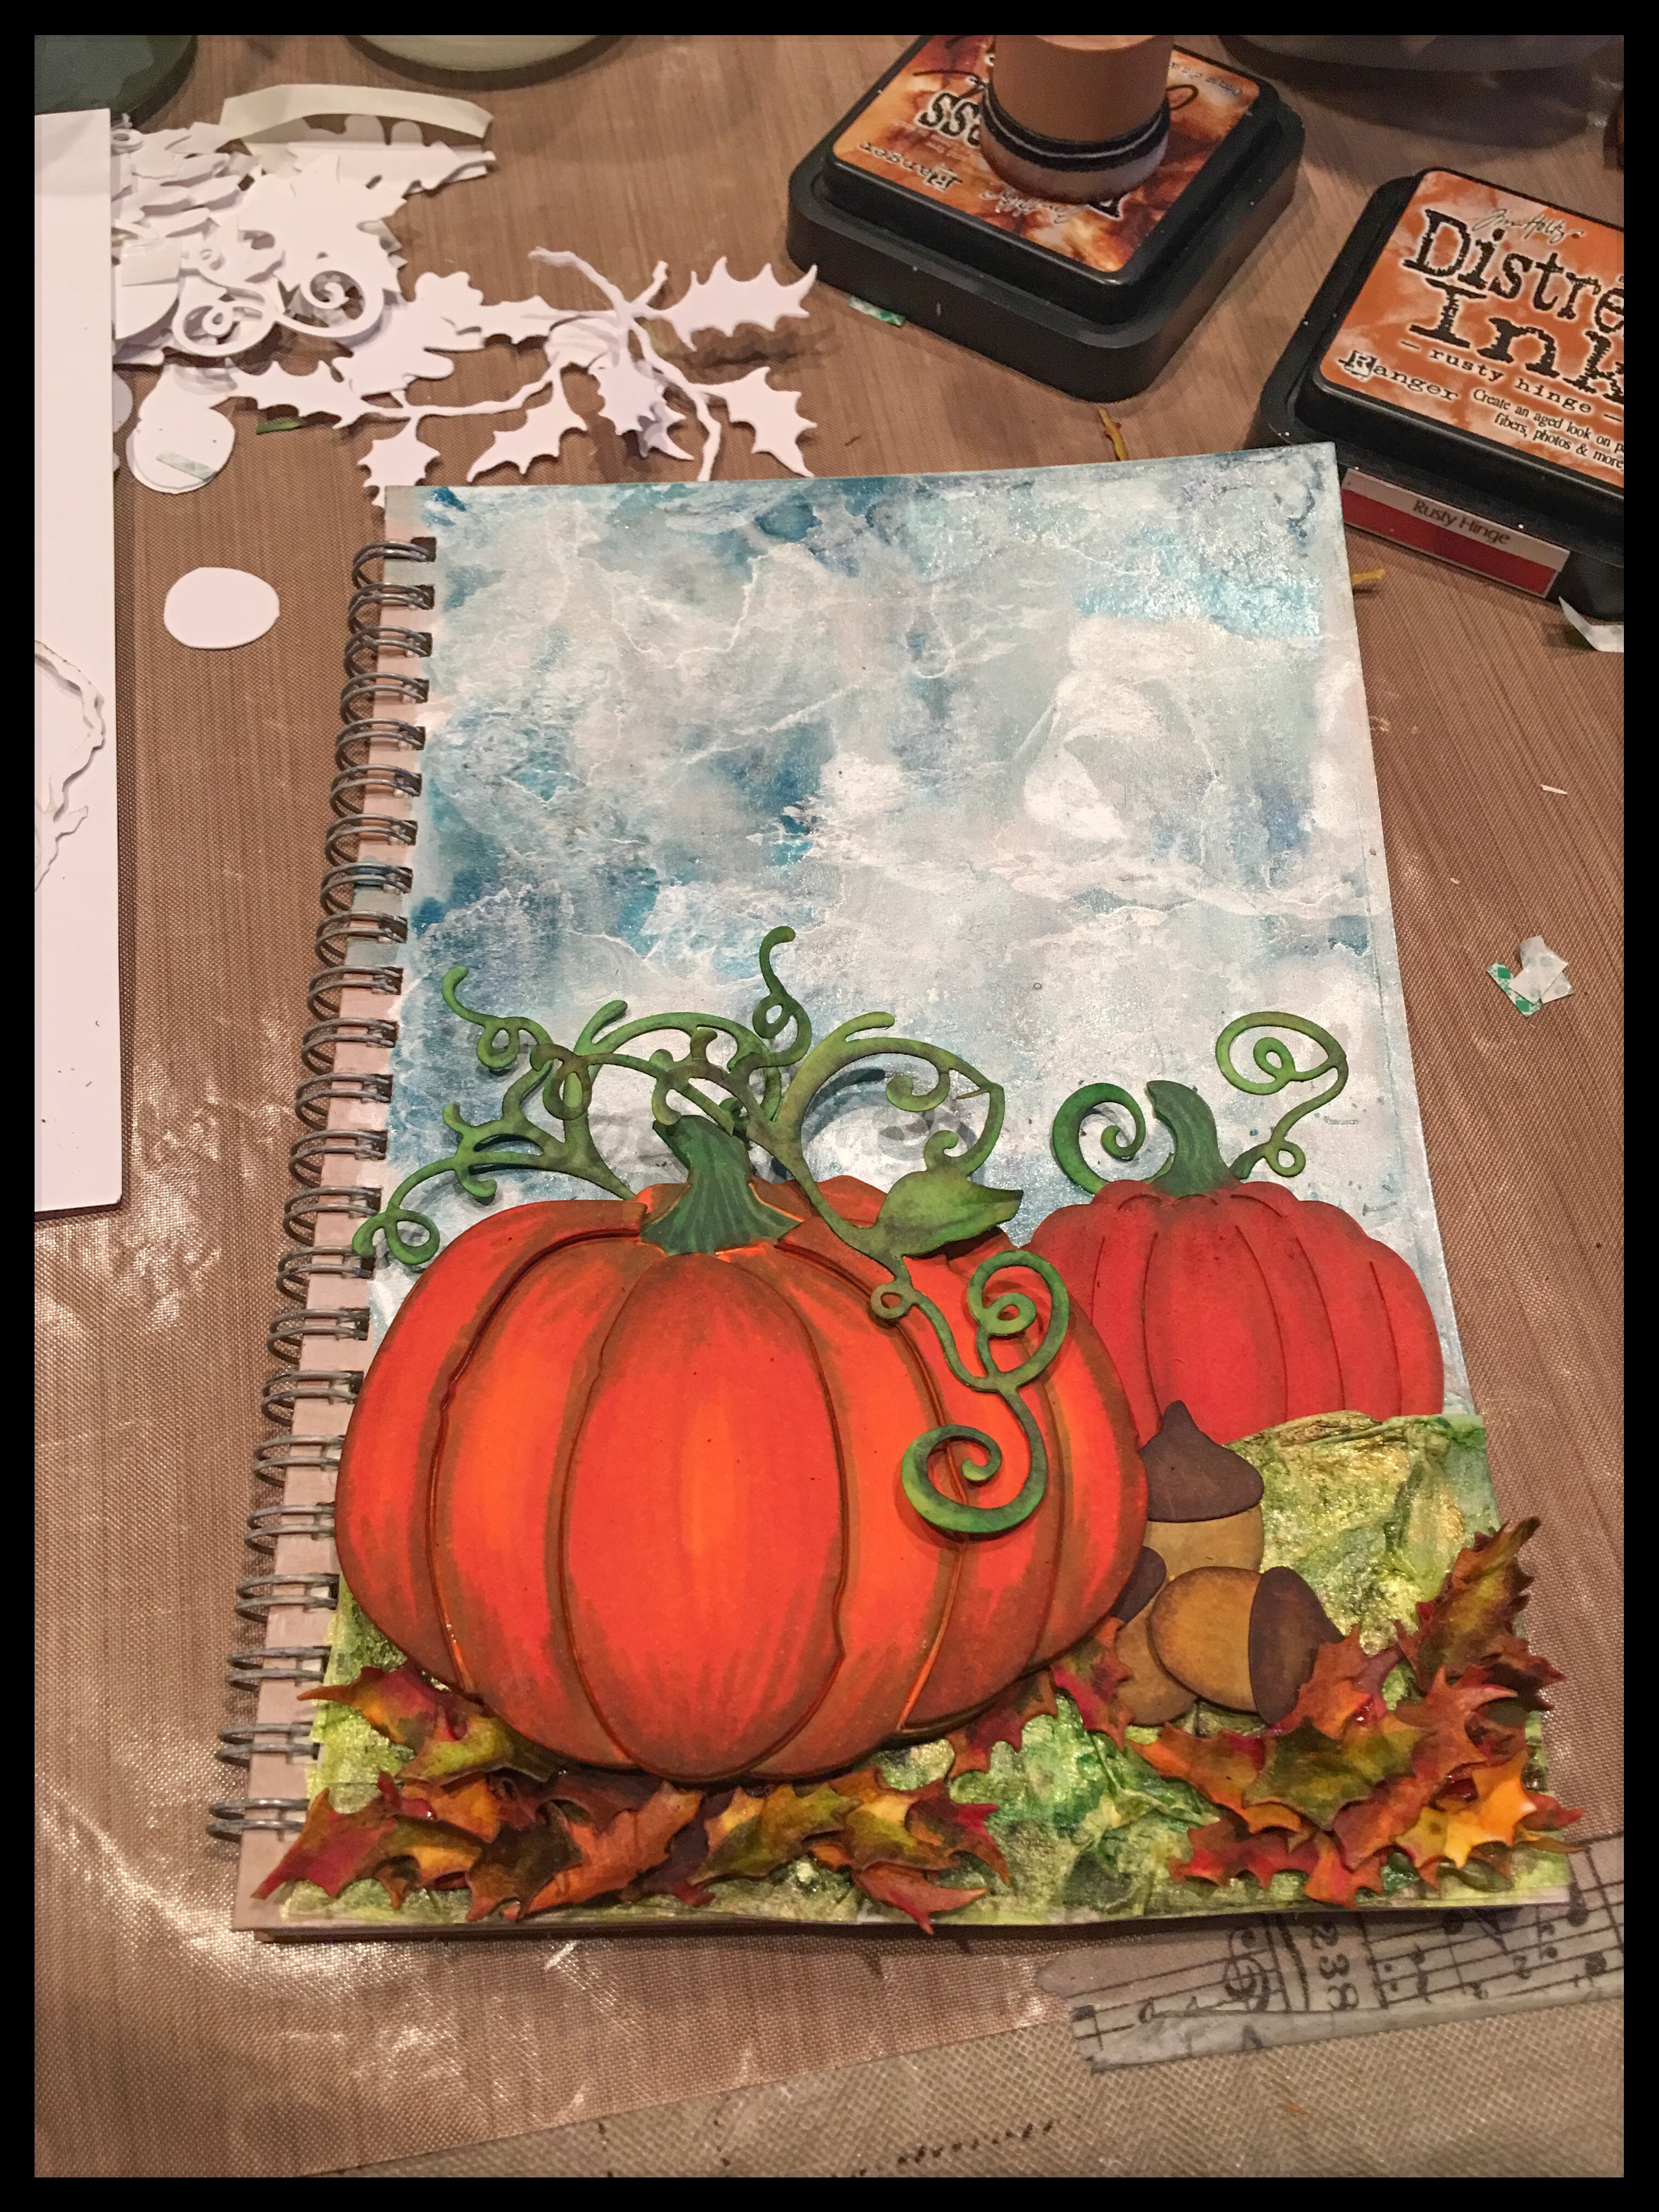
Die-cut the shapes you will use on your journal cover (I used pumpkins, vines, fall leaves, acorns, and sentiments. A couple of the dies I used are no longer available but I have linked to current dies that are similar. Any pumpkin or fall dies would be great for this project. I die-cut the large pumpkin from mat board to give it a little extra visual weight as this is my main focal point.
Hint: If you don’t have a die-cutting system you can sketch and cut-out the shapes you desire.
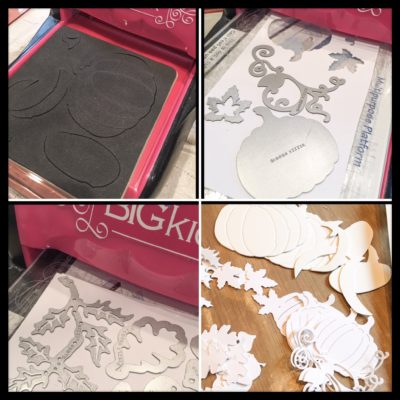
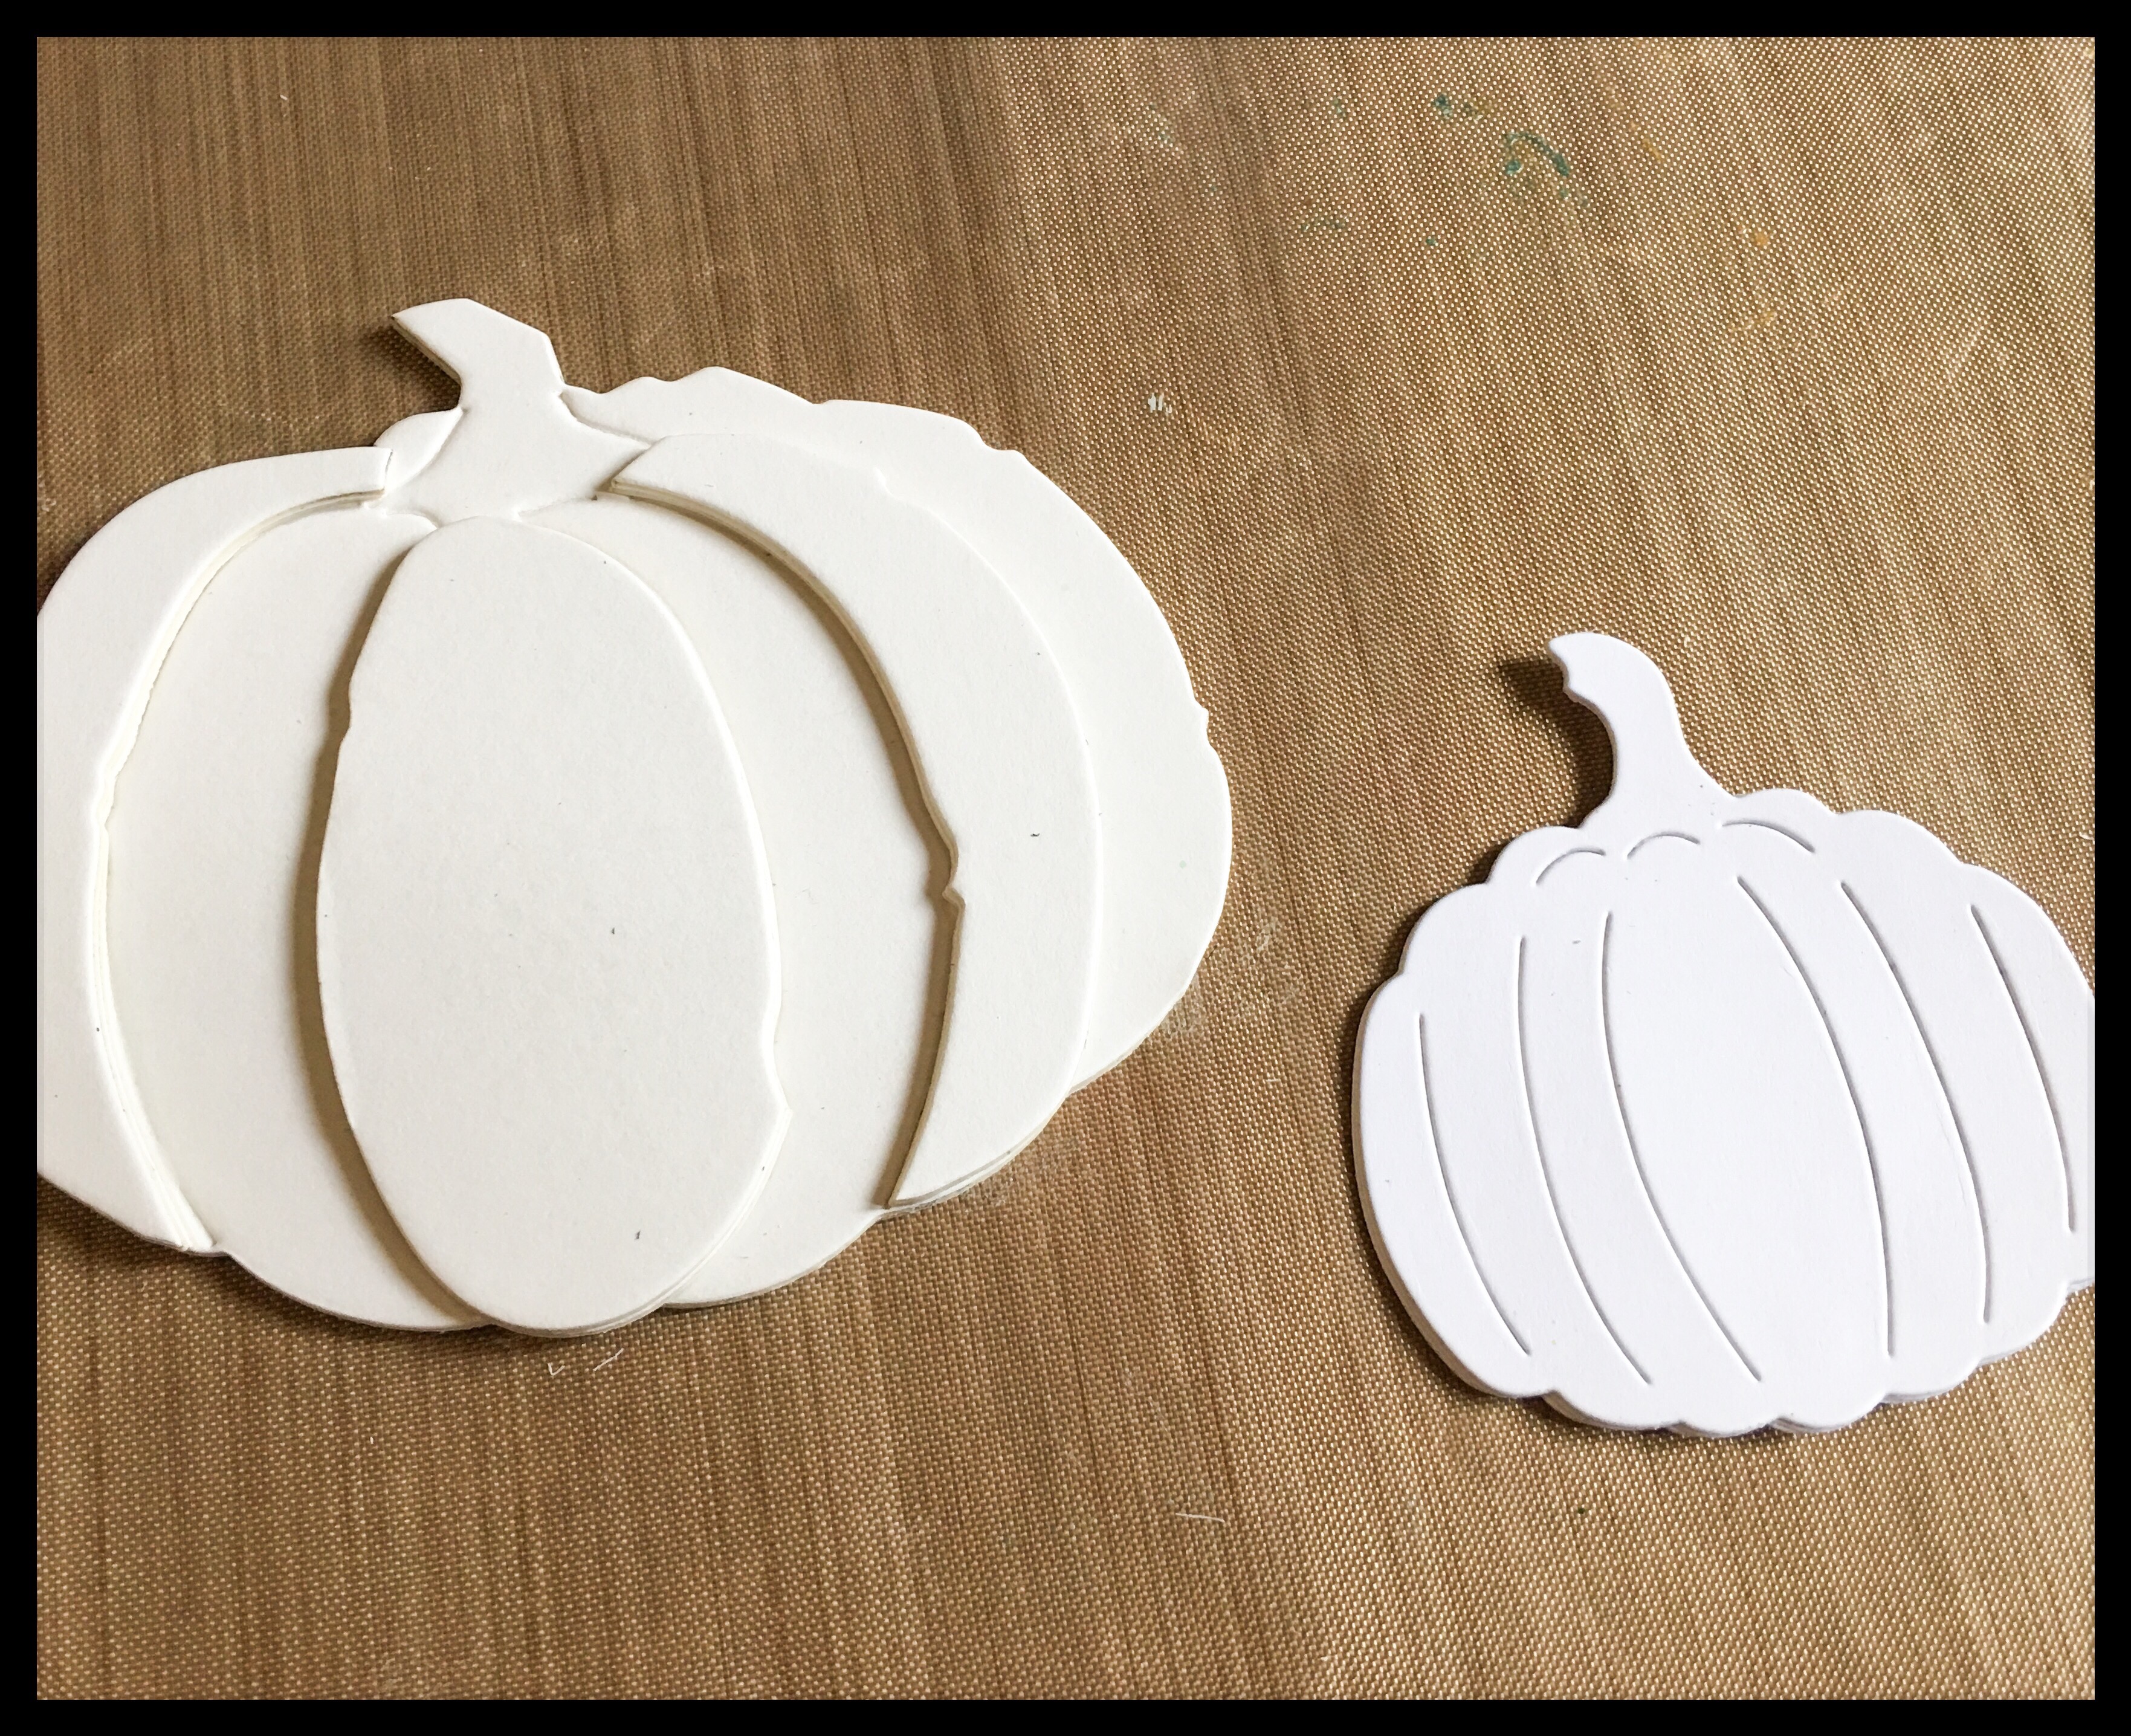
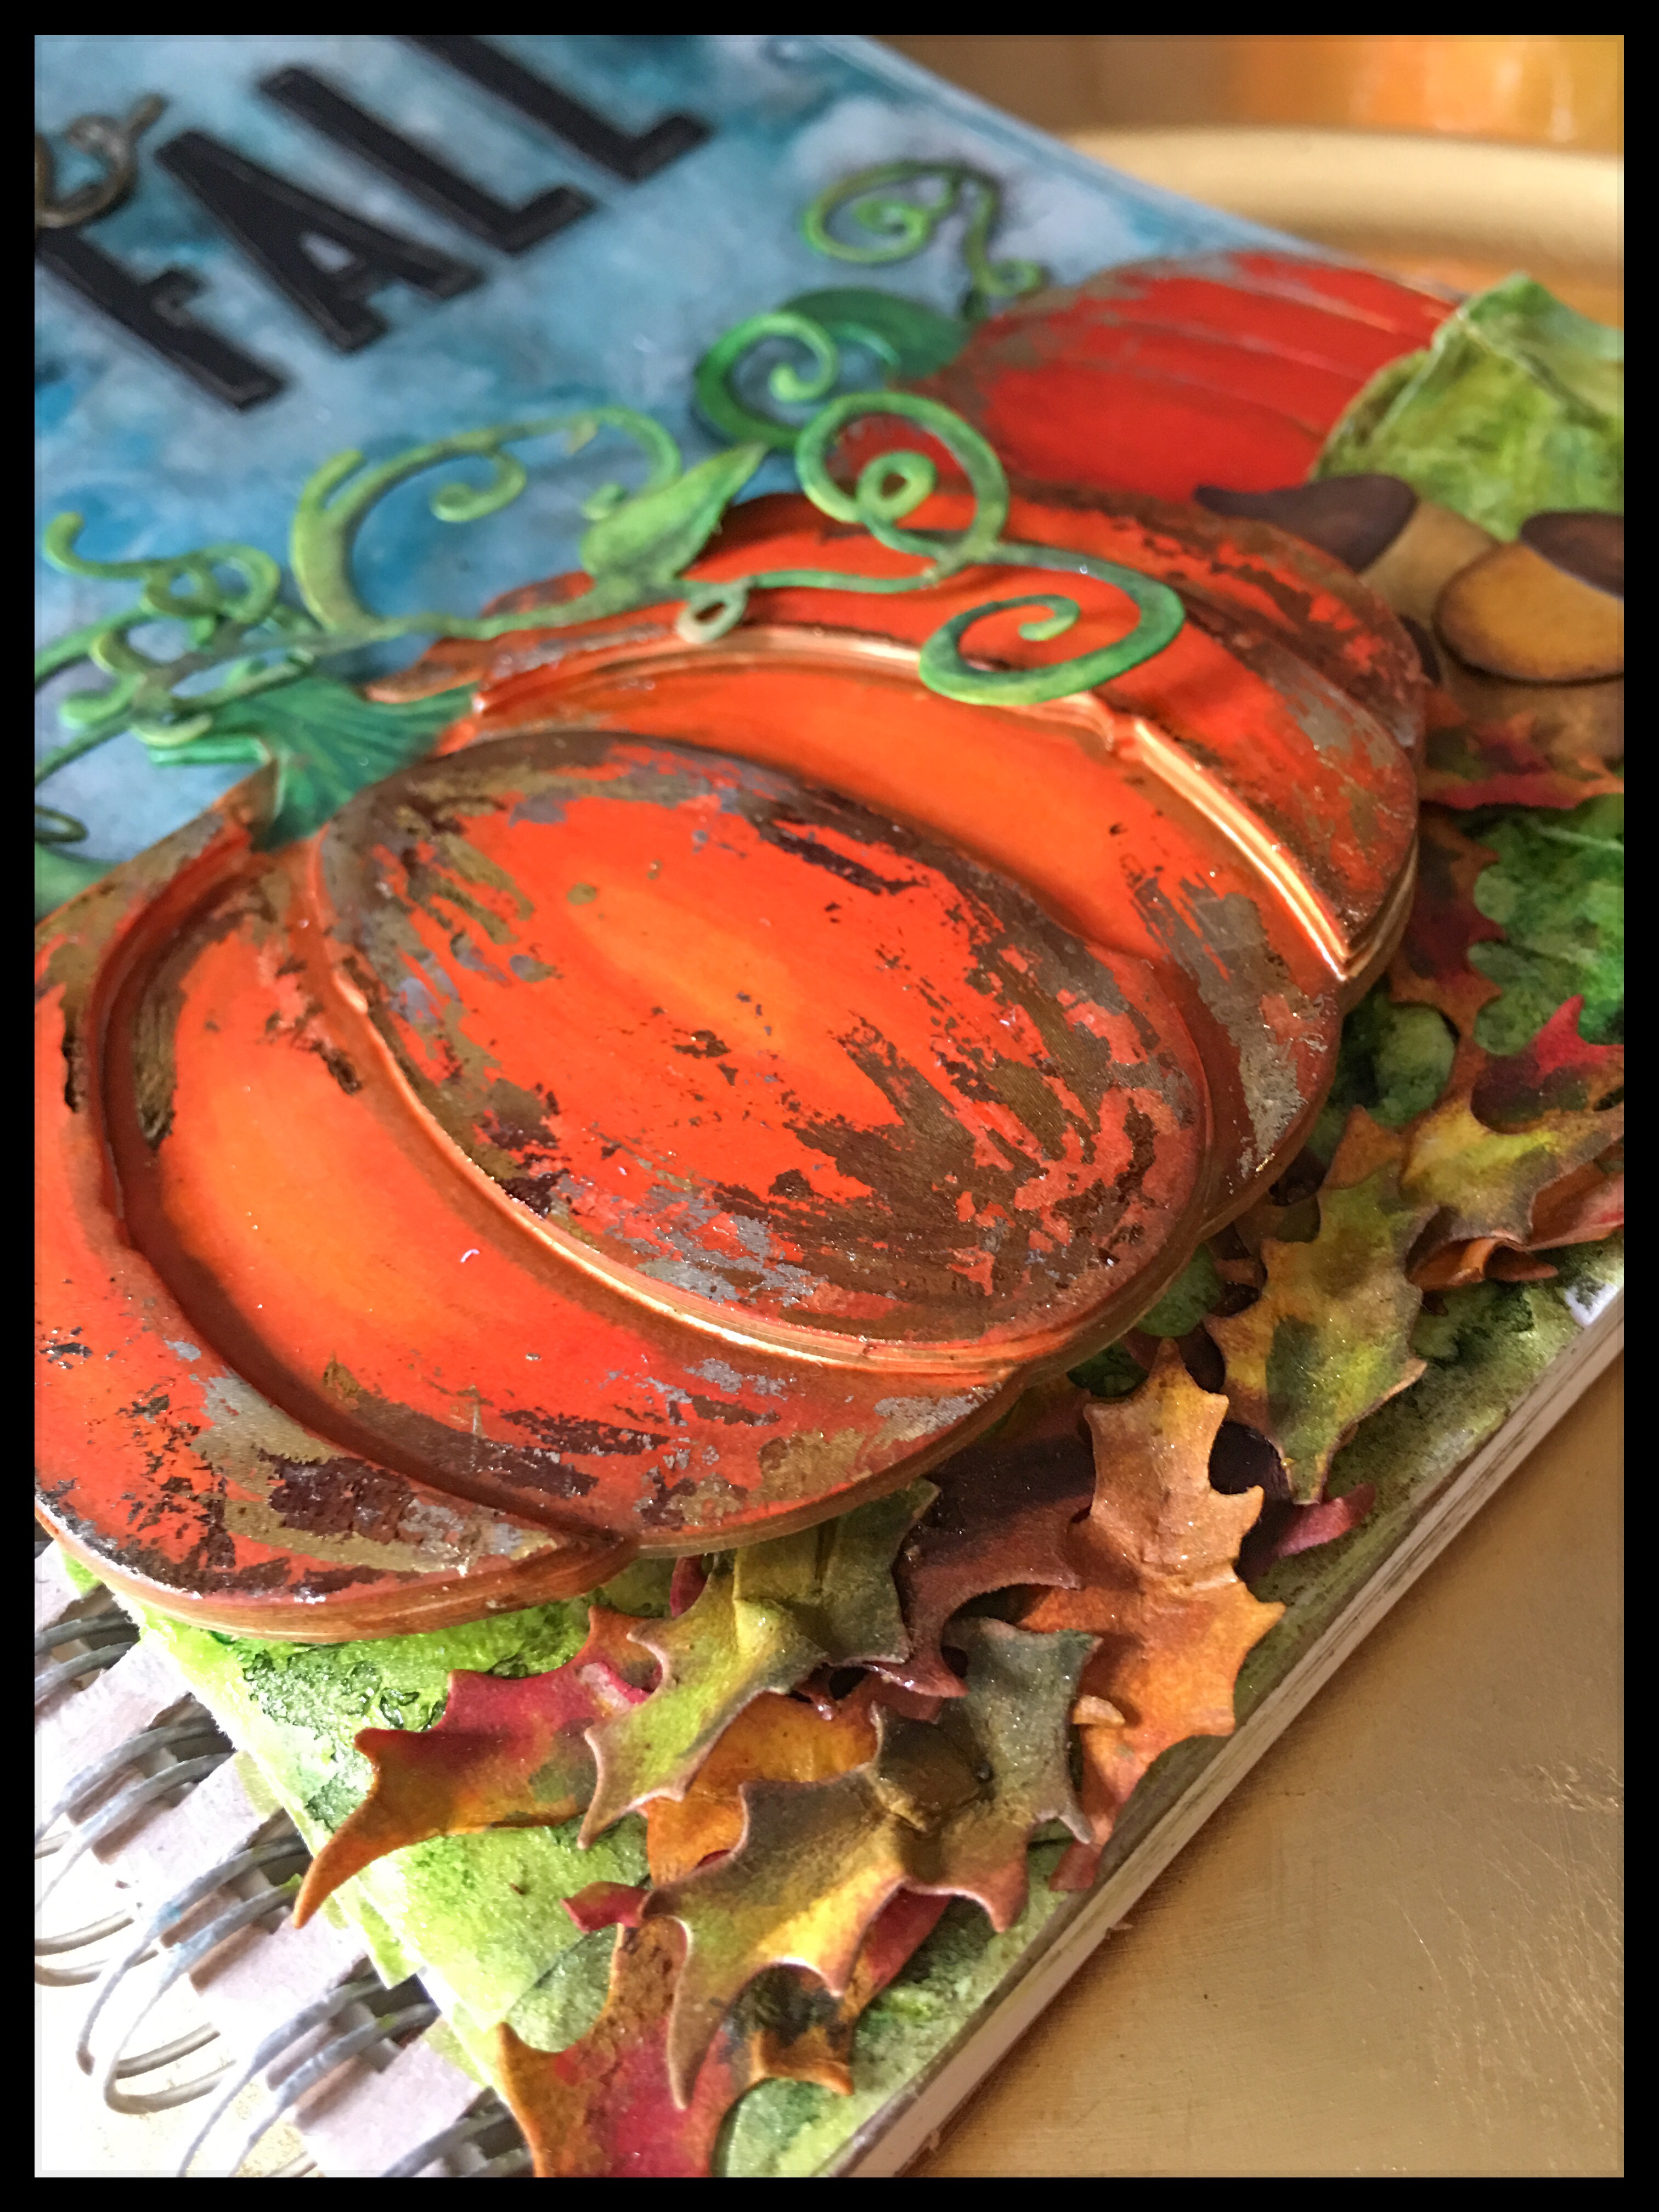
Because I really wanted my large pumpkin to stand out, I cut two and adhered them one on top of the other. Because I was using a steel rule die I was able to cut them from mat board and then double.
Hint: If you don’t have a steel rule die, cut the desired shape multiple times and stack them. this will give you a thicker more substantial shape to add to your project.
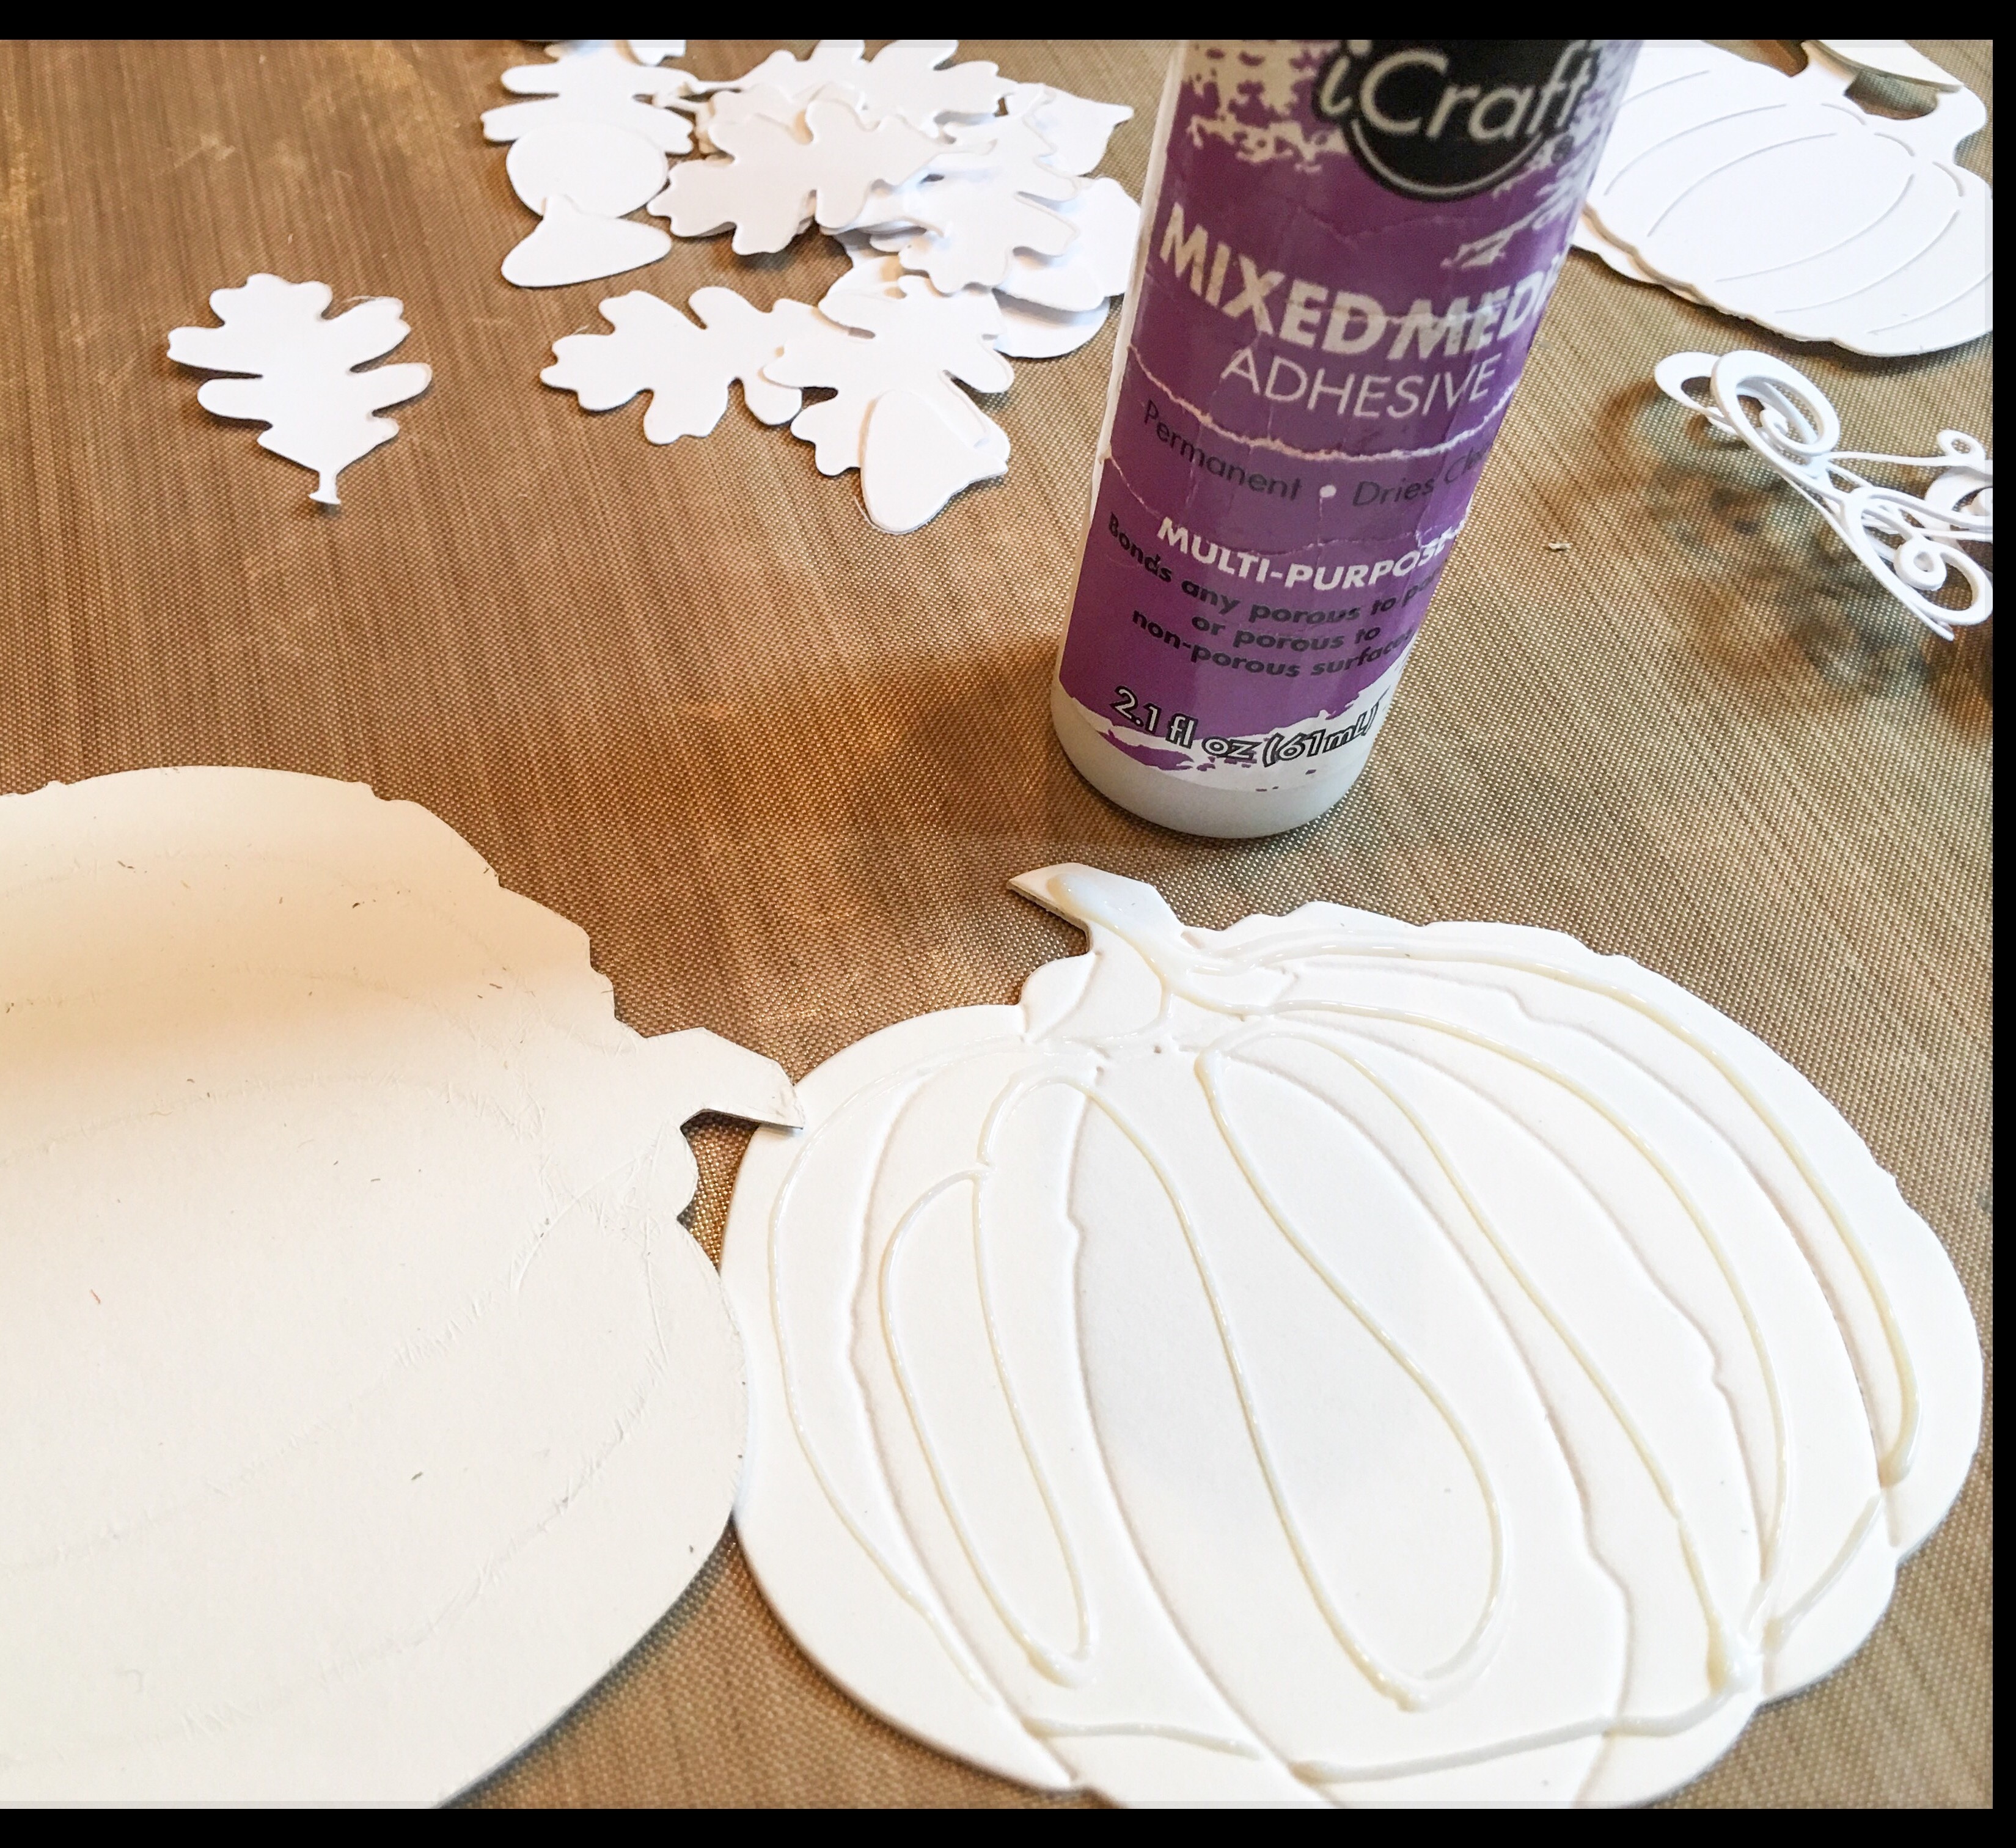
Color your die-cut shapes using your preferred media. I used alcohol markers for my coloring. Once my pieces were colored, I used Distress Ink to add another layer of color around the edges.
Hint: You can mix your alcohol markers. I have a few different brands (my new favorite is the Nuvo markers by Tonic) and they all blend really well together.
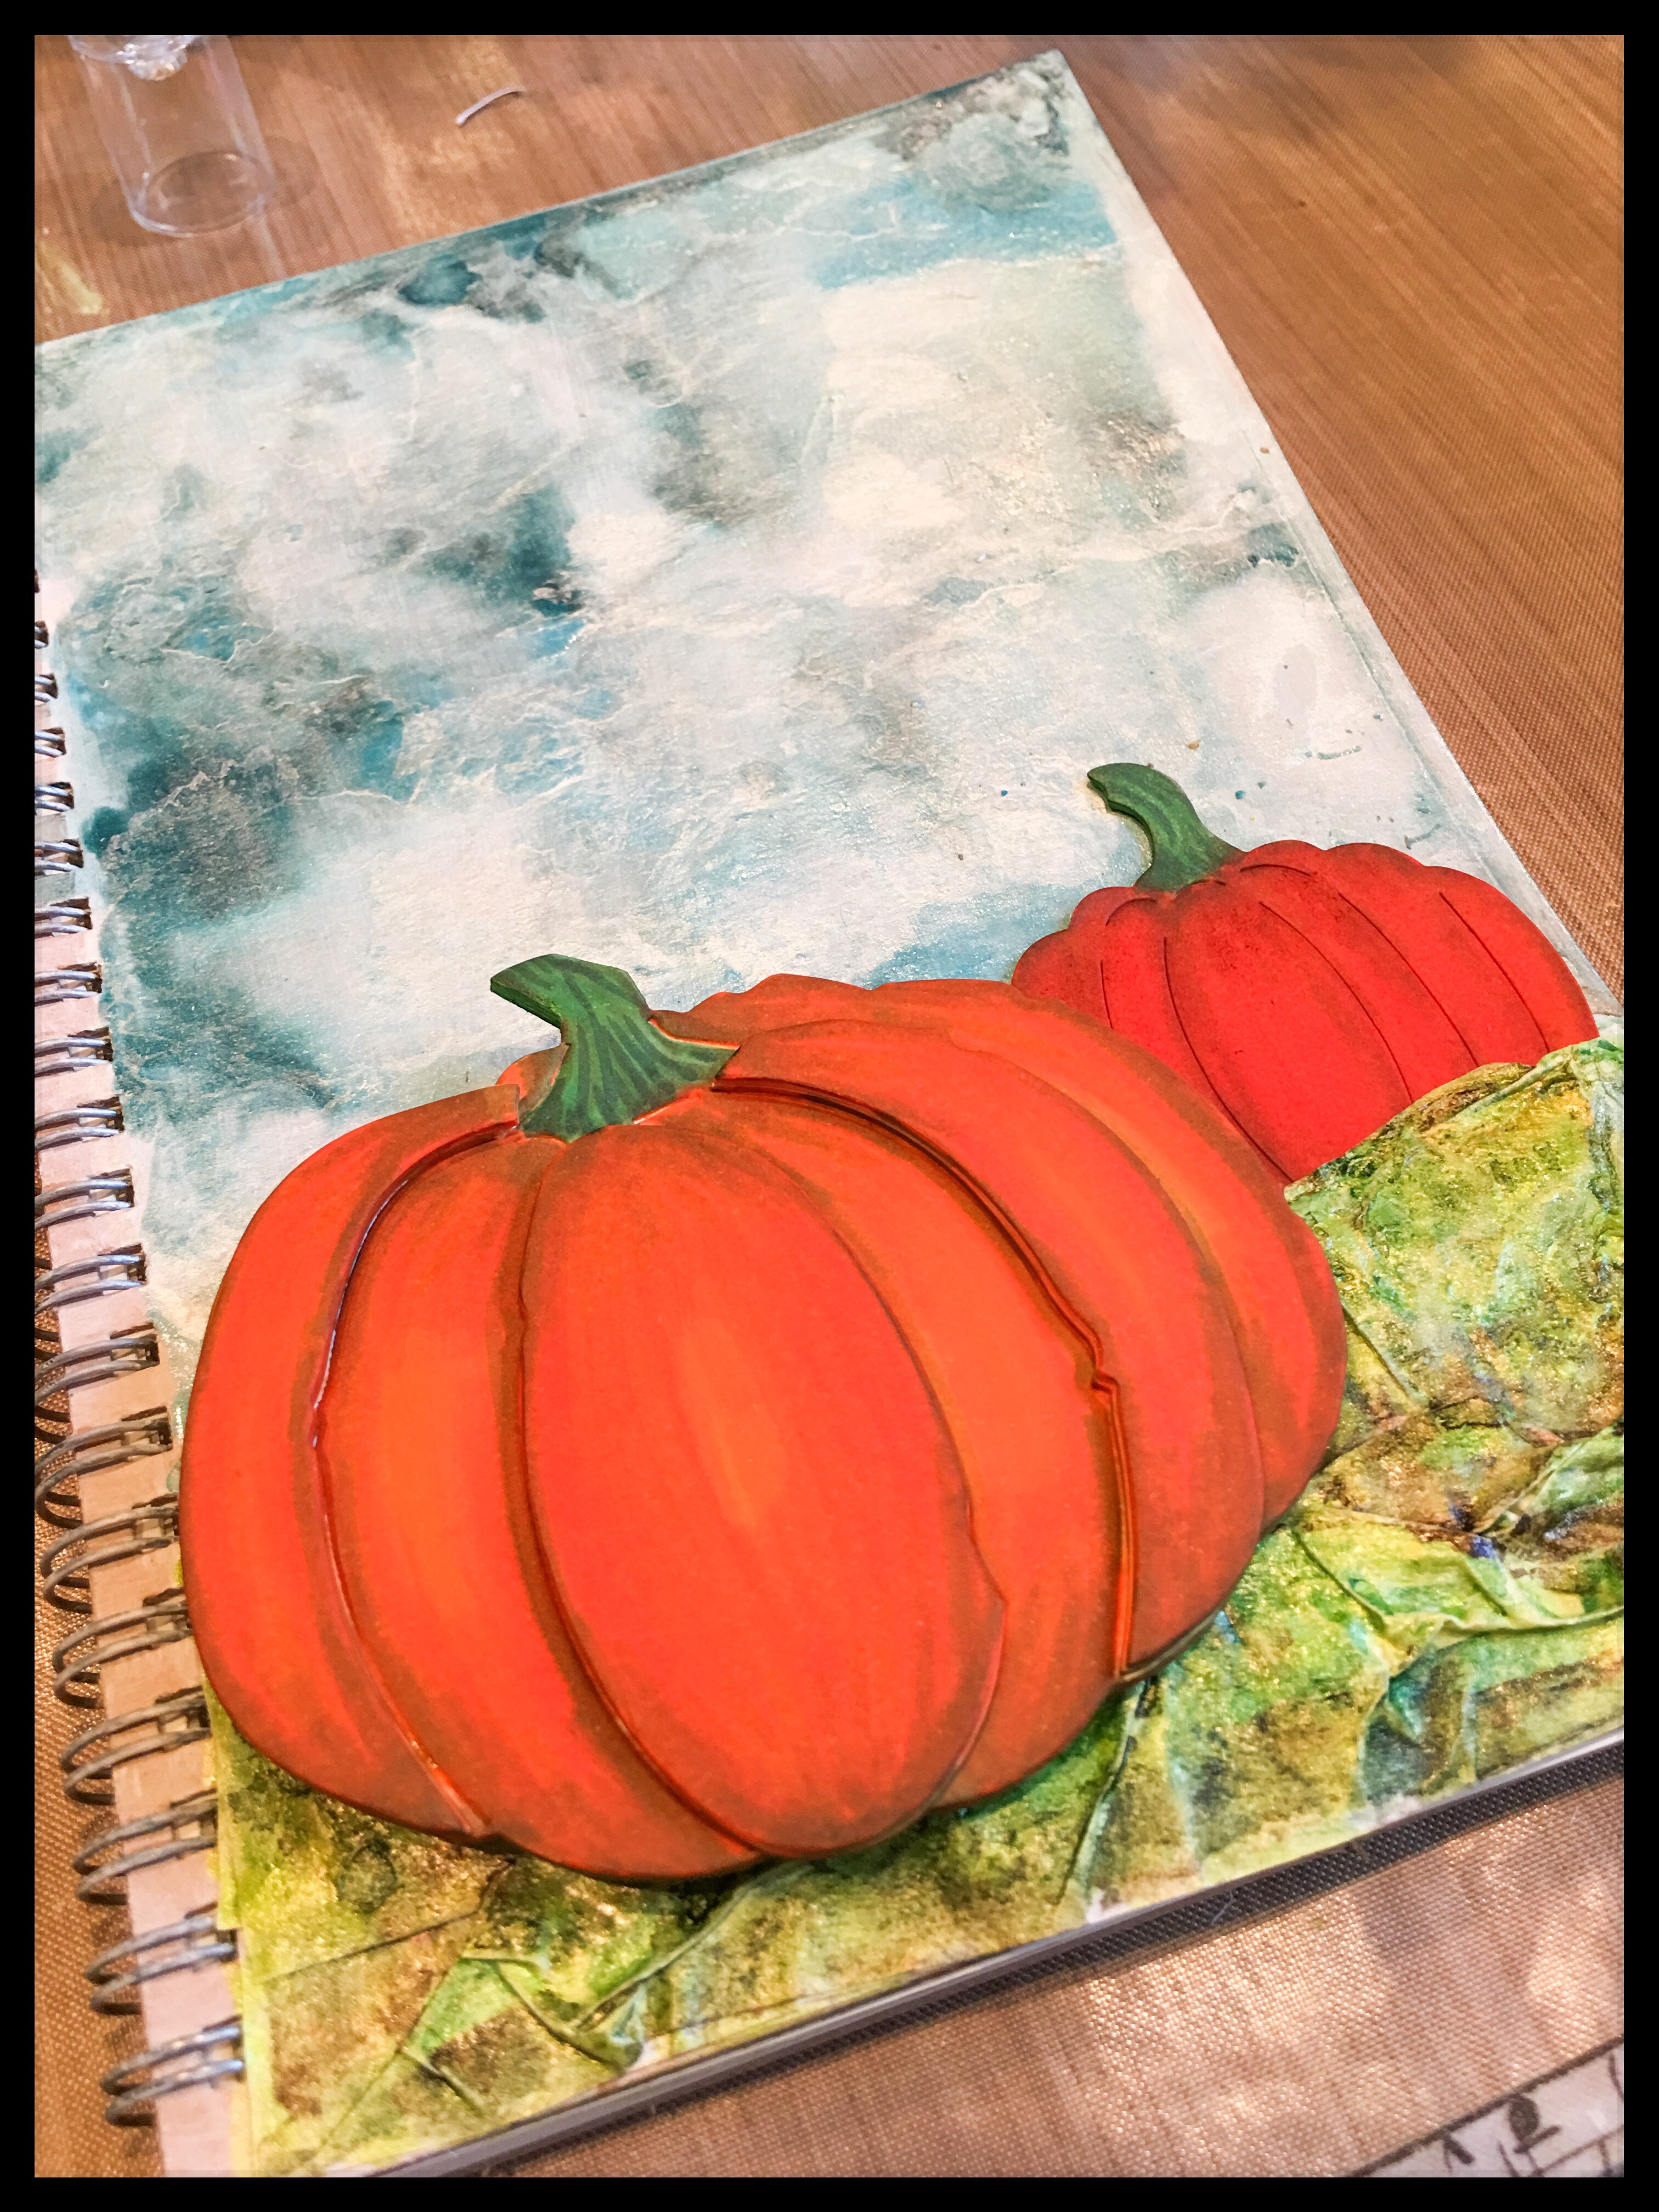
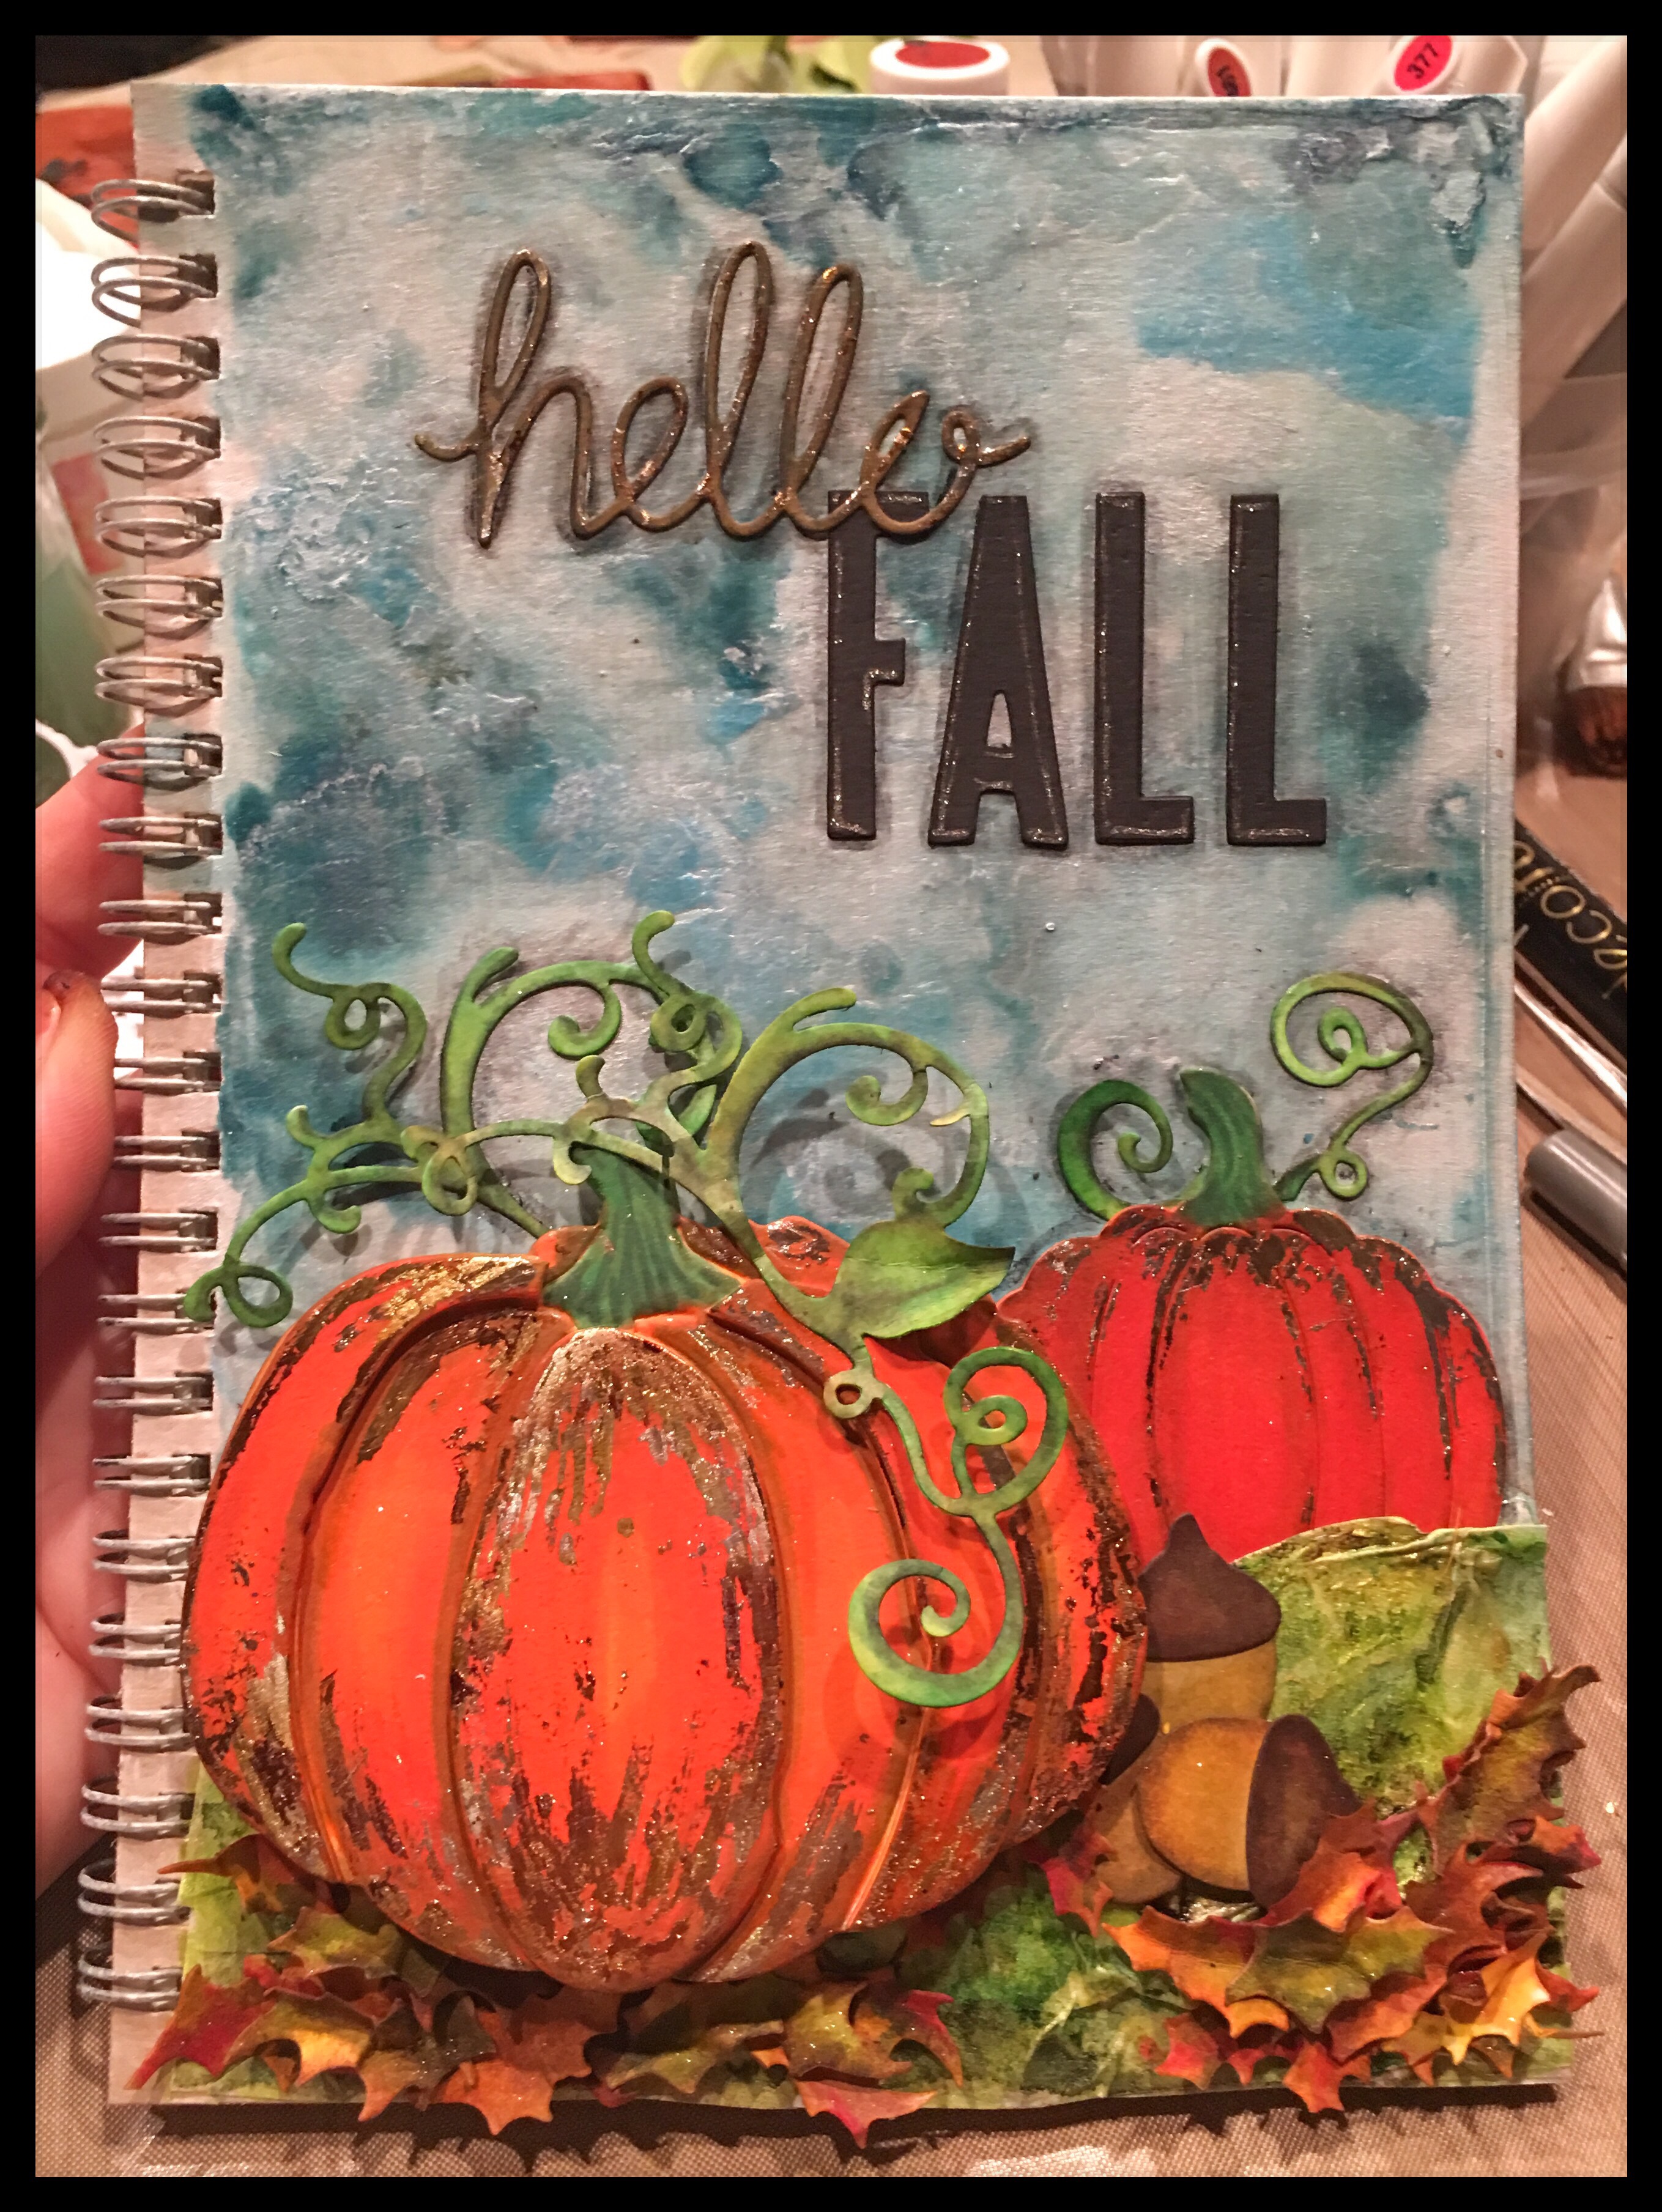
Using the 3D Foam Strips or Squares, adhere the largest die-cut (focal point) to your journal cover and then begin to add pieces around it to build your scene. I curled by leaves around the end of my paintbrush and crinkled them a bit to give a little dimension. When you see the pictures below, you will see how important this step is. The pile of leaves has a greater impact because of the dimension.
Hint: By laying down your focal point first, you can play with the other pieces a bit to decide your layout.
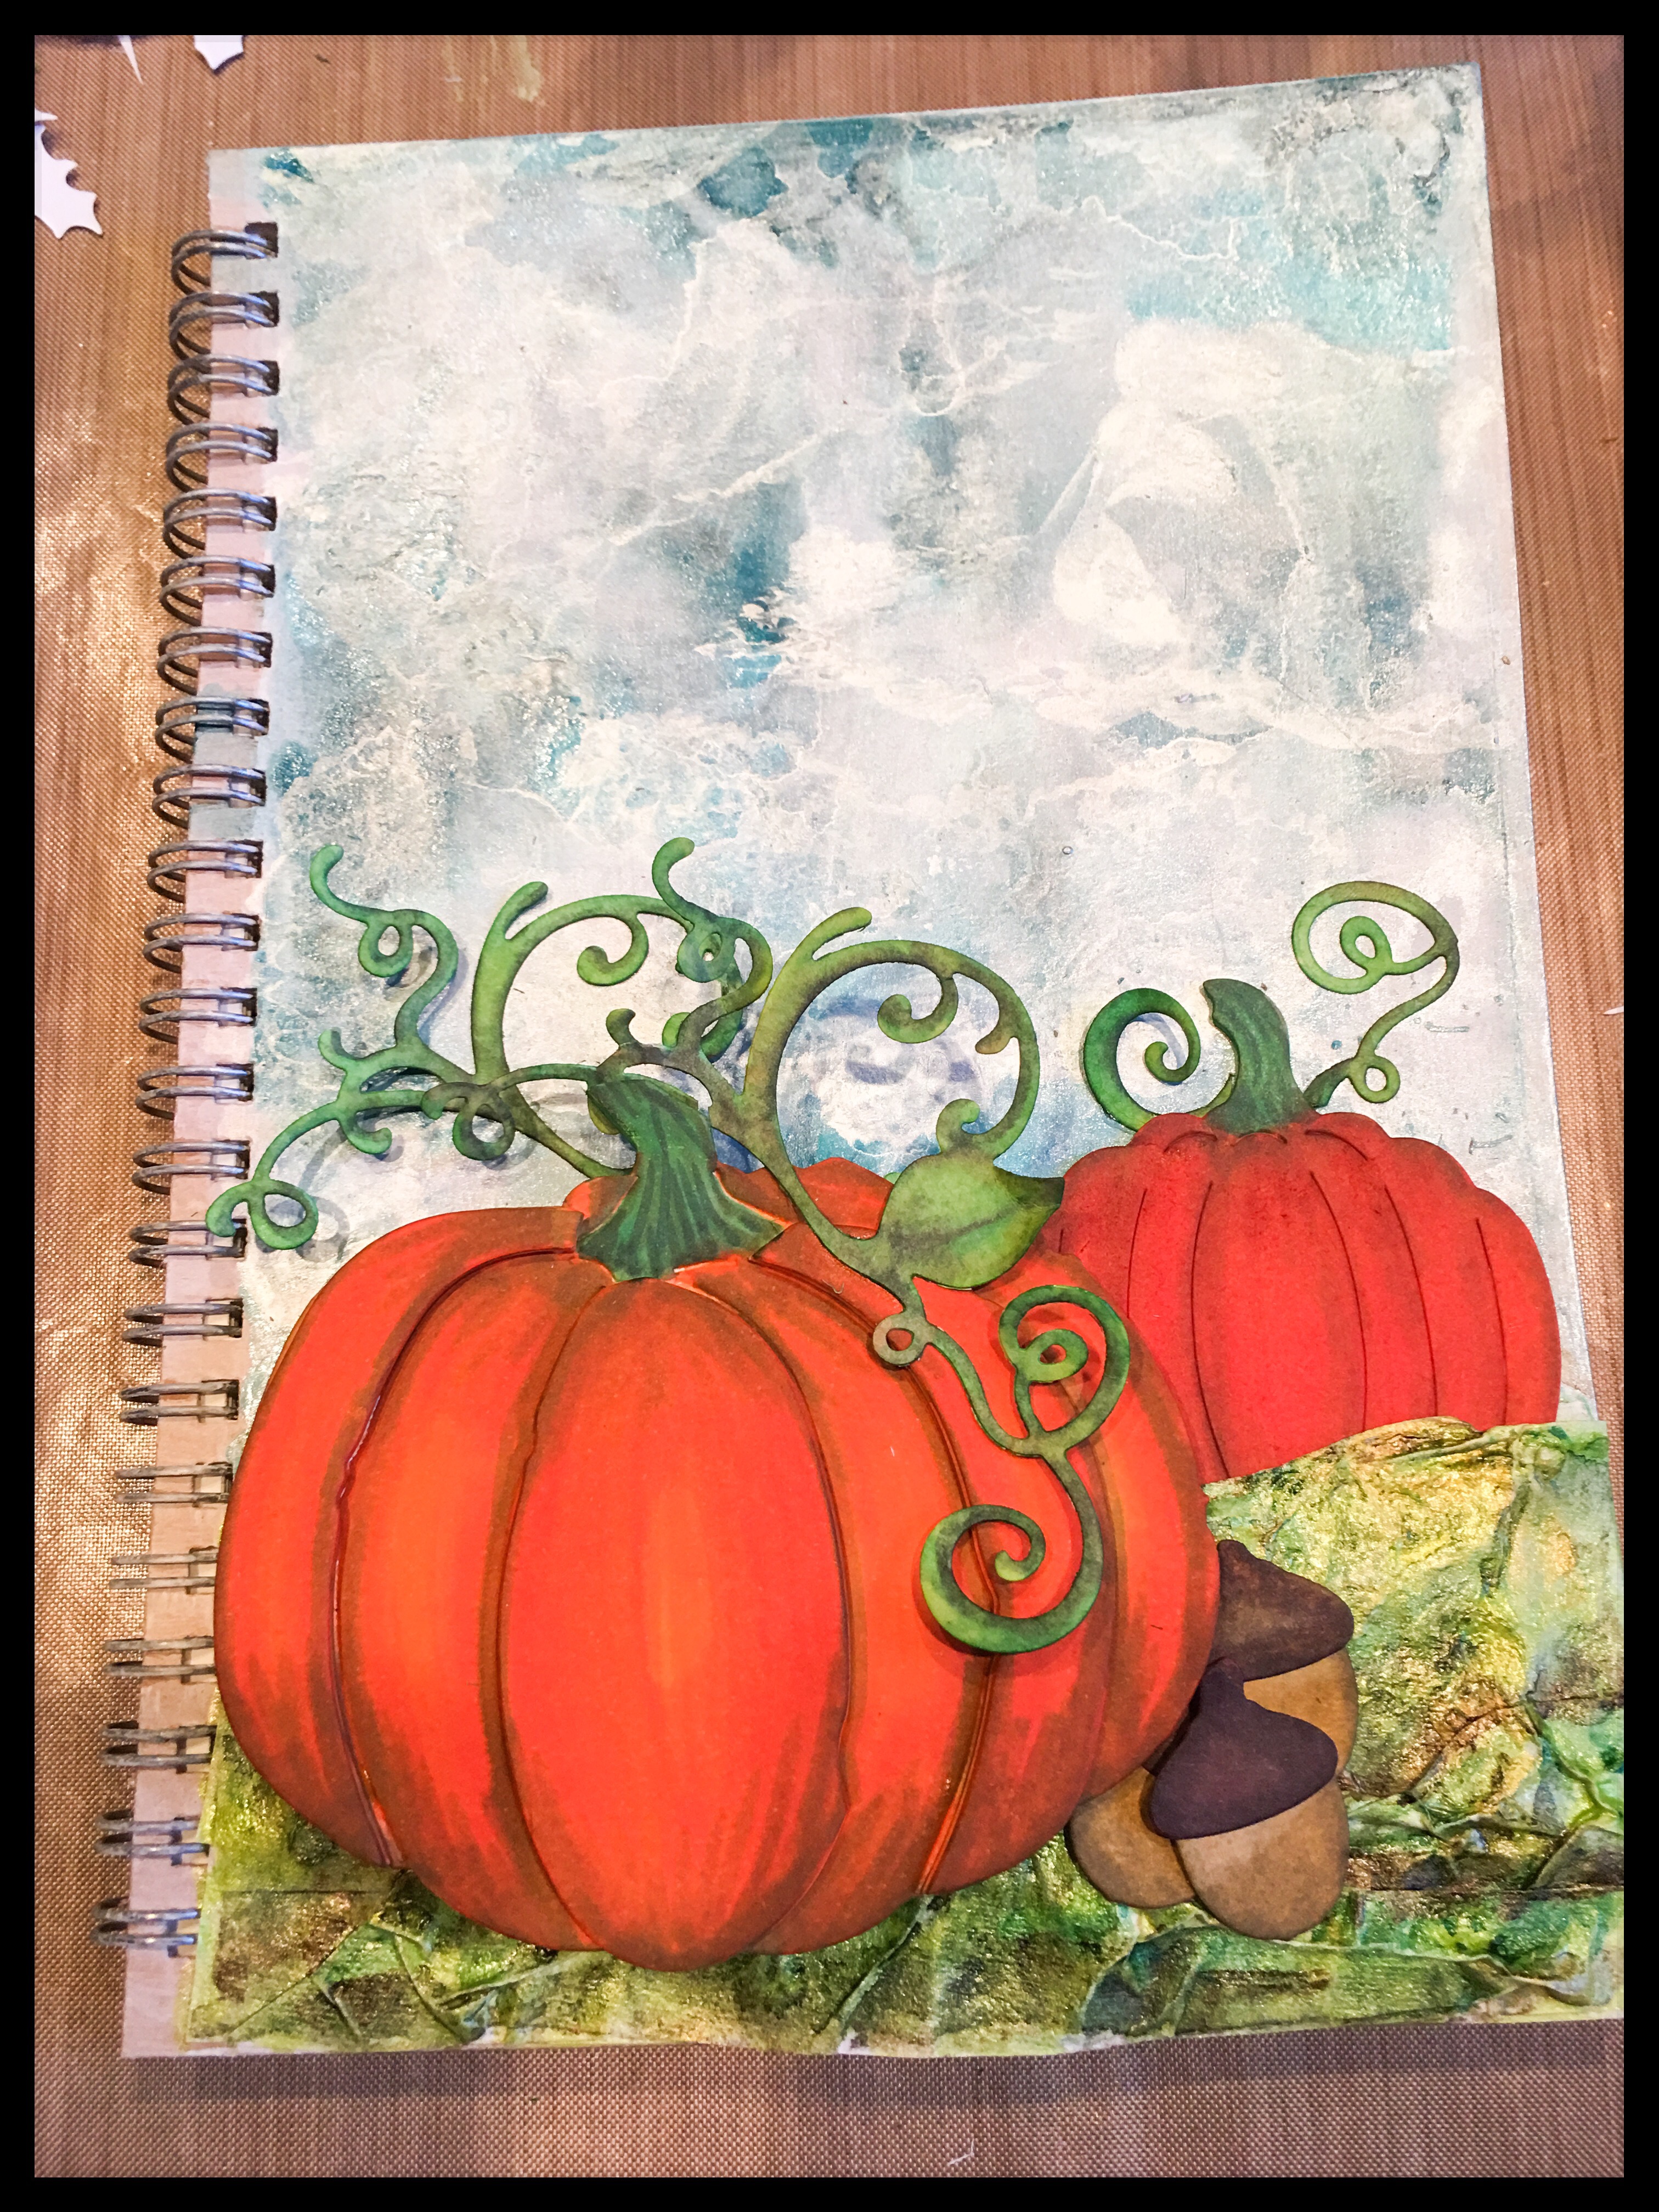
I went about this a little backward because I realized right after I adhere my pieces that I hadn’t added my foil yet! While it looks nice without the foil, it just doesn’t have that finished look that I knew I would have once I added some shine!
Even though I made a mistake, I was still able to get the foil right where I wanted it using the Glue Pen (have I mentioned that I LOVE this pen!). I simply scribbled here and there as though I was shading with a marker and then, using a small piece of Amber Watercolor foil I pressed on the shine! I really like the way you can get different tones of color in one small piece of foil. The change in tones of the variegated color is so subtle that it blends seamlessly. Photos just don’t do it justice. The shine achieved by the foiling technique is so much more spectacular in person.
Hint: Remember to foil your pieces before you adhere them 😉
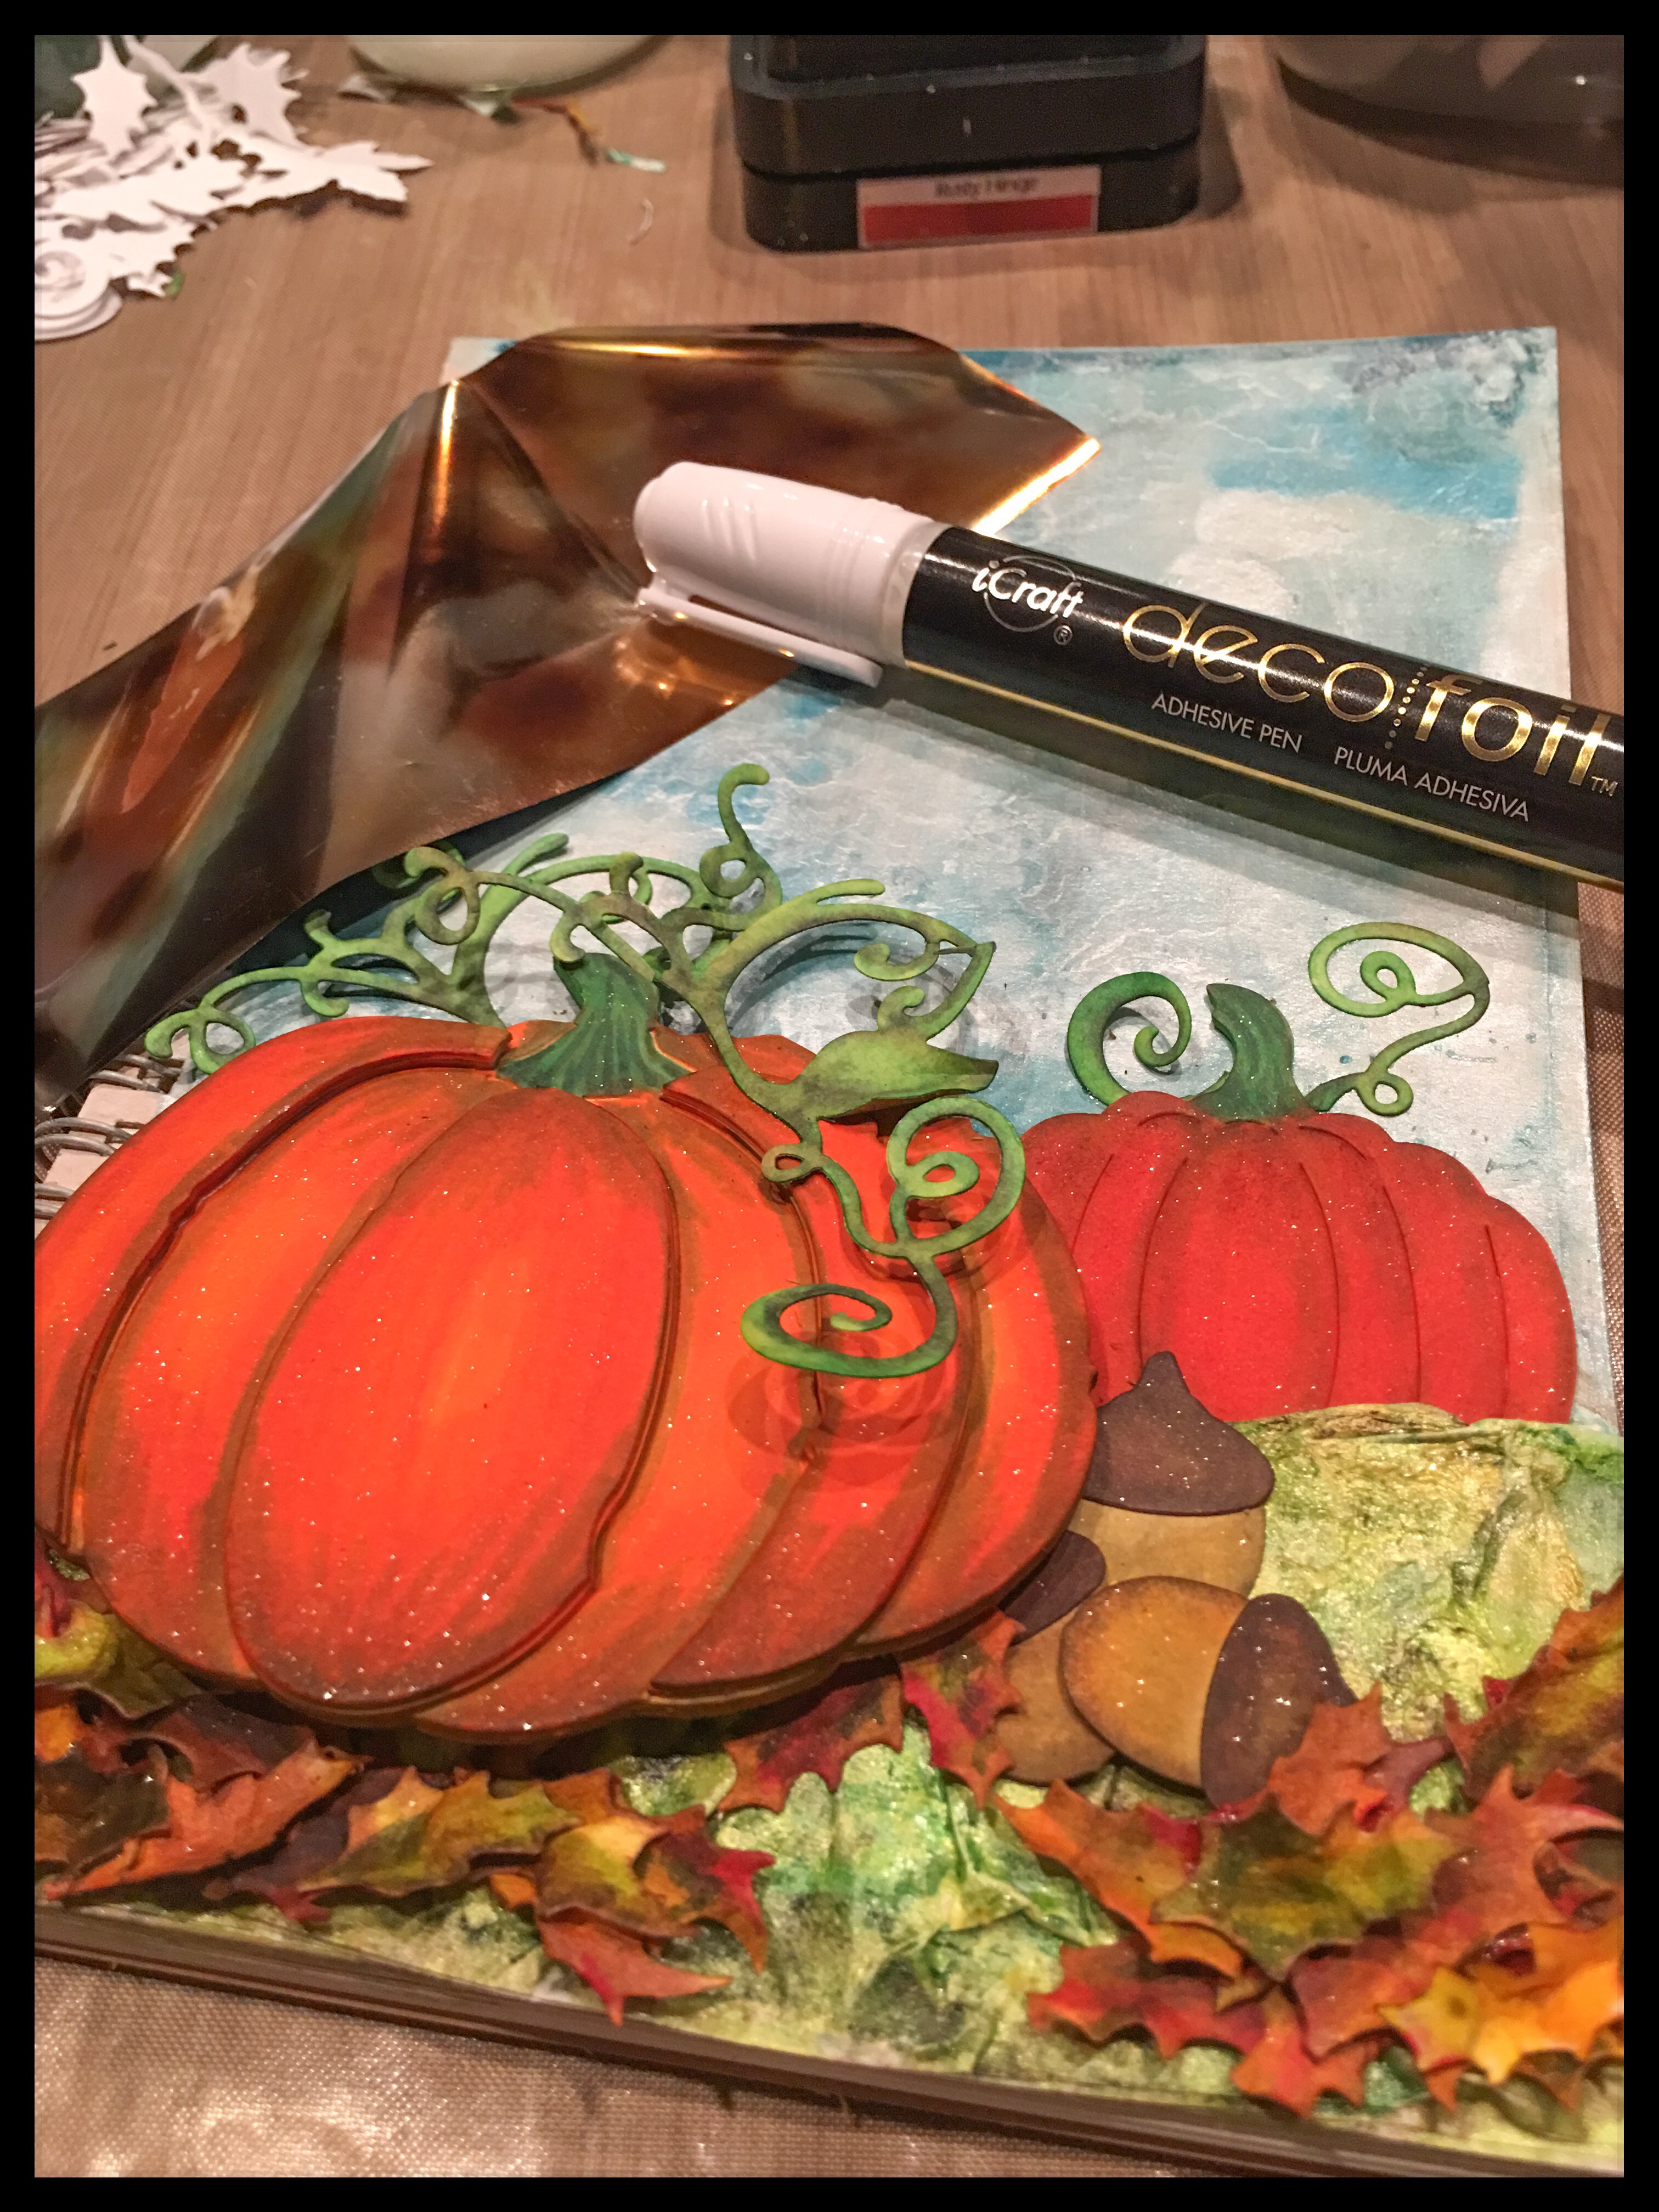
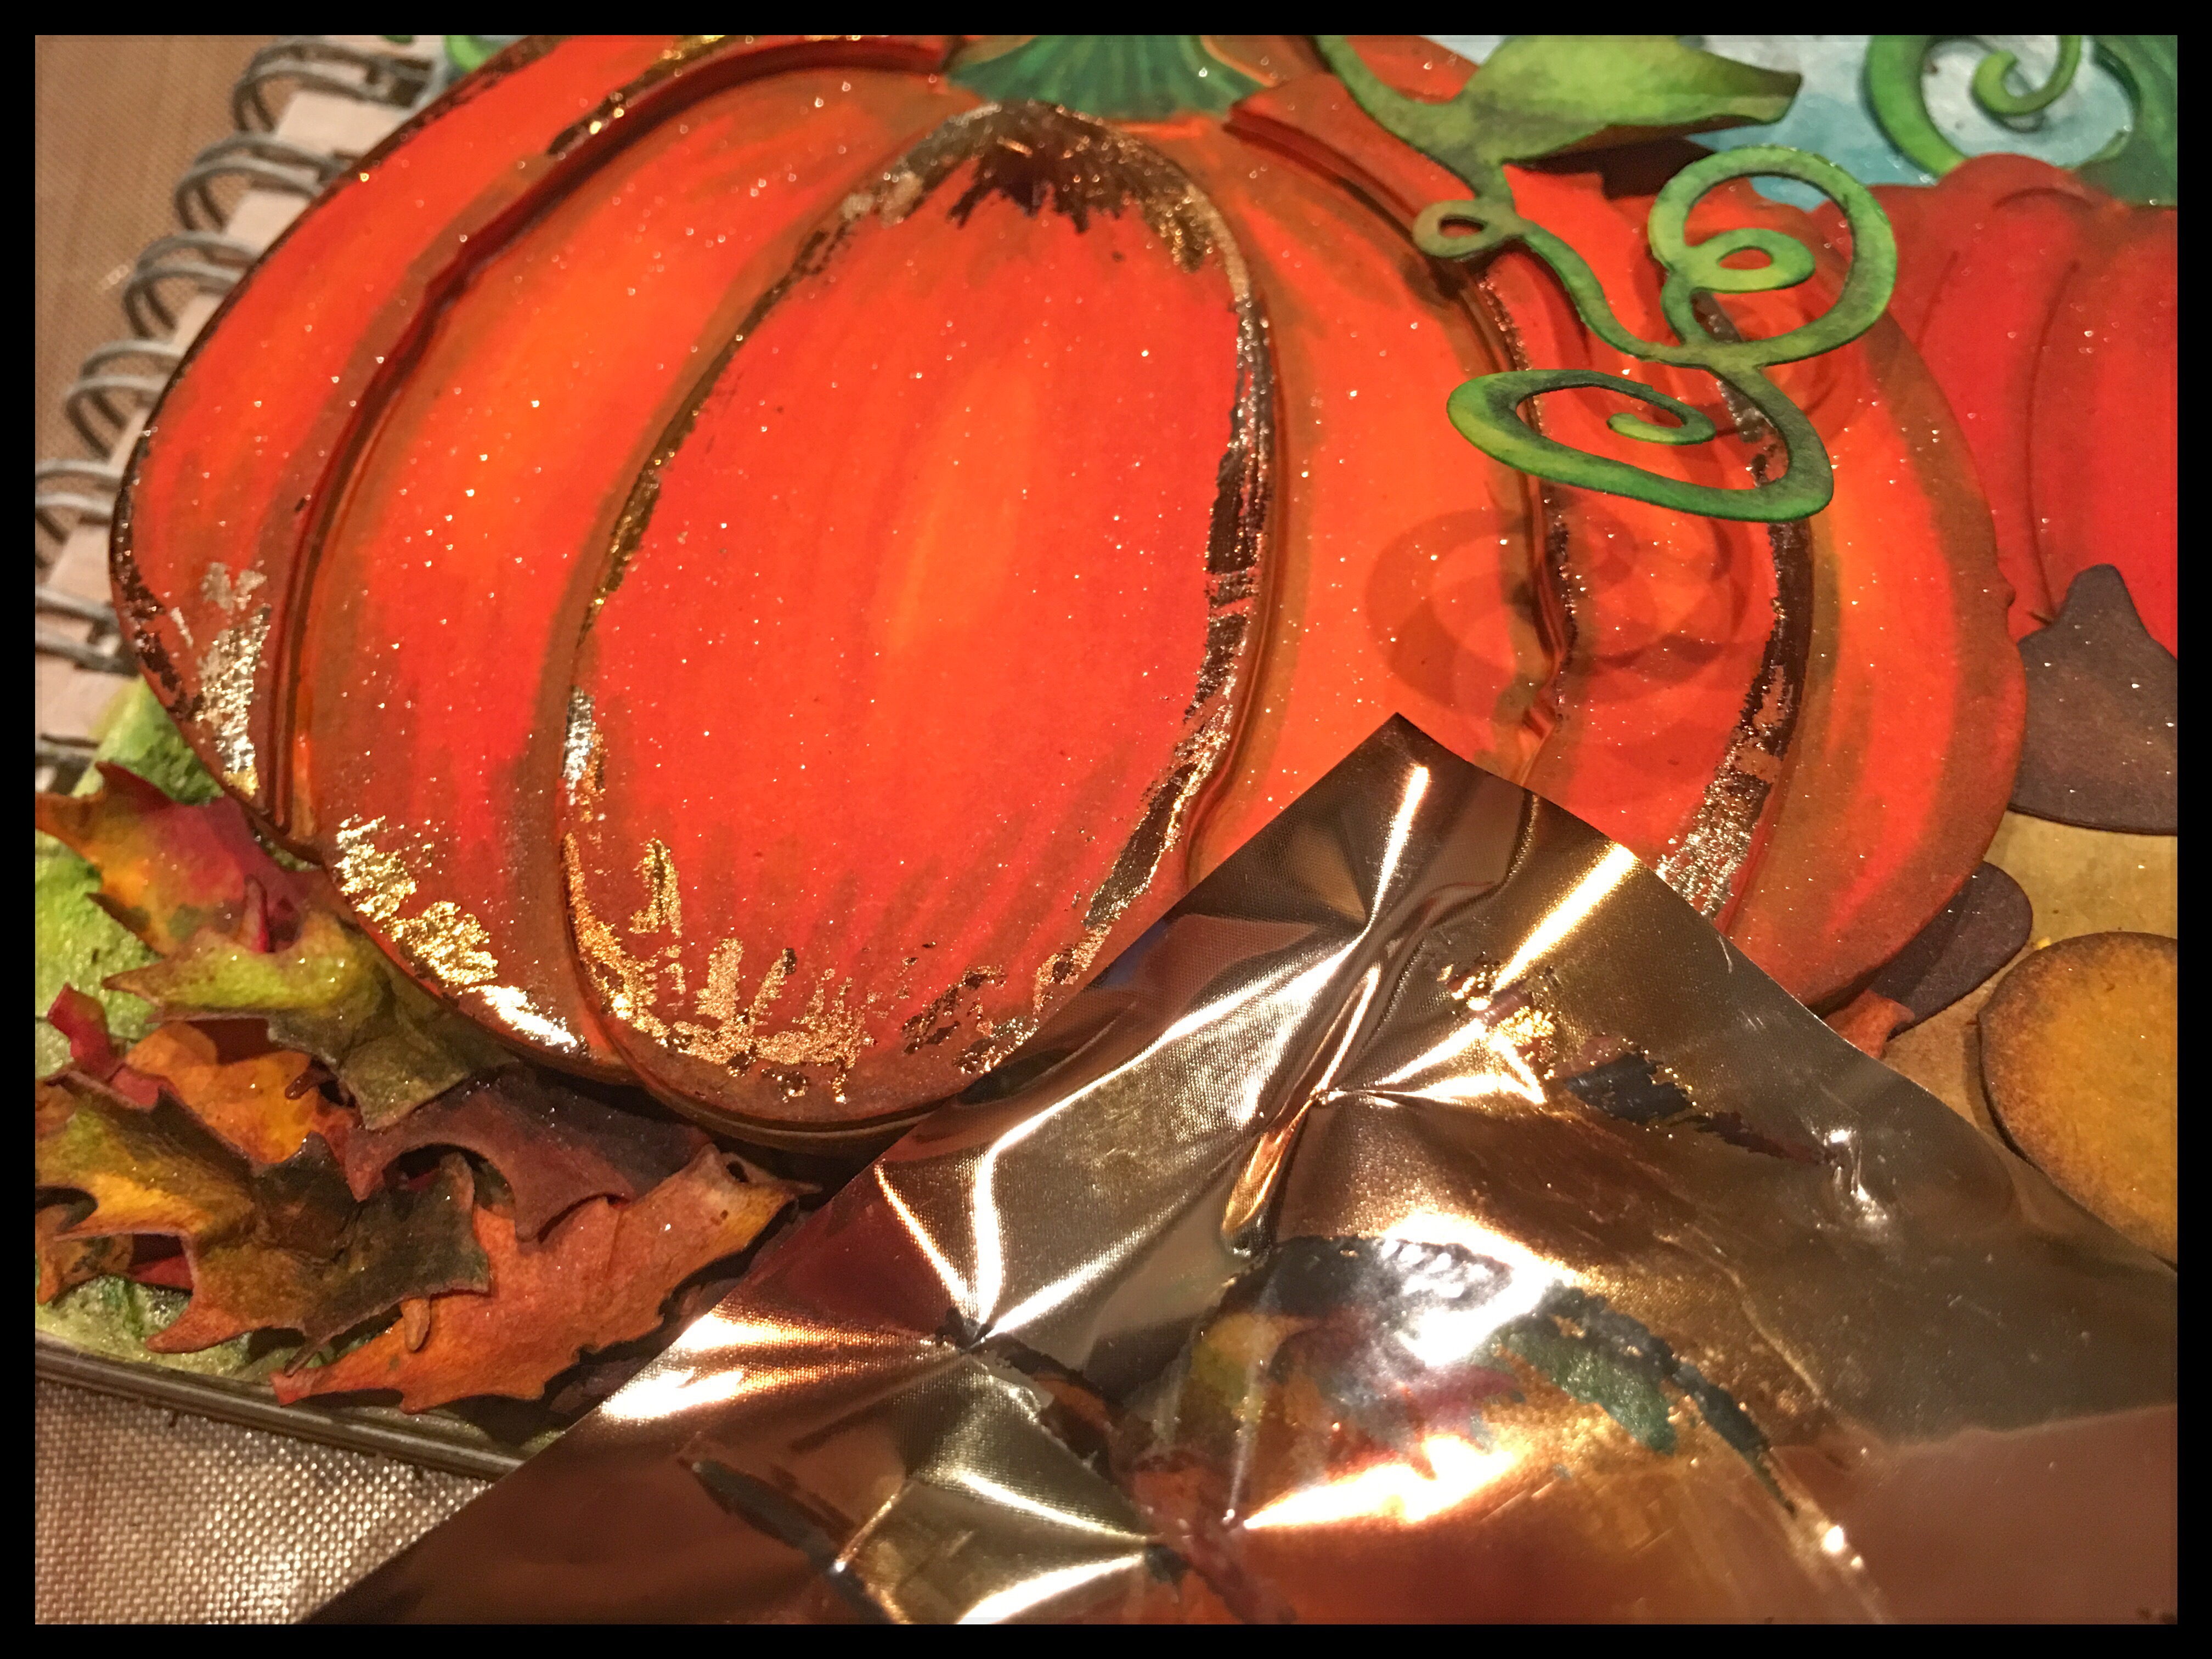
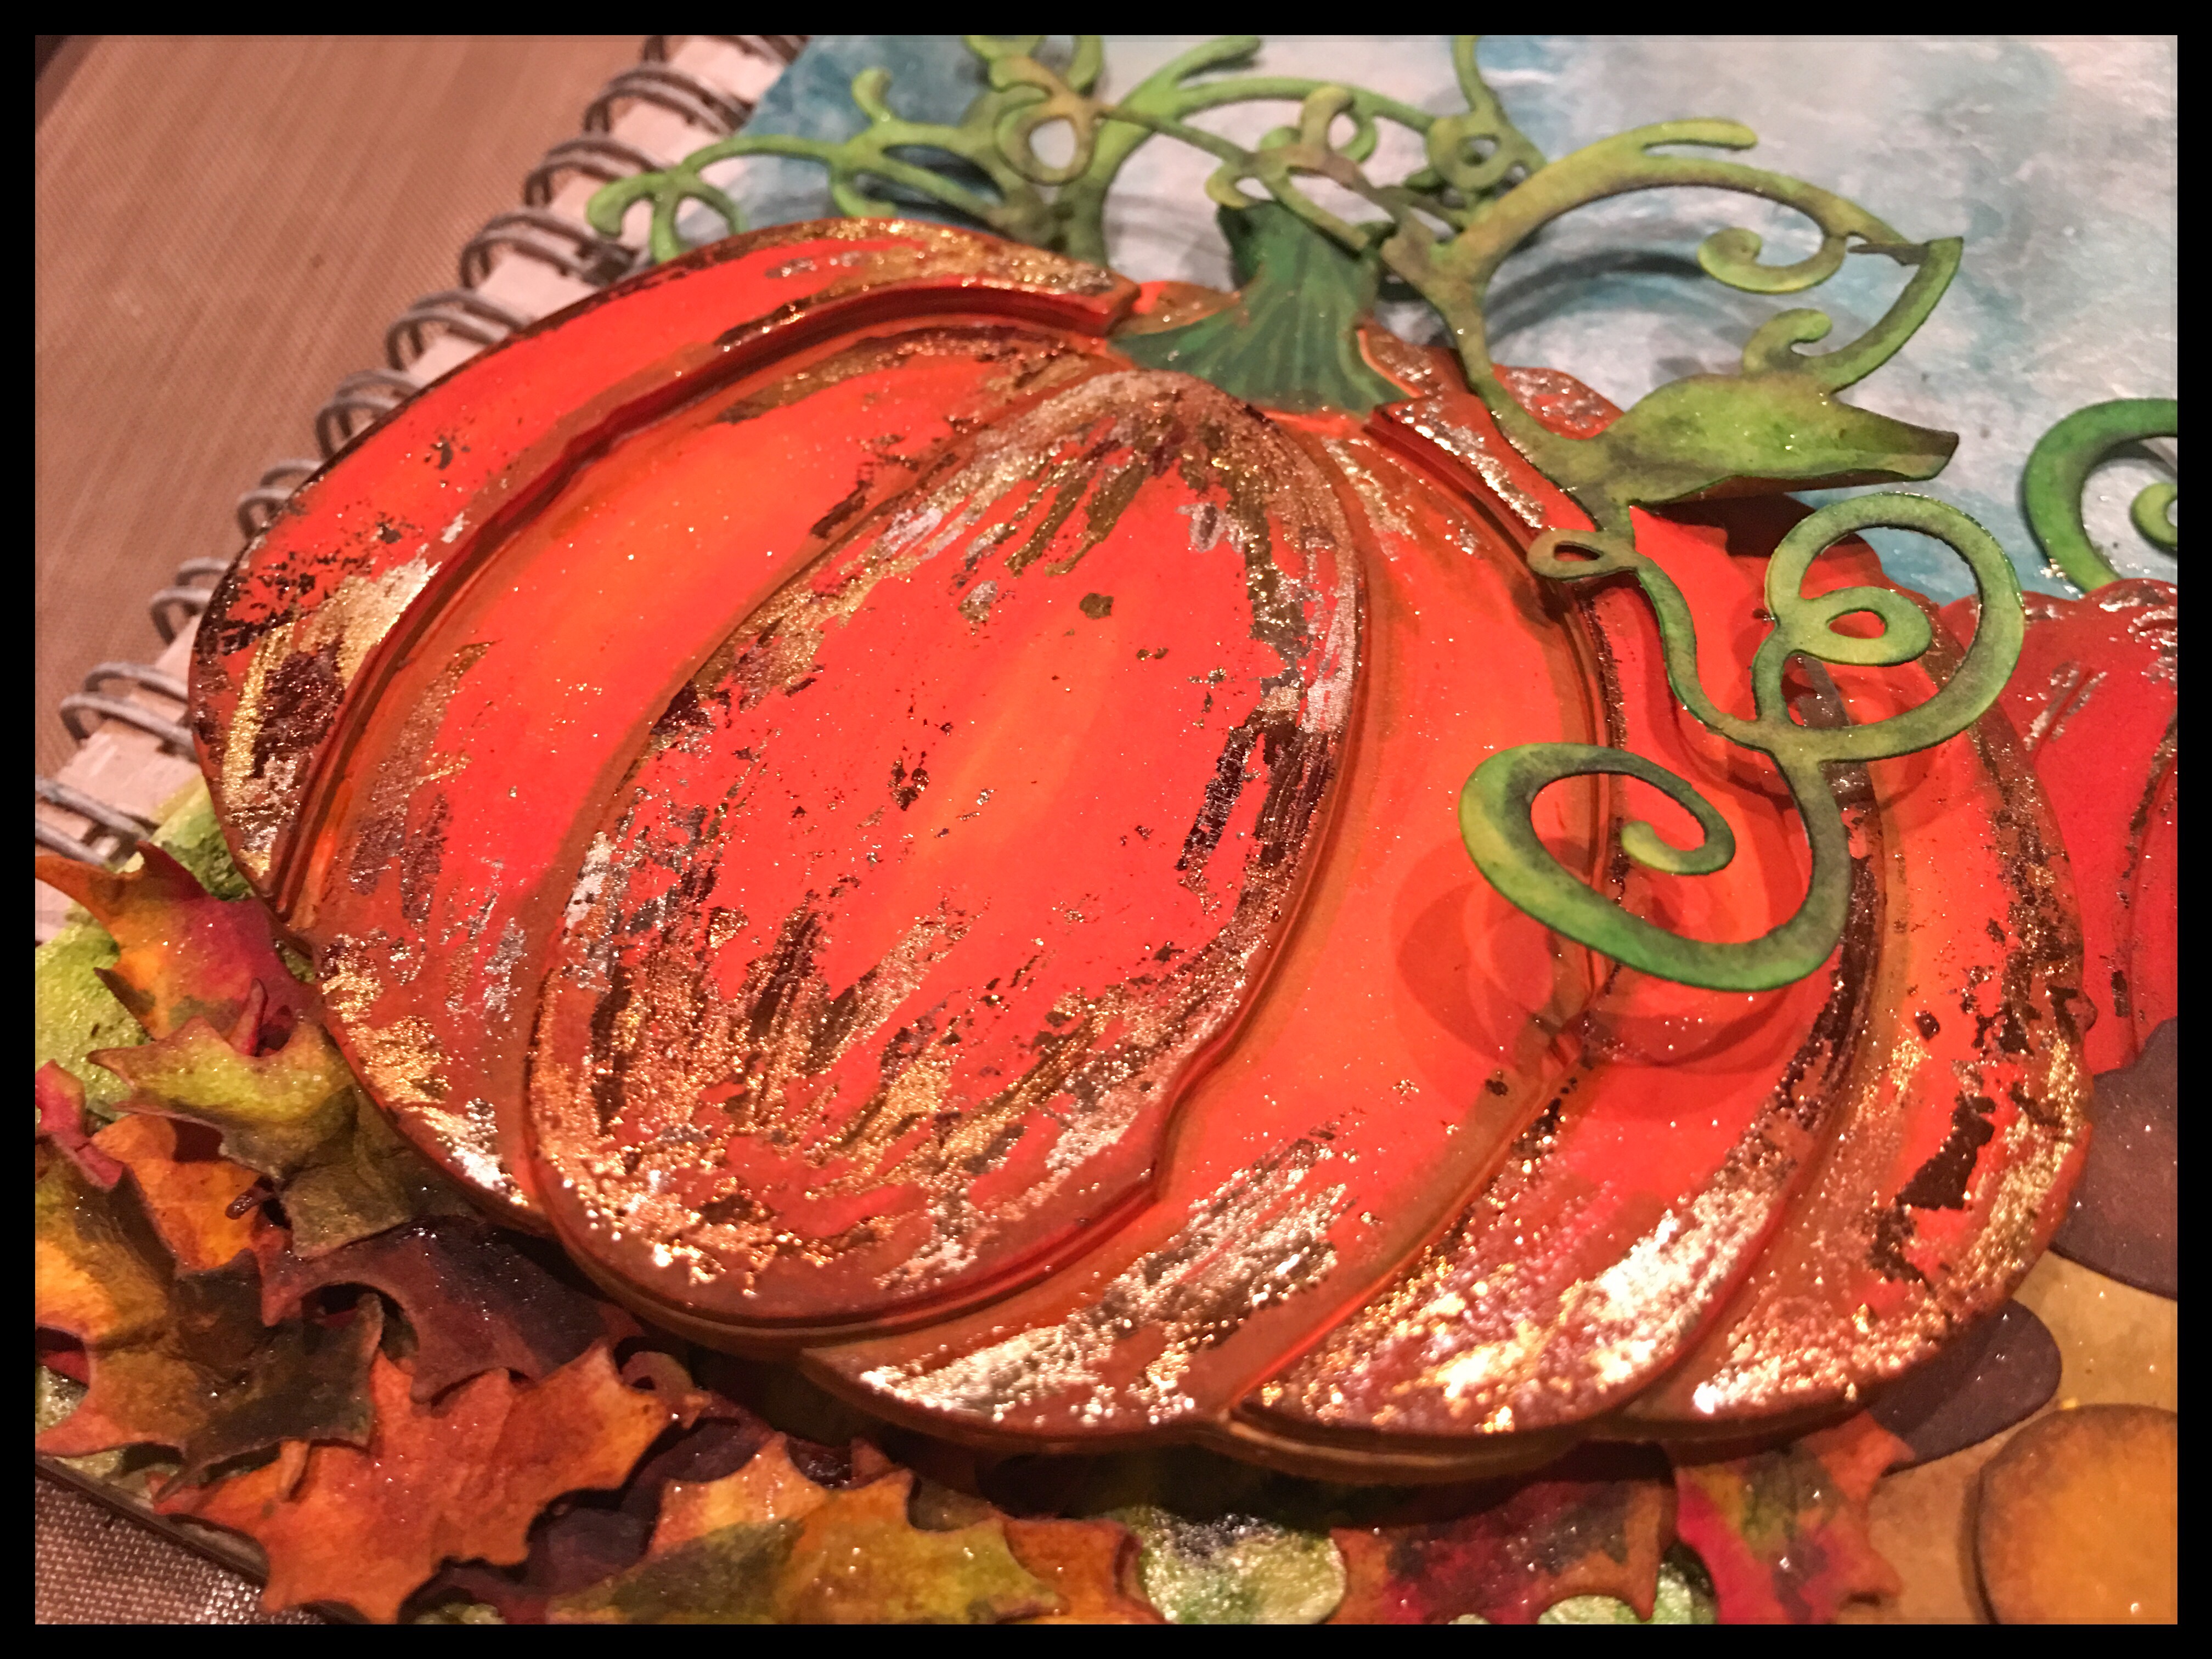
I started with just a little foil, but the more I added, the more I wanted. I was really liking the look and my pumpkins had almost a mercury glass look to the edges where I applied the foil.
Hint: For even more control over where you apply the foil, try using the Deco foil Transfer Gel and a paintbrush. Using a very small paintbrush, you can get the foil exactly where you want it. And, with a round brush you can do some brush lettering and foil it – I wish I was good at brush lettering (heavy sigh). However you choose to apply your foil, you won’t be disappointed in the result.TooltipText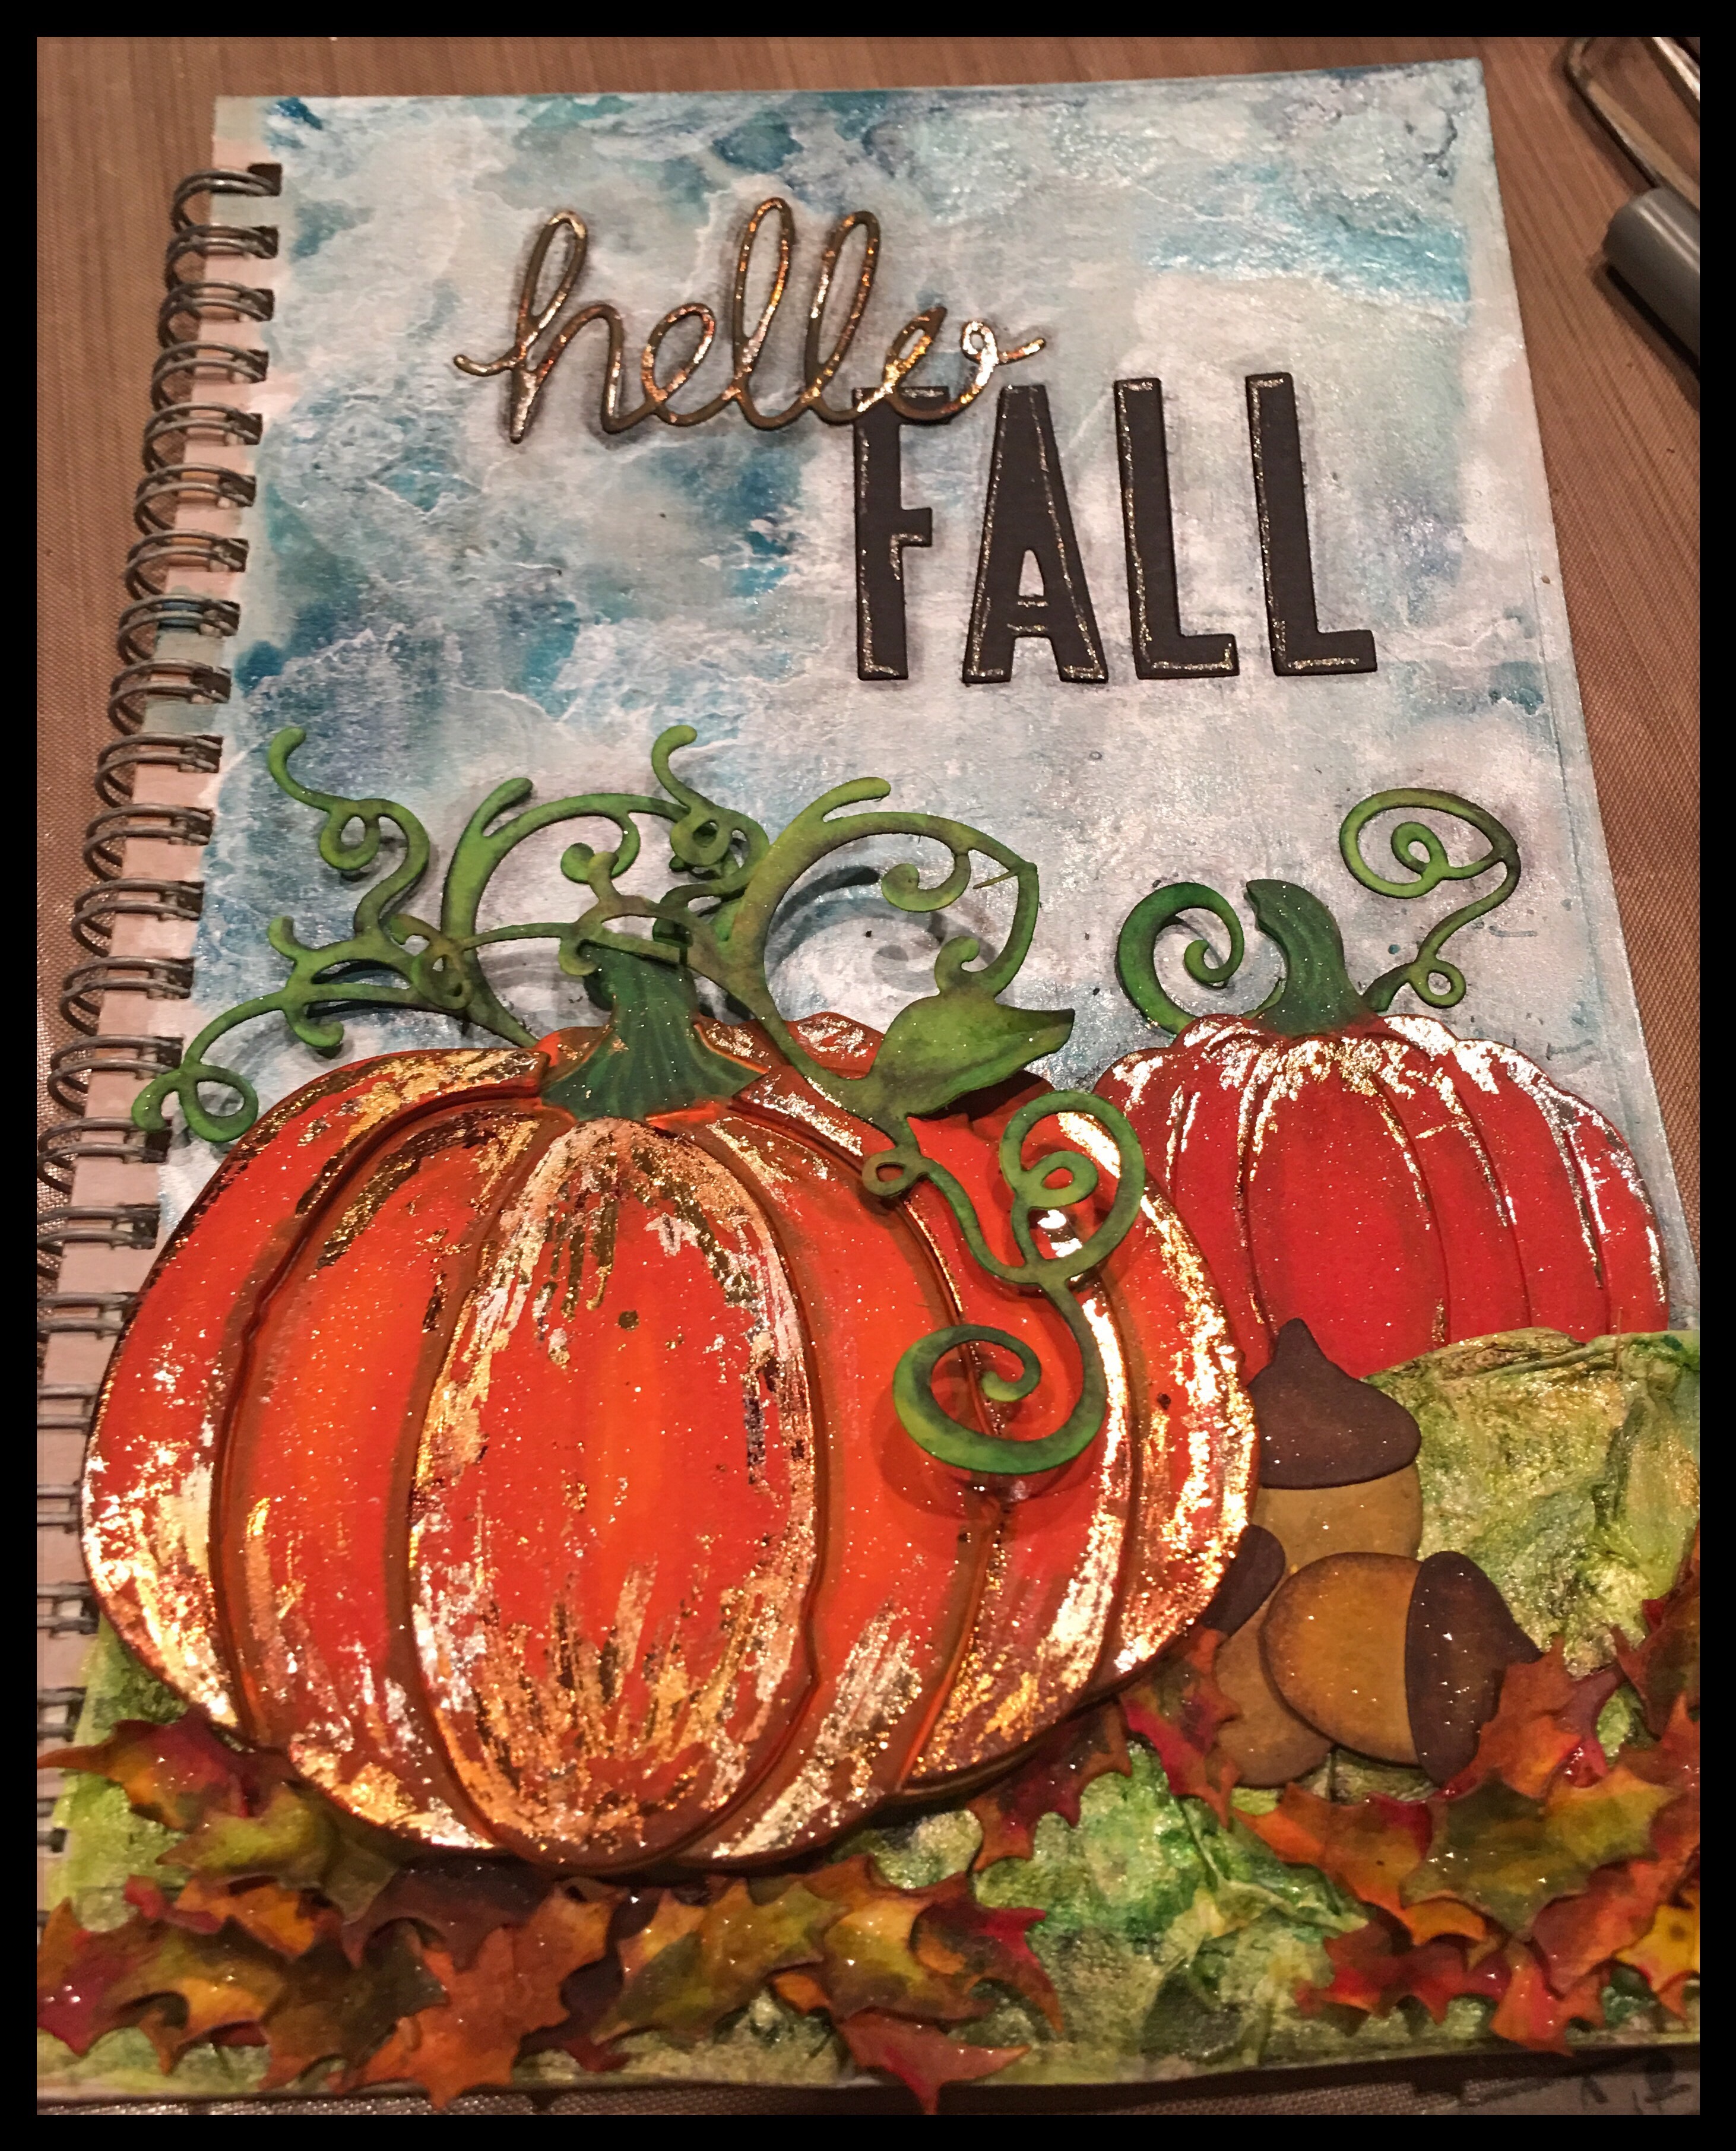


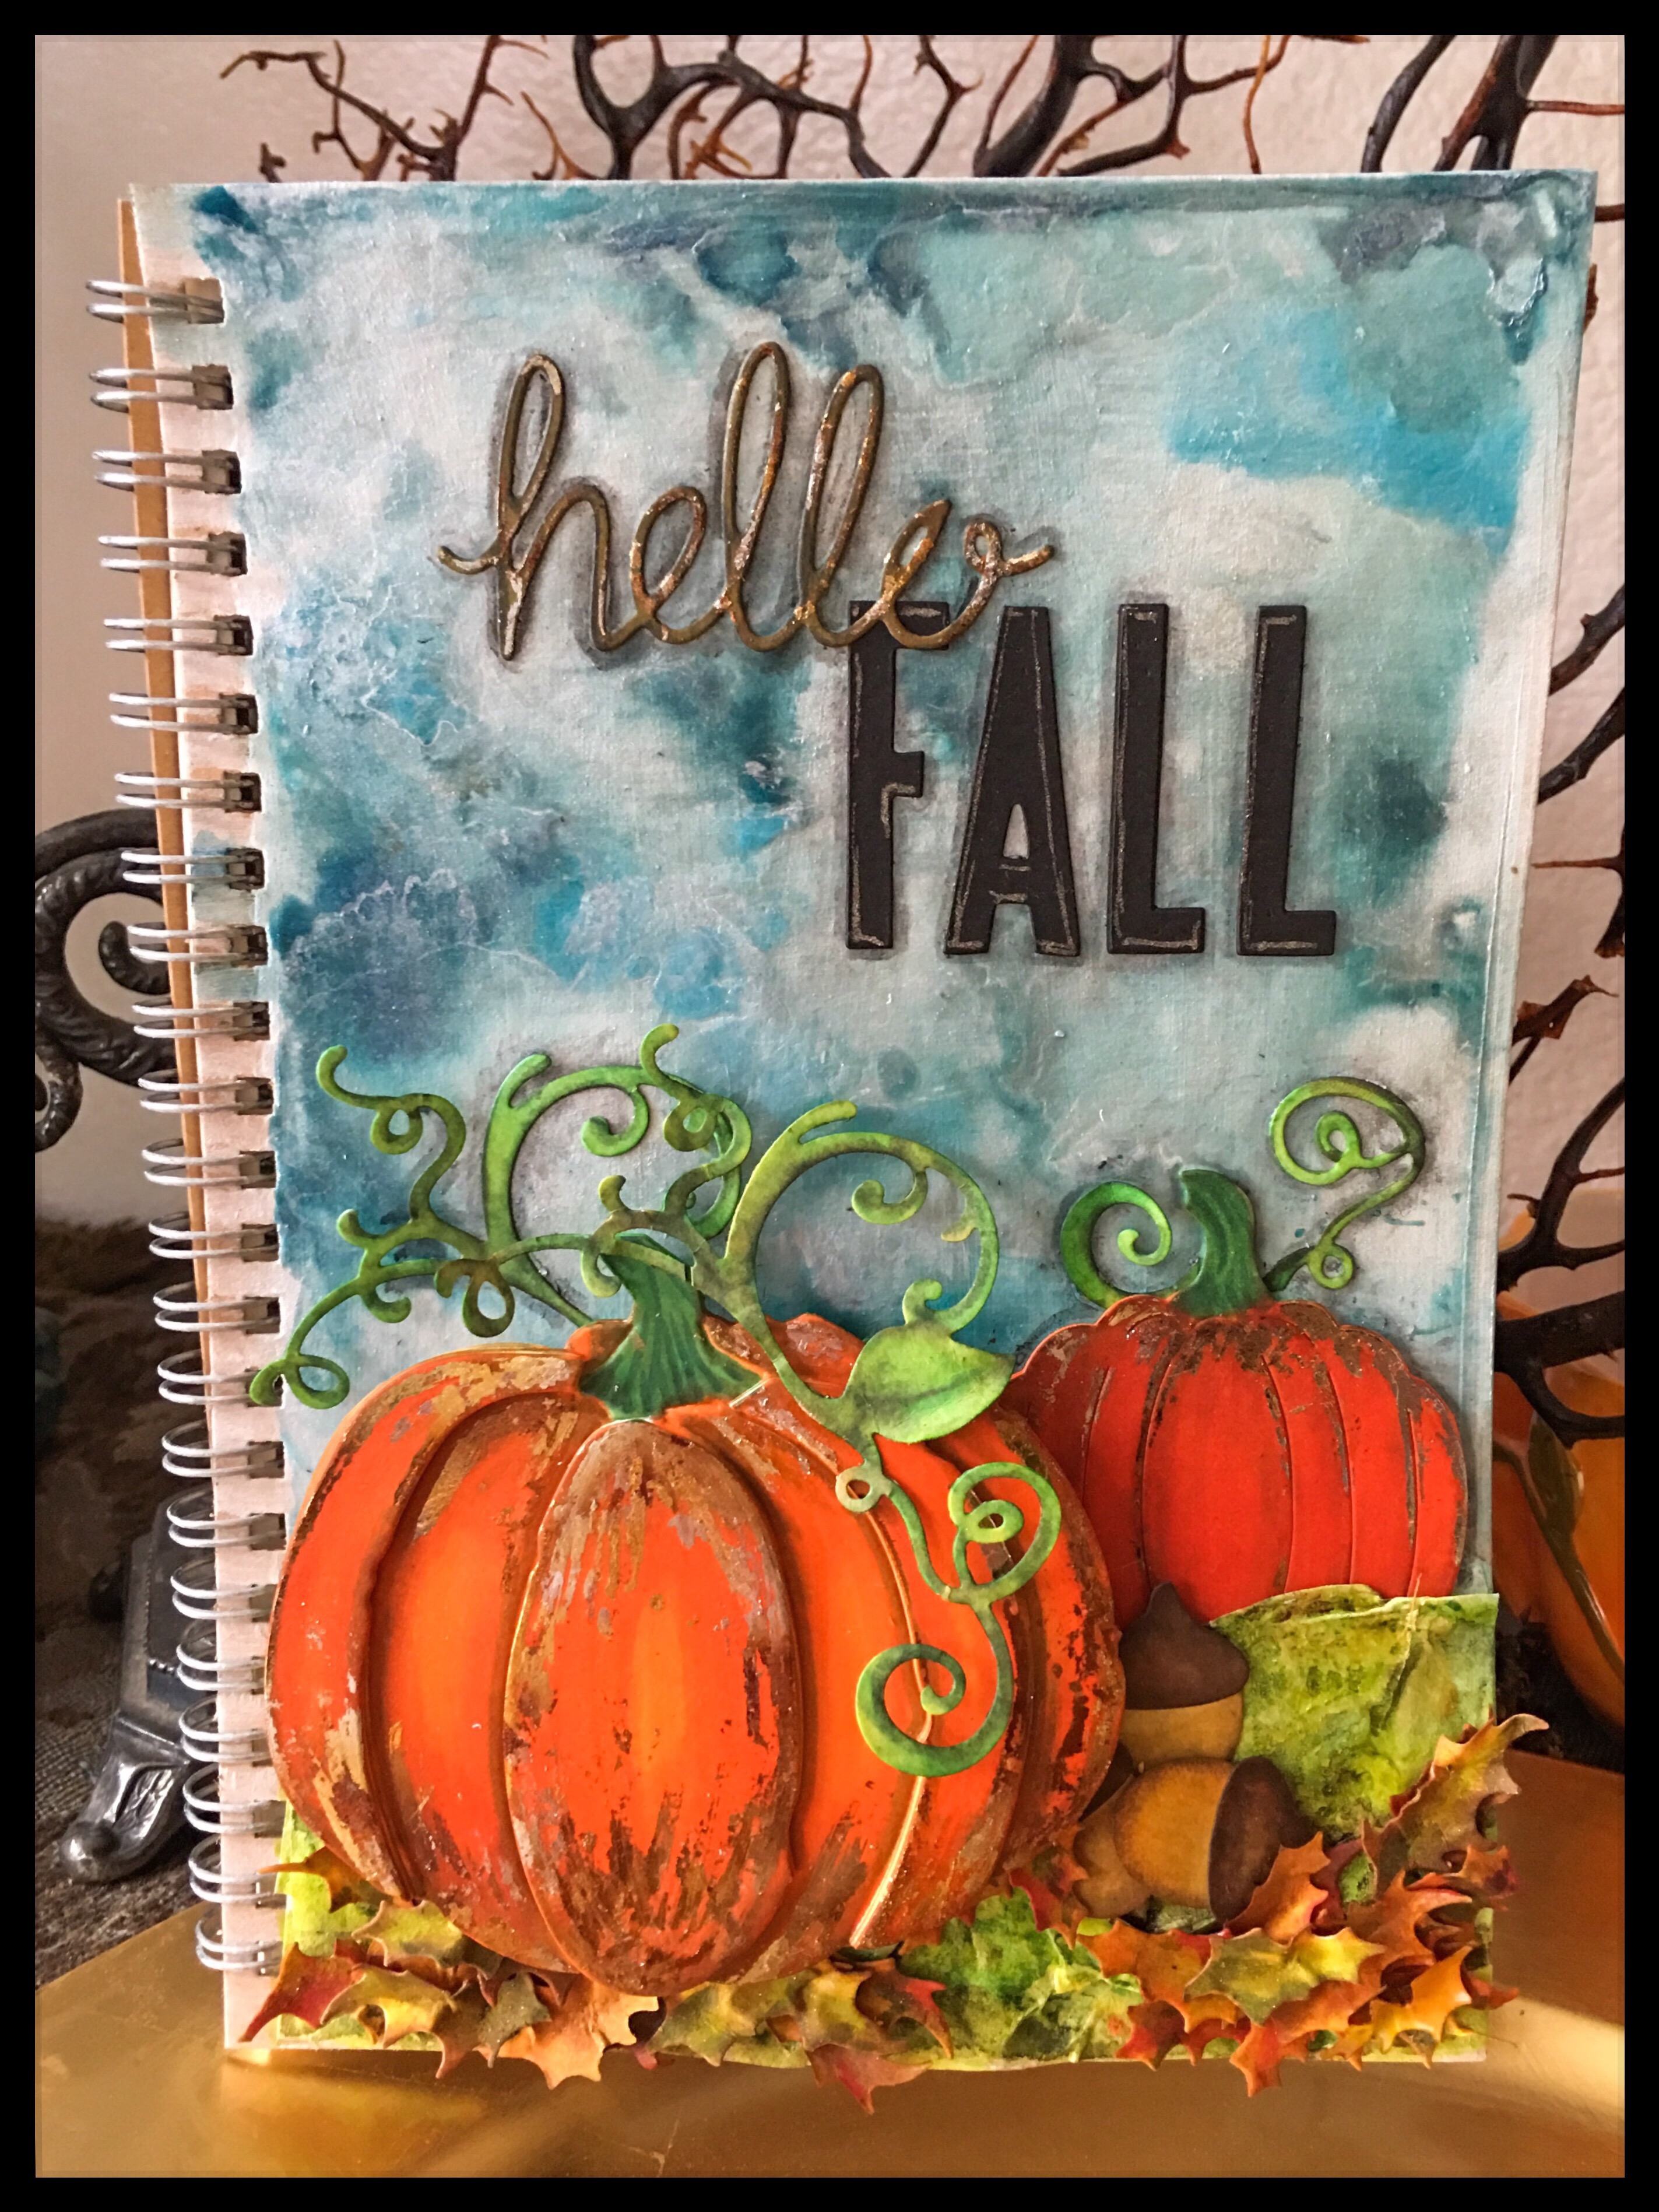
I hope y’all enjoyed my tribute to fall!
Natalie Godfrey
September 11, 2017 at 8:29 pm (7 years ago)Awesome! Love how the gold makes the pumpkin pop even more.
Wendy
September 29, 2017 at 10:51 am (7 years ago)Thank you so much!!
Sharon Roselli
September 28, 2017 at 8:12 am (7 years ago)This is so wonderful! Thank you for the step by step instructions. I want to try this myself. The foil on the pumpkins gives it such details.
Wendy
September 29, 2017 at 10:52 am (7 years ago)Thank you! I hope you do try it – it was fun to make.