


![]()
We’re excited to kick off a new week of fun and a new week of pairing up for the first time with our friends at Pink & Main!
Pink & Main
Pink and Main is your one-stop-shop for clear photopolymer stamps made in the USA. Their amazing stamps are designed with you in mind by owner and creator Michelle Currie! We hope you’ll stop by their website, get to know their products and take advantage today of special savings for Cyber Monday!
Join us all week as we team up with new projects to inspire you combining our two companies’ products along with some giveaways too! Getting us started this week is Katrina Hunt with a wintery layout featuring Deco Foil Flock Transfer Sheets along with Pink & Main papers and dies!
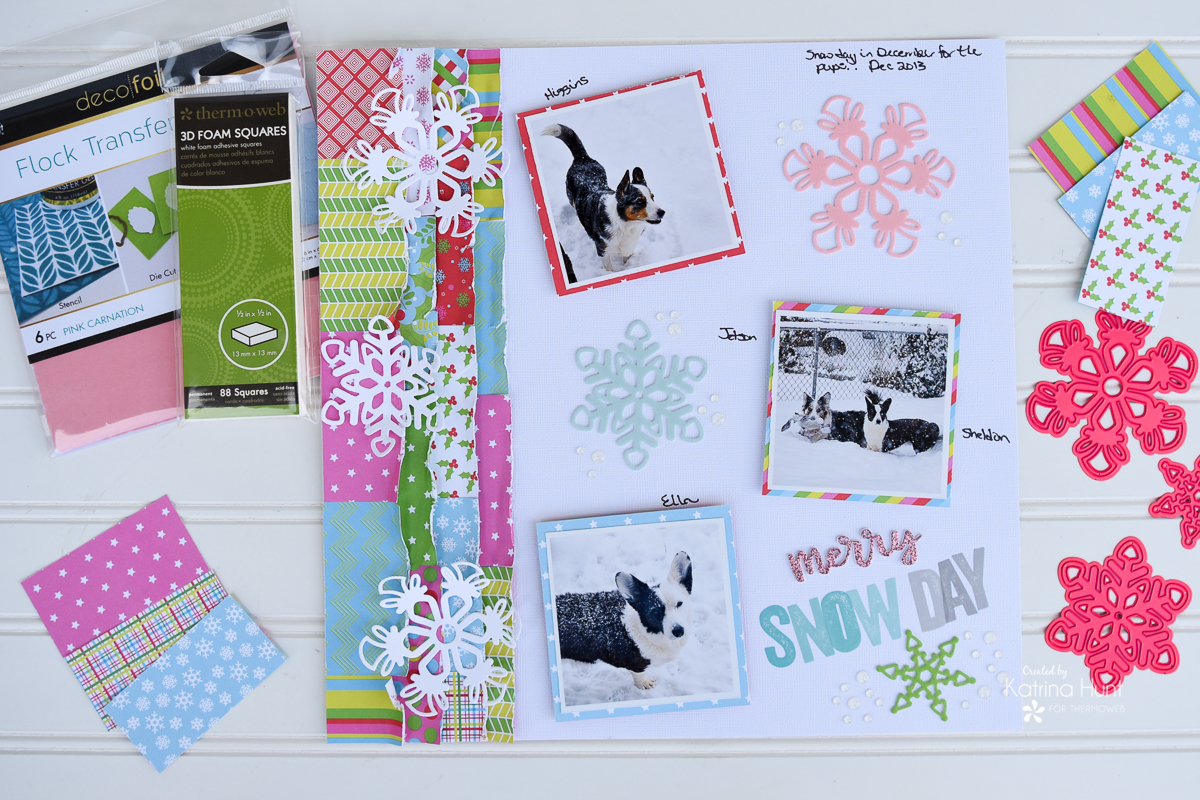
Hey Hey! It’s Katrina from Paper, Scissors, Glue and Hybrid Too sharing another layout on the blog here today to get those creative ideas going! I am going to show you how you can use just some cardstock, a 6×6 paper pad, some dies and some Deco Foil Flock to make a quick, fun layout!
Merry Snow Day Layout
Therm O Web Supplies Used:
iCraft Ultra Bond Adhesive-6.0 oz
iCraft Ultra Bond Adhesive-2.0 oz
Therm O Web 3D Foam Squares – 1/2 inch
Therm O Web 3D Foam Square – 1/4 inch
iCraft Adhesive Tape-1/2 inch
iCraft Purple Tape 1.5 inch
iCraft Purple Tape .5 inch
iCraft Deco Foil Flock Transfer Sheets-Blue Sky
iCraft Deco Foil Flock Transfer Sheets-Pink Carnation
iCraft Deco Foil Flock Transfer Sheets-Green Envy
Gina K Designs Premium Cardstock – Luxury White
Other Supplies Used
American Crafts White Cardstock 12×12
Waffle Flower Crafts Stardust Enamel Dots
Pink and Main Be Merry 6×6 paper pad
Pink and Main Bold Christmas Dies
Pink and Main Bold Snowflake Dies
Layout Instructions
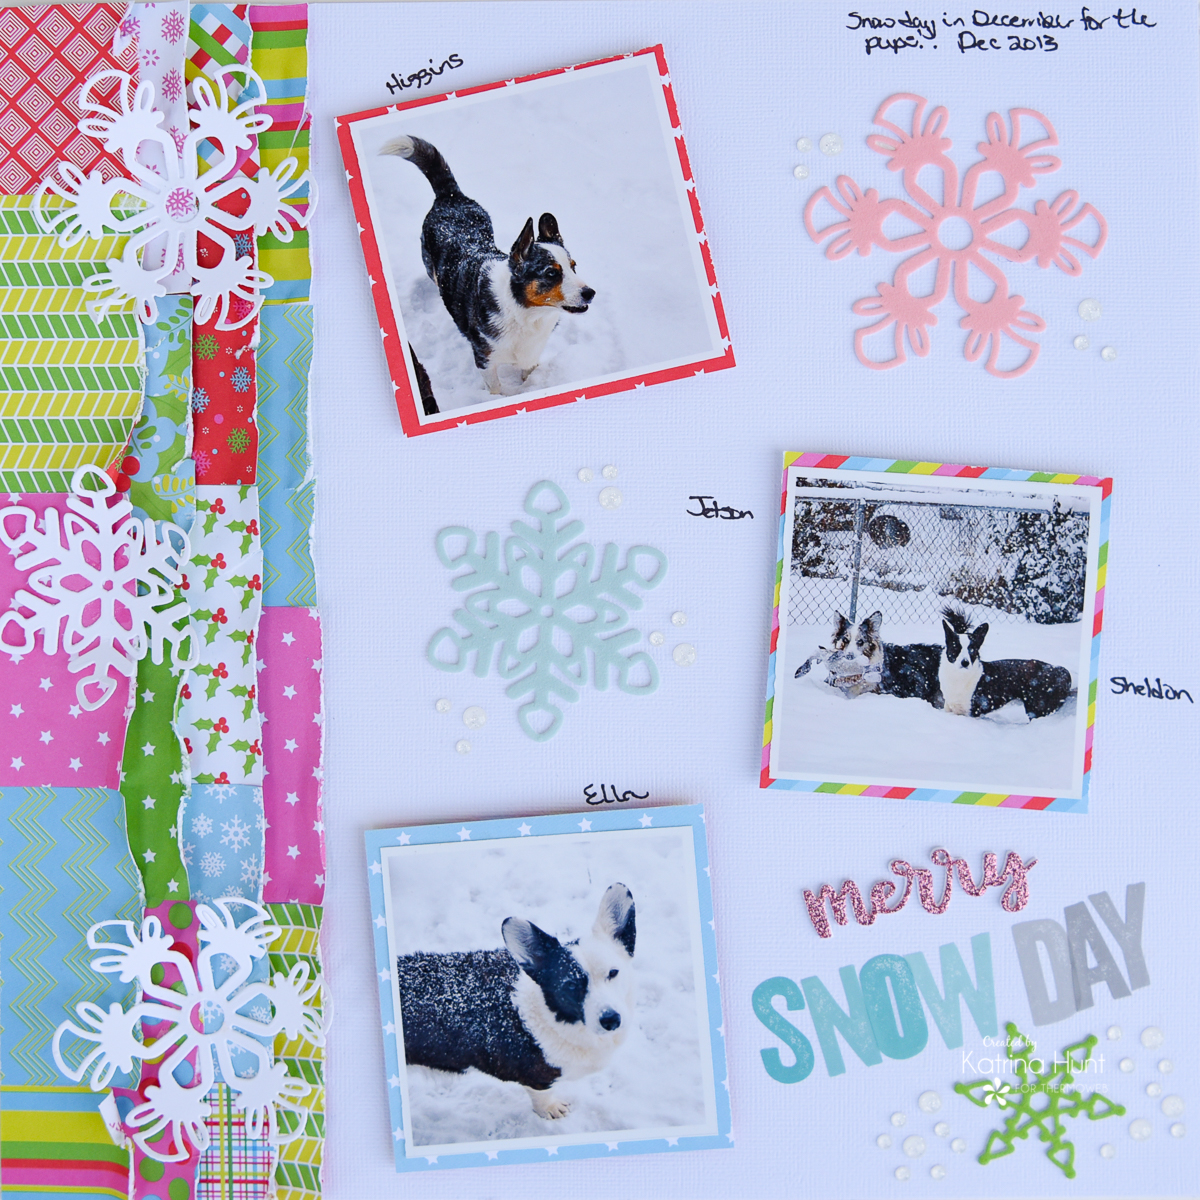
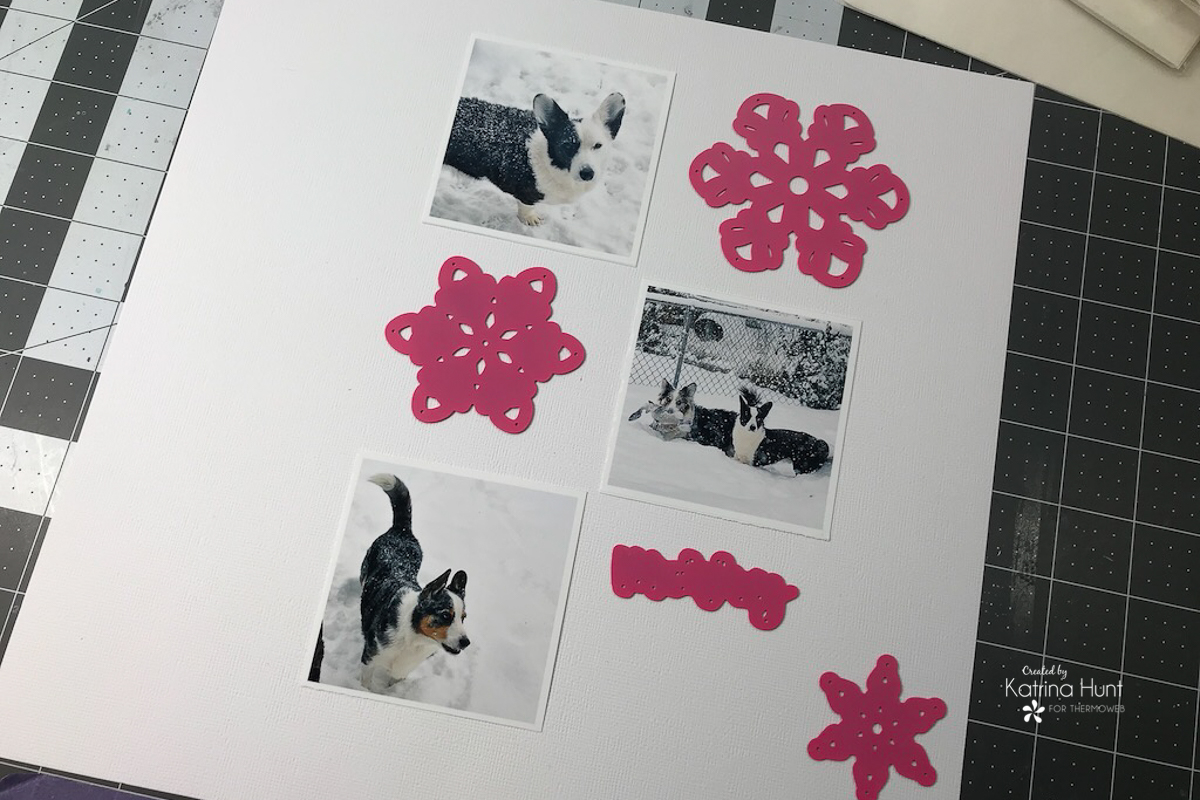
Begin layout by printing three pictures with an approximate size of 2.75 square. After printing pictures, play with the arrangement on your page by using the pictures and the dies as shown below. This process will also allow you to figure out where you want your strips of paper to stop on the left-hand side of the page.
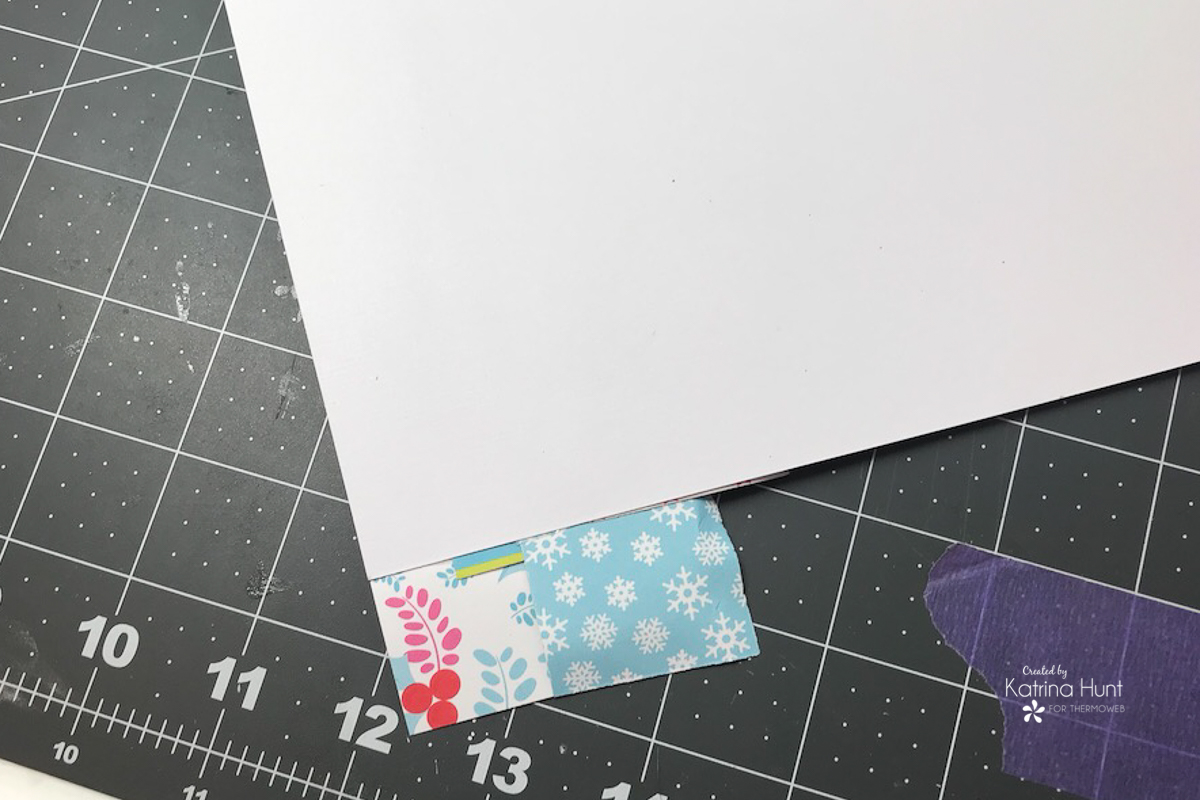
Once you have your spacing, you can then begin cutting your strips of paper that you will piece together. I used a 6×6 paper pad and cut strips approximately 1.5 inches by 3.0 inches, but you could vary this depending on how detailed you want your strips.
Next, to make the strips easier to arrange and adhere, I used the iCraft Purple Tape to hold my pieces together. By doing this, it also allows you to move patterns around if you do not like the arrangement once you have your strip together. This technique will also allow you to make strips slightly longer than your 12×12 cardstock and then you can offset the paper pieced strips.
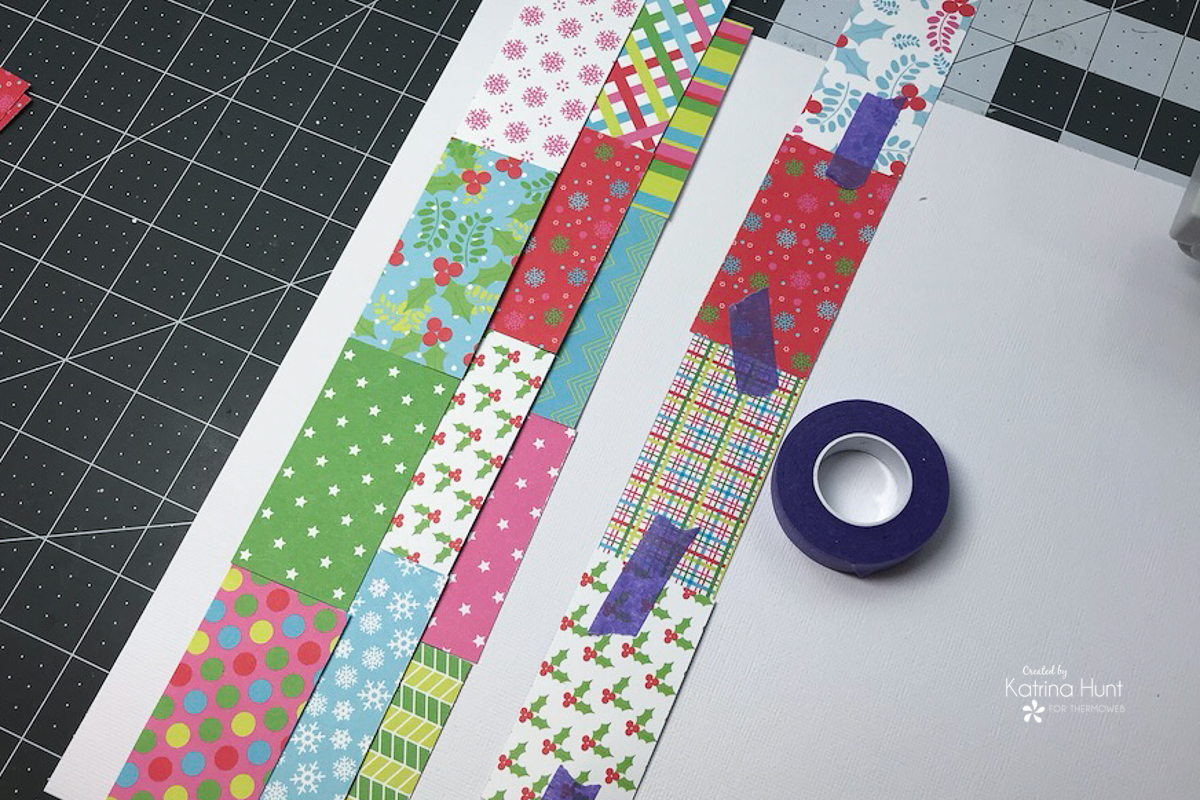
Before attaching your taped together strips down on your cardstock, you can distress the edges if you like using a pair of scissors. Next, adhere the trips on the cardstock by running a length of the iCraft Adhesive Tape down the length of the page. Remove the adhesive protective covering and then adhere the strip down on the length of adhesive. This will also allow you to rough up and curl the edges of the strips for some added dimension to your layout.

If you follow the instructions and make longer strips, this will, of course, have part of the strip hanging off the edge of your cardstock. Easily solved by just trimming off the excess even with your layout edge!
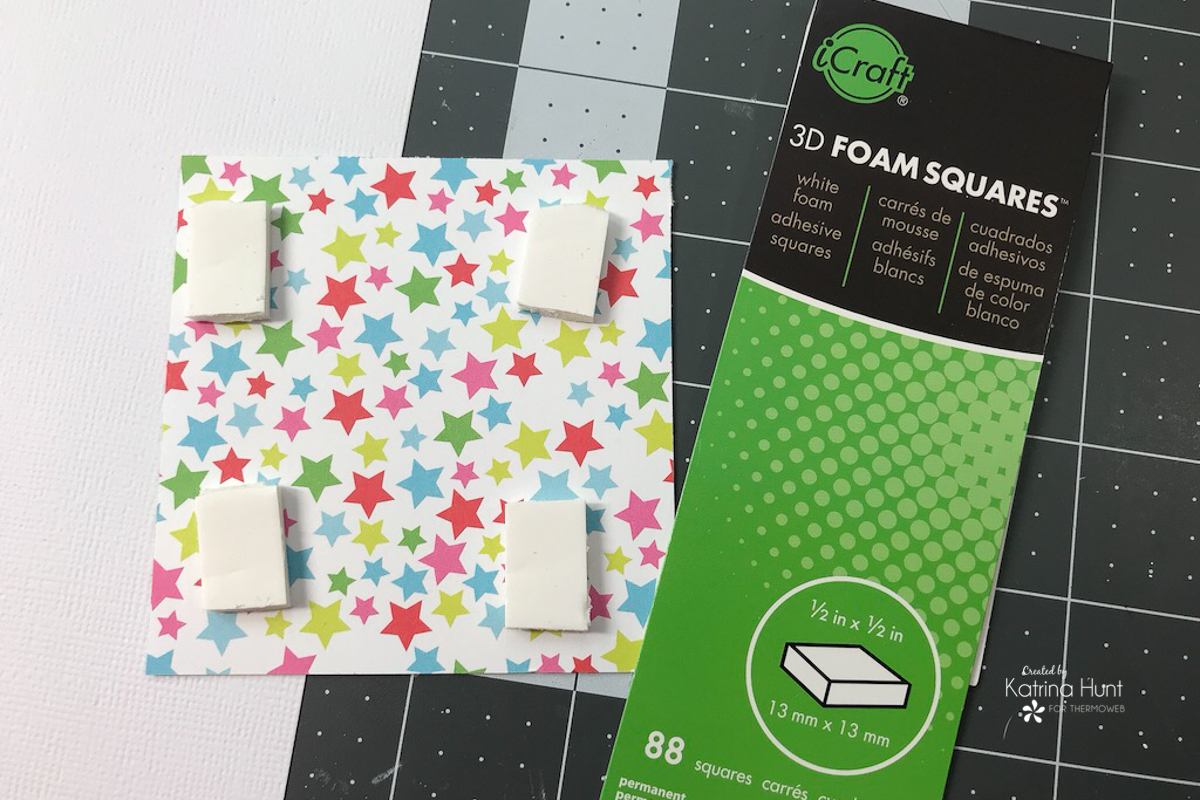
After your strips are adhered down, you can begin working on placing your pictures on the layout. You can mat the pictures with a piece of the coordinating pattern paper you used, or you can leave them as is. I wanted a little more color, so I choose to mat them. In addition, you can create more dimension to your layout by using the 3D Foam Adhesive Squares to adhere your pictures to your layout.
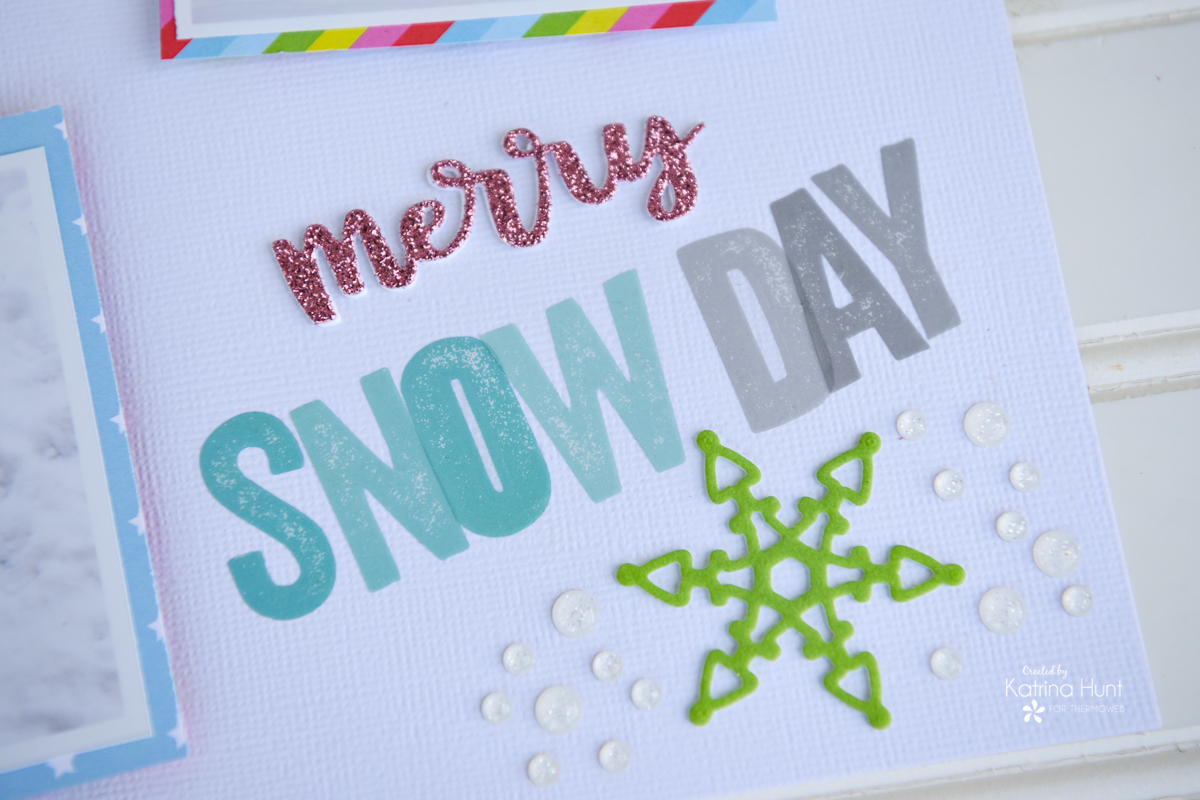
Finally, it’s time to add some flocked snowflakes! Start by cutting pieces of Deco Foil Foam Adhesive and Deco Foil Flock that will fit the snowflake dies.

Begin by peeling the adhesive protective covering off the foam adhesive. Lay your flock fuzzy side down on top of the adhesive foam. Run thru your manual die cutting machine to transfer the flock to the foam adhesive. Carefully peel back the flock transfer sheet. The easiest way is to place the flocked piece down on your table.
Now, slowly pull the flock transfer sheet away from the foam, while holding the foam in place. This will keep the foam from stretching. Next, place the die (cutting side down) on top of the flocked foam adhesive, then run back through your die cutting machine. Carefully remove the flocked die cut piece from the die and attach it to your layout.

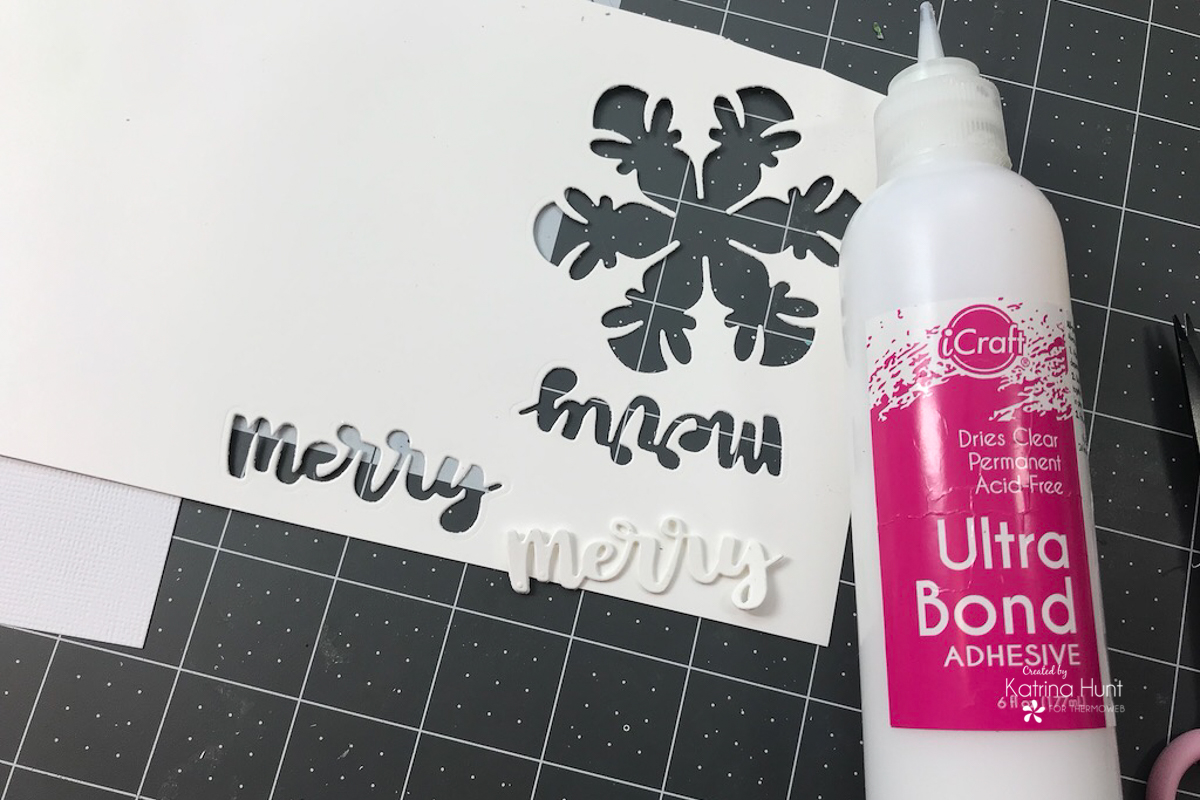
In order to create your title, you will die cut the word “merry” three times. Two times from the Gina K Cardstock in White and one time in a glitter cardstock. By using three cuts, you can create a chipboard type effect with your die cut. Adhere all of the cuts together with the Ultra Bond Liquid Adhesive.
Besides the flocked snowflakes, you can also make white cardstock ones to add some more fun to your layout! In addition, sparkly enamel dots or sequins are fun to add as you can see below.
Thanks for stopping by today! And I know a lot of you have snow, so why not make a layout about it!!!
So before you go we’d like to invite you to enter to win a $25 Gift Card to shop with us! Be sure to follow the Rafflecopter to get yourself entered to win! And that’s not all! Our friends at Pink & Main are offering a chance to win a surprise package valued at $50!! Visit their blog for more details and to see the projects their talented team made with our products as well! It’s going to be an amazing week!

And before you go…today is the last day to take advantage of our Cyber Monday Sale! Save 20% off plus receive FREE shipping on orders over $50 after coupon applied! Plus you’ll find many of your favorite products on sale for added savings! Shop online at http://www.thermowebonline.com for all your favorite products! It’s the perfect time to stock up!

phyllis rodriguez
December 2, 2019 at 10:03 am (4 years ago)what a great way to us up your scraps .. always looking for good ways to use them ..thanks you for a new idea
Meghan Kennihan
December 2, 2019 at 3:59 pm (4 years ago)Great collaboration and darling LAYOUT! My fav product from Pink and Main is the Fa La Llama stamp set!
Becca Yahrling
December 2, 2019 at 4:48 pm (4 years ago)Awesome collaboration! I love the new ‘Holly Jolly’ stamp. That’s a card all by itself! lol
Sue D
December 2, 2019 at 7:45 pm (4 years ago)Fabulous snowy layout. I like Pink and Main’s holiday wreaths set.
laurie2cats
December 2, 2019 at 11:04 pm (4 years ago)Did you mean to comment on our favorite product from Pink and Main? I am loving the Wreath Base 2 Dies, so versatile. (Rafflecopter says comment on my favorite product from Reverse Confetti, it is Stitched Bursts Cover Panel Confetti Cuts.)
Denise Bryant
December 2, 2019 at 11:20 pm (4 years ago)Love the snowflakes and papers! Awesome layout!
My favorite is the Season of Change stamp set!
Jamie Hodge
December 3, 2019 at 2:28 pm (4 years ago)The Snowflakes are stunning and I love the colour palette you chose.
Mary Holshouser
December 4, 2019 at 1:02 pm (4 years ago)Love the layering of the papers on the one
side. Have to keep those pictures of the pups.
Looks like they are enjoying the snow.
thanks for sharing
txmlhl(at)yahoo(dot)com