


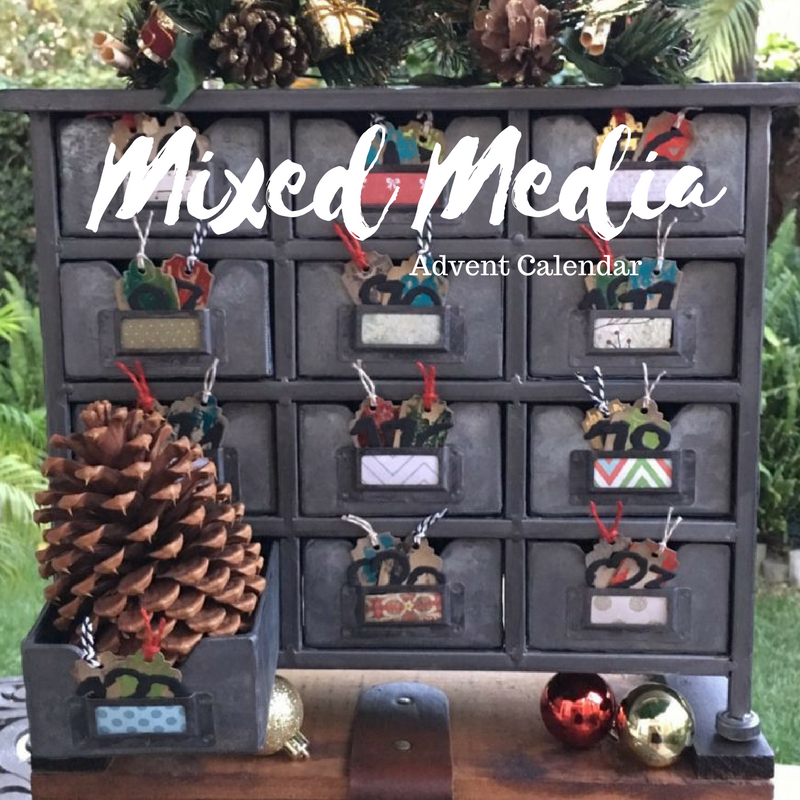
Hello, Wendy here with my take on a traditional advent calendar. I always want more space than what a traditional advent calendar allows (so I can fit small games, mini Lego sets, etc.), so this was my answer . . .
It’s a Mixed Media Advent Calendar (Chest)!
Therm-O-Web Supplies used:
iCraft Mixed Media Adhesive
iCraft Deco Foil Adhesive Pen
Rebekah Meier Designs Mixed Media Transfer Foil – Amber Watercolor
Deco Foil Transfer Sheets – Gold
Deco Foil Transfer Sheets – Pewter
Deco Foil Transfer Sheets – Spring Green
Deco Foil Transfer Sheets – Red
Deco Foil Transfer Sheets -Aqua
Deco Foil Transfer Sheets – Opal
Deco Foil Transfer Sheets – Green
iCraft Super Tape- 1/8″
Other Supplies Used:
Sizzix Big Shot Die-Cutting Machine
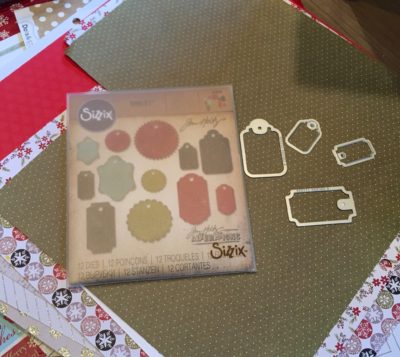
Sizzix Thinlit Die Set – Gift Tags by Tim Holtz
Sizzix Bigz XL Die Inserts & Envelopes by Brenda Walton
Mini Chest of Drawers
Stencils
Distress Ink
Twine
Cardstock
Patterned Papers (Christmas Theme)
Scissors
Heat Tool
Mixed Media Advent Calendar Instructions:
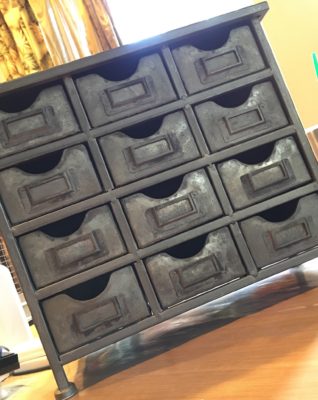
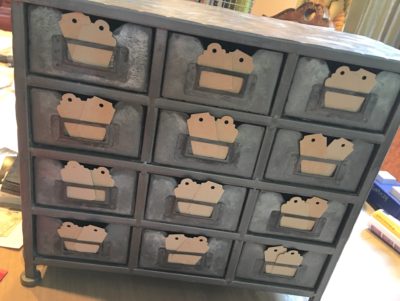
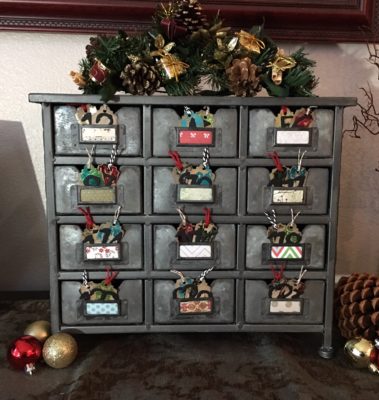
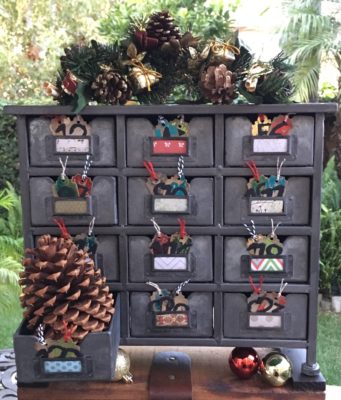
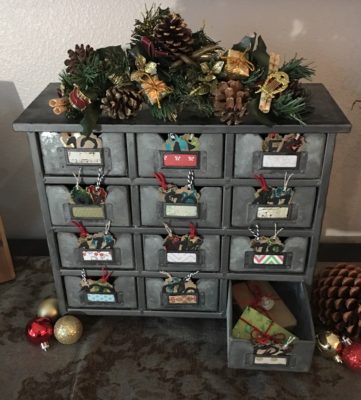
I started my project with a small chest of drawers I purchased at a local craft store. I had this in my stash (because I have an obsession with anything that has lots of small drawers) but I have seen the same one recently.
Hint: If you don’t have or don’t want to invest in the chest, Large matchboxes covered in scrapbook paper and adhered together could work just as well.
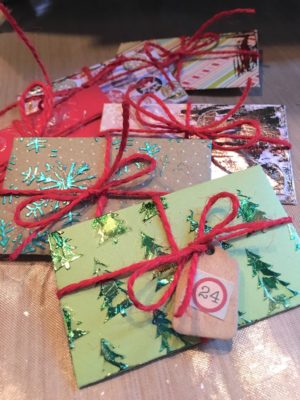
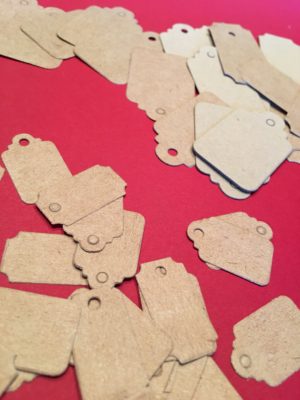
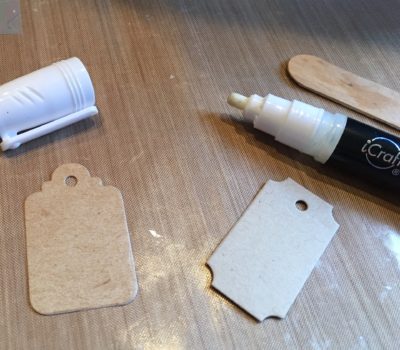
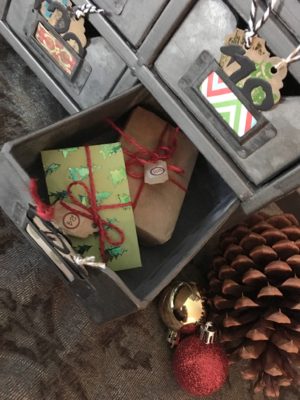
Because the drawers are a pretty good size on this, I decided to do a full 24 days. Each drawer will contain one wrapped gift and one envelope containing a treat, or a clue to find the treat. I started by die-cutting 48 tags (24 small and 24 tiny). The small tags will go into the front of the drawers and the tiny tags will go onto the envelope or gift to match up to the outside tag.
Hint: If you don’t have a die-cutting system, you can hand-cut one tag of each size and then use them as templates to cut the rest.
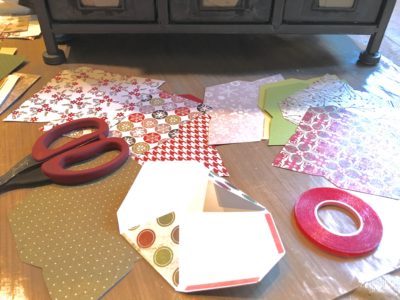
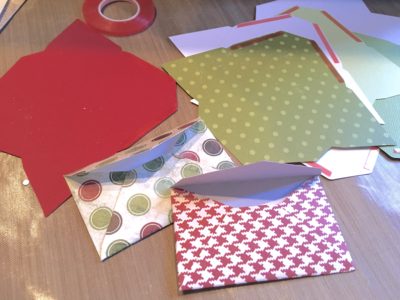
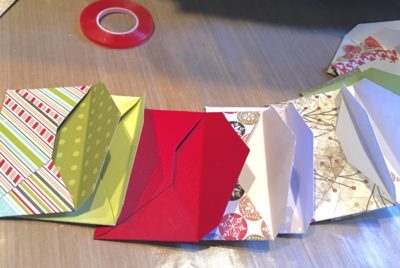
Next I die-cut 12 mini envelopes from scrapbook paper and assembled using iCraft Super Tape.
Hint: You can also use purchased mini envelopes and just mat them with scrapbook paper.
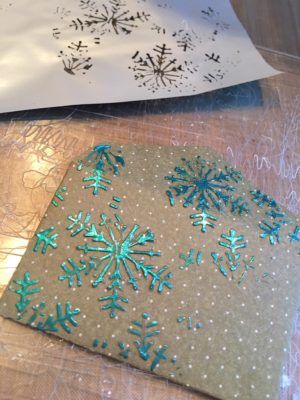
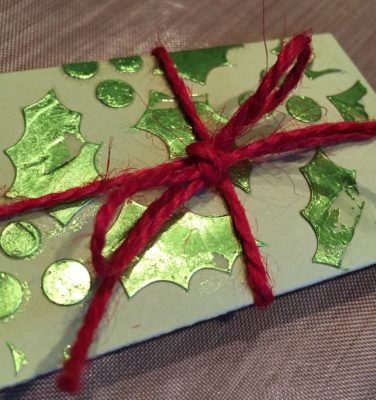
Now the fun part begins! I absolutely love using the Deco Foil Transfer Gel with stencils. I did this part before I started on the tags because the Transfer Gel needs to dry for about an hour to set up. Lay your stencil over the area of your envelope you wish to embellish and spread a generous amount of Transfer Gel over the surface of the stencil using a spatula. Gently lift the stencil from your envelope and set aside to dry. Note that I stenciled random areas on my envelopes. For some of the env, lopes I didn’t use a stencil at all, but used my spatula to spread a little Transfer Gel at the corners or along the edges.
Hint: If you don’t have a craft spatula, an icing spreader will work just as well.
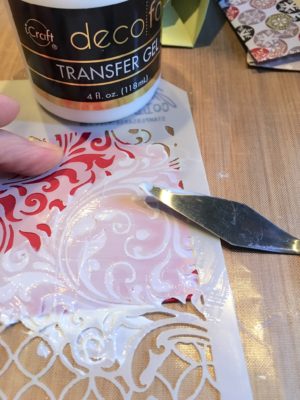
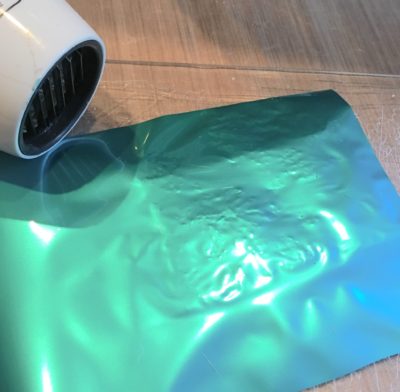
Let the Gel set up completely (it will turn clear when it is ready). You can see that this one is just minutes from being ready.
For this next part you have choices. You can choose to either follow the Deco Foil Transfer Gel instructions which direct you to cover the dried Transfer Gel with your Deco Foil Transfer Sheet and run it through your laminating or foiling machine to transfer the foil. This works perfectly and gives you a flawless foiled image. I, however, was looking for a way to get a more grungy foil treatment so I played around with it a bit and found choice number 2. This is what I did: After the Transfer Gel was completely dry, I used my heat tool to heat the Transfer Gel until the surface of the Gel was glossy and then I quickly placed my foil sheet over it and burnished it with a bone folder. I even gave mine a once-over with the heat tool after I applied the foil.
Hint: Make sure you have a piece of Transfer Foil cut to size and ready if you are using your heat tool to activate Transfer Gel.
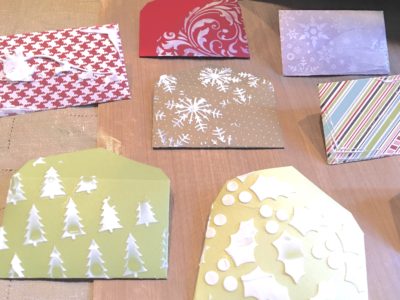
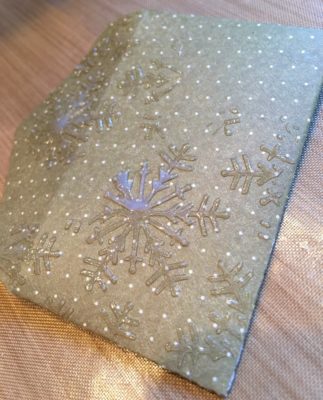
Photos do not do justice to this technique. I can’t even describe how fab these look. Not only is there shine from the foil, but the dimension you can achieve with the Transfer Gel is phenomenal. The viscosity of the Gel (which is similar to a gel medium) gives the impression that you are just transferring the stenciled image, but that is just not the case. I absolutely love the way these envelopes look and feel.
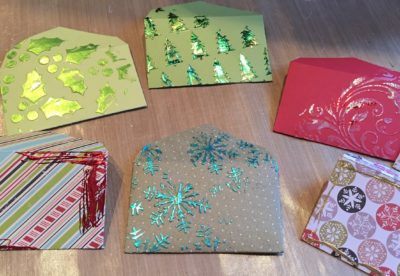
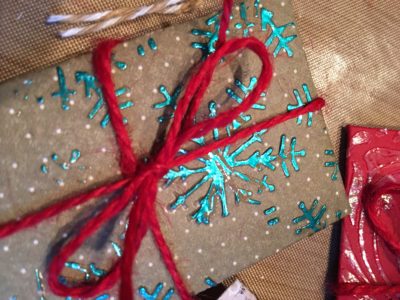
Once you have foiled all of your envelopes, stuff with treats or clues and tie up with twine. Make sure to add your tag which matches the countdown on the front of the drawers.
Next, we will turn our attention to the tags.
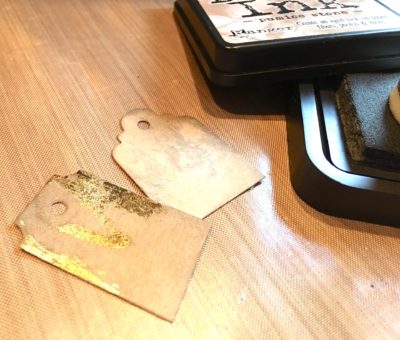
I used the Deco Foil Glue Pen to add a little foil to the tags. To keep it interesting I used several different colors. Scribble on the tags (anywhere you want the foil to stick), give it a minute or two to set up and press the mat side of the Deco Foil Transfer Sheet to the tag. It’s as easy as that. After I foiled my tags, I used a bit of Distress Ink by Tim Holtz. to age the tags a bit.
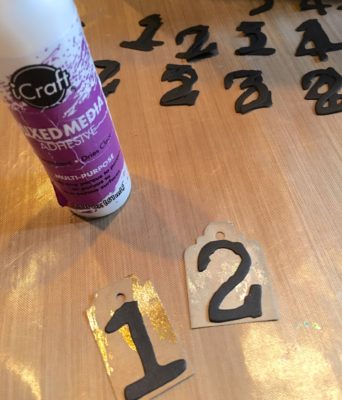
Finish the tags by adding numbers (mine are die-cuts) and a bit of twine.
I finished up my embellishing by adding scraps of patterned paper to the label area of each drawer and by adding some Christmas decoration picks to the top.
I hope you enjoyed my take on a traditional Advent Calendar and are inspired to create your own while there is still time!

Don’t forget to join us on Instagram all this week! We’re celebrating Mixed Media by hosting a Photo a Day Challenge to give YOU a chance to win Rebekah Meier Designs Mixed Media Collection from Therm O Web.
Simply post a picture on your Instagram with the challenge word and then tag us #thermoweb #rebekahmeierdesigns for a chance to win! Today’s word is stamping!