


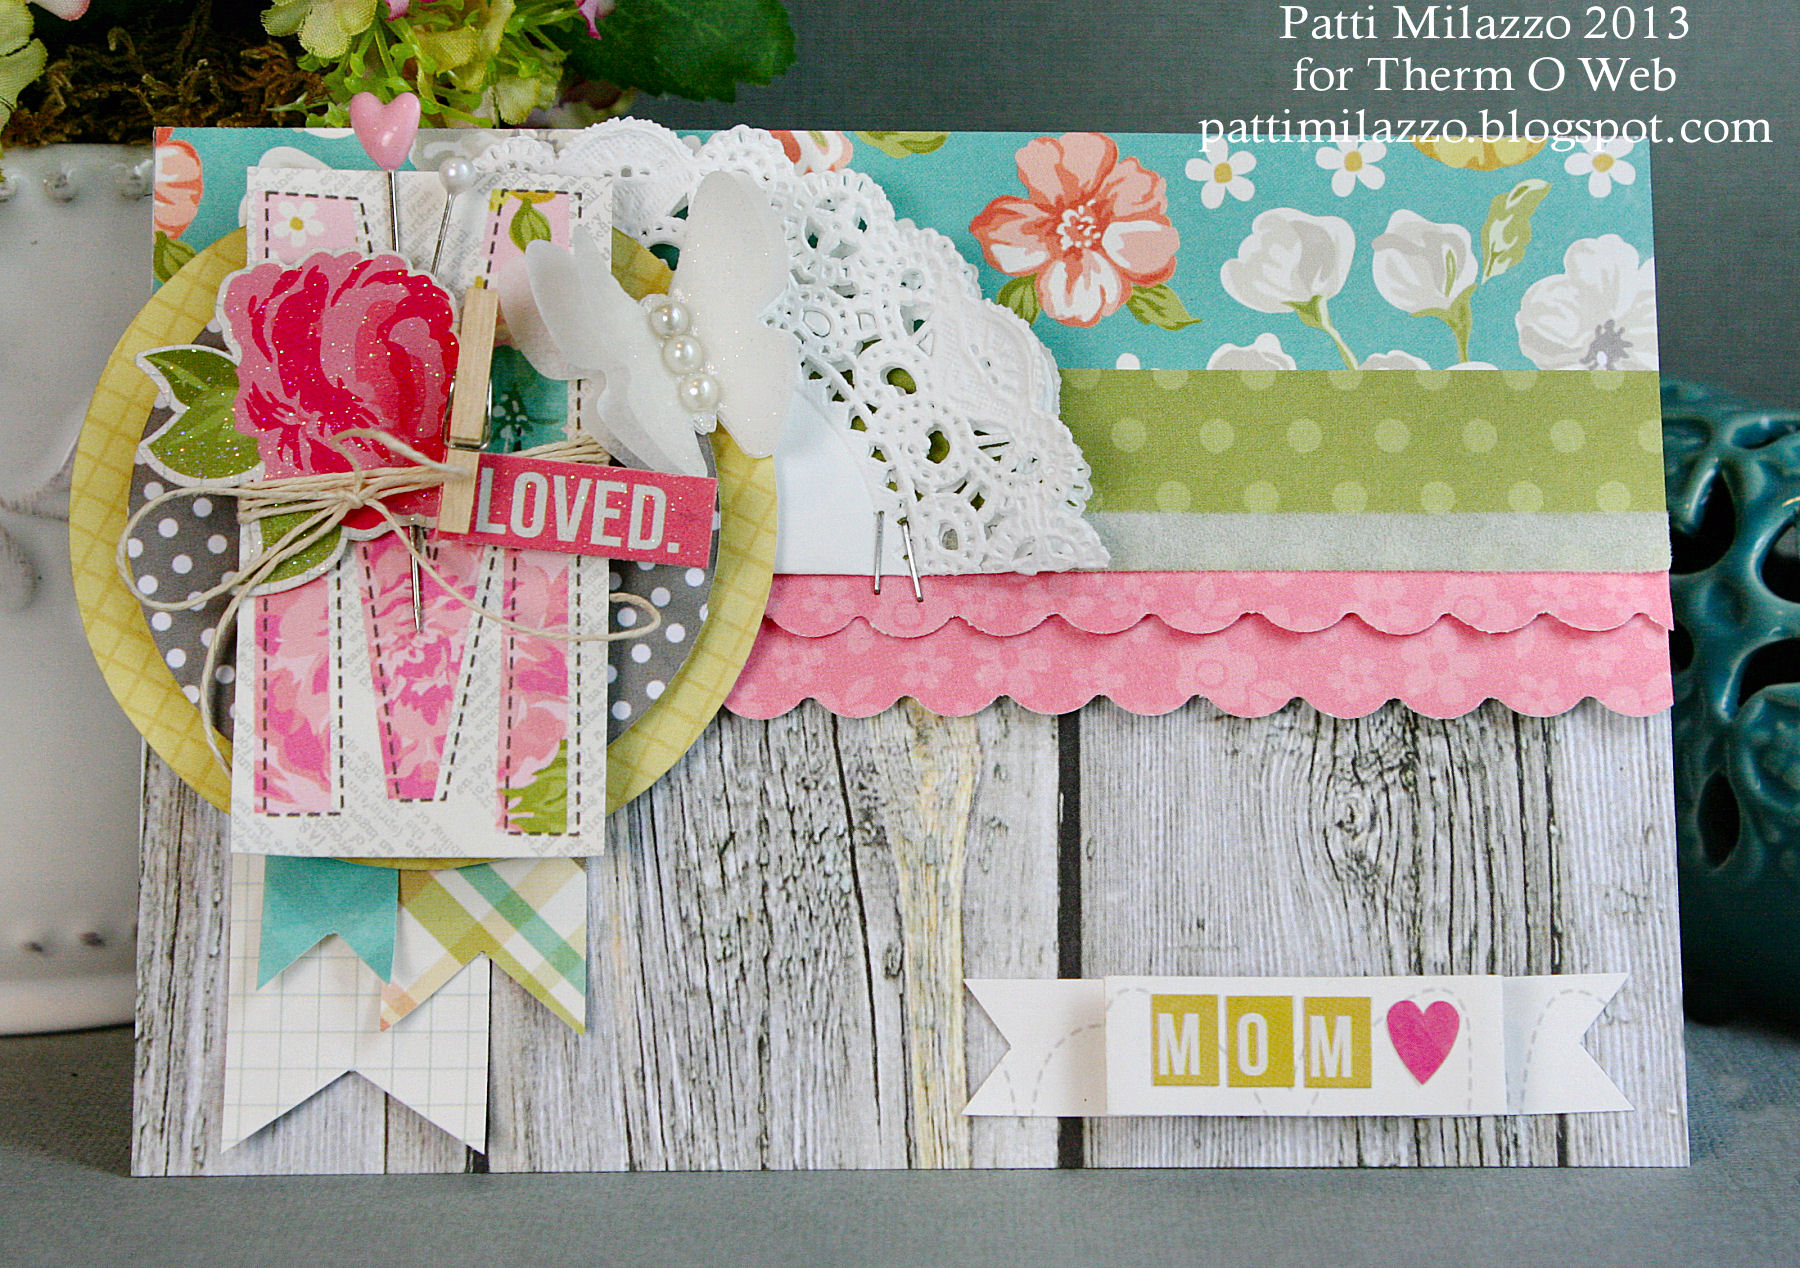
This Mother’s Day, show mom how much you appreciate her by giving her this handmade card, bookmark and gift card pillow box created with Simple Stories Vintage Bliss collection and Therm O Web Adhesives.
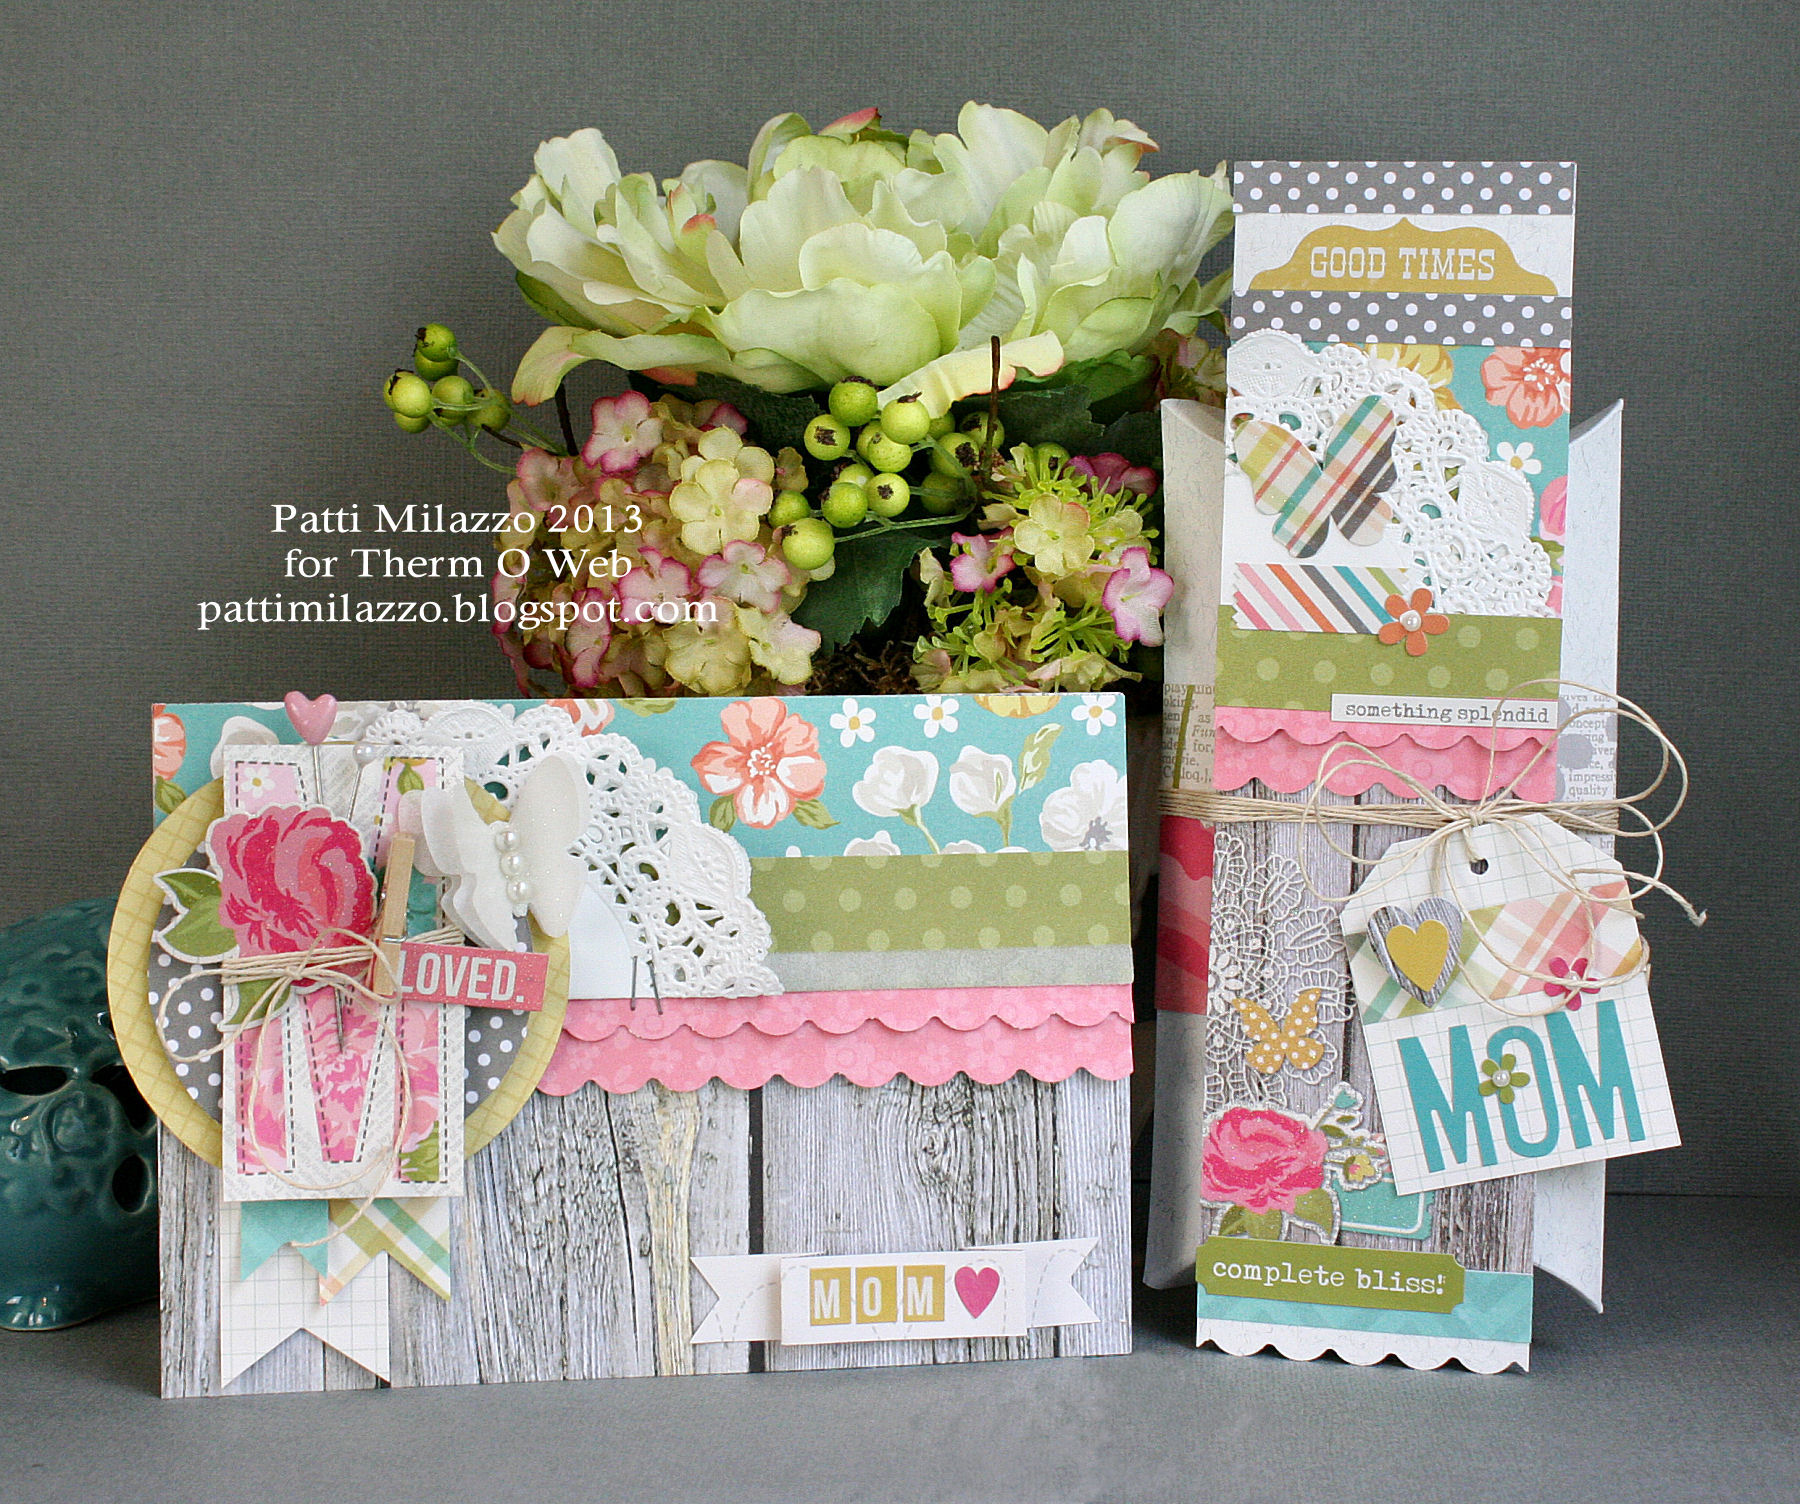 Card, Bookmark and Gift Card Box by Patti Milazzo
A good book is a wonderful gift and if you’re not sure just which one she’d like you can let her choose. Fill this pillow box with assorted gift cards for her favorite bookstore and coffee shop. Maybe include a list of best sellers in her favorite genre and a few of her favorite chocolates too!
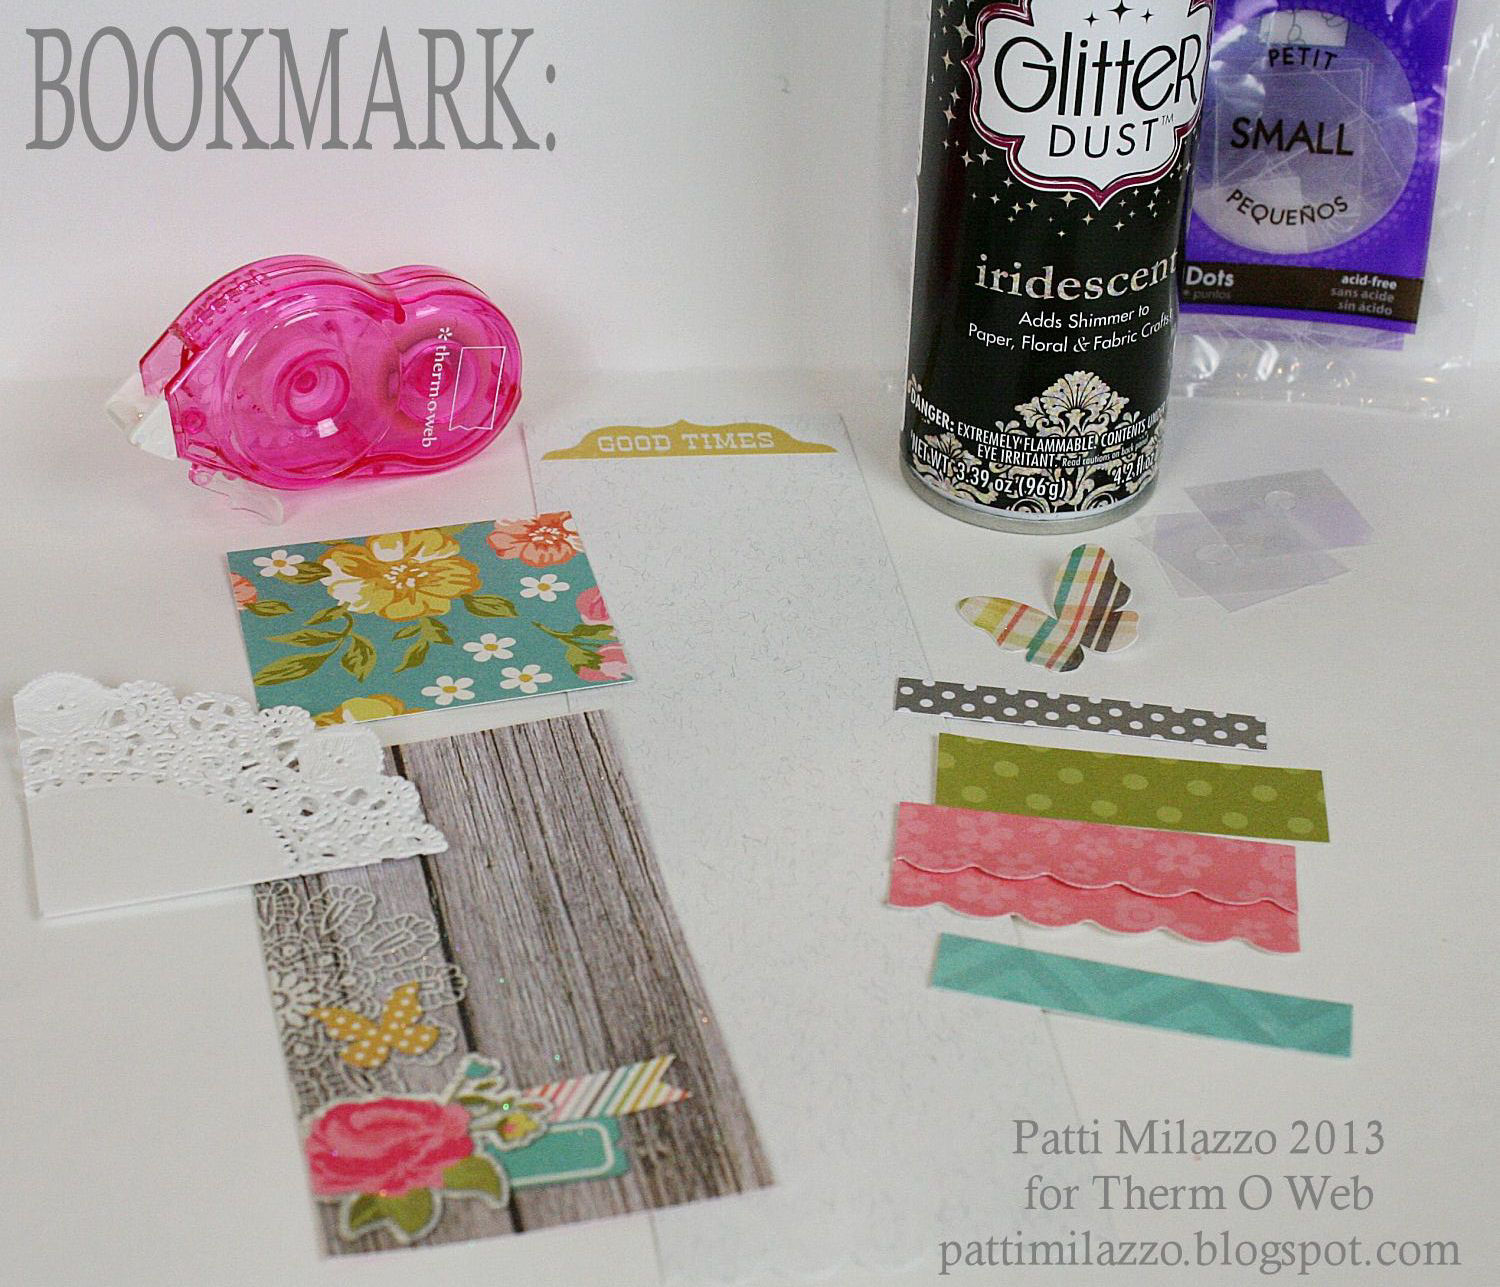
Therm O Web Supplies:
Therm O Web Mini Runner – Sticky Tape
Therm O Web Supertape ½”
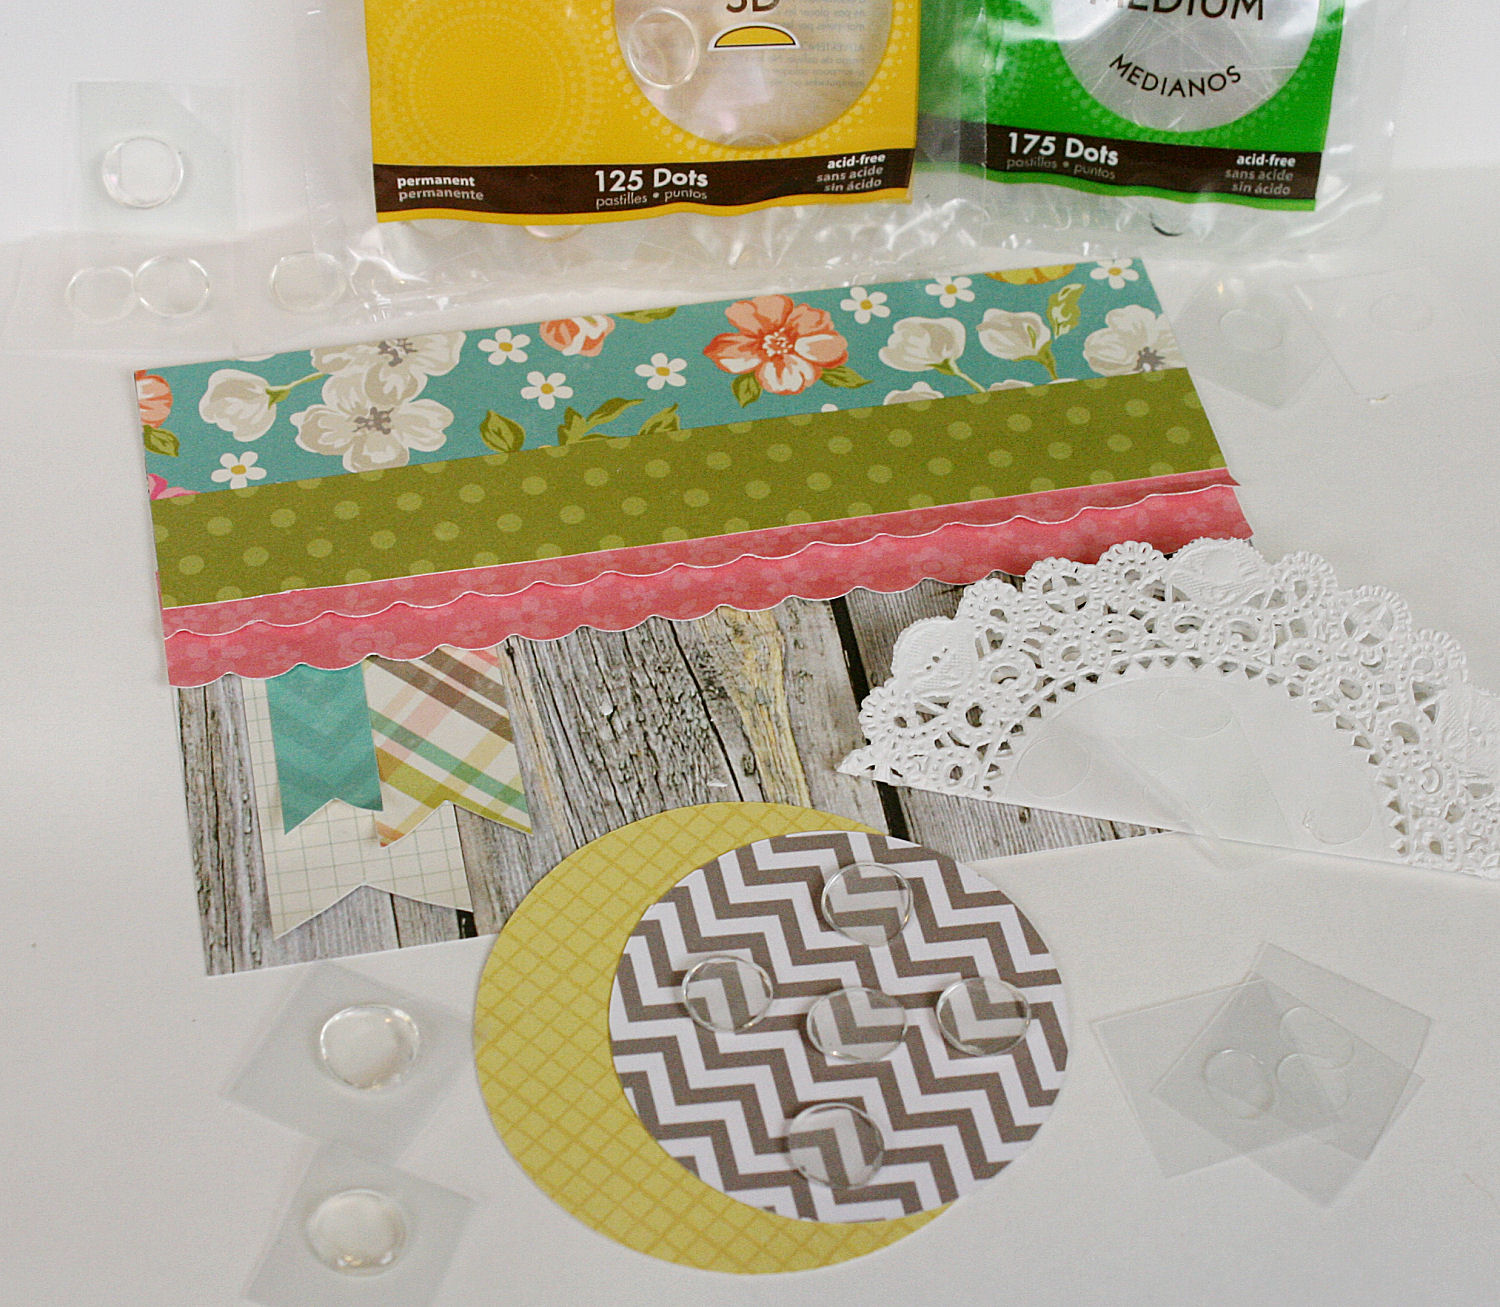
Therm O Web Zots – Small
Therm O Web Zots – Medium
Therm O Web Zots – 3D
Therm O Web Glitter Dust – Iridescent
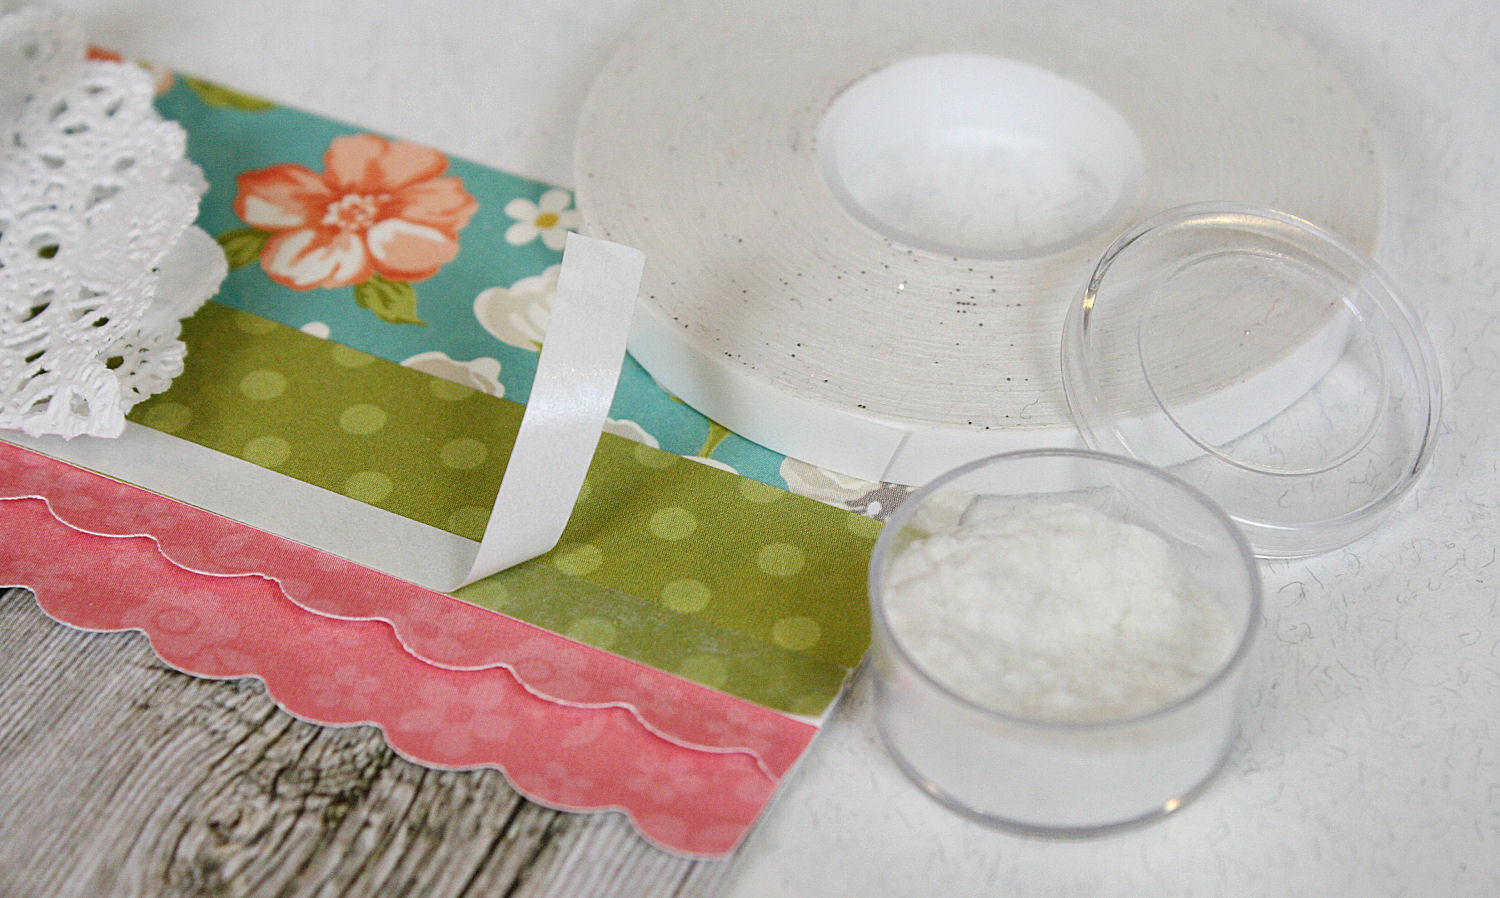
Therm O Web iCraft Adhesive Tape ¼”
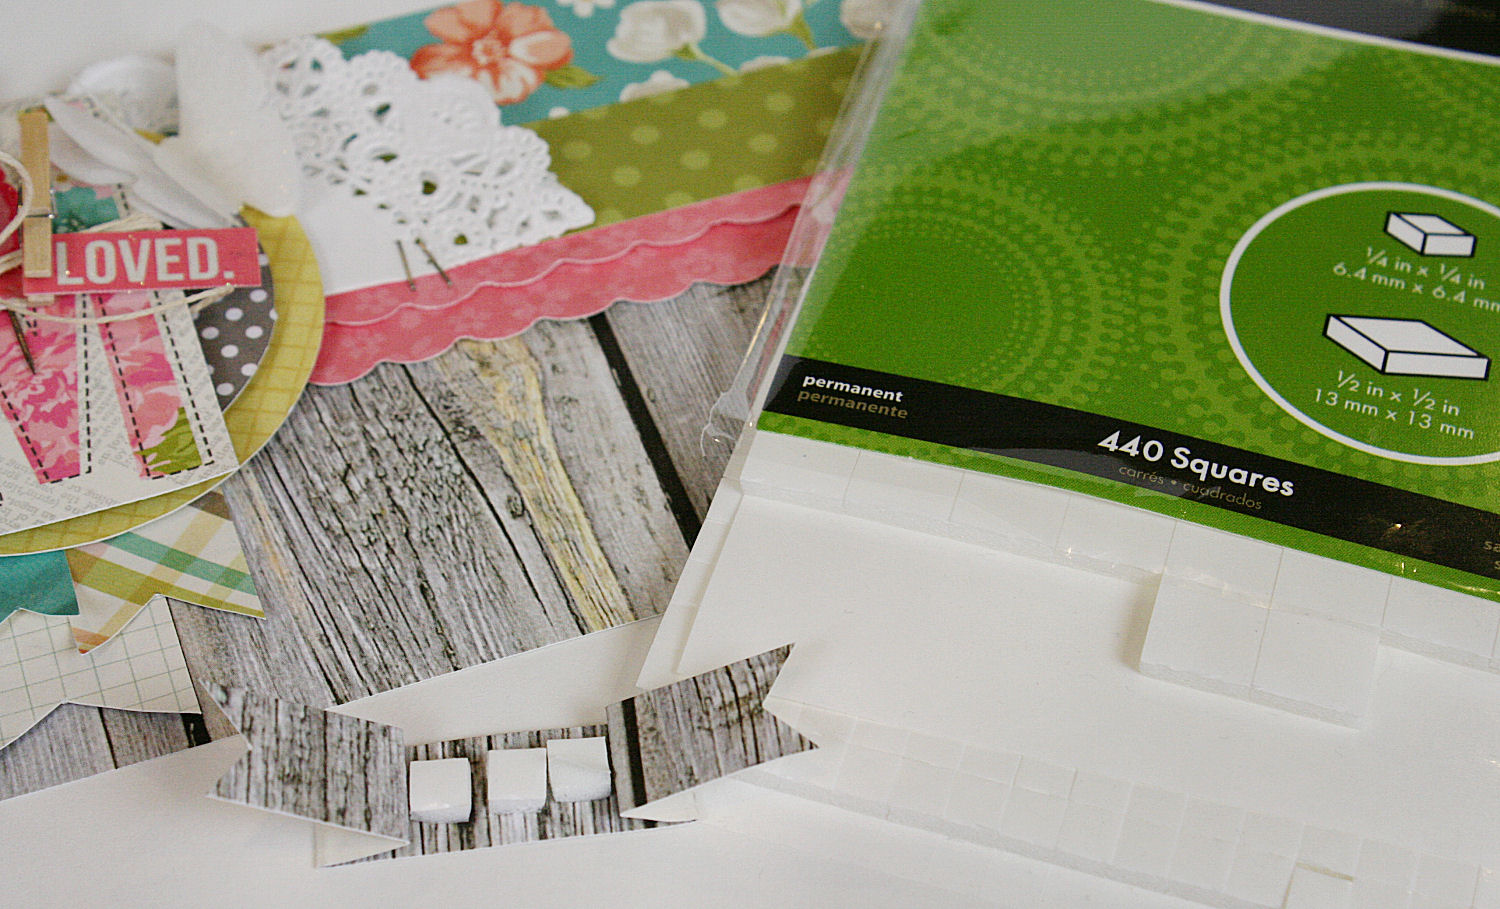
Therm O Web 3D Adhesive Foam Combo Squares – White
Other Supplies:
Simple Stories – Vintage Bliss collection
cardstock (light gray), hemp, decorative pins, buttons, vellum, paper doily, mini clothespin, white flocking (gStudio)
Instructions:
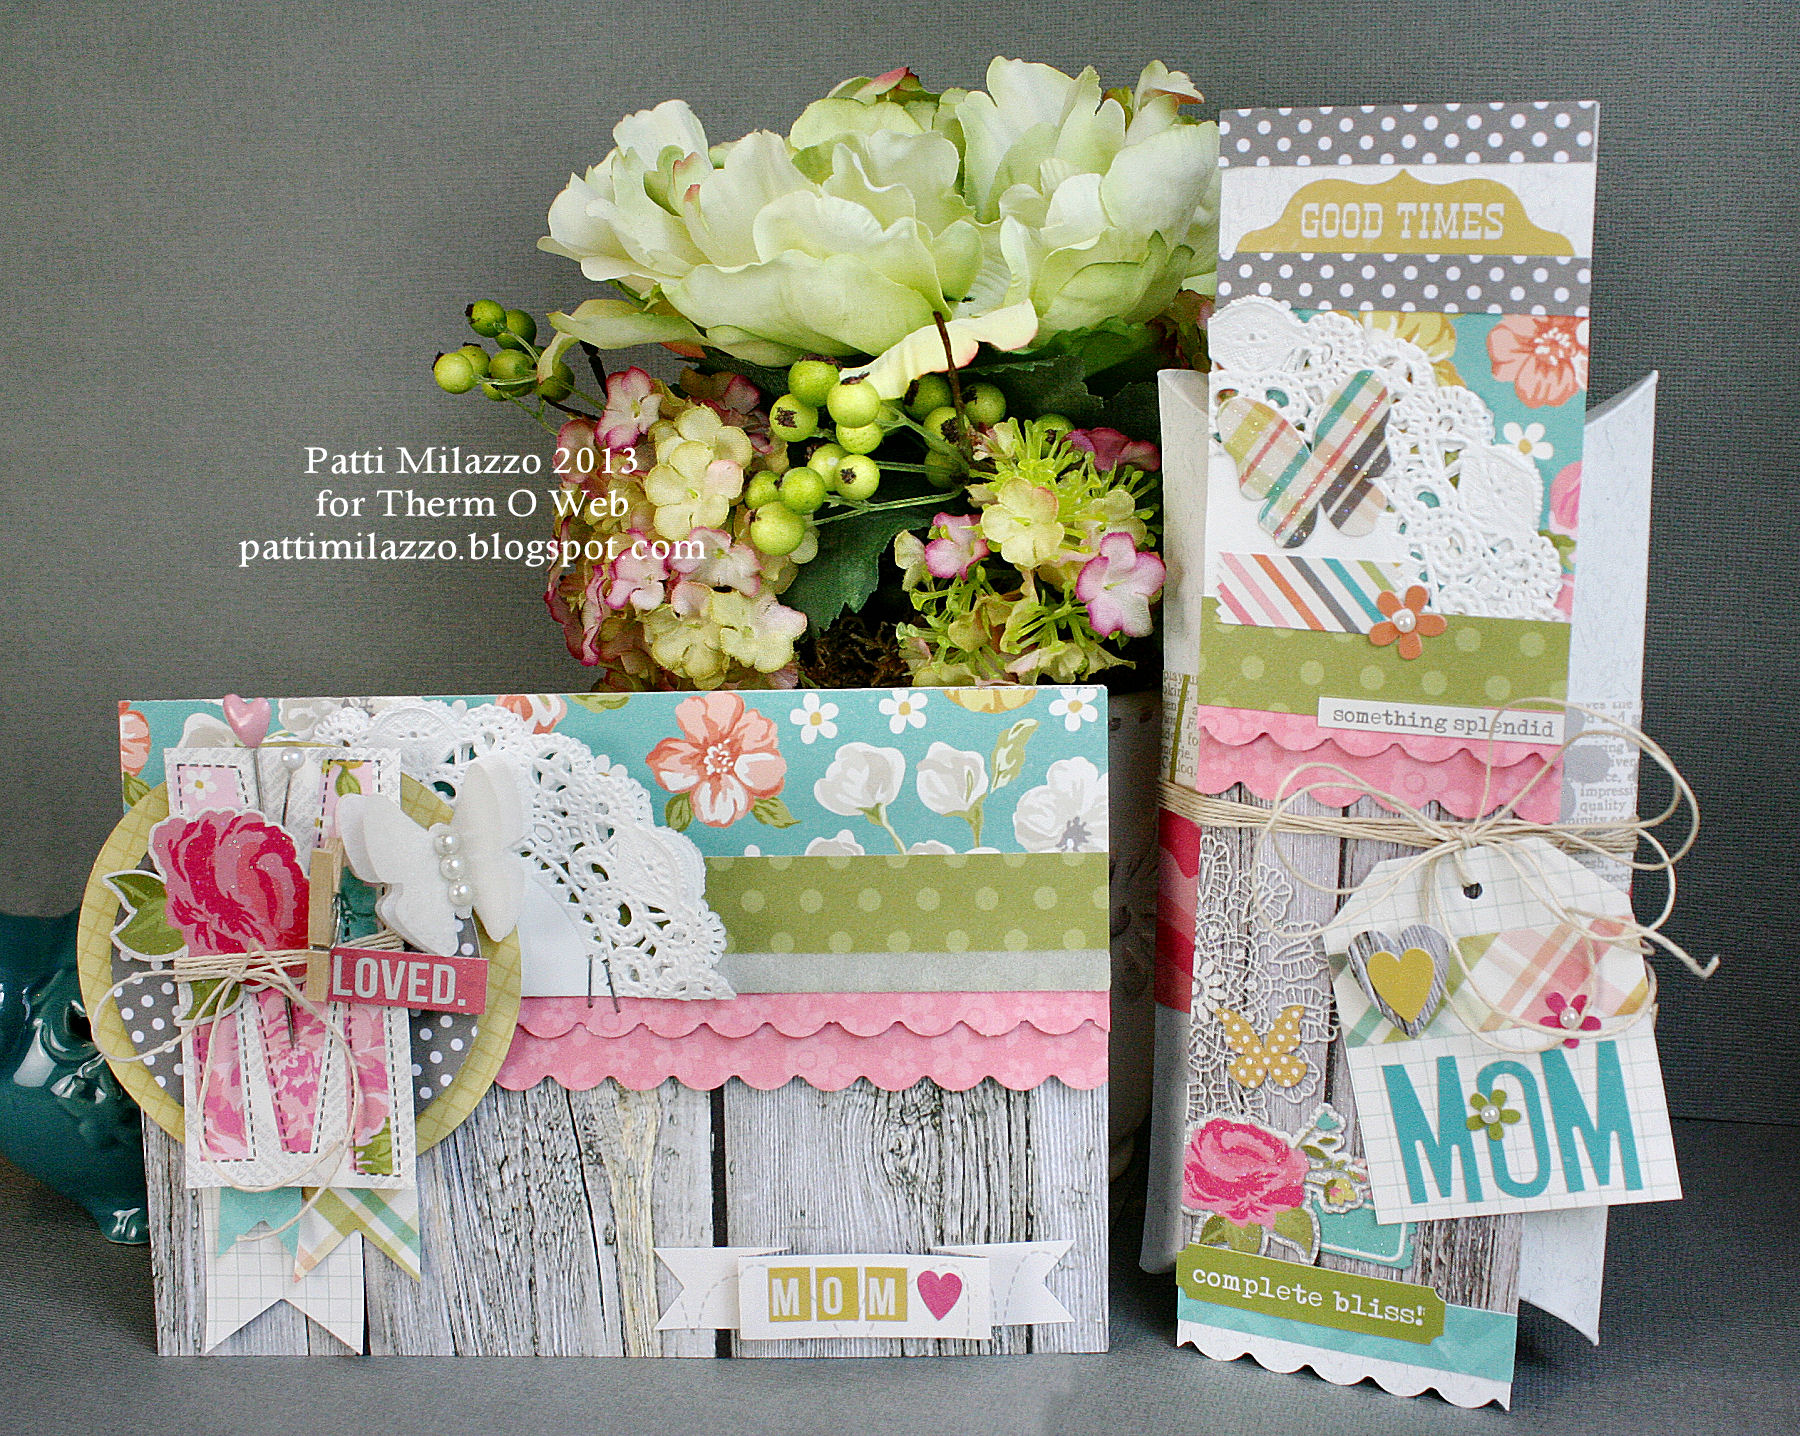
CARD
1. Create a 5.5” x 6.5” landscape oriented card from light gray cardstock.
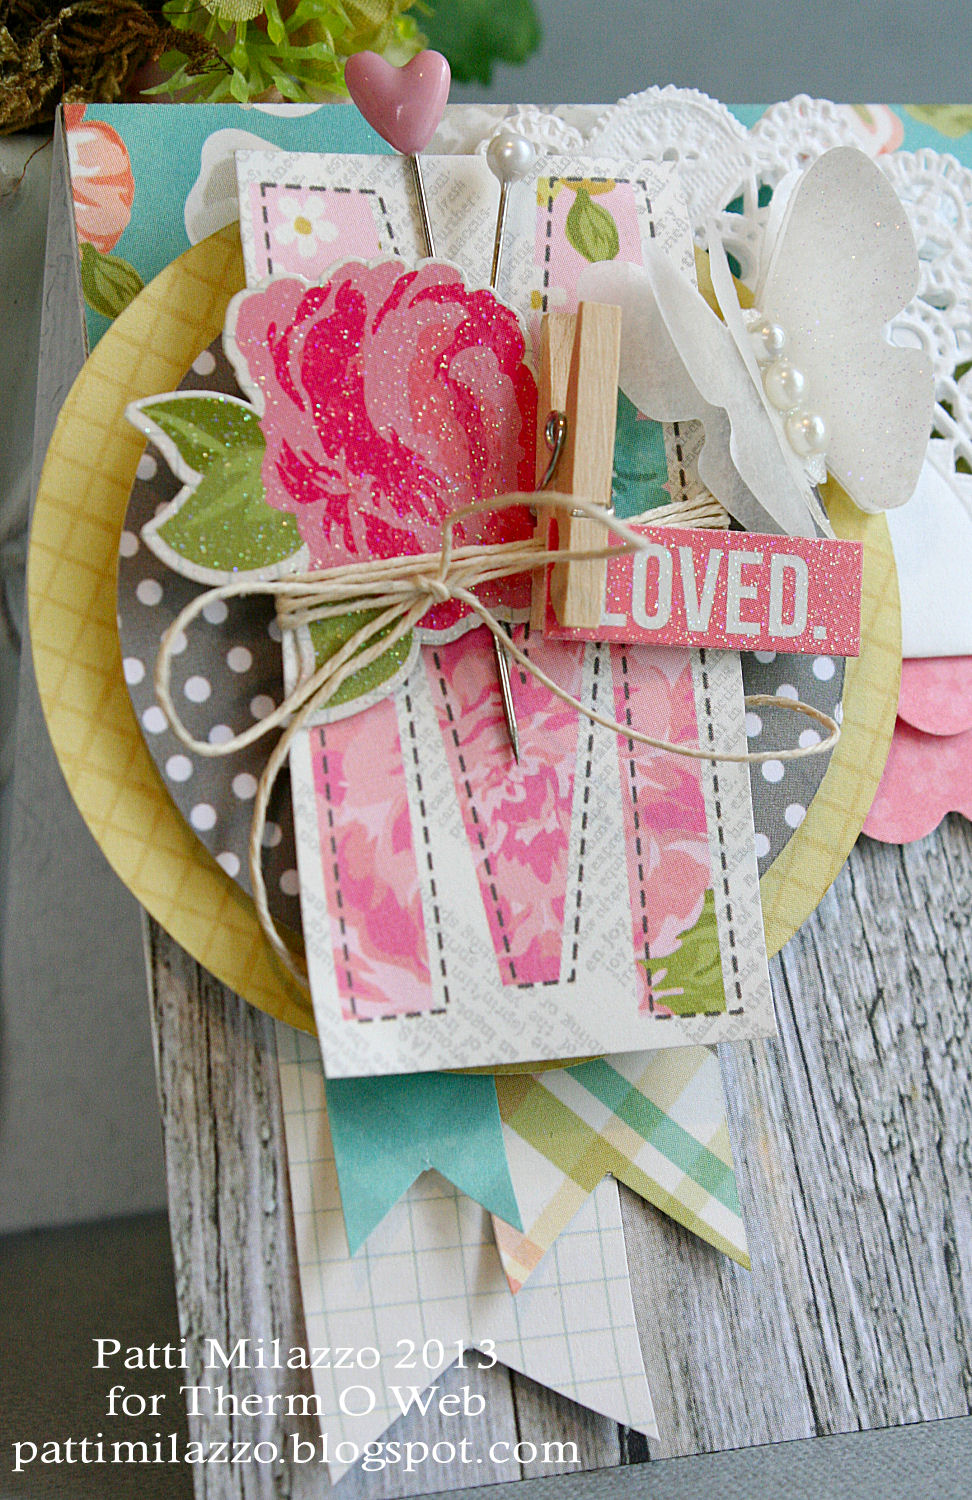
2. Cut 5.5” x 6.5” card front from wood grain pattern paper. Cut pattern paper strips to fit the length of the card and adhere layers using Therm O Web Mini Runner – some of these can be decorative border strips. Cut 2 circles from pattern paper and cut 3 small strips of pattern paper to create small paper ribbons by notching out small triangles at one end. Layer and adhere the paper ribbons under the scalloped border on the left side, as shown.
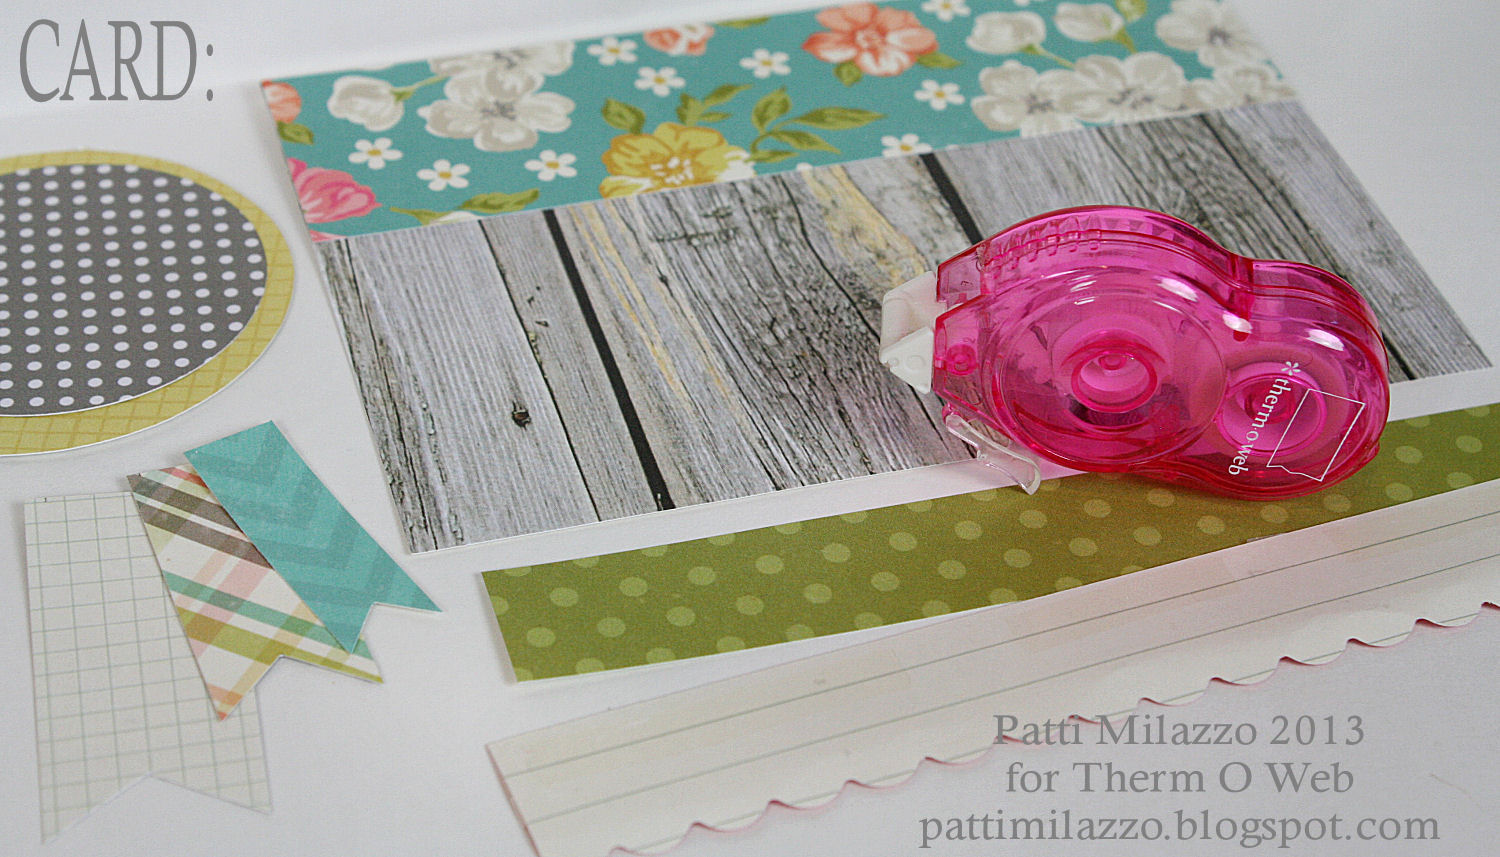
3. Fold a small paper doily in half, apply Mini Runner Adhesive to keep it flat. Adhere this on the left side over the green strip. Layer and adhere the circles over the doily and paper ribbons – use Therm o Web 3D Zots on the circle for a little dimension. Add a few staples on the right side of the doily, as shown.
4. Punch 3 butterflies from vellum. Spray 1 butterfly, the flower sticker and the “loved.” sticker with Therm O Web Iridescent Glitter Dust. Let dry completely.
TIP: The vellum may curl up a bit from the spray – no worries though. Once it dries it will flatten out on its own.
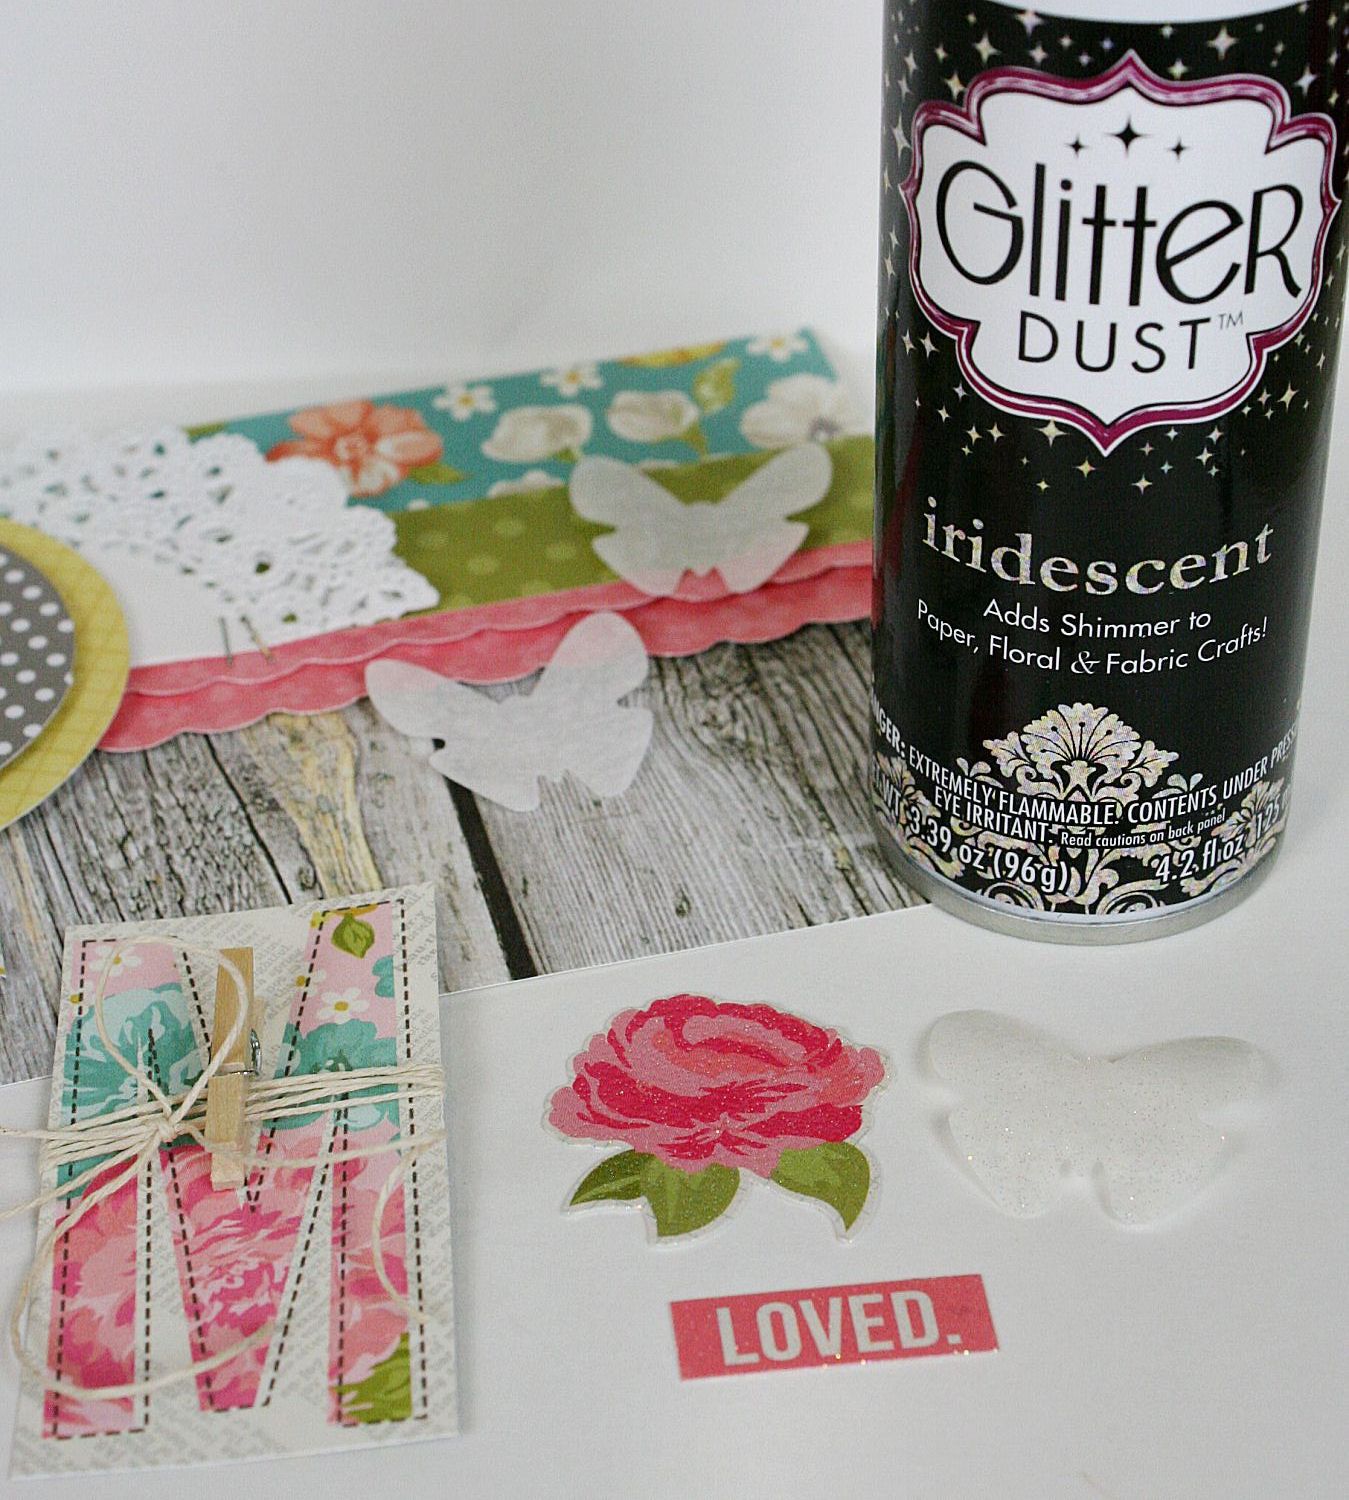
5. Create an accent for the circle by cutting out the letter “M” from pattern paper. Wrap thin twine around it several times and tie a bow. Apply a 3D Zot to the back of the flower sticker and tuck it beneath the twine. Clip the “loved.” sticker with a tiny clothespin. Apply more 3D Zots to the back of the letter “M” accent and adhere to the center of the circles.
6. Layer the vellum butterflies using Small Zots. Attach the glittered butterfly punch on top. Then add a few more Zots to the back of the layered butterfly and attach near the right side of the circle.
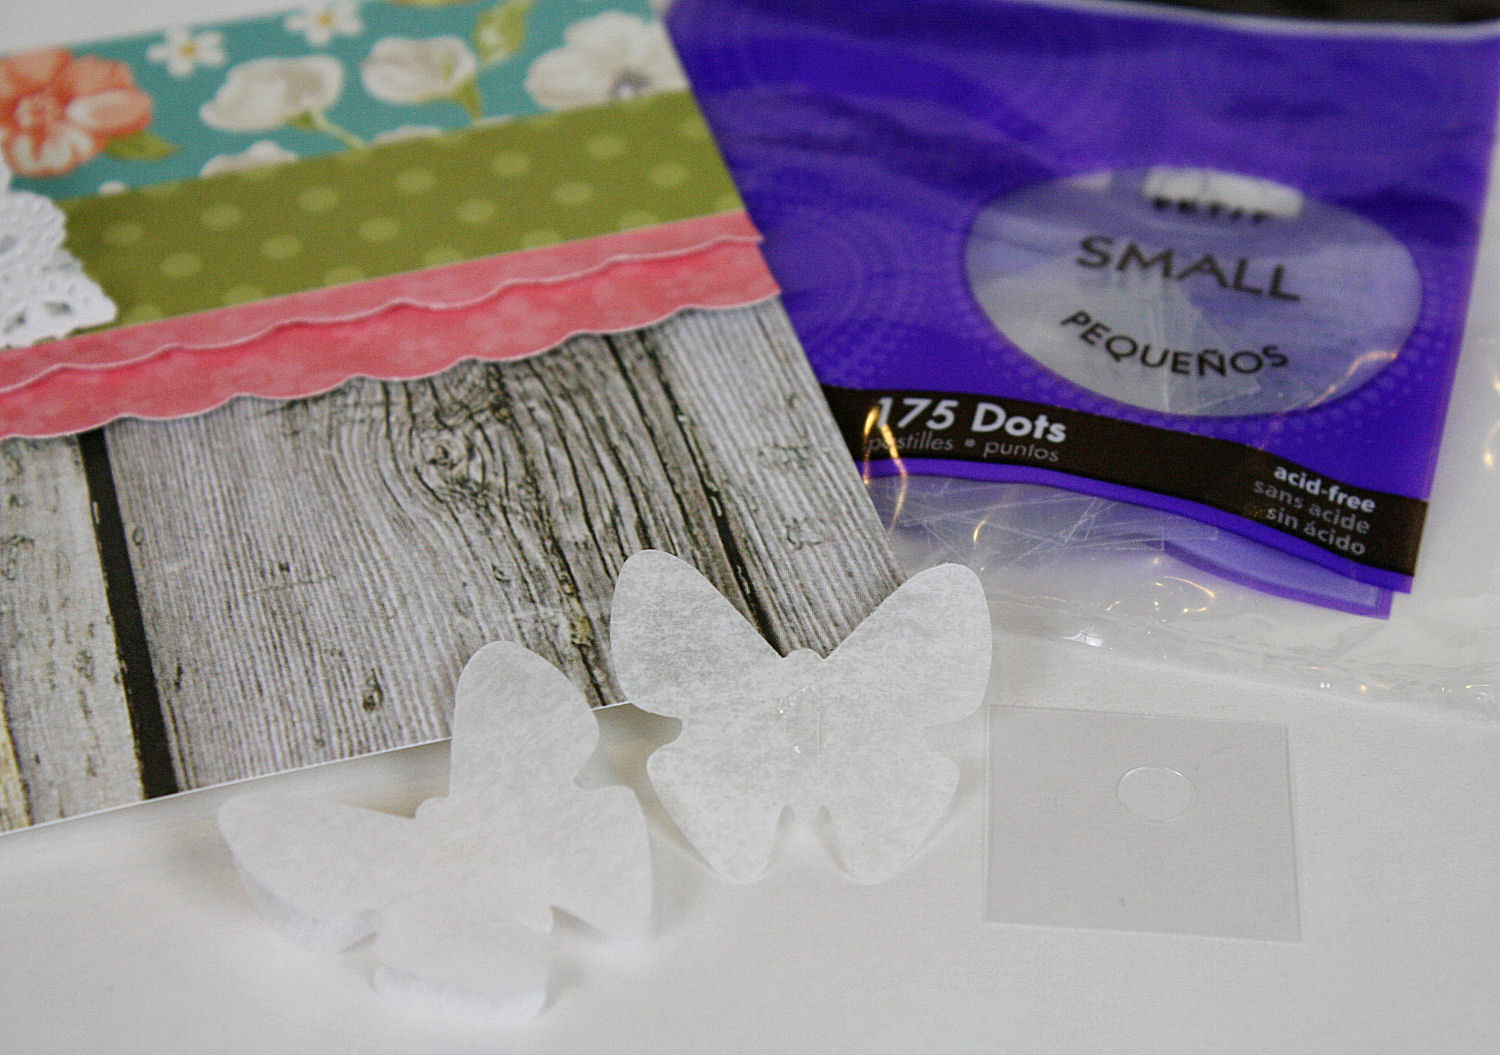
TIP: To make the Zot narrower, remove 1 sheet of plastic then fold the piece with the adhesive in half. Unfold and the Zot will be half the width to fit nicely in a small space between the butterfly wings.
7. Create a small banner with a narrow strip of wood grain pattern paper. Apply “MOM” alpha stickers and fold the sides. Attach this to the card using Therm O Web’s 3D Adhesive Foam Squares on the bottom right of the card front.
8. For a little more texture, apply a ¼” strip of iCraft Adhesive Tape along the bottom edge of the green strip. Remove the protective paper and apply white flocking – rub in gently and remove excess with a soft brush.
 BOOKMARK:
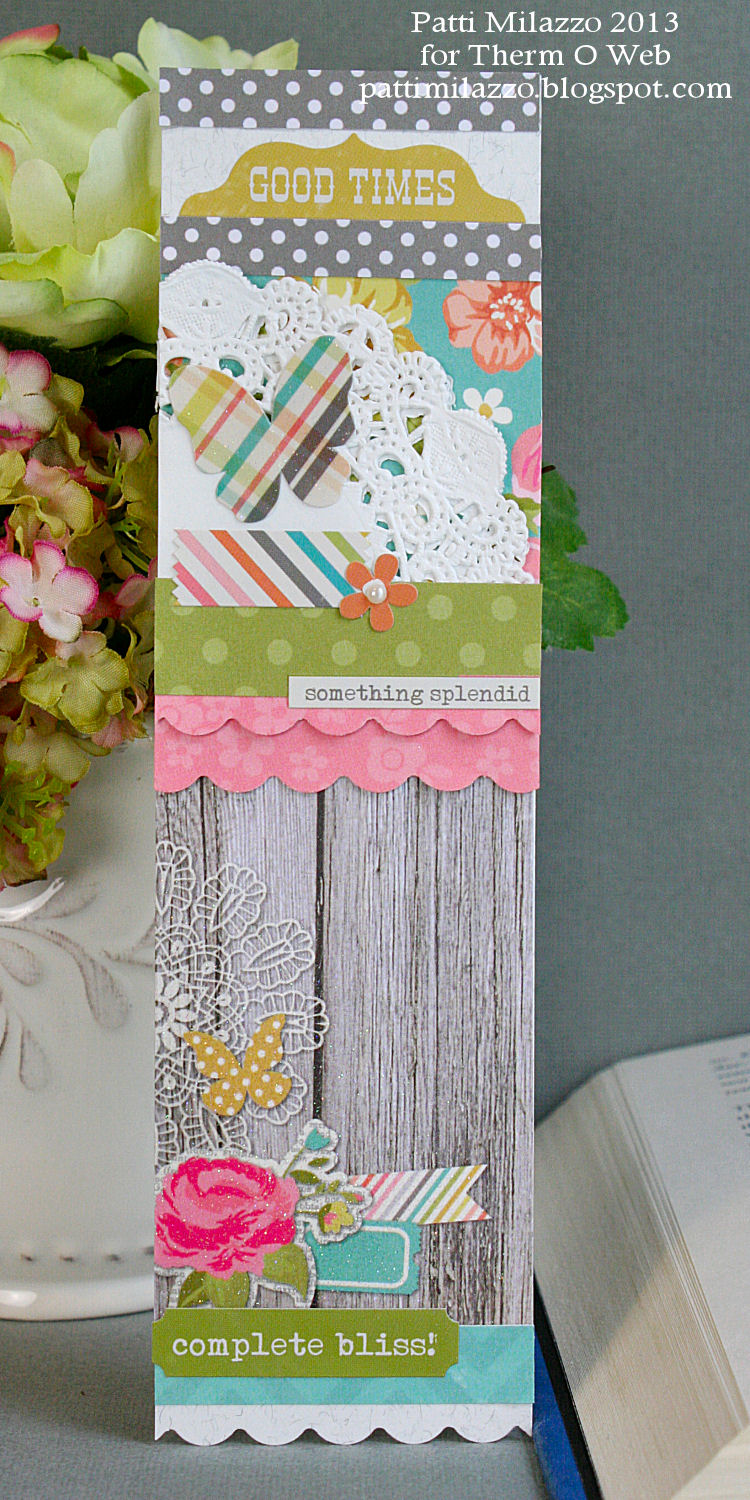
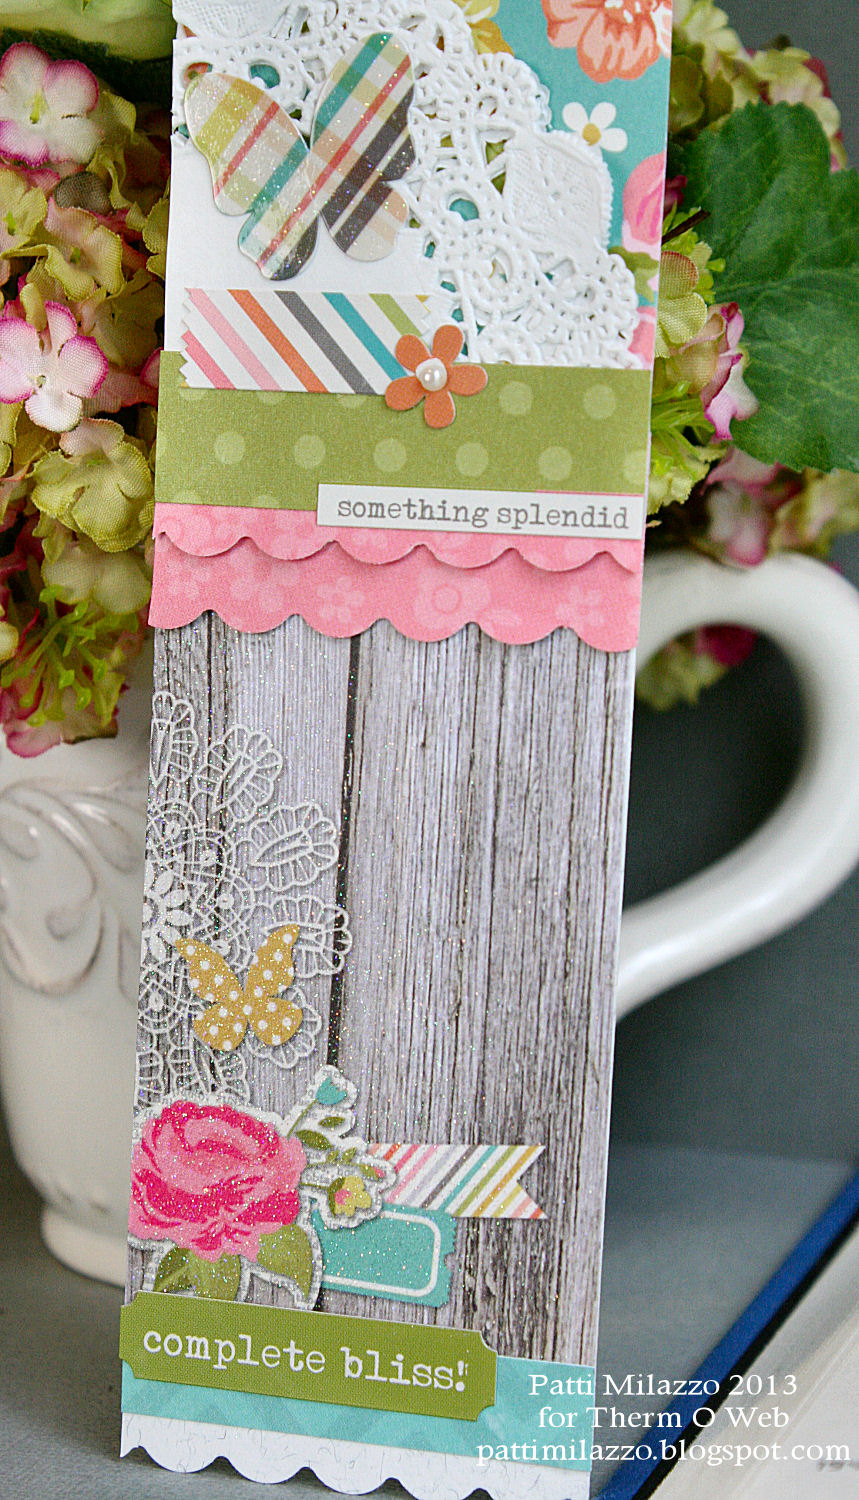
9. Next, create the bookmark. Use scraps to create a similar look to the card. Keep in mind to keep the bookmark functional and less dimensional. This one is 8” and although it’s embellished with stickers and even a bit of Glitter Dust on the butterfly sticker, it is relatively flat and will easily tuck into a book without causing any damage.
 PILLOW BOX Gift Card Holder:
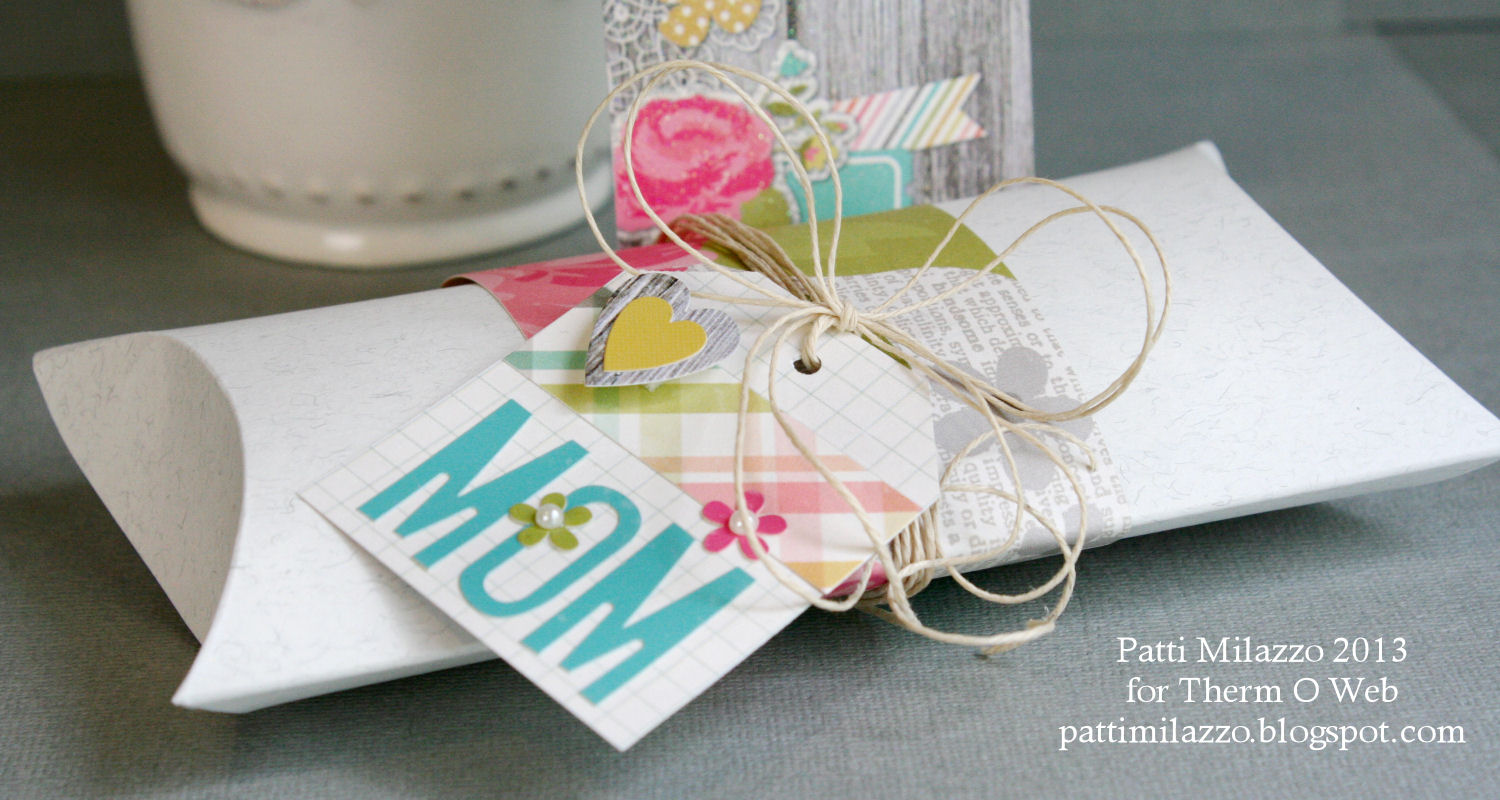
10. To complete the gift set, create a pillow box from cardstock. This one is 3”x 5” when folded, big enough for a couple of gift cards and a small treat or two. Size and print a template from the computer onto cardstock, add score lines, then cut out with scissors or die cut one from a machine if you have one.
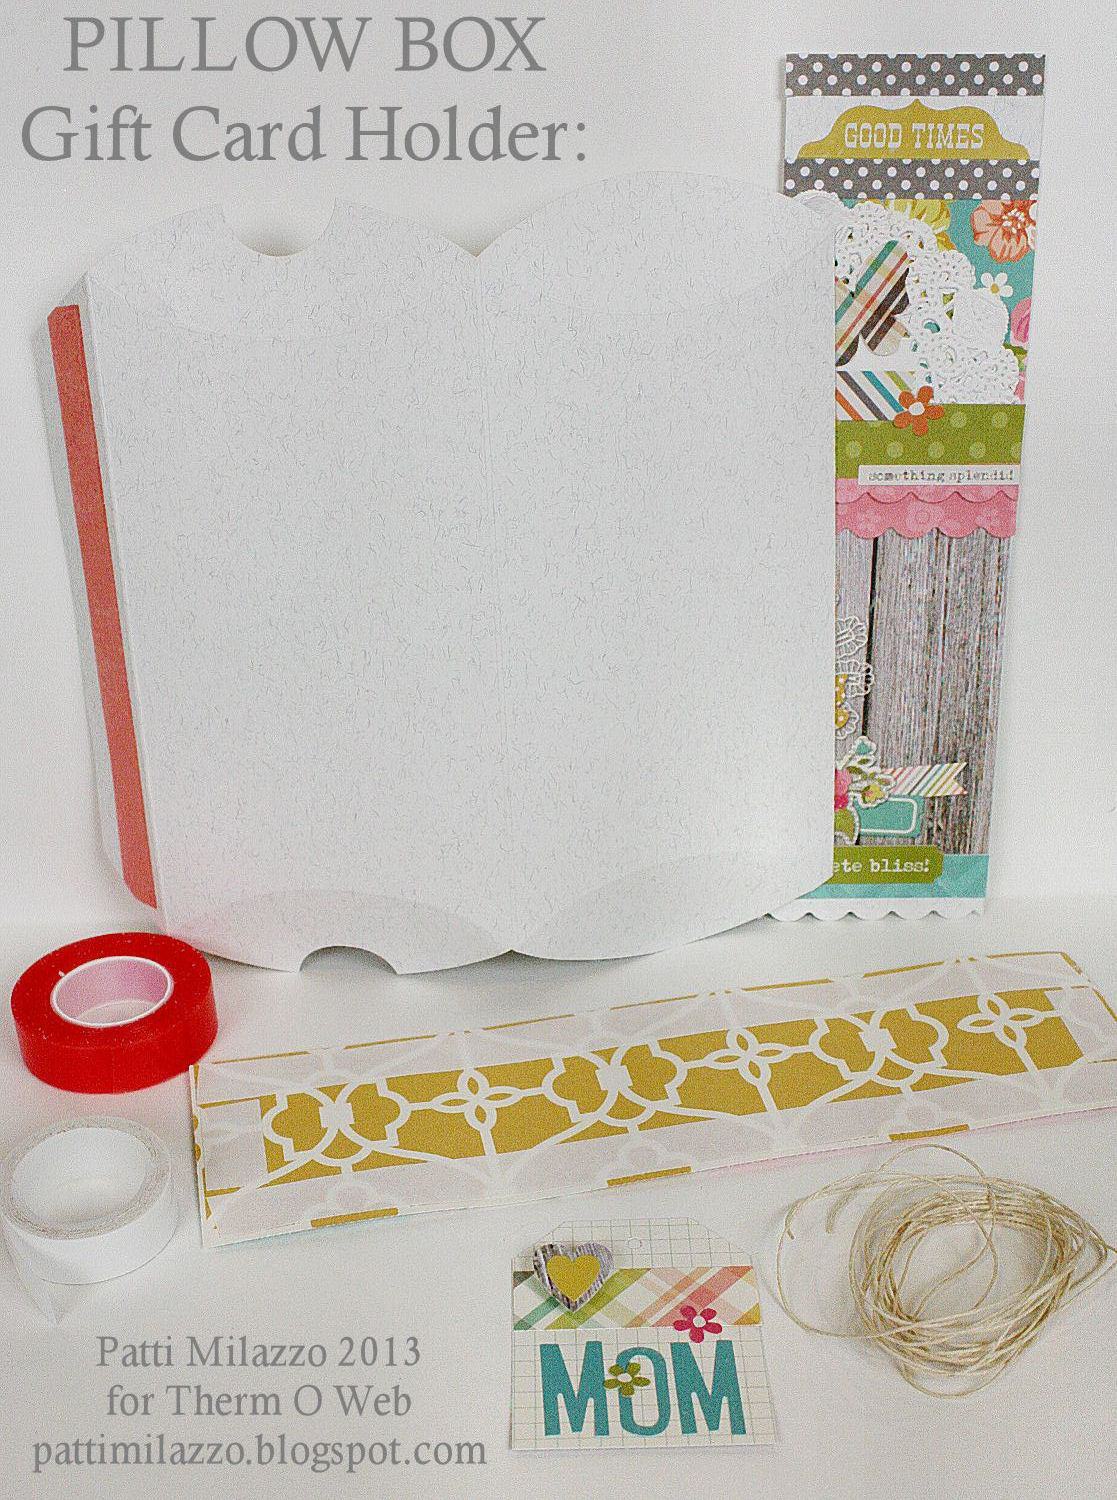
11. Apply SuperTape on the tab of the box, remove protective film, fold and press firmly to secure. Fold ends closed. Cut a 2.5” wide strip, apply iCraft Adhesive Tape to the back, remove the paper layer and wrap around the center of the box. Create a tag from cardstock and stickers. Lay the bookmark over the top of the box and attach wrap hemp around the box several times, attach the tag, then tie a bow. Fill the pillow box with gift cards, notes and other treats, as you wish.

Don’t forget to include a little peace and quiet for her to enjoy this heartfelt gift. She’s sure to appreciate that you’ve been thinking of her and that you’d like her to have a little time for herself.
Happy Crafting & Happy Mother’s Day!
Patti
We’d love for you to have a chance to create some of these items..so we’re giving away the new Simple Stories Vintage Bliss Collection Kit along with the Vintage Bliss Collection Kit! Just follow the Rafflecopter steps to enter to win!

Denise Bryant
May 12, 2013 at 11:50 pm (11 years ago)Beautiful projects! Love the papers. Always keeping my eyes open to try some great adhesives too, and these look great!