


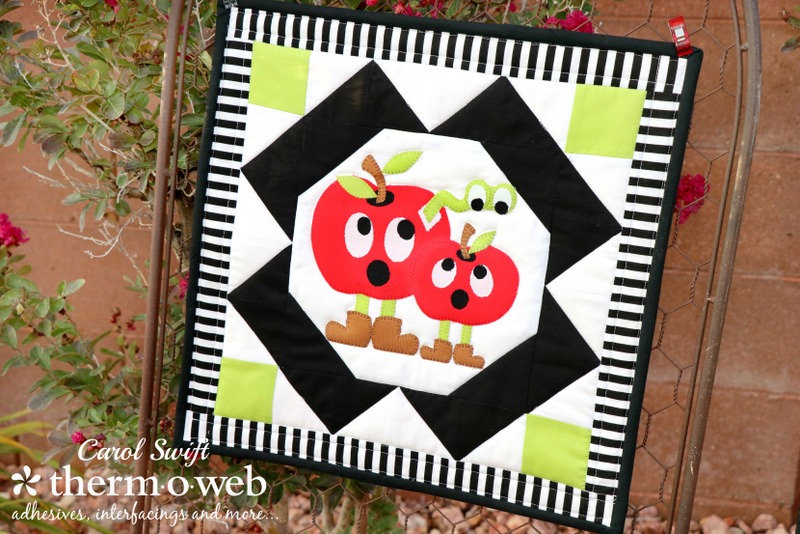
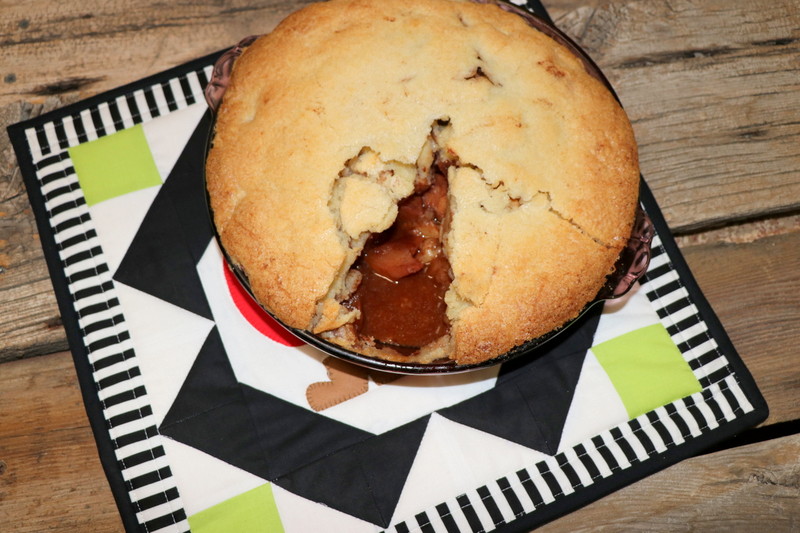
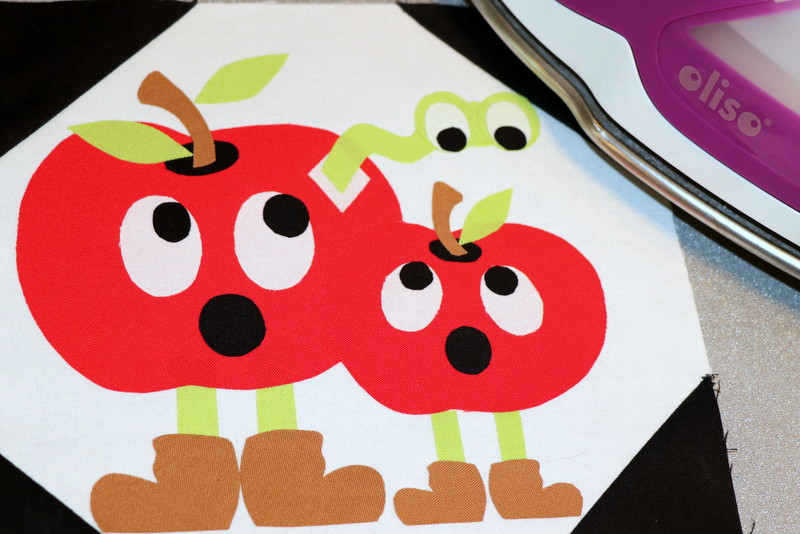
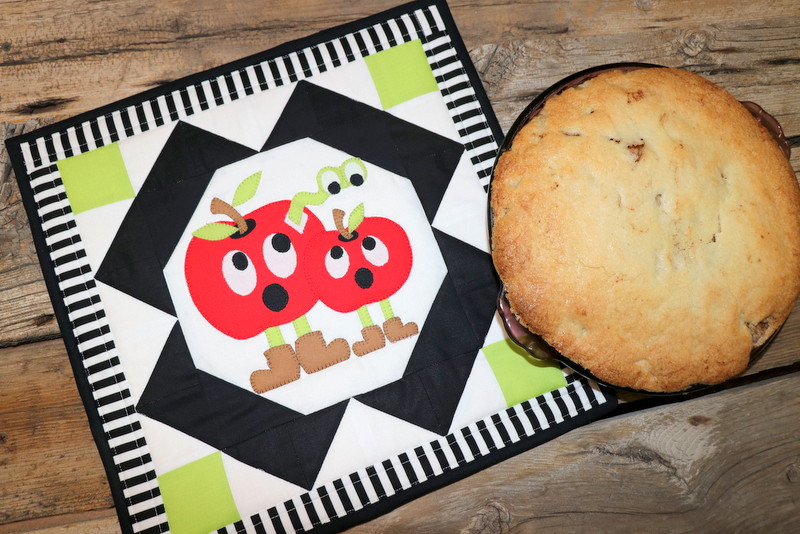
Little potholders don’t always do it for me when I make my way to the kitchen for some baking. Occasionally, I need a BIG potholder to hold those roasts, casseroles, cakes, or pies after they come out of the oven. This oversized potholder, No Worms Allowed, measures 14” x 14” which was perfect for holding my apple pie (it didn’t have worms it, for sure!) I love using Therm O Web’s Heatnbond EZ Print Lite Sheets to quickly print out my applique patterns…no tracing!
No Worms Allowed Pot Holder, by Carol Swift, Just Let Me Quilt
I’m not very good at making pie crusts, so when my mother-in-law shared her Swedish Pie recipe with me I jumped for joy. It doesn’t involve a rolled crust…yay! The pie is topped with a dough like crust that gets spread across the chopped apples. It’s sugary delicious, full of cinnamon, and even better with a little ice cream or whipped cream on top. It fits perfectly on this potholder and looks nice on the table, too!
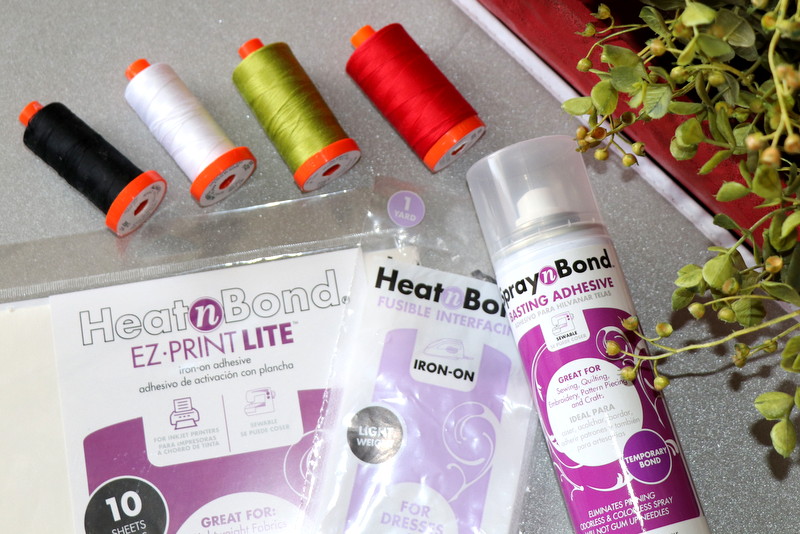
No Worms Allowed Pot Holder Supplies needed:
Therm O Web EZ Print Lite Sheets
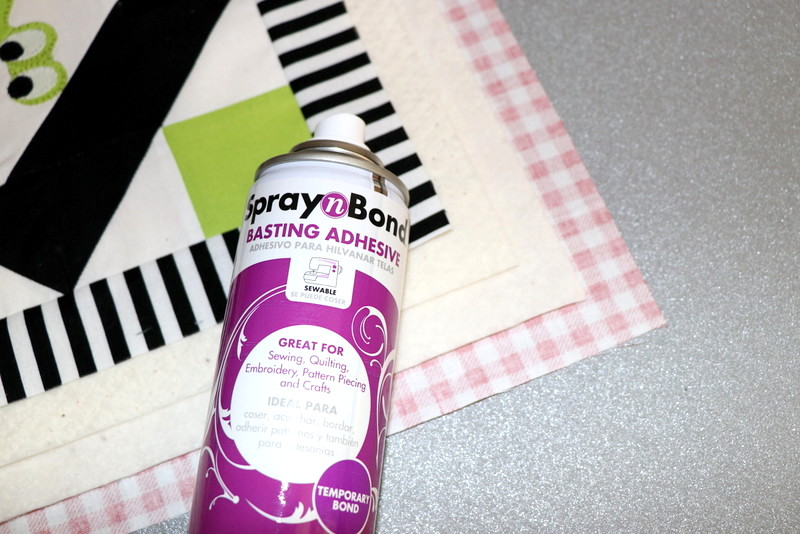
Therm O Web Spray n Bond Basting Adhesive
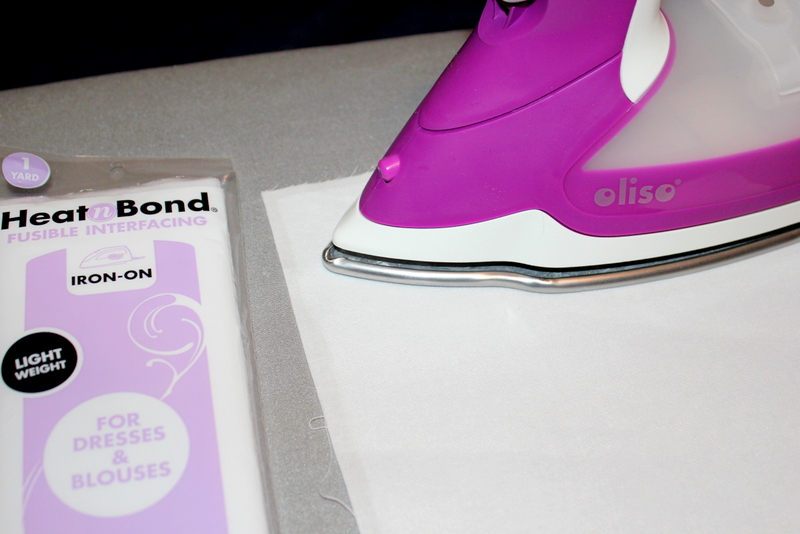
Heat n Bond Fusible Interfacing
Aurifil Thread, 50 WT
Oliso Purple Iron (Everything is better in purple!)
Cotton fabric
Cotton batting
Fabric needed:
2 black fat quarters
2 white fat quarters
1 green fat quarter
1 brown fat quarter
1 red fat quarter
1 striped fat quarter
1/6 yard black fabric (binding)
Cutting instructions:
Cut 1 – 8½” x 8½” white rectangle, center block
Cut 4 – 3” x 3” black squares, center block corners
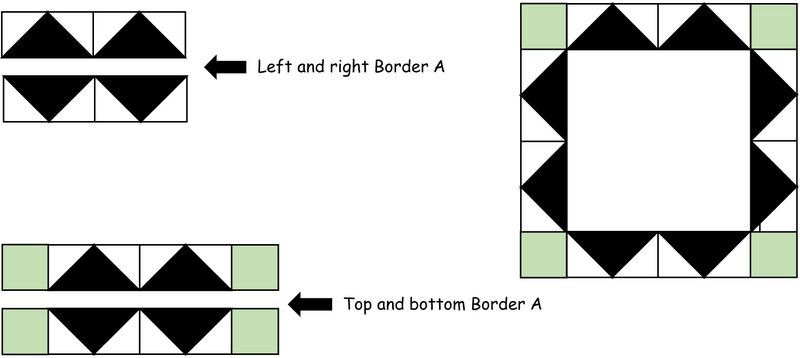
Cut 8 – 3” x 3” white squares, Border A
Cut 8 – 3” x 3” black squares, Border A
Cut 4 – 2½” x 2½” green squares, Border A corners
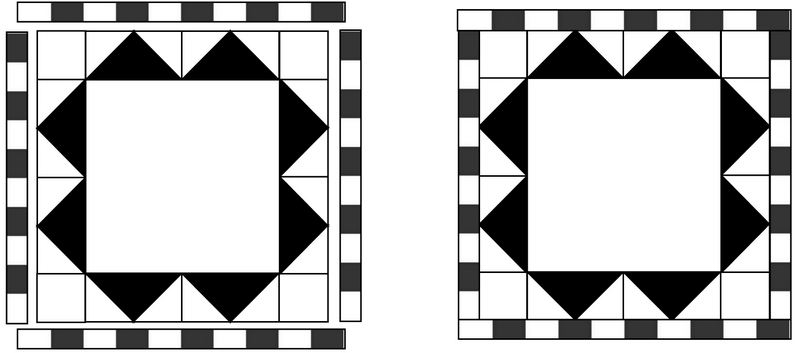
Cut 2 – 1½” x 12½” striped strip, Border B
Cut 2 – 1½” x 14½” striped strip, Border B
Cut 2 – 2½” x 42” black strips, binding
Cut 1 – 14½” x 14½” black rectangle, backing
Cut 2 – 14½” x 14½” rectangles, batting
Sewing/Applique Instructions: All seams are sewn 1/4”.
No Worms Allowed Pot Holder with HeatnBond Instructions:
Step 1: Prepare the applique patterns following applique instructions below:
Applique with printable Heat n Bond EZ Print Lite Sheets: Using your inkjet printer, print out applique pattern pieces using Heat n Bond EZ Print Lite sheets. Load one sheet at a time into the paper tray. Sheet should be placed so printing is on the smooth side of the paper. Print quality at the normal setting and for plain paper. Allow 5-10 seconds for ink to dry.
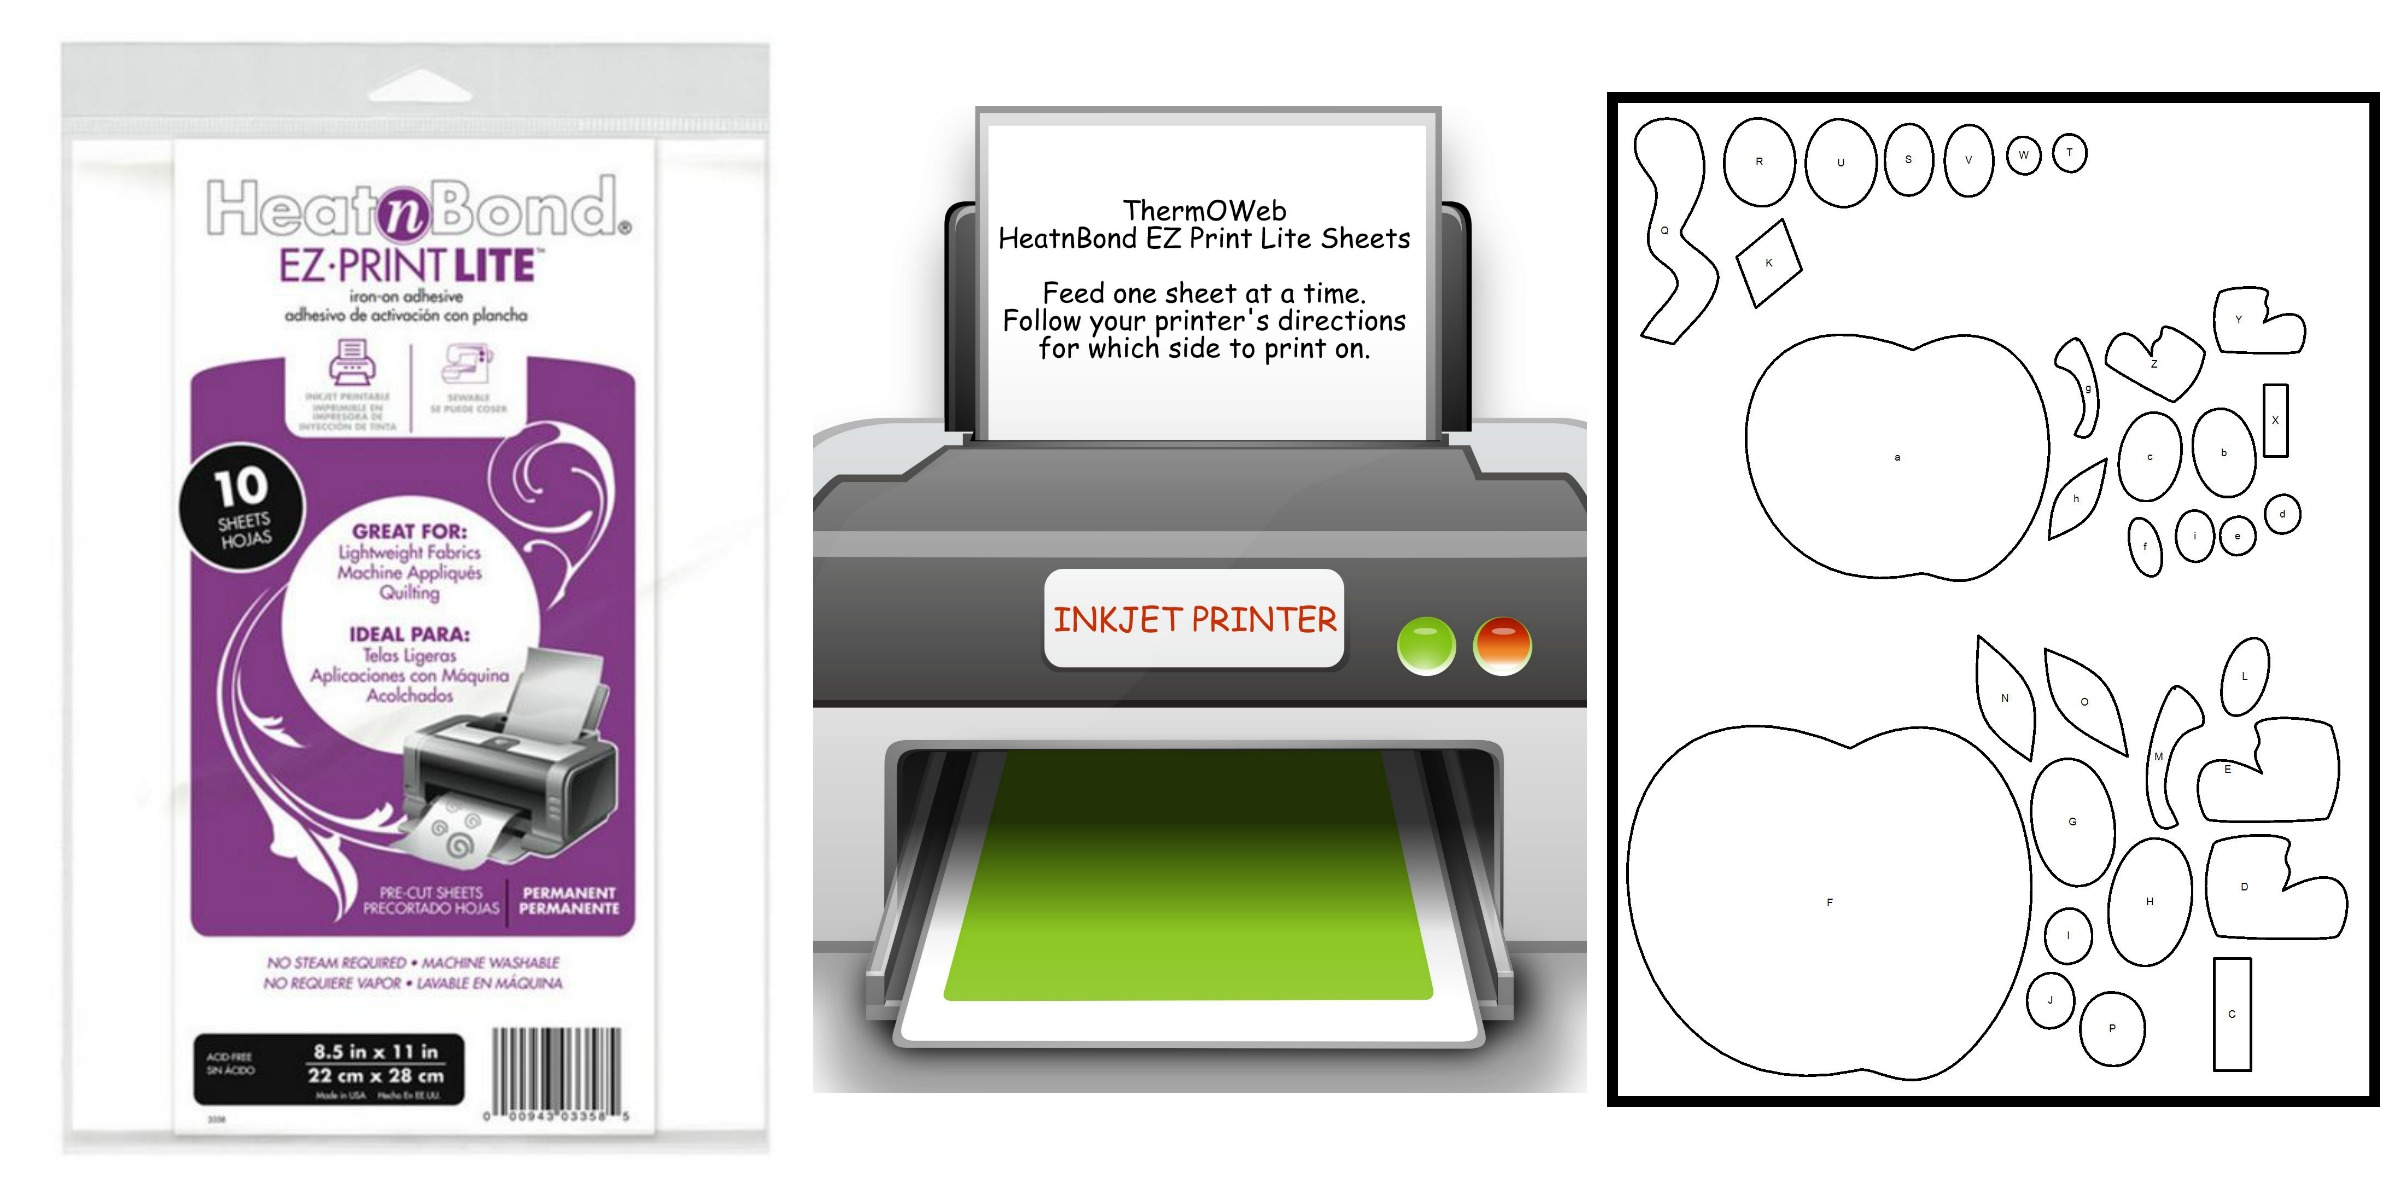 Step 2: Iron adhesive pieces to wrong sides of fabrics following manufacturer’s directions. Let cool. Cut out applique pieces.
*Ironing Heat n Bond Fusible Interfacing to the back of an applique block can help keep the threads from showing through the fabric and make stitching small pieces easier. Place interfacing rough side down on the wrong side of the fabric. Cover with protective cloth and iron following manufacturer’s directions.
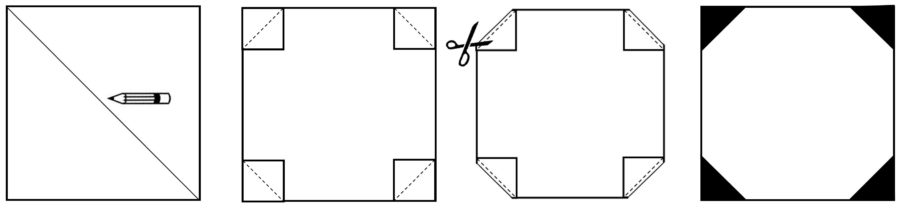
Step 3: Draw a diagonal line on the wrong side of 3” x 3” black squares. Place one square in each corner of the center block, wrong sides together. Sew on drawn line. Trim 1/4” from edge and press open.
Step 4: Peel off paper liner from the backs of applique pieces. Place applique, adhesive side down, on the right side of the fabric. Press each section following the manufacturer’s directions until the entire piece is bonded. Let cool. Sew around edges using a straight, zig-zag, or blanket stitch.
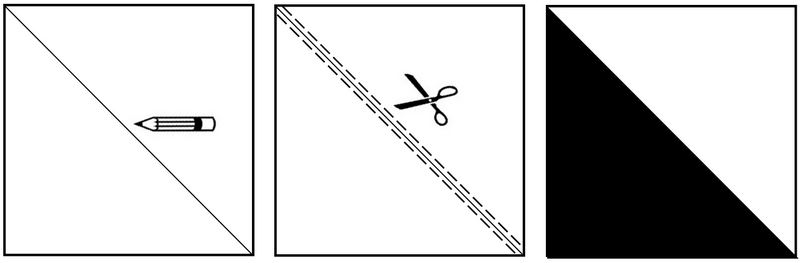
Step 5: Border A – To make half square triangles, draw a line diagonally across the wrong side of eight 3” x 3” white squares. With a white and black square, right sides together, sew 1/4” on each side of the drawn line. Cut on drawn line. Open and press seam to side. Repeat with all 3” x 3” squares. Trim each to 2½” x 2½” square.
Step 6: Border A – Sew half square triangles and 2½” x 2½” green squares together as shown below. Sew strips to left and right of the center block. Press seams open. Sew strips with 2½” x 2½” squares on ends to the top and bottom of the center block, matching seams. Press seams open.
Step 7: Border B – Sew 1½” x 12½” strips to left and right sides of Border A. Press seams towards Border. Sew 1½” x 14½” strips to top and bottom of Border A. Press seams towards Border.
Step 8: Place two layers of batting between the wrong sides of top and backing. Secure layers by spraying between them with Therm O Web Spray n Bond Basting Adhesive. Quilt as desired and add binding using your favorite method.
Yes, the recipe for the pie is full of sugar and butter, but isn’t that what old fashioned baking is all about!
JOAN’S SWEDISH APPLE PIE
4 (or more) apples, peeled & diced
Press down in the bottom of pie plate.
Mix together: 1 Tbs. sugar and 1 Tbs. cinnamon and sprinkle over the apples.
Mix together: 1 1/2 stick butter, melted; 1 1/2 cup sugar; Pinch of salt;
1 1/2 cup flour; 1 egg; 1/4 cup chopped pecans (optional)
Spread mixture over the apples; it will be thick.
Bake at 350 degrees for 45-50 minutes.
Enjoy with ice cream or whipped cream…yum!
Here you can find the PDF for No Worms Allowed Potholder.