


Do you ever pull out your Glitz, all excited to glam things up, only to find that THE color you want isn’t something you own? Or manufactured? Have to fear, the Glitz-mixer tutorial is here! LOL! Corny, I know. There’s been a lot of that going around in this house since #stayathome #quarantine. But seriously, all you need is your white Glitz Glitter Gel and something with which to stain it. I use Distress Stain because that’s what I have for a liquid color but you could use any mist or Distress re-inkers.
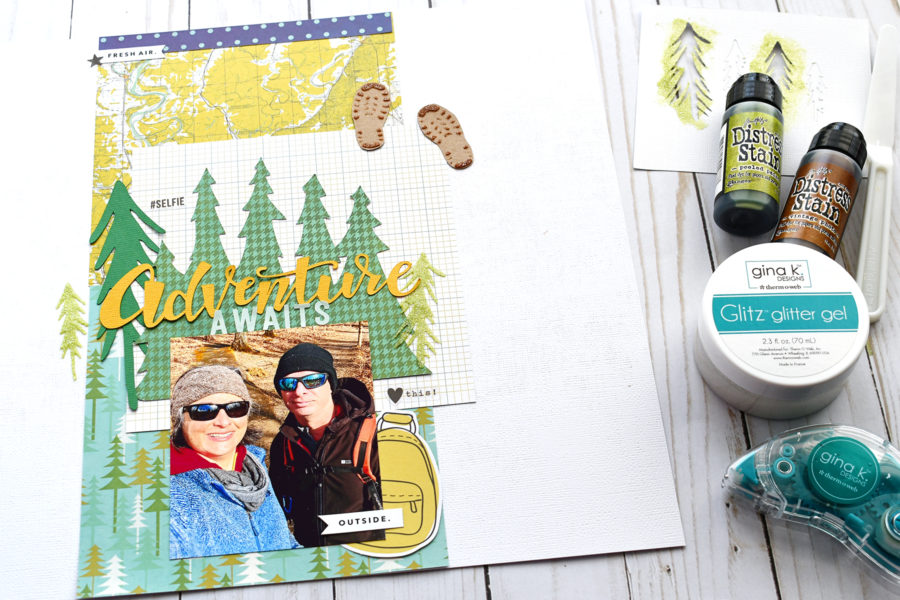
Outdoor Scrapbook Layout
THERMOWEB SUPPLIES
- Gina K. Designs Permanent Adhesive Dot Runner
- iCraft Ultra Bond Adhesive 2 fl oz
- iCraft Metal Tips For Liquid Adhesives
- Gina K. Designs Glitz Glitter Gel – White
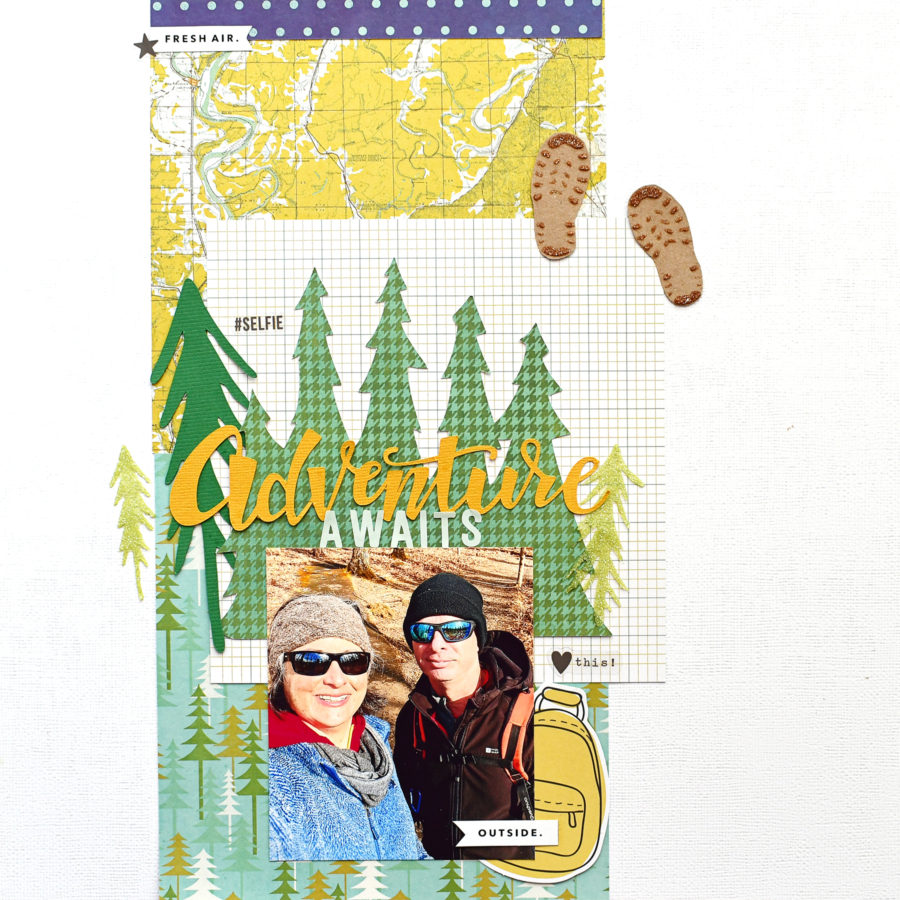
The idea of creating a multi-color forest with multiple layers behind the photo really appealed to me. I wanted it to match the Pebbles Inc patterned paper at the bottom of the layout. The only Glitz that was going to work was a far brighter shade of green than I wanted or really matched the layout. Enter, the idea to try and make my own shade of olive green!

It’s as simple as one, two, three. Scoop some white Glitz onto a palette with a palette knife. Daub some liquid color media onto the palette beside the white. Use your palette knife and “smoosh” the color into the white until the desired depth of color is achieved and the color is evenly blended! Proceed as if you purchased this freshly made color!
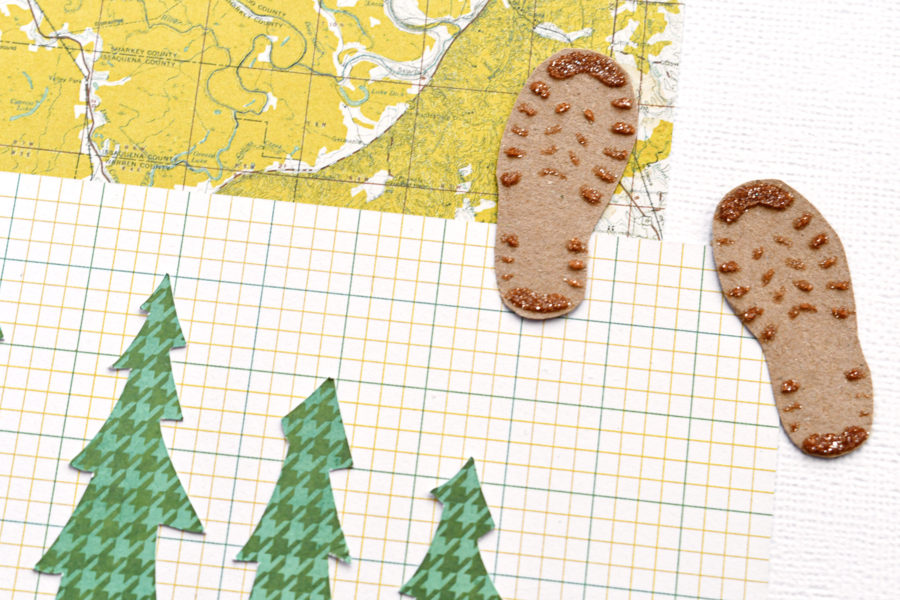
I did the same with the “Vintage Photo” Distress stain for the boot prints above.
In case you are wondering, yes, you can store the leftover! While filming the process video for this (link at the end), I wanted to try the process to ensure it worked before filming. After discovering it DID indeed work, I didn’t want to chuck the precious mixture. I put my palette in a freezer Ziploc bag and left it overnight. It was as good as fresh the next day!

I used homemade stencils cut using my Silhouette and cardstock for the above Glitz applications. I will caution you that with cardstock stencils, the Glitz does build up quickly so probably not good for multiple uses. Perfect for that one application (can be used several times in a sitting) then it’s probably wise to cut another should you want to use the same pattern again.
For clearer instructions on how I mixed the Glitz and to watch this layout come together, be sure to click on the link or visit the ThermOWeb YouTube channel.
I hope you have some wonderful outside activities coming up to look forward to. I know I can’t wait to get back out on the trails again! Thanks for stopping in today!
Suzanna
[…] Visit the Therm O Web blog for a process video. […]