


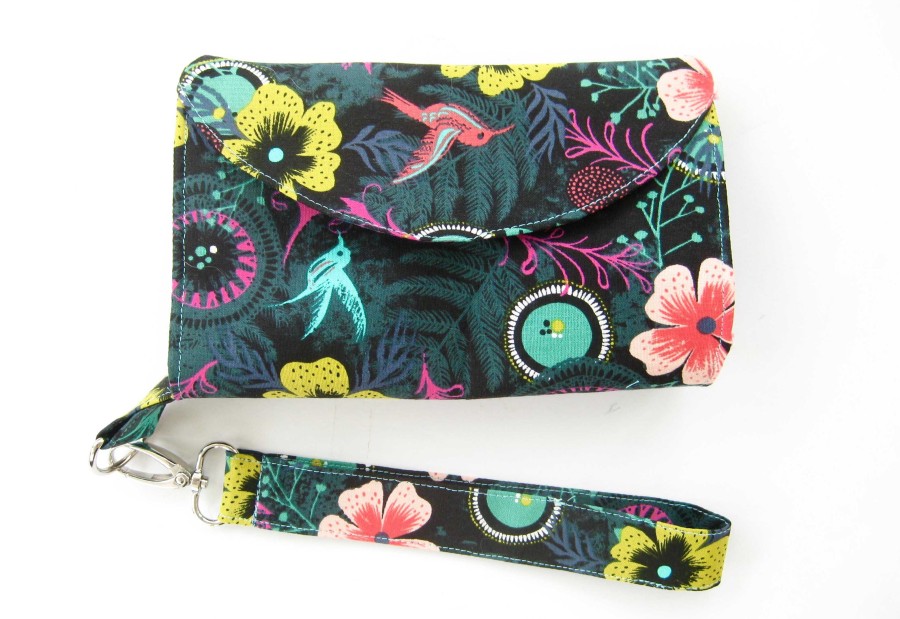
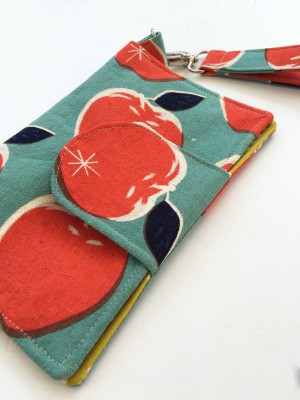
Hello this is Audrey, and I’m so excited to bring you this tutorial today! I’m always looking for little things that I can make for gifts for the women in my life! Friends, my mom, even teachers! I tried to think of something practical that people would actually use. EVERYONE has a cell phone, and busy women sometimes don’t want to lug around a huge purse.
So a little wristlet/clutch is the perfect gift! You can whip one of these up in about an hour. (NOTE: this pattern could also be enlarged to find other sized phones or even tablets and iPads.)
Project Supplies:
-about 2 fat quarters of fabric, one for the outside, and one for the inside pockets. Contrasting prints add a lot of character!
–Heat N Bond® Craft Extra Firm Fusible Interfacing
–Heat N Bond® Light Interfacing
-D ring for 1″ strap
-Swivel clasp for 1″ strap
-Magnetic Snap closure
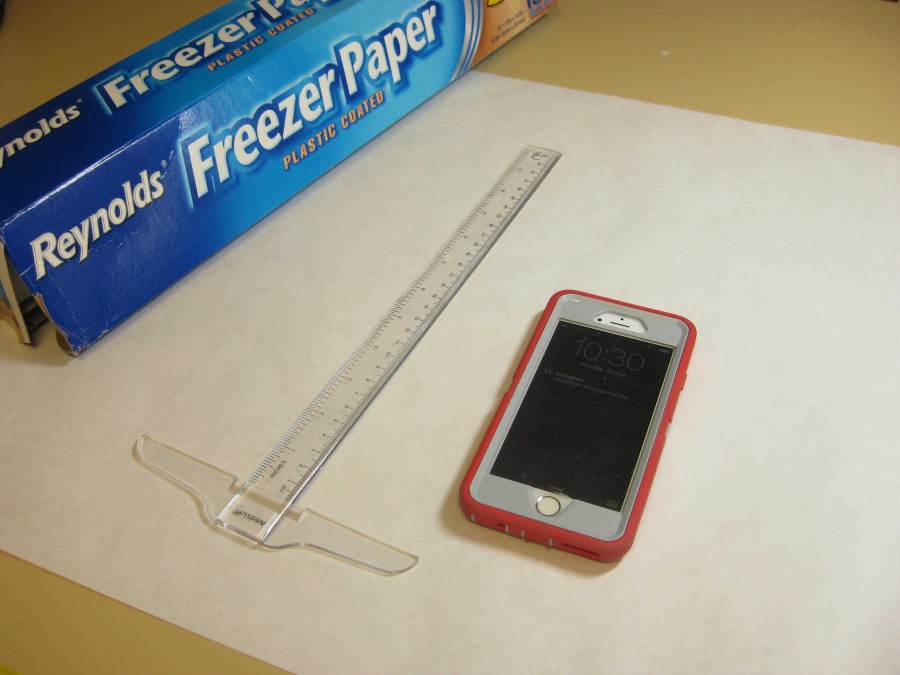
-Freezer paper (or other large paper) for drawing pattern
Project Instructions:
If you want to make a wristlet EXACTLY like the one I made, follow these cutting instructions:
From your outside fabric:
- Cut two pieces 7.5 x 10″.
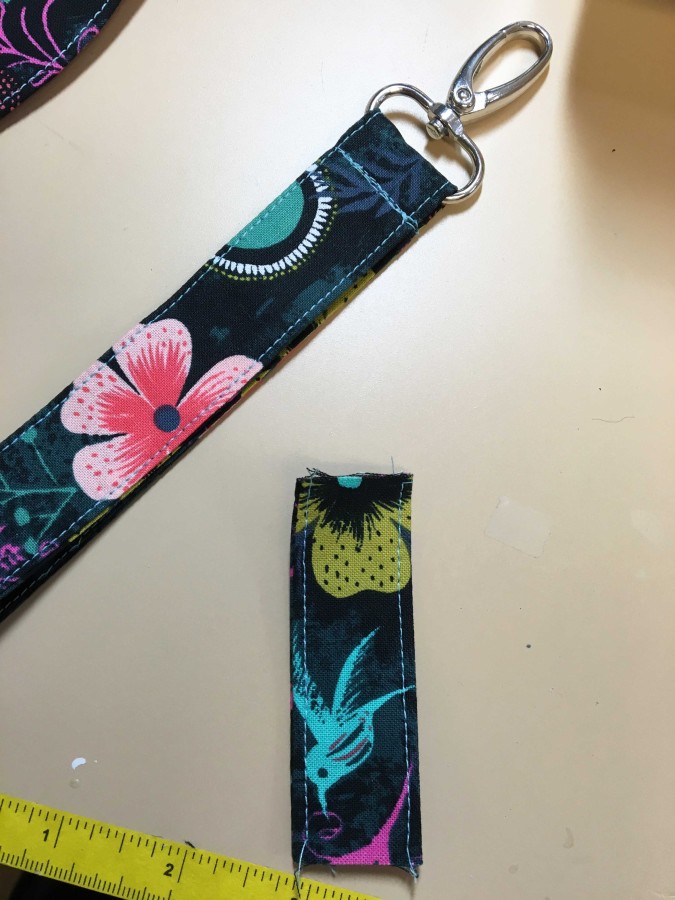
- Cut 4″x15″ and 4″ x 2.5″ pieces for the straps and D ring parts.
- Cut a piece about 4″x3″ for the flap closure. You can really make this any size you want. Read further into the instructions for more details on this part.
From your lining/pocket fabric:
- Cut TWO pieces 8″ x 7.5″, and ONE piece 6″ x 7.5″.
- Cut a piece to match the same shape/size as your flap closure with the outside fabric.
From your HeatNBond® Craft Extra Firm interfacing:
- Cut a piece 7″ x 9.5″
- Cut a piece to match your flap closure, and then trim off 1/4″ all the way around so that there is no interfacing in your seam allowance.
From your HeatNBond® Lite interfacing:
- TWO pieces 3.75″ x 7″.
- ONE piece 2.75″ x 7″.
- Optional: You may want to add interfacing to your strap to give it some more stability. If so, cut a piece 2″ x 15″ for the long strap and a 2″ x 2.5″ piece for the D Ring strap.
Making Your Own Pattern:
If you want to make your own pattern of a certain size, start with a large piece of paper for drawing.
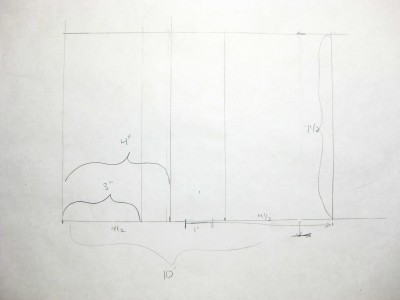
For the pockets, draw out where you want them and measure that width. You can see on my pattern above that I chose 3″ and 4″ the pockets are still 7.5″ high. So I cut my pocket pieces 6″ x 7.5″ and 8″ x 7.5″ because they will be folded in half.
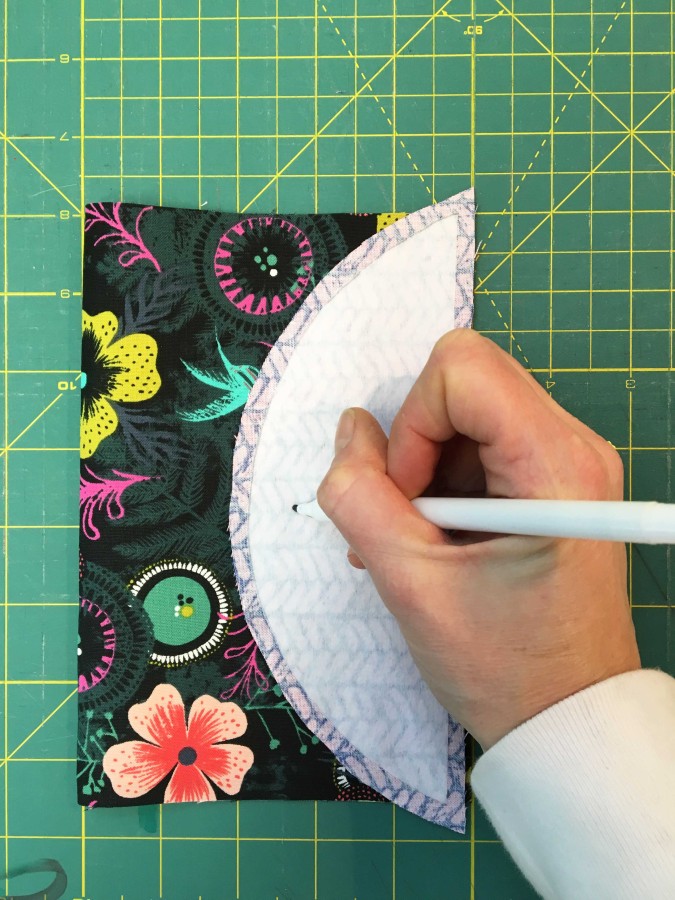
Cut out a flap closure. On the photo of the black wristlet I created, I made a large flap that was 7.5″ high and about 3.5″ wide. I then used a template to trace a half circle shape to get the rounded edge. I would recommend that you actually use a small closure, but it’s up to you!
Directions:
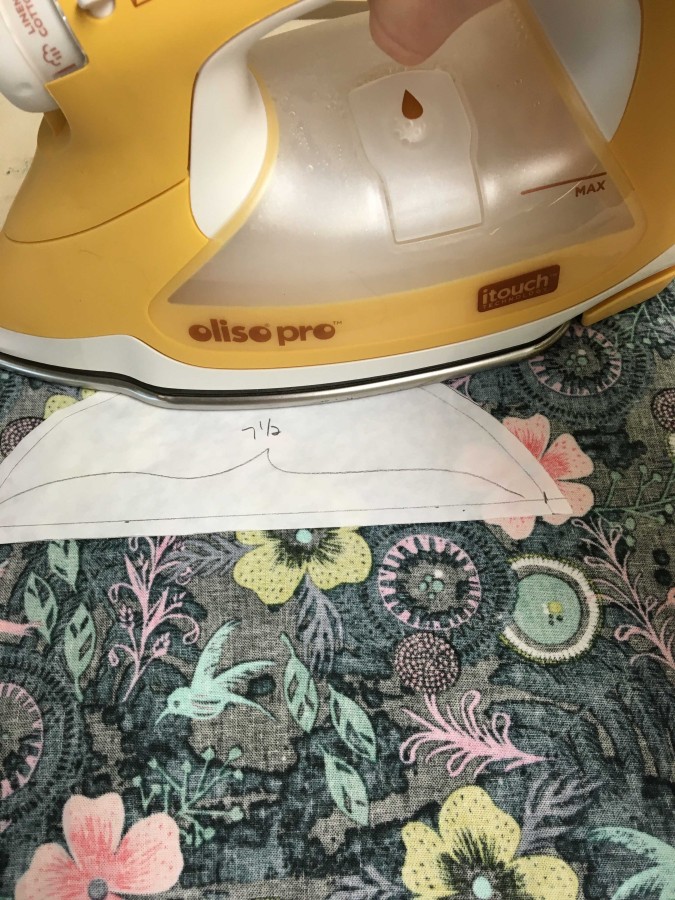
Ironing-
- Begin by ironing all the interfacing to the correct pieces. Choose one of your outer fabric pieces for the outside of the clutch and iron the HeatNBond® Extra Firm interfacing to the wrong side following the directions on the interfacing package.
- Iron the HeatNBond® Extra Firm Interfacing to the wrong side of the inner flap closure piece.
- Fold each pocket piece in half so that they are still 7.5″ high. Iron the HeatNBond® Lite interfacing to the inside of each pocket.

- If using interfacing for your straps, iron the 2″ wide pieces down the middle of the two strap parts.
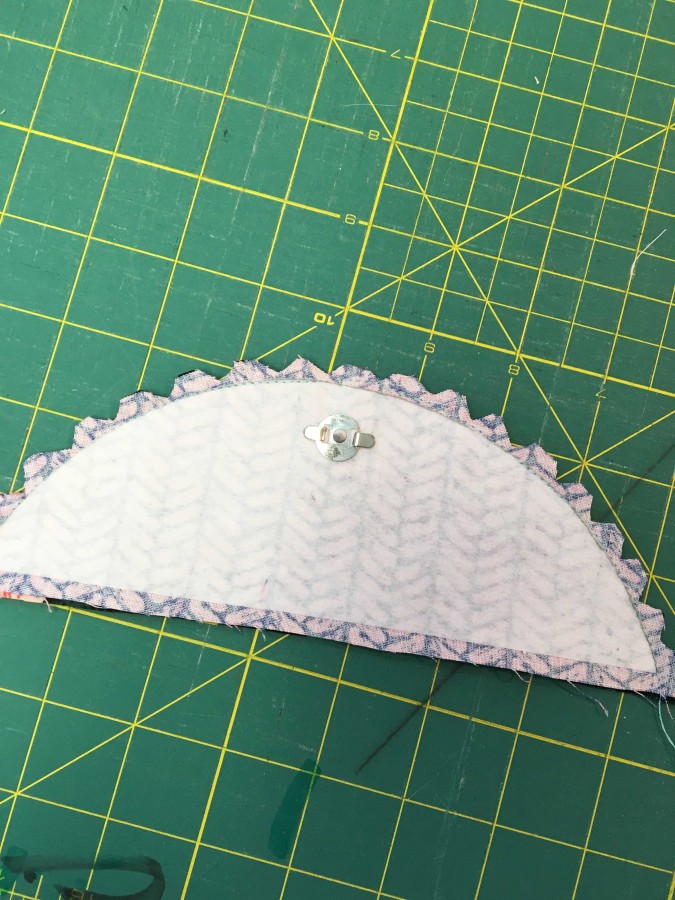
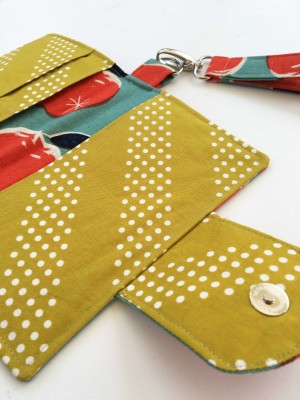
The Snap:
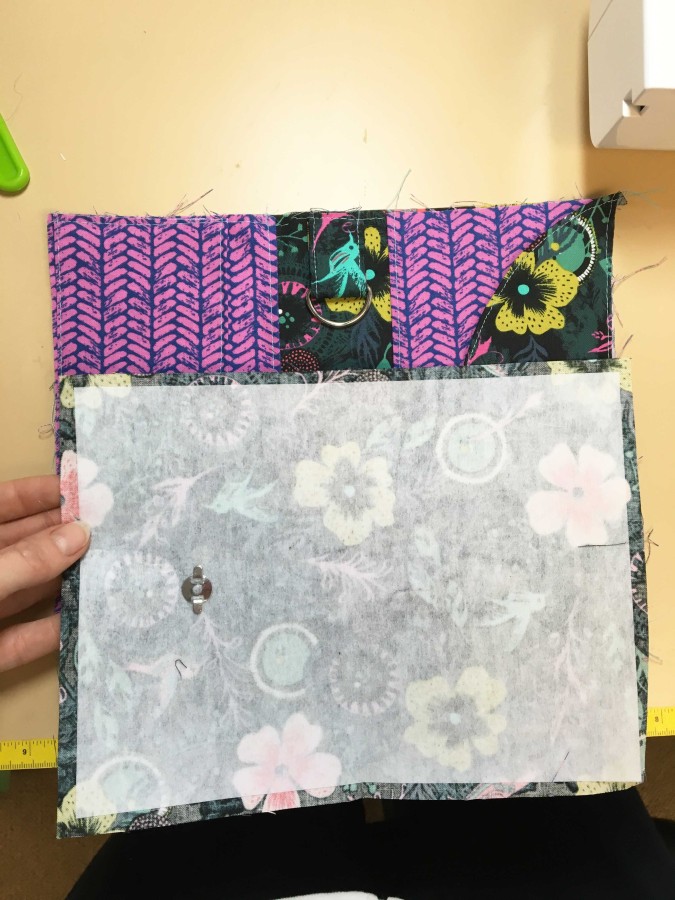
- Line up your flap lining piece on your outer piece of fabric that has the interfacing so that the raw edges of the flap are lined up with the raw edges of the outer piece on the right. (NOTE: In my photo below, my outer fabric is folded and the fold is on the left.) The flap piece should be interfacing side up and the outer piece should be interfacing side down.
- Make a mark on the flap interfacing about 3/4″ from the edge and make a dot.
- Place a pin through this dot into the outer fabric below, all the way through the back of the outer fabric. On the outer fabric, mark this spot where the pin came through with a dot as well. ***NOTE: After making a few of these, I think it is best to move this lower mark about 1/2″ closer towards the raw edge of the outer piece to allow for more bulk when the wristlet is closed!!!! I would highly recommend you do this!
- Attach snap according to package directions.
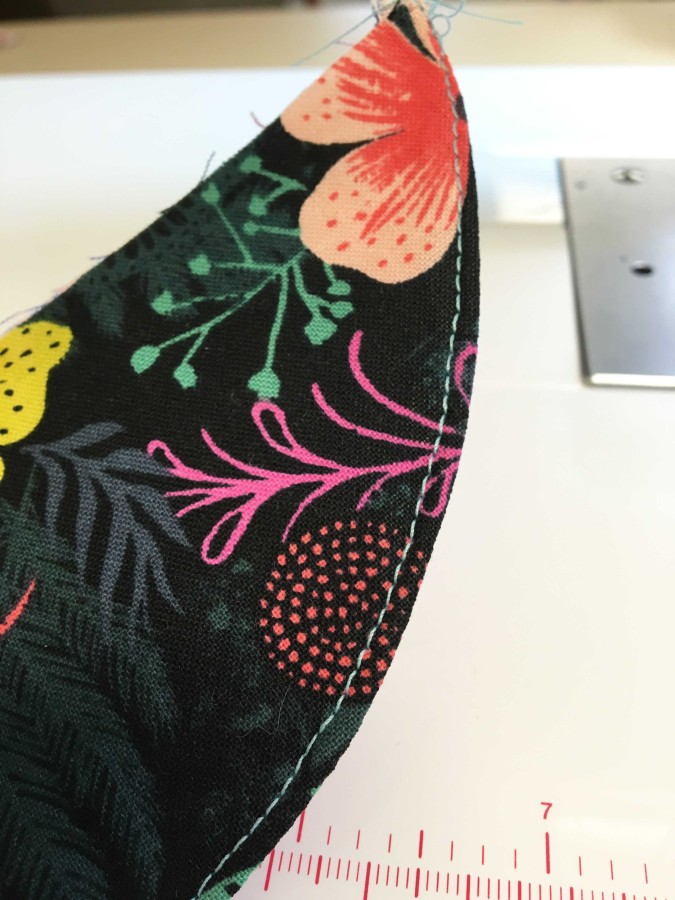
The Flap:
- Place the two pieces of flap closure piece right sides together and sew along the outside edges. Leave the lower edge unstitched.
- Trim the seam allowance and clip curves.
- Fold right side out and top stitch along the outside edge.
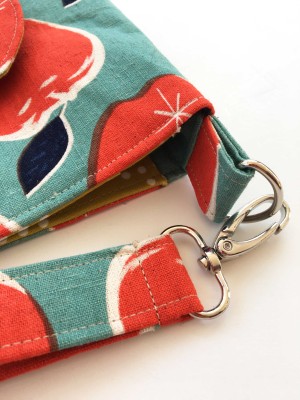
The Straps:
- Fold each strap in half and iron. The open and fold the raw edges into the middle. Fold in half again and iron.
- On the small strap, top stitch down both edges, about 1/8″ from the edge.
- Add your swivel clasp to your long strap. DON’T FORGET TO DO THIS FIRST!! Then open the ends of your strap, place right sides together, and sew 1/4″ seam. Finger press the seam open and fold the fabric back as it was.
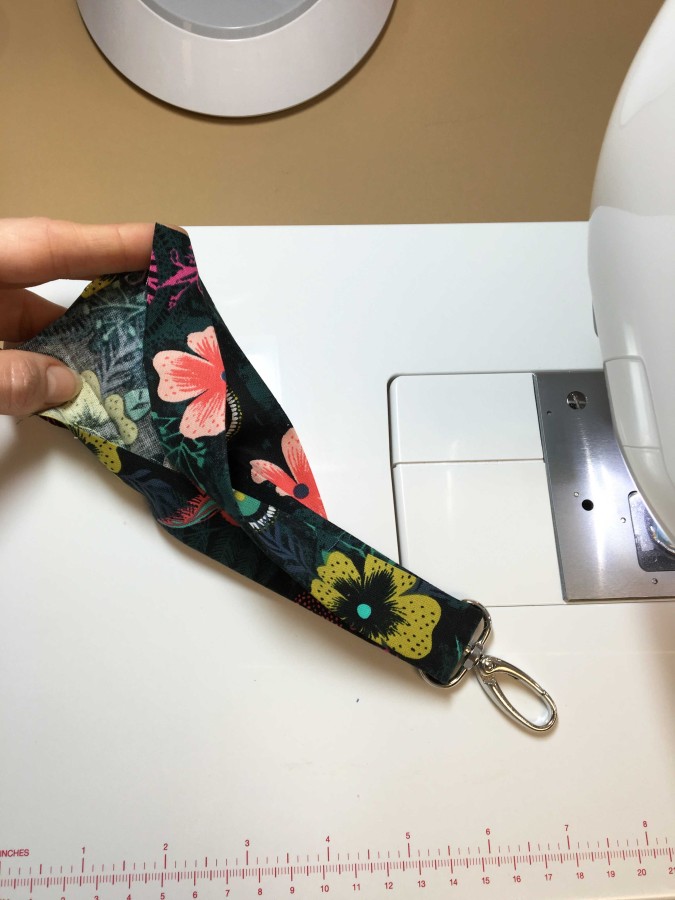
- Top stitch along the edges of the strap, moving the clasp down as you sew. You may want to start and stop on the seam for a cleaner look.

- Fold the long strap so the the seam is about 3/4″ above the clasp and stitch along the seam to enclose the clasp. Neatly backstitch a few times.
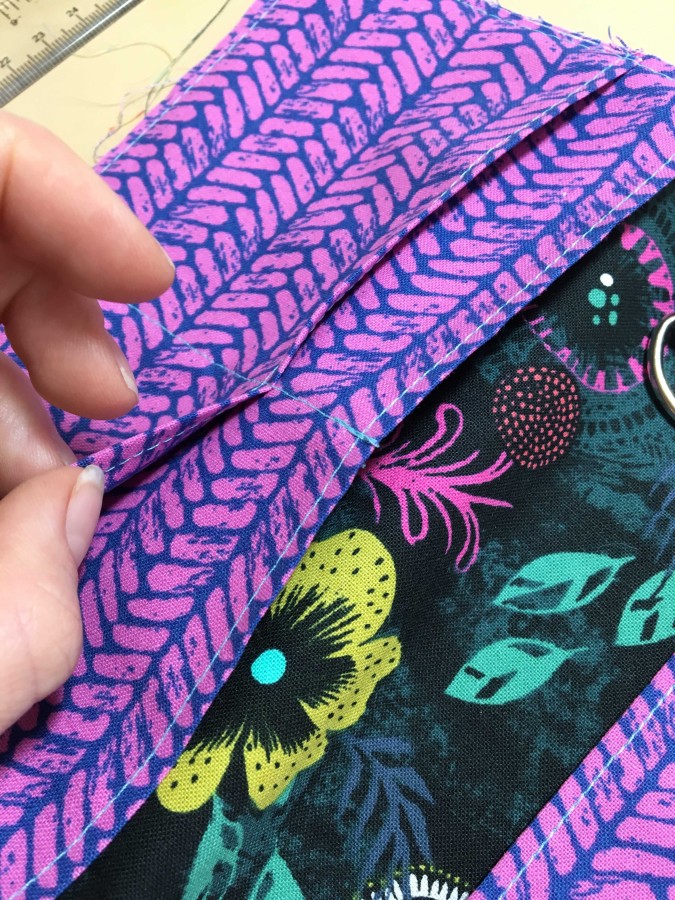
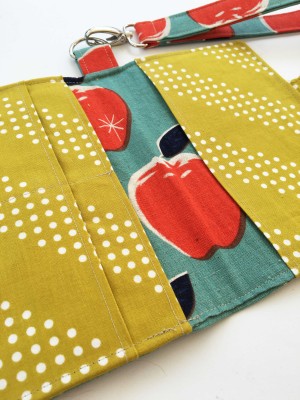
The Pockets:
- Top stitch along the folded edge of all three pockets 1/8″ from the edge.
- Layer the smaller pocket on top of one of the larger pockets and stitch a seam down the middle.
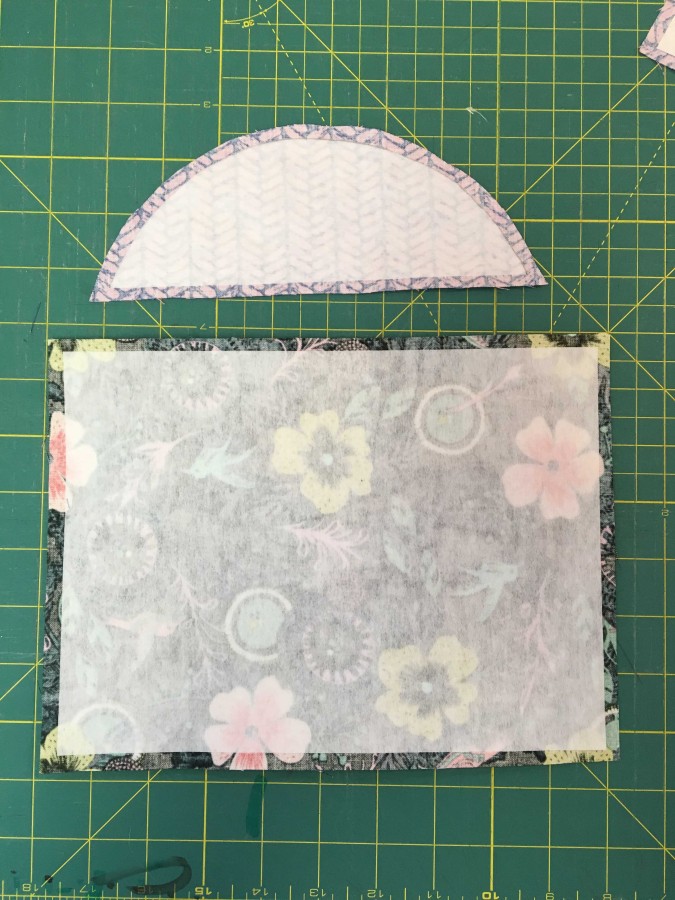
Assembly:
- Lay out your piece of outer fabric WITHOUT the interfacing right side up.
- Line up your double pocket on the left, with the raw edges of the pockets lined up with the raw edge of the outer fabric.
- Line up your single pocket on the right, again with the raw edges matching.
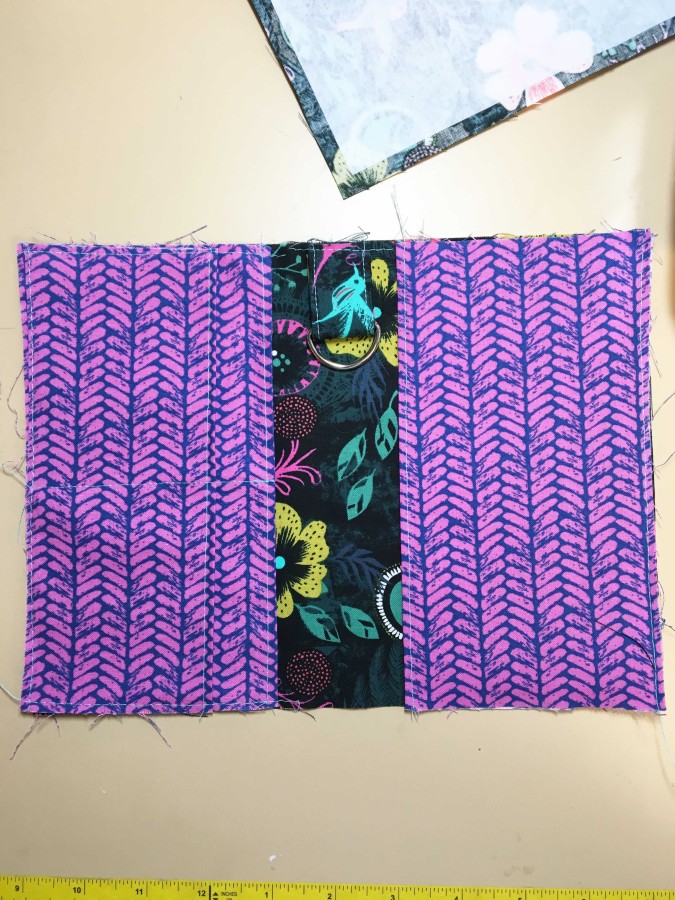
- Line up your small strap with the D-Ring so that it is right in the middle on the top. The ring should be pointing towards the middle of the assembly.
- Line up your flap closure, SNAP SIDE DOWN on the center right, on top of the large pocket.
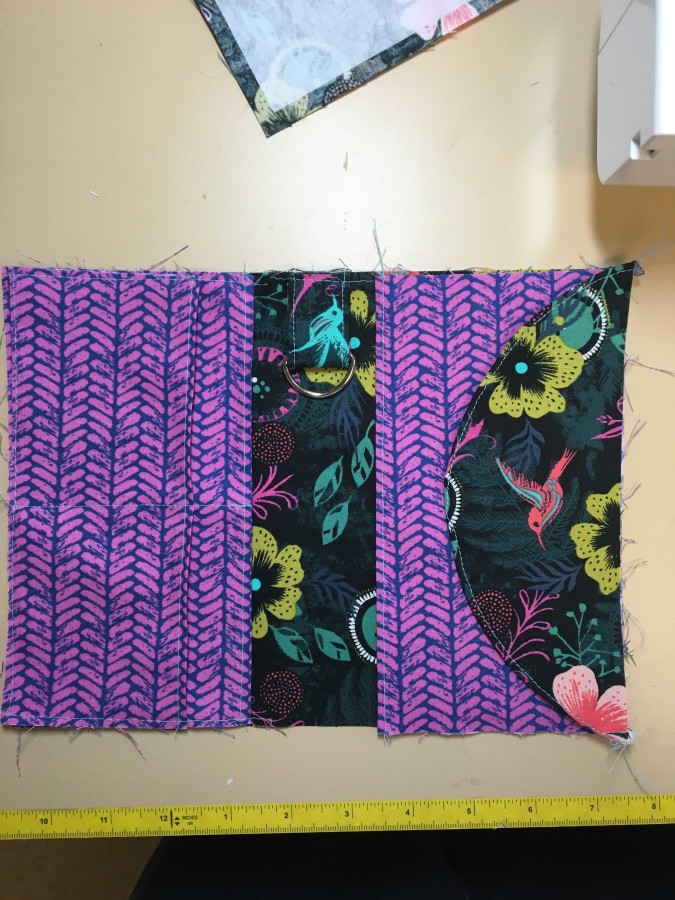
- If desired, baste or pin all the way around.
- Layer your outer piece on top, interfacing side UP and SNAP TO THE LEFT.
- Machine stitch all the way around, leaving a 2-3″ open space at the bottom to turn inside out. The opening is marked in my photo below. Be sure to backstitch around this opening!
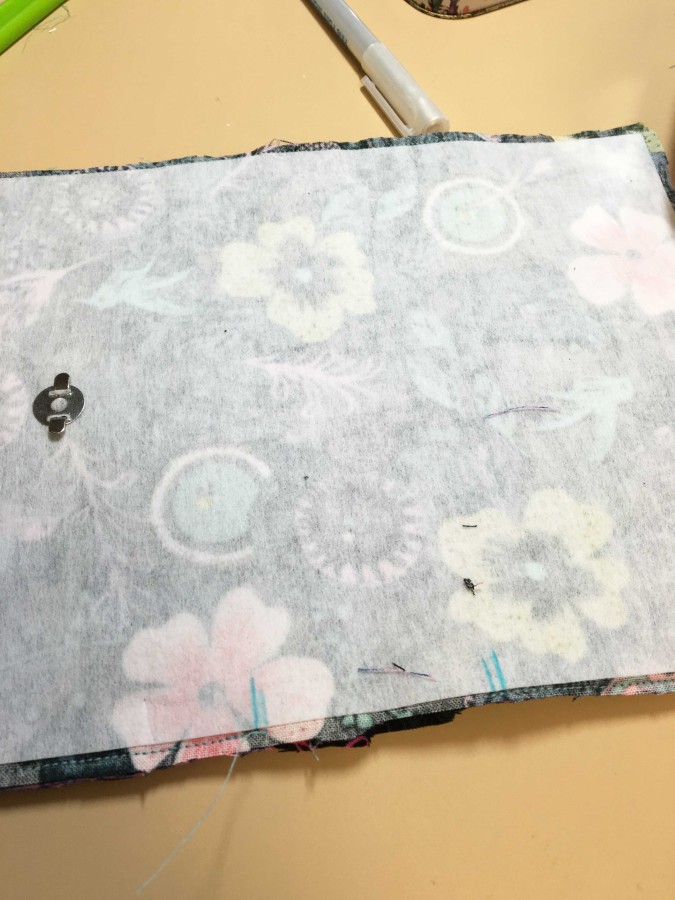
- Turn right side out. *NOTE: At first it may look like you sewed the pocket wrong, but be sure to turn the pockets right side out, too!!
- Iron well, and top stitch all the way around, being sure to stitch over the opening to close it up!
- Clip on swivel strap and you are DONE!
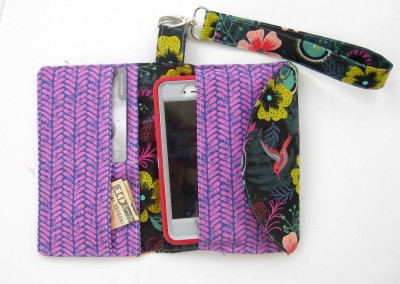

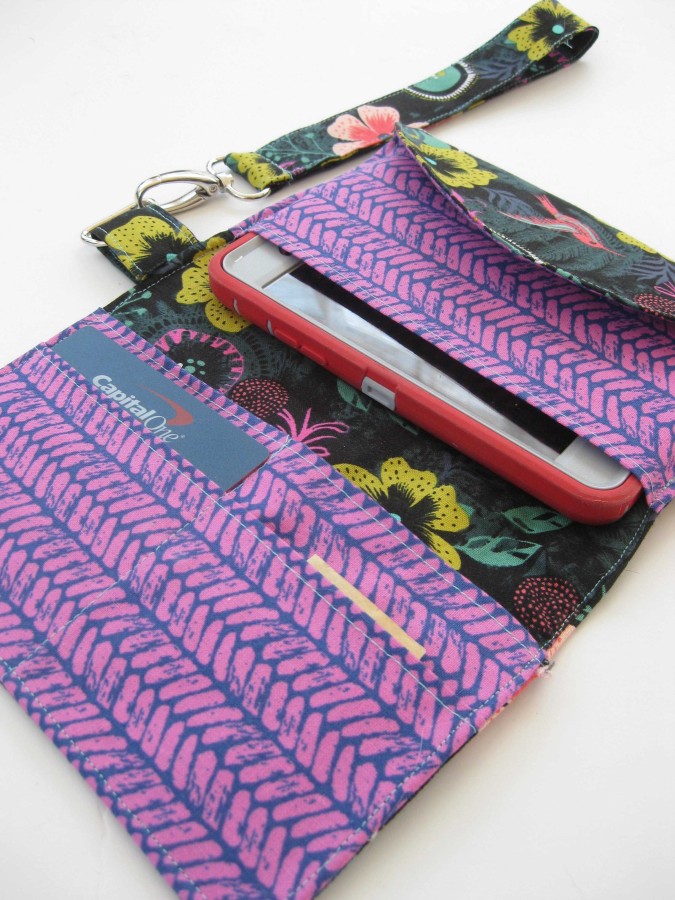
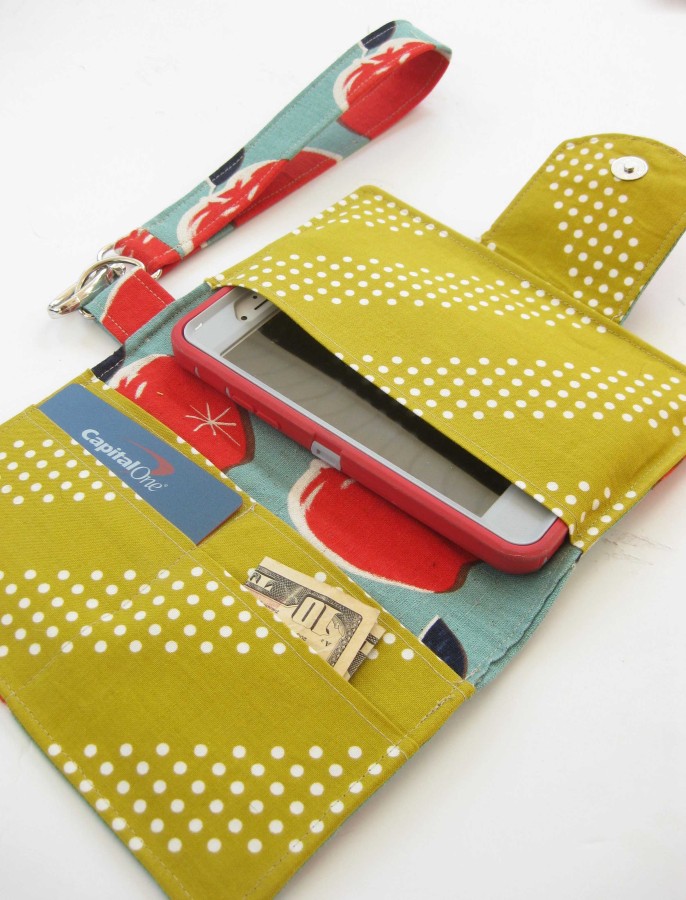
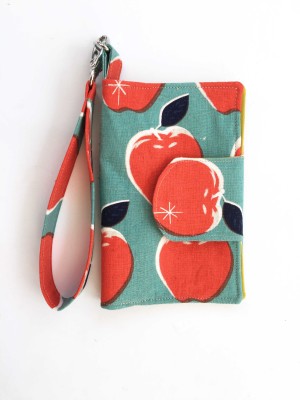
Here are a few of the wristlets I made with different closures. Experiment with the shapes and have fun!

Please let me know if you have any questions for comments!
25 Comments on Phone Wristlet Stylish Clutch Tutorial with HeatnBond Interfacing
4Pingbacks & Trackbacks on Phone Wristlet Stylish Clutch Tutorial with HeatnBond Interfacing
-
[…] Phone Wristlet Stylish Clutch Tutorial with Heat n Bond Interfacing, by Skirt Fixation […]
-
[…] I’ve recently become a phone having a little phone clutch. I got one for Christmas and find I drop my phone a lot less if I carry it around in the little clutch! This phone wristlet clutch would be a great speedy project to make for your phone. Check out the tutorial here. […]
-
[…] get tutorial var addthis_config = {"data_track_clickback":true,"ui_atversion":300,"ignore_server_config":true}; var addthis_share = {}; var addthis_product = "wpp-5.3.3"; var wp_product_version = "wpp-5.3.3"; var wp_blog_version = "4.5.7"; var addthis_plugin_info = {"info_status":"enabled","cms_name":"WordPress","cms_version":"4.5.7","plugin_name":"Share Buttons by AddThis","plugin_version":"5.3.3","anonymous_profile_id":"wp-cad3b0be90525017c453adeb37b933e6","plugin_mode":"WordPress","select_prefs":{"addthis_per_post_enabled":true,"addthis_above_enabled":false,"addthis_below_enabled":true,"addthis_sidebar_enabled":false,"addthis_mobile_toolbar_enabled":true,"addthis_above_showon_home":true,"addthis_above_showon_posts":true,"addthis_above_showon_pages":true,"addthis_above_showon_archives":true,"addthis_above_showon_categories":true,"addthis_above_showon_excerpts":true,"addthis_below_showon_home":true,"addthis_below_showon_posts":true,"addthis_below_showon_pages":true,"addthis_below_showon_archives":true,"addthis_below_showon_categories":true,"addthis_below_showon_excerpts":true,"addthis_sidebar_showon_home":true,"addthis_sidebar_showon_posts":true,"addthis_sidebar_showon_pages":true,"addthis_sidebar_showon_archives":true,"addthis_sidebar_showon_categories":true,"addthis_mobile_toolbar_showon_home":true,"addthis_mobile_toolbar_showon_posts":true,"addthis_mobile_toolbar_showon_pages":true,"addthis_mobile_toolbar_showon_archives":true,"addthis_mobile_toolbar_showon_categories":true,"sharing_enabled_on_post_via_metabox":true},"page_info":{"template":"posts","post_type":""}}; if (typeof(addthis_config) == "undefined") { var addthis_config = {"data_track_clickback":true,"ui_atversion":300,"ignore_server_config":true}; } if (typeof(addthis_share) == "undefined") { var addthis_share = {}; } if (typeof(addthis_layers) == "undefined") { var addthis_layers = {"sharedock":{"counts":true,"position":"bottom","numPreferredServices":4}}; } (function() { var at_interval = setInterval(function () { if(window.addthis) { clearInterval(at_interval); addthis.layers(addthis_layers); } },1000) }()); […]
-
[…] → Click Here ← […]
Carla
April 7, 2016 at 8:11 am (8 years ago)I’m getting ready for vacation and this will be perfect to take with me. Thanks for a great tutorial!
Sarita
April 8, 2016 at 12:08 pm (8 years ago)I have a fat quarter that would make a beautiful wrist clutch. Thank you for this amazing tutorial. Is there a printable version?
Susan Seal
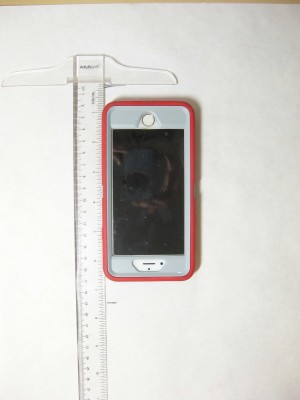
September 8, 2016 at 12:32 pm (8 years ago)Perfect! Thank you, I need this! Could I ask, are your dimensions based on an iPhone 6 plus?
admin
October 10, 2016 at 12:44 pm (8 years ago)Hi Susan! It is an iphone 6s! Hope that helps!
daylilydawn
October 8, 2016 at 6:09 pm (8 years ago)You should use RFID fabric to line the credit card pockets. It will prevent someone using a card reader to steal your information .It happened to me and they cleaned out my bank account.
Mary Hackemer
July 22, 2020 at 2:49 pm (4 years ago)Where do you get Rfid fabric.
admin
July 23, 2020 at 1:56 pm (4 years ago)Hi Mary…if you Google RFID fabric you’ll find many online sources such as Etsy and Amazon.
daylilydawn
July 23, 2020 at 2:06 pm (4 years ago)I ordered my RFID fabric from Amazon. When on Amazon website, just type RFID fabric in the search box. Several sellers are available to order from.
Sharon
October 10, 2016 at 9:53 am (8 years ago)What size phone is the given measurements for? Looks like iPhone 6+ with otterbox case?
admin
October 10, 2016 at 12:44 pm (8 years ago)Hi Sharon! Her phone is an iphone 6s. Best to you!
Maxine Larsen
January 22, 2018 at 9:47 am (6 years ago)Like the tutorial, but wish I could have printed it out.
Laura Robb
February 10, 2018 at 5:28 pm (6 years ago)Is there any chance the magnetic snap could erase info from the magnetic strip on credit and bank cards?
thanks!
admin
February 12, 2018 at 9:16 am (6 years ago)Hi Laura…while we have not tested it..money clips and wallets are not known to demagnetize credit cards, they have been known to demagnetize a hotel room key or two. We’ve not heard of any issues so would say given the sheer number of wallets and purses sold with magnets, this should not present a problem.
Kathy M
February 11, 2018 at 4:50 pm (6 years ago)I’m new to sewing and am very excited to try this. What size D ring and closure clasps? Or does it not matter?
admin
February 12, 2018 at 9:13 am (6 years ago)Hi Kathy! Audrey mentions it is for a D-ring for a one-inch strap so a one-inch ring should do the trick!
GmamaT
March 7, 2018 at 1:34 pm (6 years ago)What would you estimate your total cost to make this would be?
admin
March 9, 2018 at 12:41 pm (6 years ago)Designer Audrey Yeager estimated around $6. Hope that helps!
Dianne
June 26, 2018 at 7:15 pm (6 years ago)Thank you for sharing this wristlet. It’s one of the easier ones I’ve found to make.
Cindy
November 14, 2018 at 11:23 am (5 years ago)Just wondering what are the measurements of the phone you used in making this little clutch? If you mentioned it in the tutorial, I didn’t see it! Thanks – it’s very handy. Would love it for quick trips to the store, etc.
Sofia
May 19, 2020 at 2:22 am (4 years ago)I love it:-)
I must have to try this my self. Your guide is so easy to follow and to understand. Thank you for sharing.
I will probably use sew in magnets like this ones https://www.magnet-shop.com/neodymium-magnets/sew-in-magnets/2001/sew-in-discmagnet-oe-12-x-2-mm-in-a-pvc-coating-square, because I prefer not to see the button:-)
Emily
April 26, 2022 at 7:46 pm (2 years ago)Newish to sewing and this is an old post, but any particular changes you would make I’d this was a three sided zipper instead of the flap/snap?