


Hi everyone, it’s Audrey, here with another fun Pinterest inspired project to share with you today!
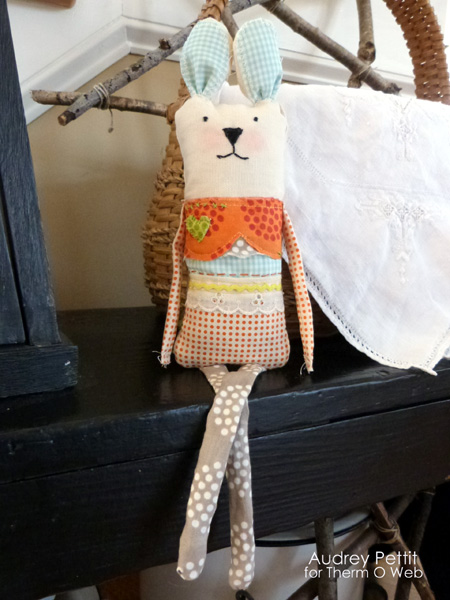 I don’t know about you all, but I am ready to think spring. My Pinterest boards are literally bursting with tons of great spring inspired project ideas, including some super adorable rag doll bunnies, like my guy here.
 I adore working with fabrics, and love coming up with ideas for using up some tiny bits of leftover fabric scraps, so this project was just what I was looking for. It’s cute and fun, and better yet, super easy to put together with the help of Therm O Web’s fabulous Fabric Fuse Tape. It’s a little trick I discovered that makes piecing fabrics a breeze. I’ll show you how.
Bunny Rag Doll by Designer Audrey Pettit:
Supplies:
Therm O Web Fabric Fuse Tape
Therm O Web HeatnBond® Lite Iron-On Adhesive
Fabrics: Bobbins and Bits Collection by Designer Pat Sloan for Moda Fabrics, Not So Spooky Halloween Collection by Blend Fabrics, Sewing Supply
Floss: DMC
Trim: vintage
Chalk Pastels: Stampin’Up
Polyfill Fiber Stuffing
Too cute, right? Before we get started, here is my original Pinterest inspiration project.
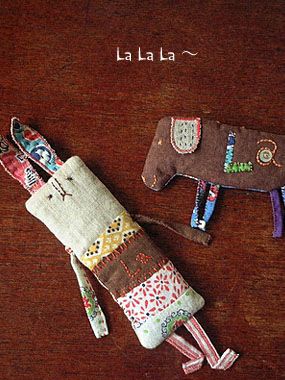
(Source)
I was totally inspired by the fun rectangular shape and all the strips of various fabrics, and used those as the jumping off points for my design. But not having a lot of sewing or quilting skills, I was a bit intimidated at first by all that fabric piecing. That is until I discovered an easy trick for fabric piecing using Fabric Fuse Tape.
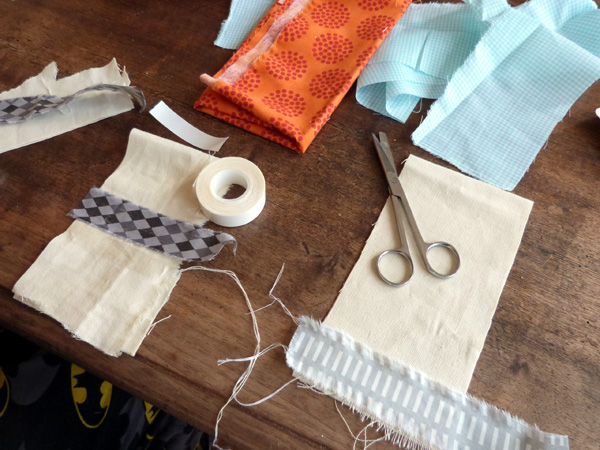
To get started, fold your base fabric together and cut out a rectangular shape. You can use any size rectangle you wish as well as any number of fabrics for the base like cotton, muslin, or the linen fabric I used here. Just remember, the larger your rectangle, the larger your finished bunny will be.
Apply strips of Fabric Fuse tape to the bottom of both your front and back panels, leaving approximately one-third of the fabric bare at the top for the face. Cover the Fabric Fuse tape with strips of designer fabrics. This is a great use for all those little scraps you may have laying around.
Important Tip:
The Fabric Fuse Tape will gum up your sewing needle, so use the tape carefully by applying it only to the middle sections, leaving 1/4″ margins on all sides. This way, your needle won’t get caught up when sewing the front and back pieces together. Also, if you plan on adding stitching between the fabric pieces, be mindful of where you place your tape.
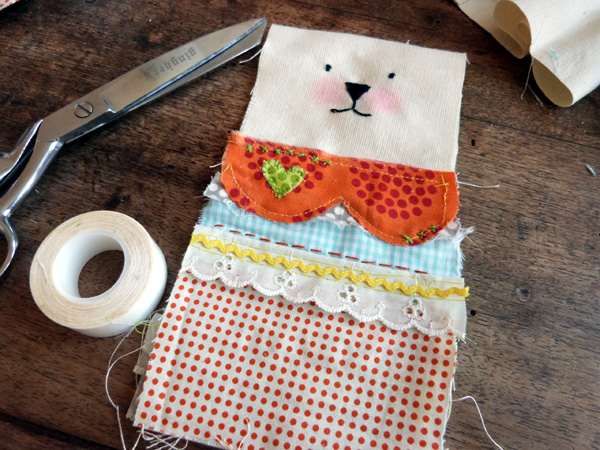
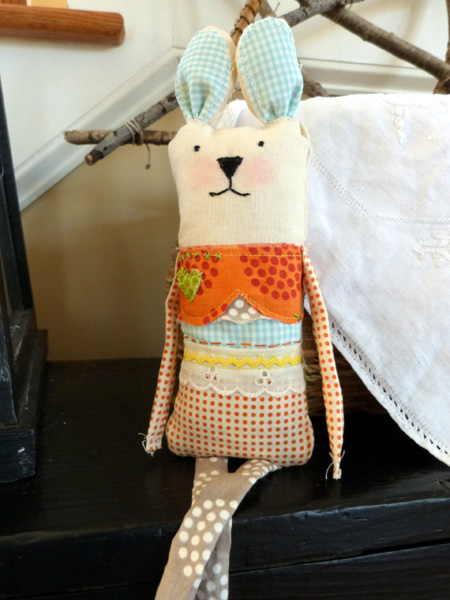
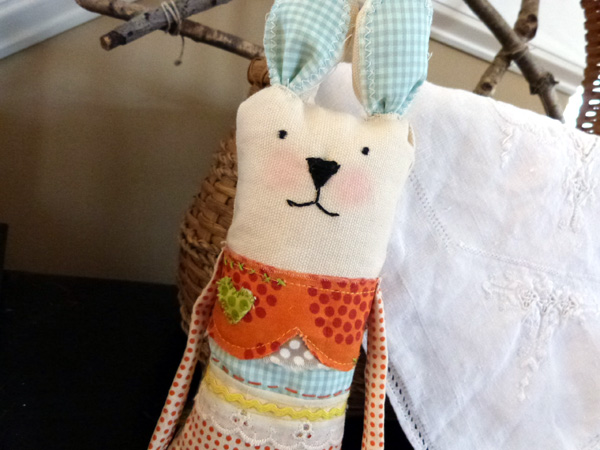
Continue to add fabric strips until you have a pattern you like. Add decorative touches with machine and hand stitching if you so desire, being careful to avoid any areas with the Fabric Fuse Tape. Hand stitch faces using black embroidery floss. I added a touch of chalk pastel to create rosy cheeks.
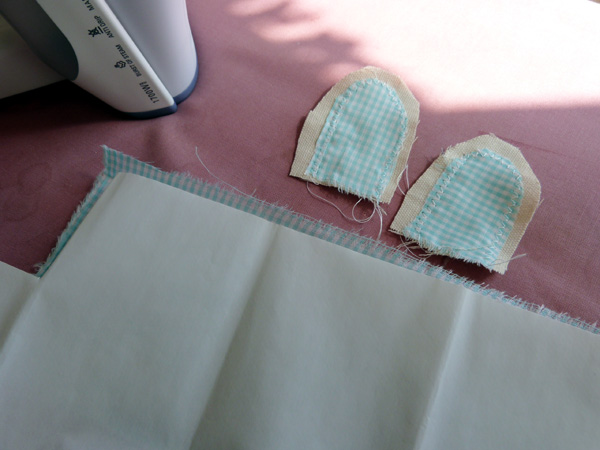
To create the ears, fold your base material together and free cut two pairs of rounded ears. Following the directions on the packaging, fuse iron-on adhesive to the backside of some gingham print fabric. Cut out two inner ear shapes and iron them onto the front of the linen ears to fuse the fabrics together. Add decorative stitching.
Note: If you plan on adding lots of stitching to the body parts of your bunnies and don’t want to worry about catching your needle in adhesive, try using the Iron-On Adhesive with all your fabric pieces.
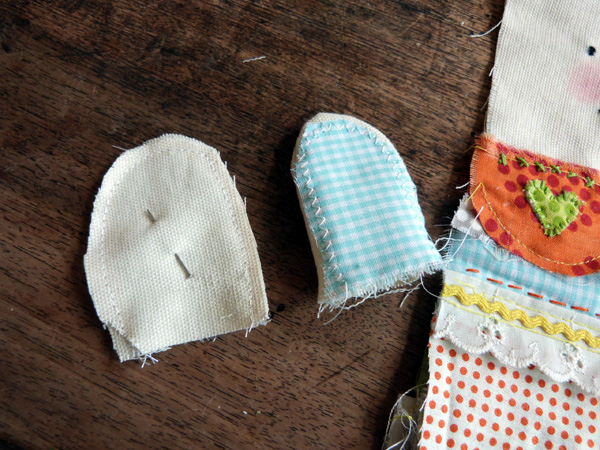
Lay the two ear shapes together, right sides facing, and machine stitch around the sides and top using a 1/8″ seam allowance. Turn the ears right side out.
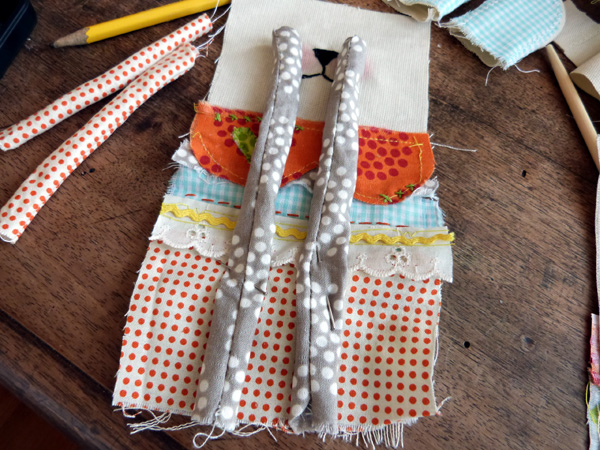
Cut long strips of decorative fabric for the arms and legs. Fold in half lengthwise and stitch down the length to create a tube. Carefully flip pieces inside out and stitch the ends closed. Pin legs up against the boy, with the top edges of the legs meeting the bottom edge of the body, and the feet pointing up towards the face. Lay the back of the bunny onto the front, right sides facing. Starting at the top left corner, machine stitch around the bunny body and up to the right corner, leaving the very top of the head open. Flip the bunny inside out.

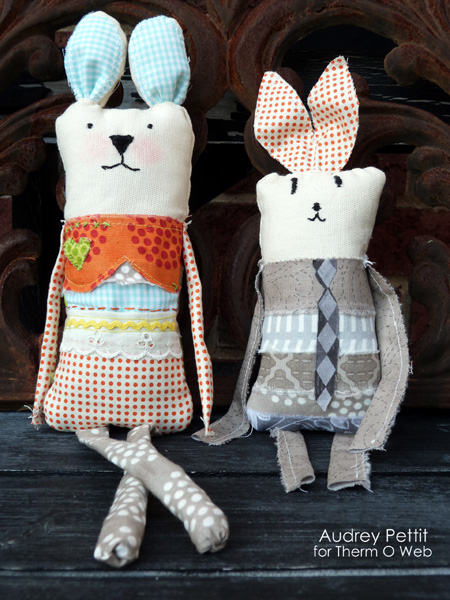
Add a bit of stuffing into the ears. Pinch the bottoms closed from the sides, then stitch the ears closed. Fill bunny body with stuffing, then tuck the ears into place and whip stitch the remaining opening closed.
Stitch on the arms, and you are finished.
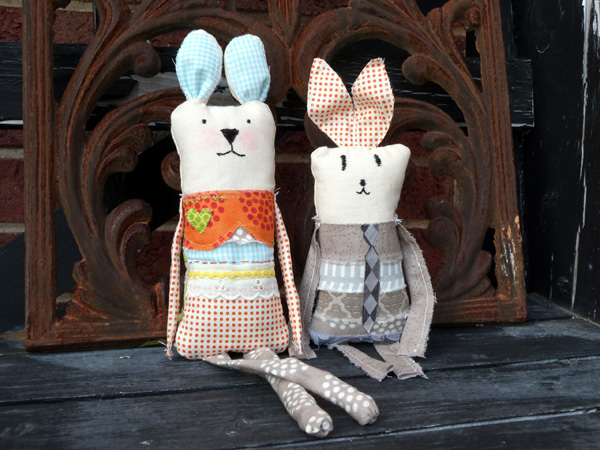
This project was so easy, my daughter played along with me, creating the smaller grey bunny here using only Fabric Fuse Tape, with no stitching between the strips.
Love a good kid-friendly project like that!

Join us as we celebrate National Craft Month! That means savings for you and chances to win prizes from some of your favorite companies and your favorite products of ours all month long!
To kick off the month enjoy savings all this week on your favorite SpraynBond® products and Zots™!

13 Comments on Pinterest Inspired Bunny Rag Doll
1Pingbacks & Trackbacks on Pinterest Inspired Bunny Rag Doll
-
[…] past week, the Therm O Web girls were sharing projects on the blog inspired by Pinterest. I don’t know about you all, but I am ready to think spring. My Pinterest […]
Phyllis Lundy
March 6, 2014 at 9:30 am (10 years ago)I have used heatnbond….it’s great for applique!
Patti
March 6, 2014 at 10:13 am (10 years ago)I’ve used the Heatnbond light. Thanks
kbo
March 6, 2014 at 12:17 pm (10 years ago)I use Heatnbond regularly in my art quilts and Zots were used on my Valentine cards this year.
Terri C
March 6, 2014 at 12:32 pm (10 years ago)I use HeatnBond light all the time do a lot of appliqué and just fun things for my granddaughter .
Karen
March 6, 2014 at 1:13 pm (10 years ago)I use it all the time for applique work and sewing.
TracyM #6773
March 11, 2014 at 6:39 am (10 years ago)These are SO CUTE – thank you for the inspiration and tutorial 🙂
You & your daughter have done a great job and love that you create TOGETHER!!!
Rosalind Gutierrez
March 12, 2014 at 8:49 am (10 years ago)Love to use Therm O Web for appliques on quilts !
Judy
March 12, 2014 at 12:48 pm (10 years ago)Yes, great for appliques on quilts! And fusing letters on t shirts!
Thanks
Sandy Youngblood
March 13, 2014 at 10:27 am (10 years ago)love these iron. I want one bad!!!!
rnconnie2be
March 13, 2014 at 10:38 am (10 years ago)i love heat and bond products and use them often in my craft and sewing prjects.
Jella Breaux
March 13, 2014 at 12:43 pm (10 years ago)I love heat n bond products! It’s a must use for quick sewing needs!
Rita
March 16, 2014 at 3:31 pm (10 years ago)I love the oil so iron, be great to win. Can’t wait for spring to get here, had snow again last night.