


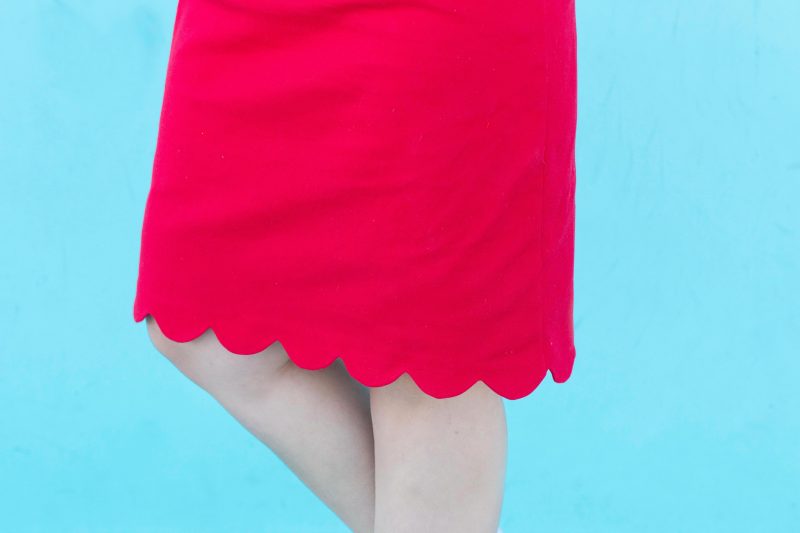
Scalloped Skirt Sewing Tutorial
Learn how to make an adorable scalloped skirt with this step-by-step sewing tutorial!

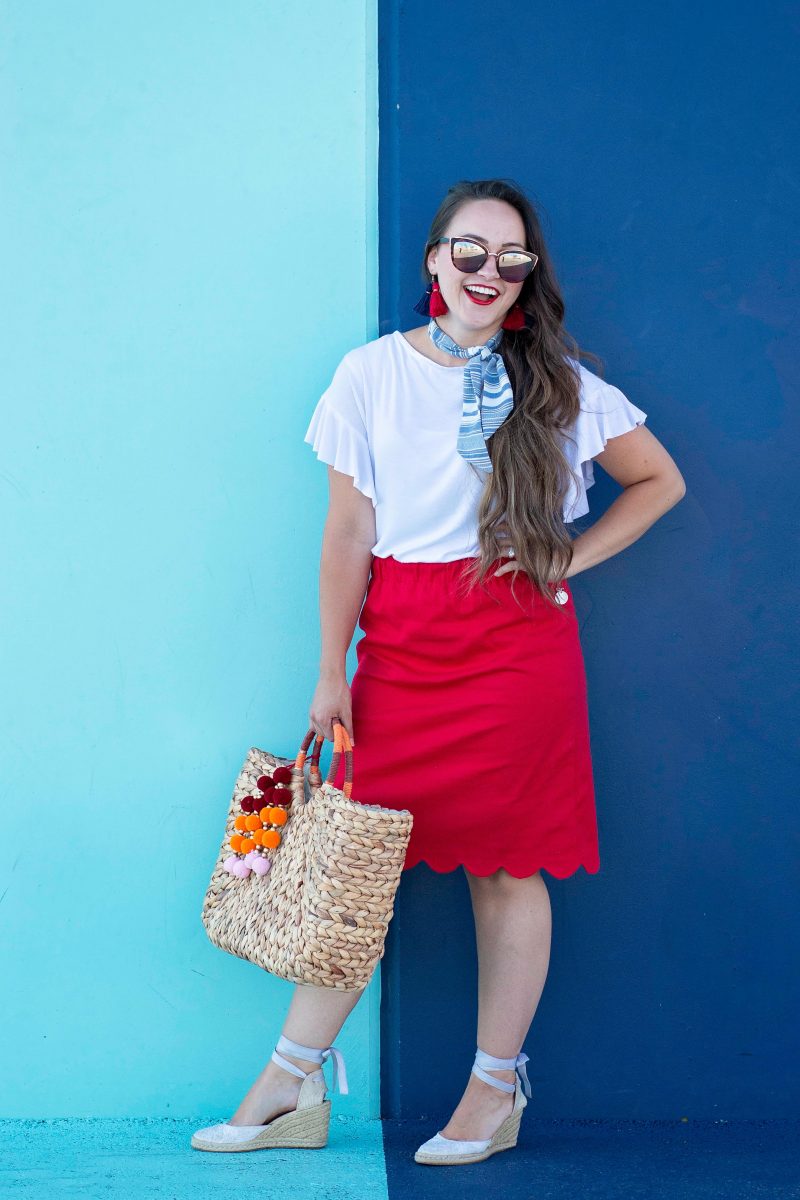
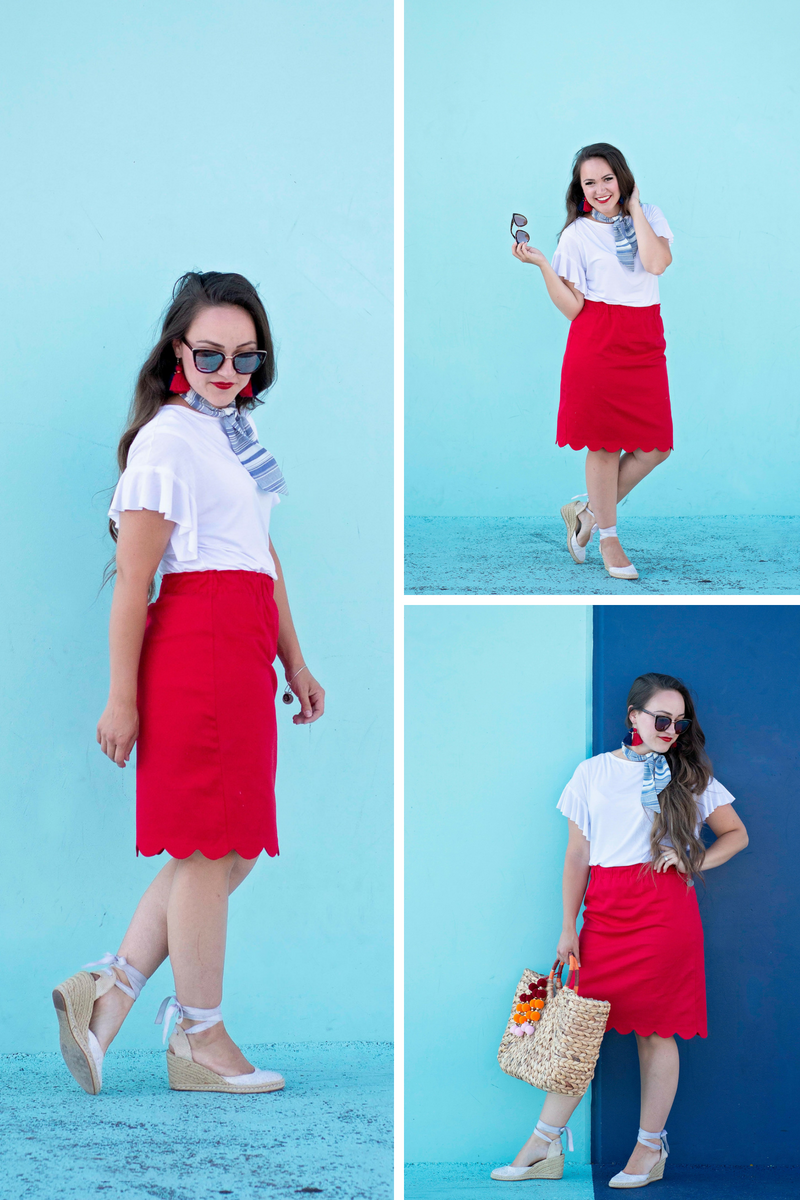
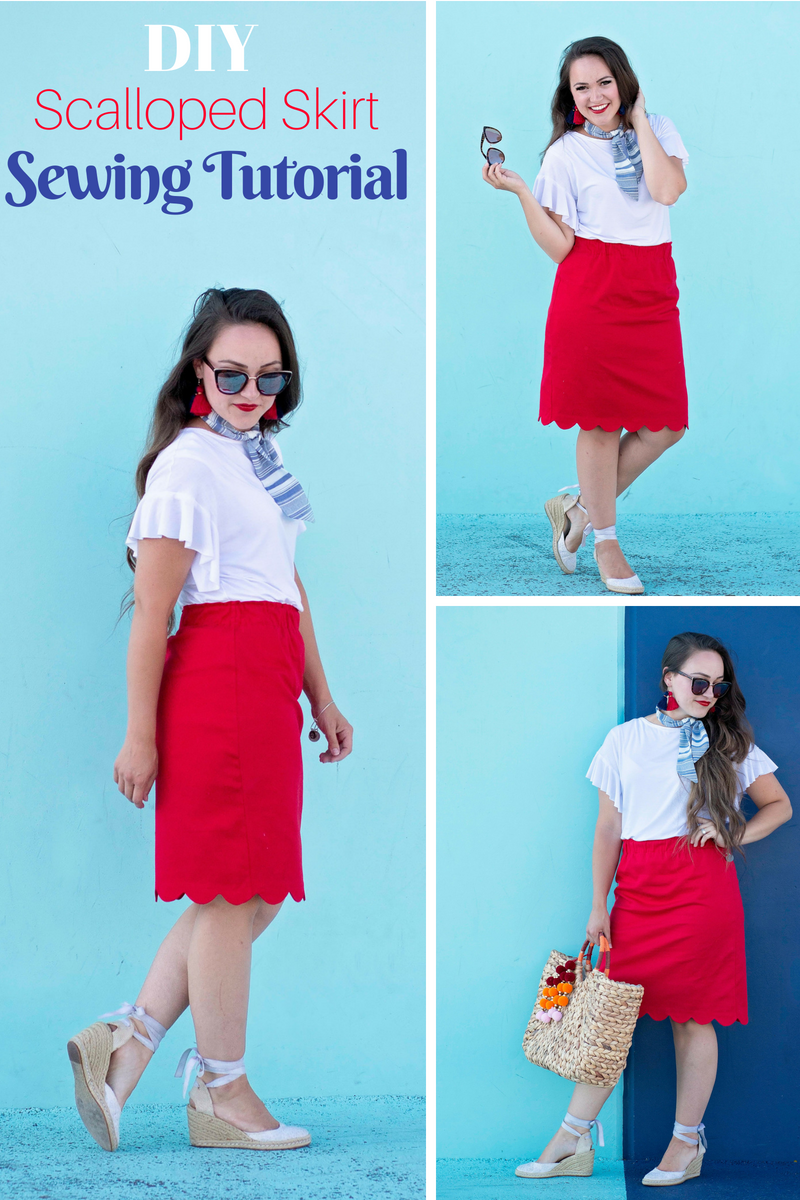
I fell in love with a sold-out J.Crew red scalloped skirt and decided to make one for myself! I was a little bit nervous about making a scallop pattern, but it was a lot easier than I thought it would be so I’m sharing the tutorial with you along with my favorite Thermoweb hem trick!
I found all of the fabrics for this outfit at JOANN in the apparel fabric department. I may have a bit of a fabric shopping addiction! Anyone else guilty of that?

Did you know I actually sewed this entire look?
To create this adorable white knit ruffle sleeved top you’ll need to download the free Uvita Top pattern from Itch To Stitch. Omit the sleeves and add circle sleeves instead. I used this white knit from JOANN to create this shirt.
I also made my scarf using a fabric I picked up at JOANN, you can get the full step-by-step tutorial here.
You can find the tutorial for the tassel earrings using DMC floss here.


Supplies
Red Solid Stretch Twill (The photo online appears darker than it actually is IRL)
Thermoweb HeatnBond Soft Stretch Lite (I always keep a few rolls on hand)
1 1/4 inch Elastic
Cricut Fabric Pen (I like this one because it’s darker than most washable pens)
Sewing Machine
Coordinating Thread
Iron & Ironing Board
Scalloped Skirt Sewing Tutorial
Measure your waist and the widest part of your hips, make note of both measurements.
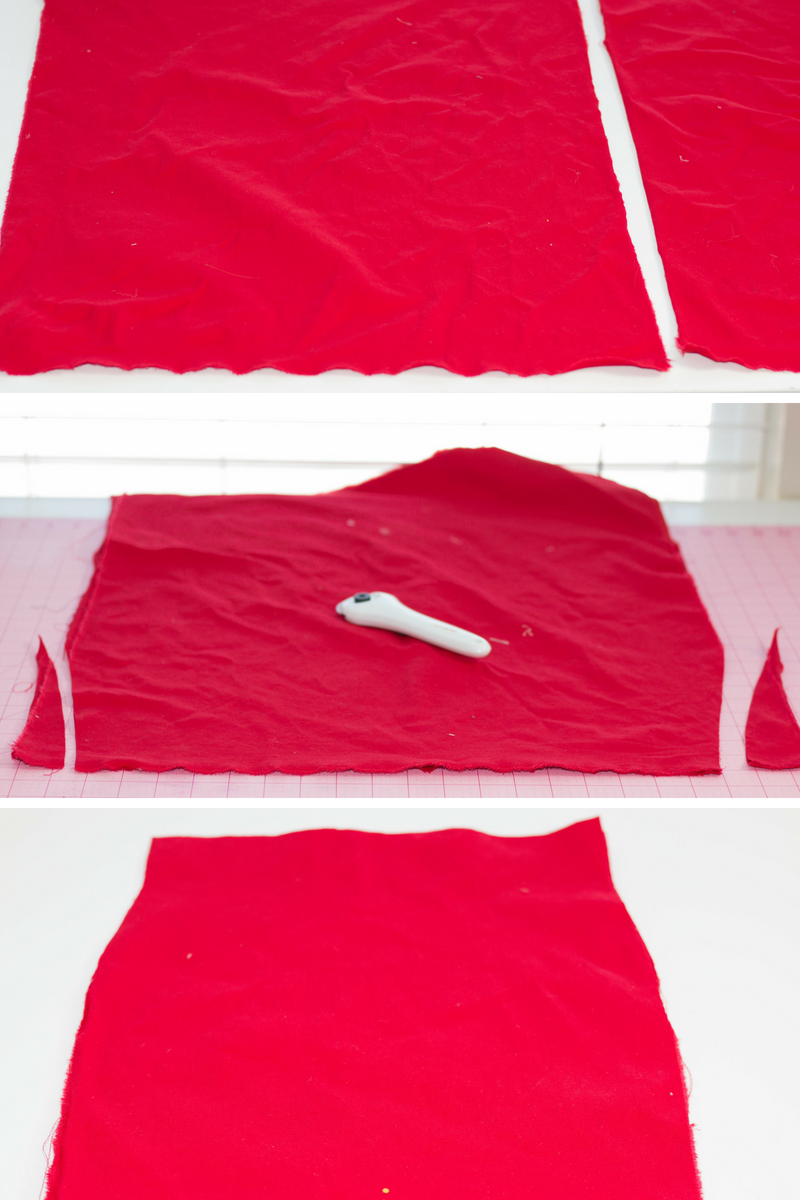
Cut out two rectangular pieces of fabric. The width of the fabric will be your hip measurement plus 5 inches for wearing ease. The length of the skirt will be your desired length plus an additional 4 inches to accommodate the waistband and hem.
My waist measured 30 inches and my hips measured 40 inches. I cut my rectangle 45 inches wide and 27 inches tall and then I cut it in half. I curved in the sides starting from the hips up to 4 inches below the top of the skirt. Keep the very top of the skirt straight up and down so that the casing can be folded without any stretching.
With right sides together sew the front and back of the skirt using a 1/2 inch seam allowance. Finish the hem and side seams with a zig-zag stitch or a serger.
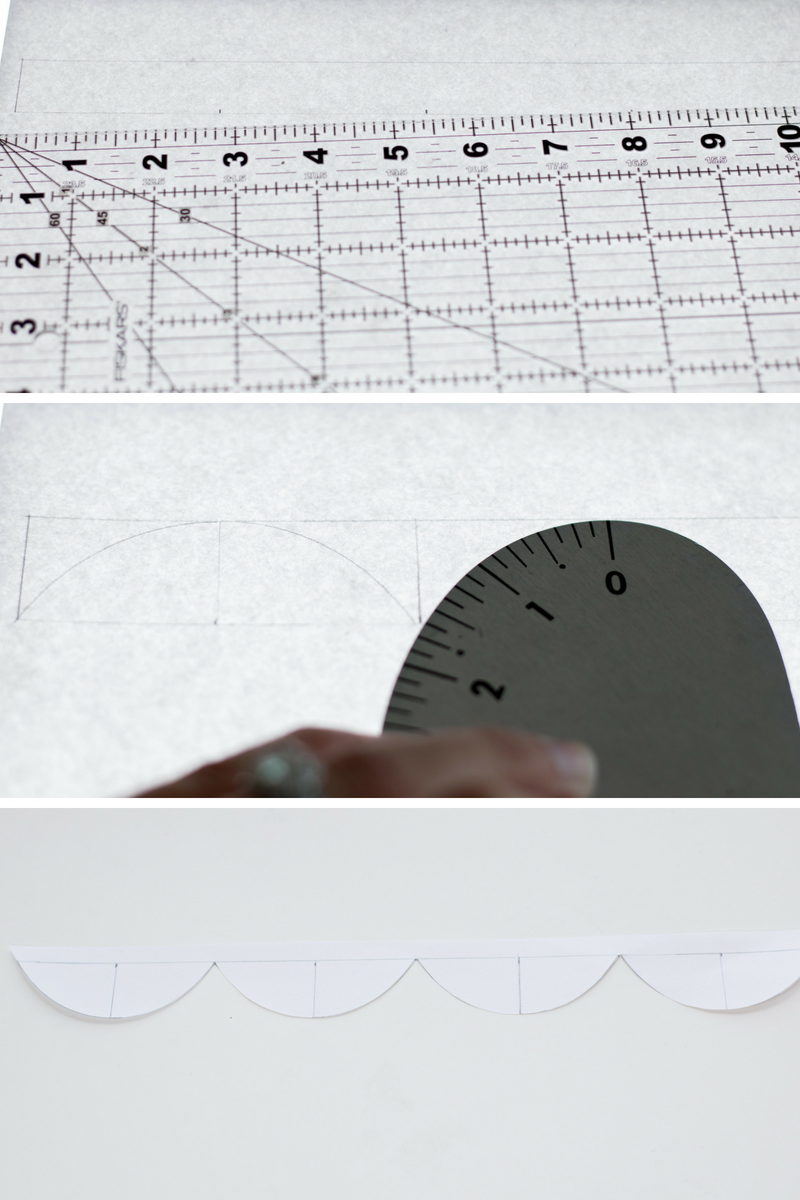
Measure the length of the entire hem. Then decide on the number of scallops you would like on your skirt. For my skirt, I chose to have 16 scallops. For example, my skirt measured 43 inches after it was sewn so I divided that number by 16 which equals 2.6 inches. I drew a rectangle using a ruler that was 10.75 inches wide by 3/4ths of an inch tall.
Divide the rectangle into four equal sections and divide those equal sections in half. Use a french curve ruler to draw your scallops. Draw one side of the scallop and then flip the ruler over to create the other side of the scallop.
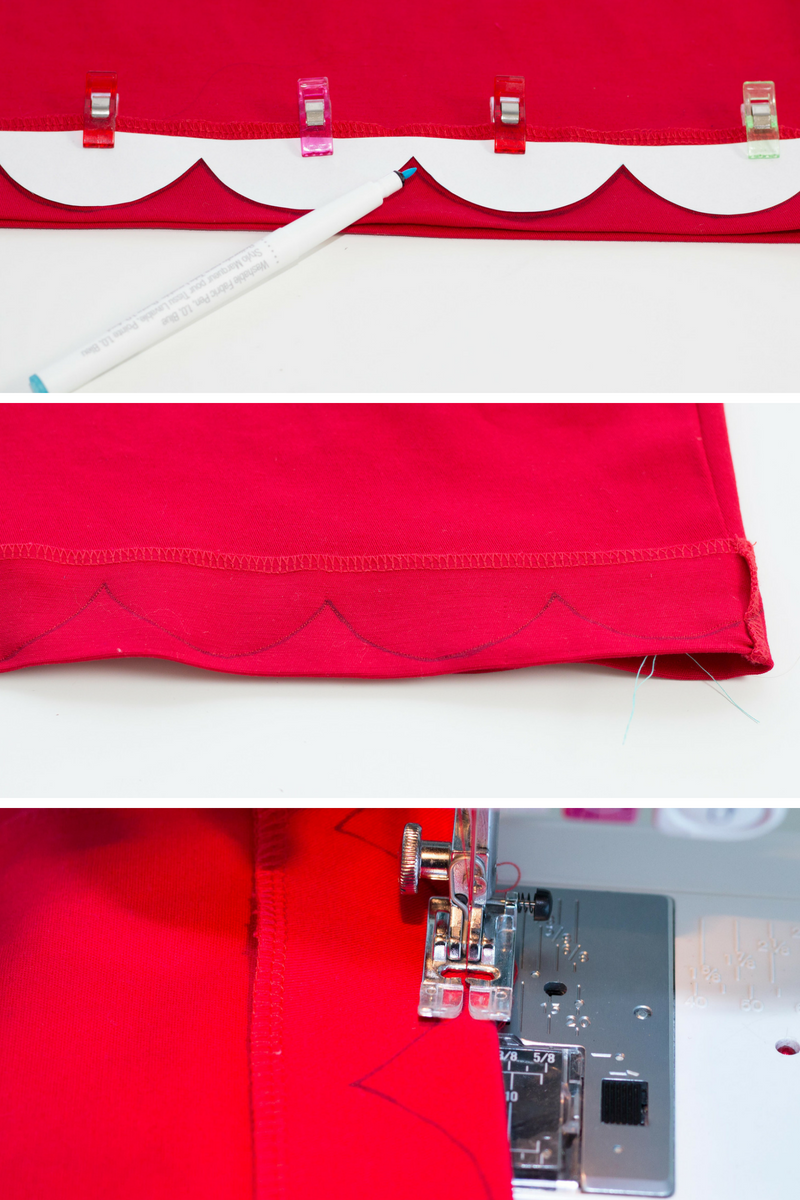
With the skirt right side out (this might seem backward but it’s correct!), turn up the hem 2 inches around the entire skirt. Press with a hot iron.
Cut around the template leaving a little bit of extra paper on the edge without the scallops. Line the straight edge of the template a half inch below the serged edge of the skirt and trace around the template. After tracing the four scallops, reposition the template until the entire hem of the skirt has been traced.
Be sure to use a dark marking pen so that you are able to clearly see the marking while sewing. I found this was easiest when I covered the light on my sewing machine.
Start at the tip of the scallop with a 1.4 stitch length and slowly stitch around the curve. When you reach the point, lower the needle to the down position, raise the presser foot and turn the fabric so that the presser foot is facing the new direction of the scallop.
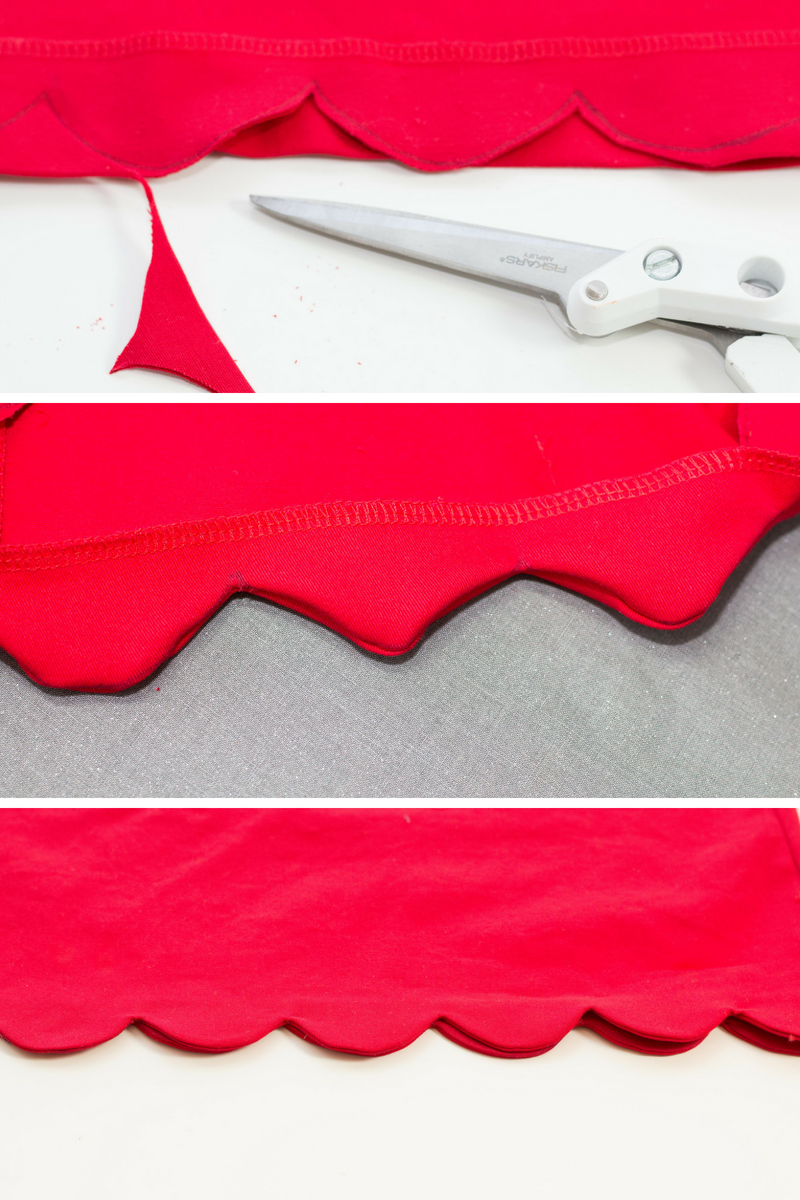
Once all of the scallops have been sewn, trim around each curve. Cut close to but not through the point of each scallop. The step allows the scallops to be turned smoothly right side out.
Turn the scallops right side out. It will look a little bit funny at first but it just needs a good pressing.
Using a rounded pressing tool, gently push out the seam allowance of each scallop to create a rounded curve.
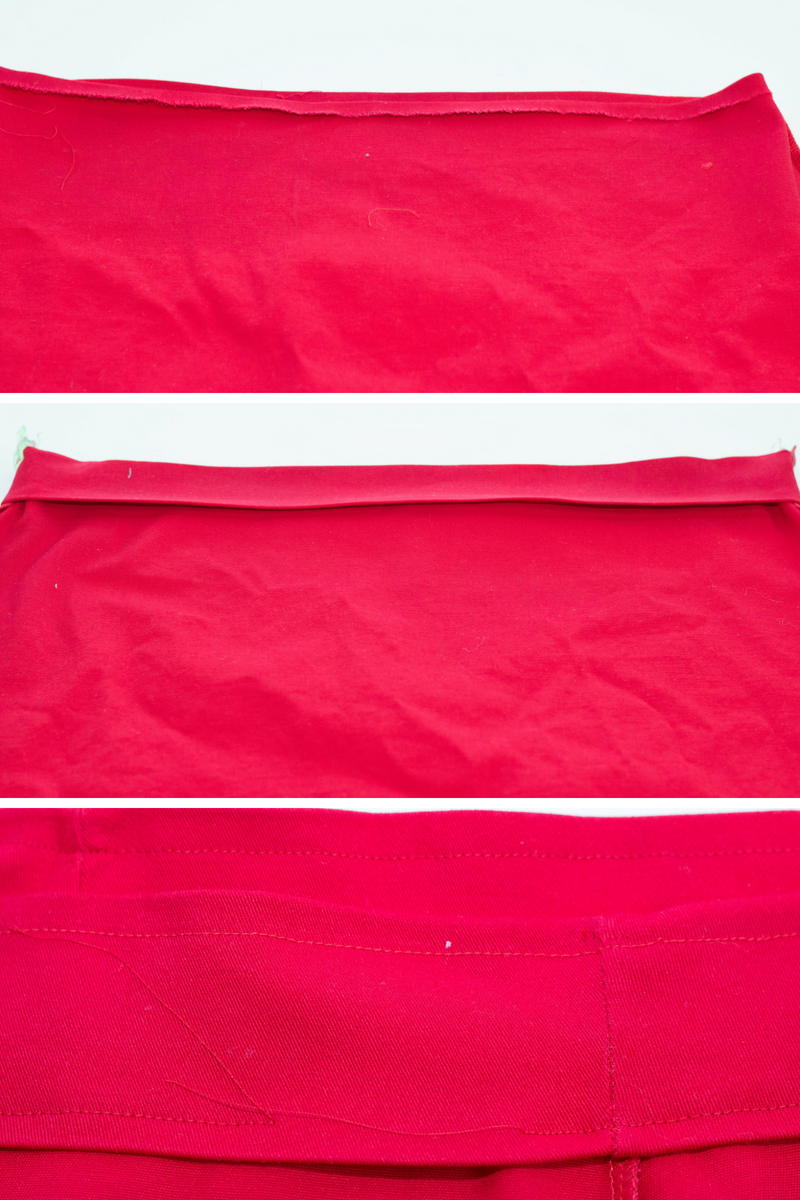
Fold back the edge of the scallop and use Thermoweb Soft Stretch Lite Hem Tape to adhere the hem to the skirt.
With the skirt wrong side out, turn down the top of the skirt 1/2 inch and press.
Turn the waist of the skirt down an additional 2 inches and press again.
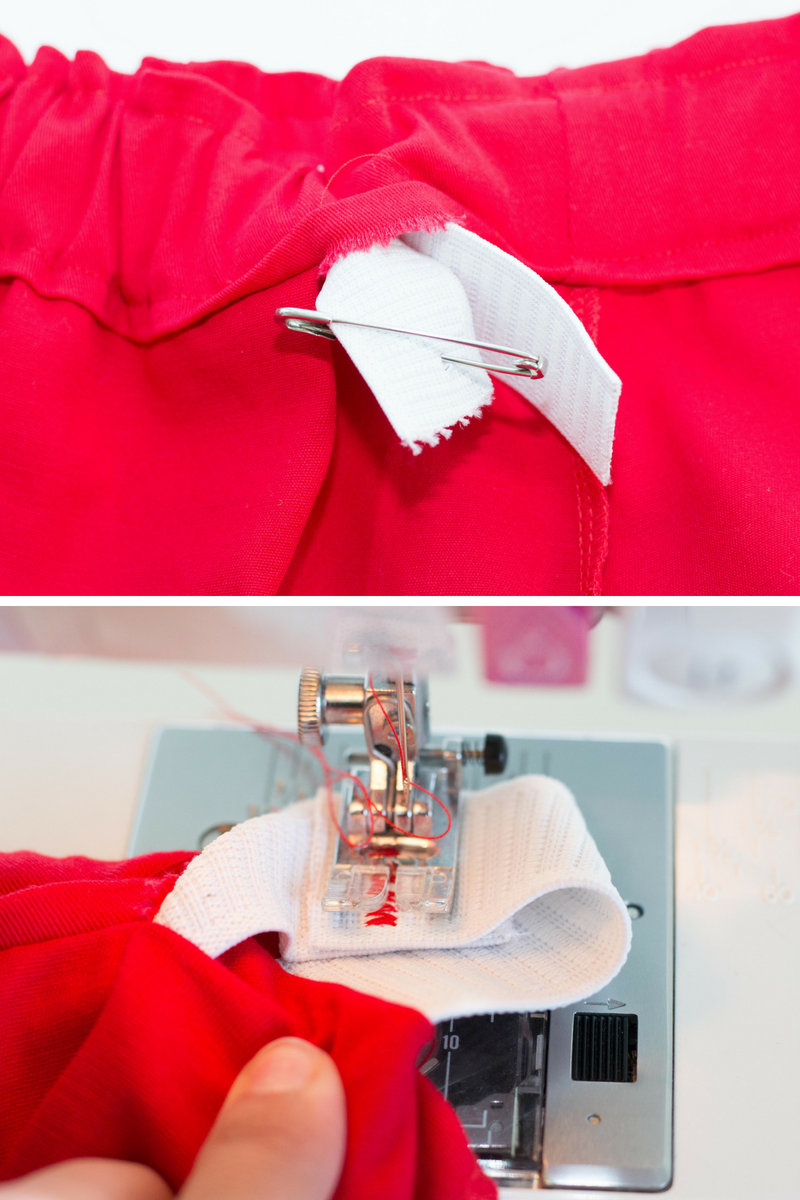
Stitch along the top of the waist 3/8ths of an inch from the edge to create a paper bag waistband. Then stitch 1/4th inch from the bottom edge of the waist to create a casing for the elastic. Leave a 2 inch opening to thread the elastic through.
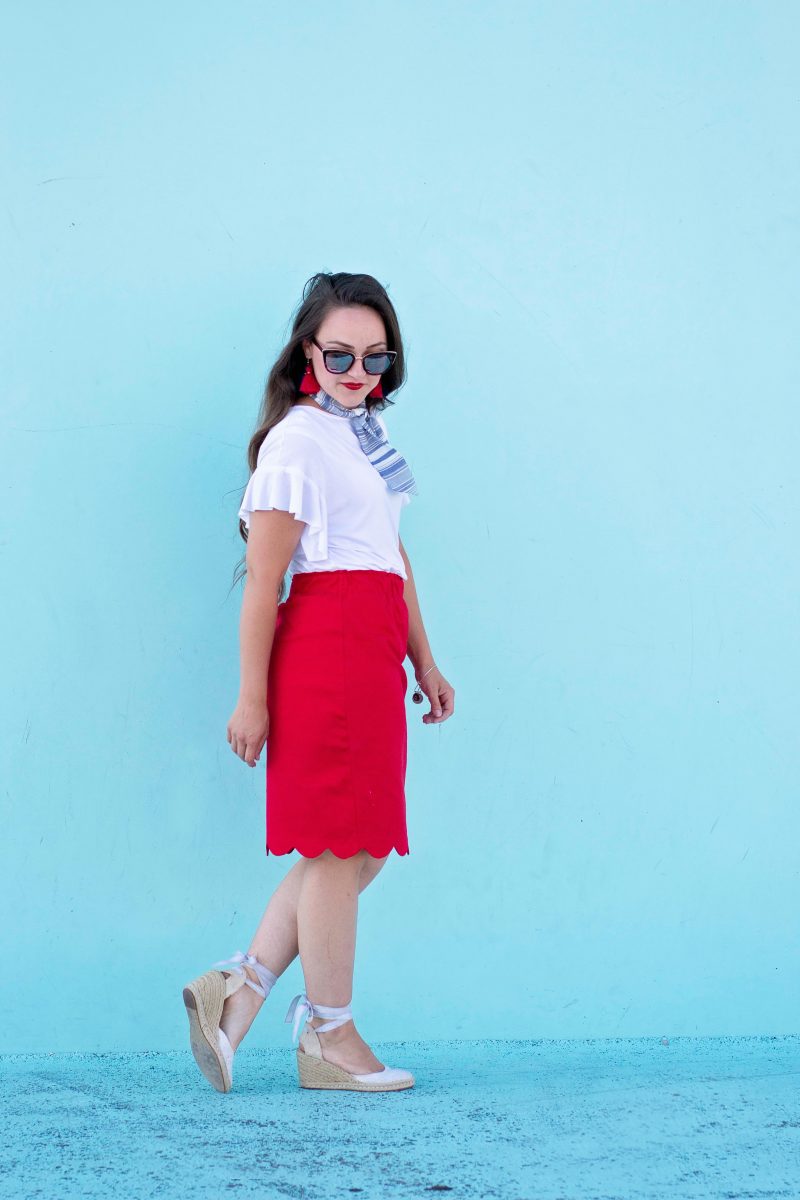
Measure your waist and subtract 3 inches, this will be your elastic measurement. Thread the elastic through the casing until it reaches where you started. Pull both ends out (making sure the elastic hasn’t twisted) and overlap them by 1 inch.
Sew over the elastic using a zig-zag stitch. Redistribute the elastic throughout the casing. Sew over the opening to secure the casing.
Now you have an adorable Paper Bag Waisted Scalloped Skirt!

Get the tutorial for the tassel earrings here.
SaveSave
SaveSave
SaveSave
SaveSave
SaveSave