


Hi everyone! It’s Kim Lapacek of Persimon Dreams here! I’m excited to share with you a fun and fast little project I made with you. With the summer months and warmer weather coming it’s time to switch up the decor in your home! Perhaps with a new and fresh table runner!
I was excited to use some of the “Affinity” fabrics from Jessica Swift for Blend Fabrics in this little project!
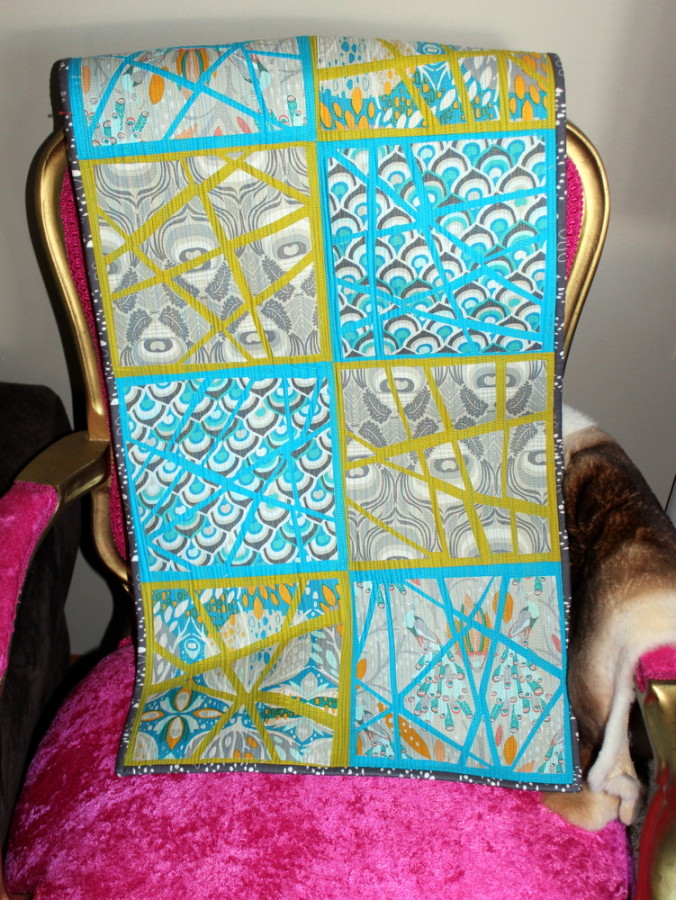
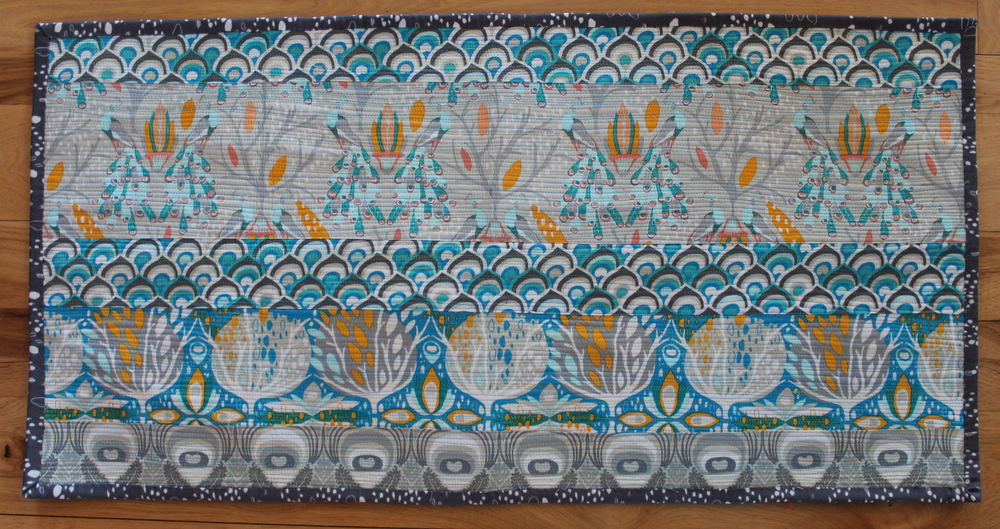
“Akin to Splinter” Table Runner
Project Supplies:
Prints:
(8) 6.5″ squares of fabric (I used 4 different fabrics, two blocks each)
Background:
Color 1: (4) 10.5″ squares
Color 2: (4) 10.5″ squares
Heat N Bond Lite:
(8) 6.5″ squares
“Akin to Splinter” Table Runner Directions:
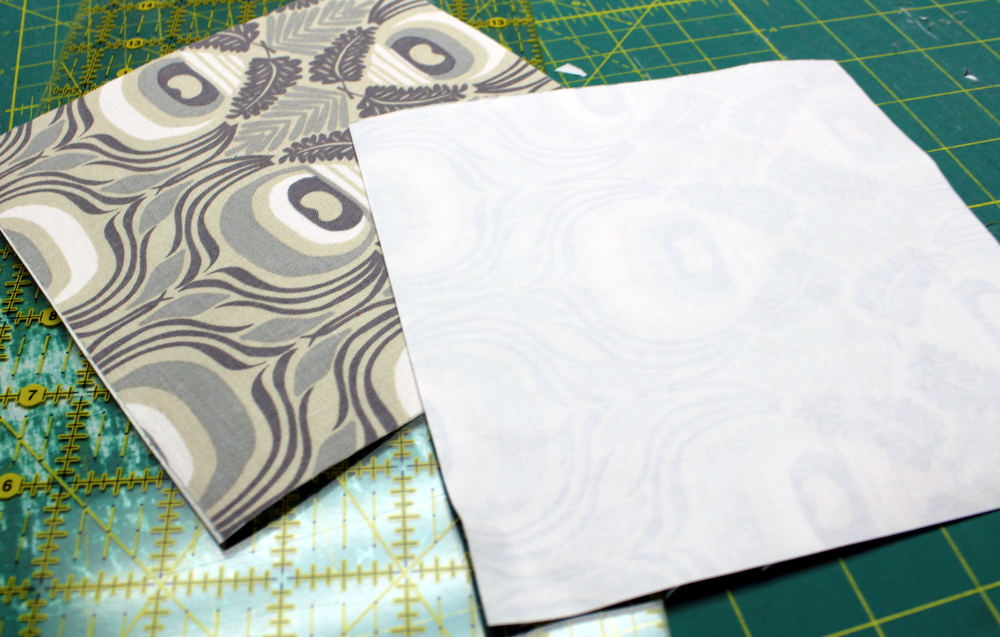
Take the eight 6.5″ squares of fabric and fuse Heat N Bond® Lite to the wrong sides of the fabrics.
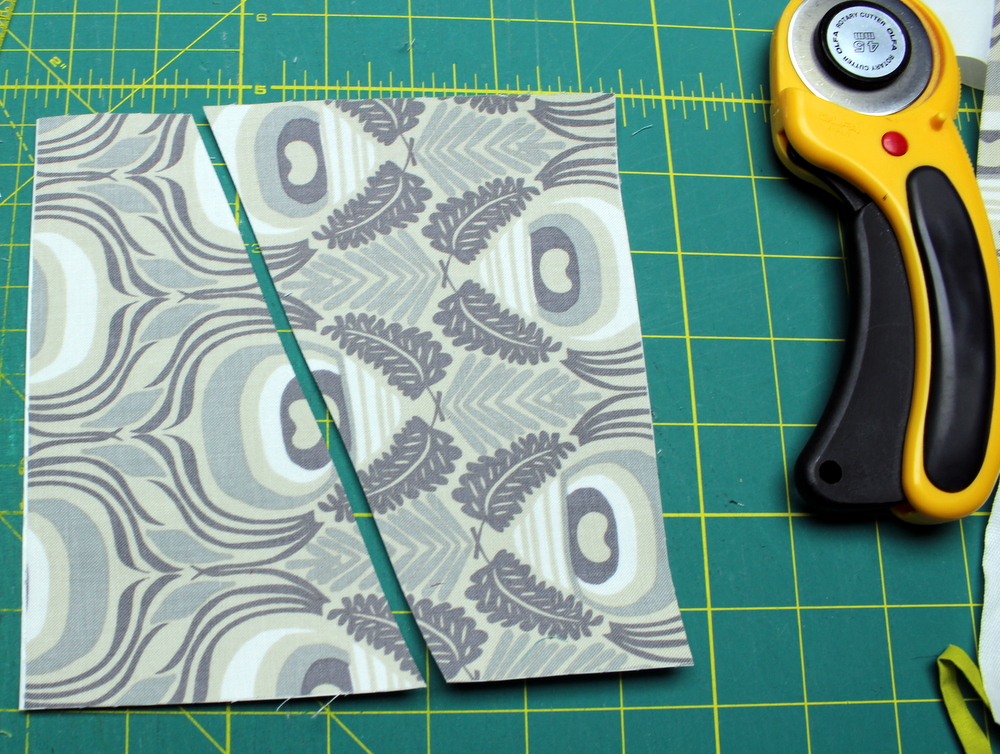
Once all your fabric is fused you’ll follow these instructions for each of the eight blocks. Randomly make a cut with your rotary cutter across your block. If you feel the need to you can use a ruler but it really doesn’t matter if the cut isn’t perfectly straight.
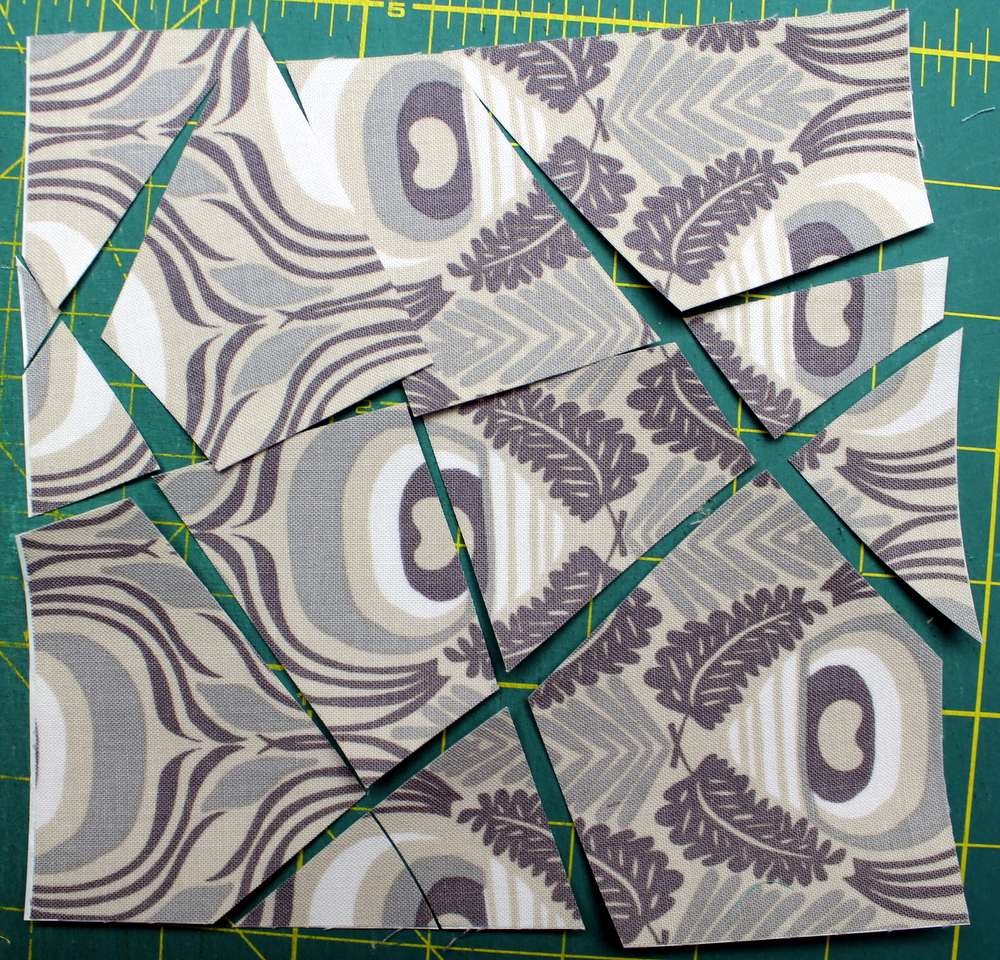
Continue to cut up the block in random directions as much as you want. Try not to make any piece too tiny because it may make things trickier in the next step.
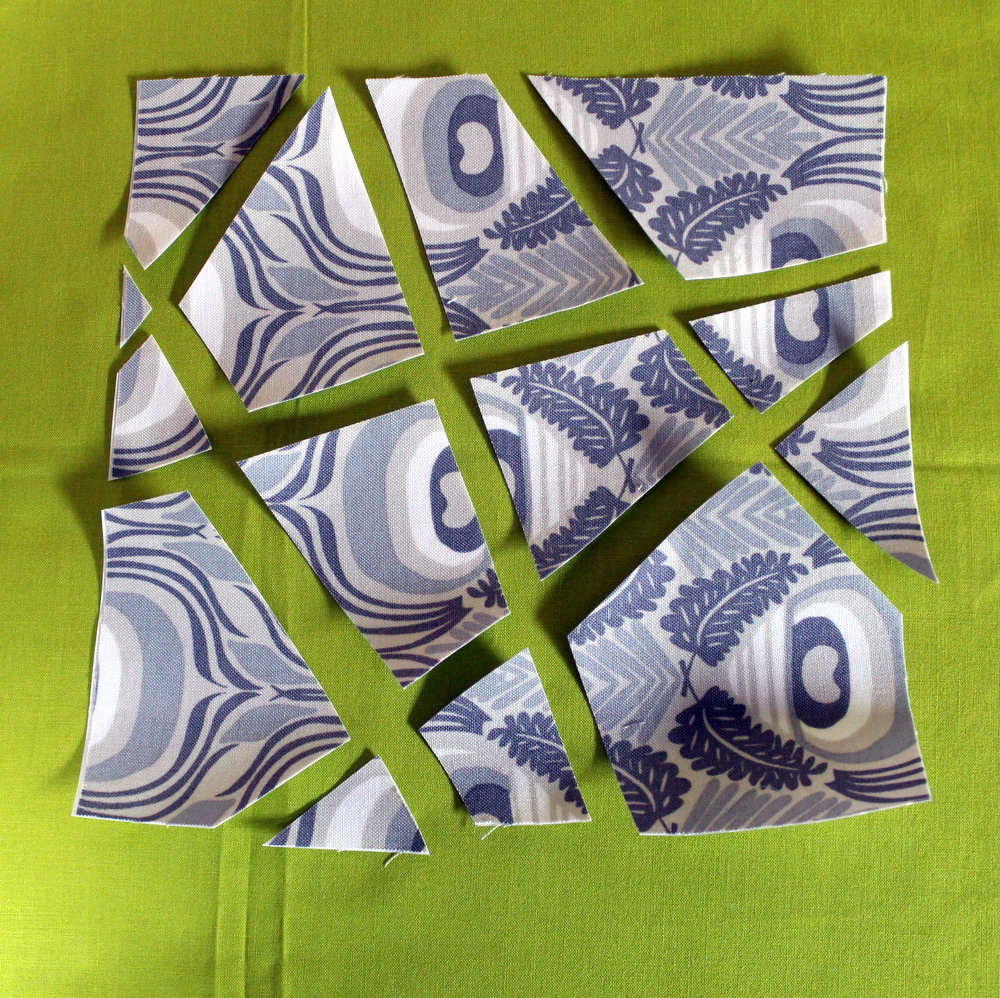
Once your piece is cut up the way that makes you happy carefully transfer the pieces in the same order to the top of one of the 10.5″ solid background fabrics. Place the pieces so there is spacing between each piece but you can still see that if it was pushed together the fabric would be oriented properly.
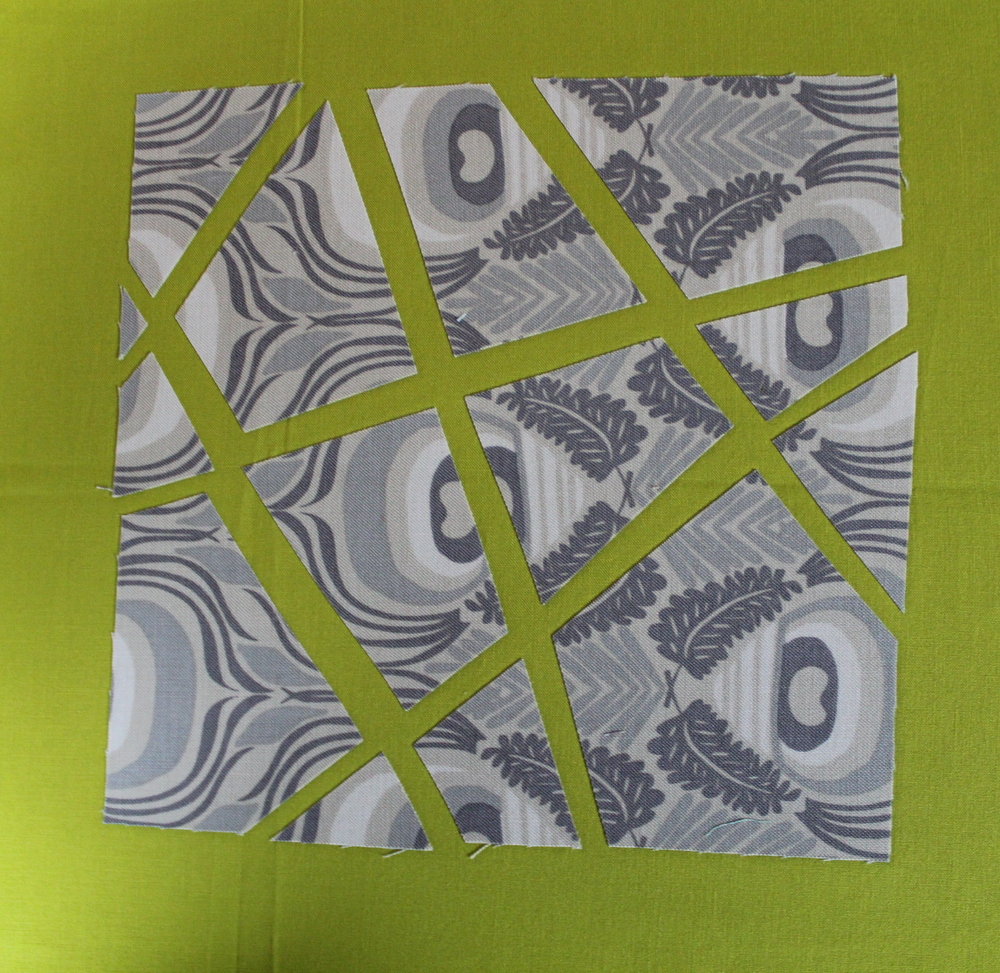
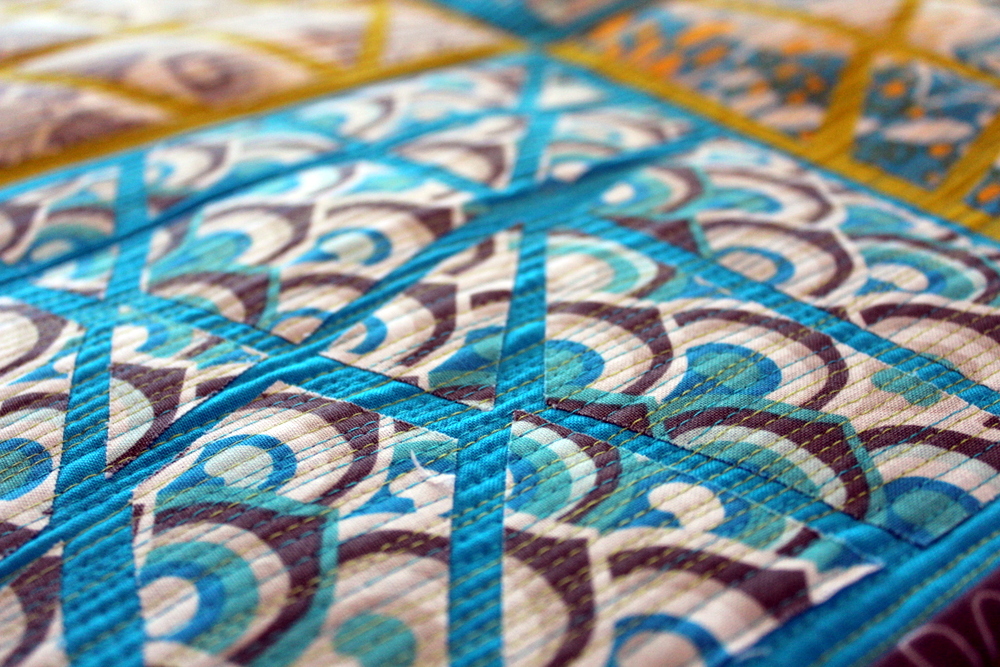
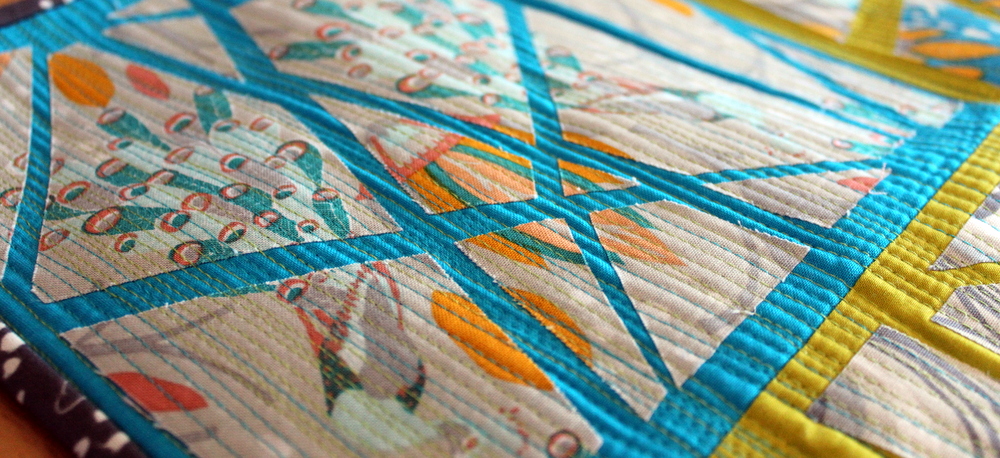
Peel the back of the fusible off and press the fabric into place. It almost looks like the fabric “shattered” onto the solid fabric. Repeat this with the next seven 6.5″ squares.
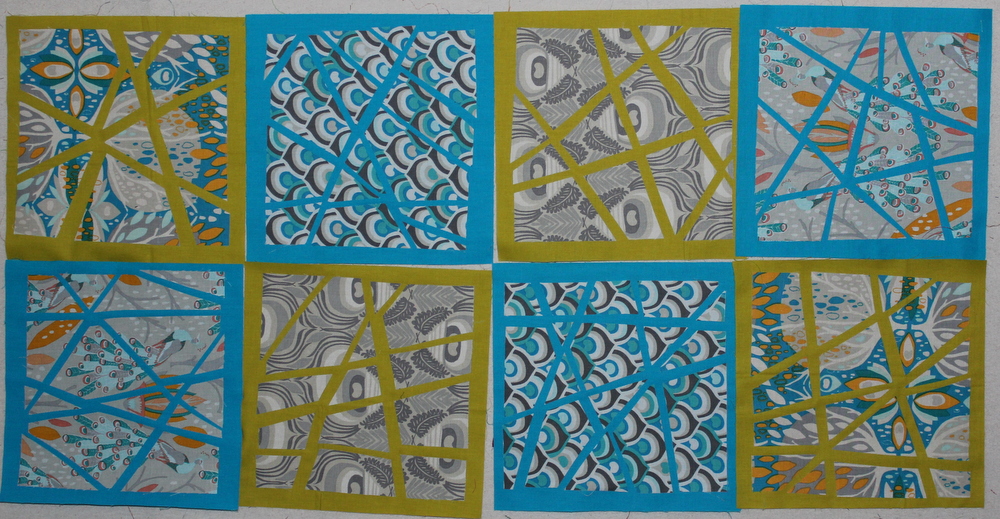
Once all eight blocks are made, place your ruler over the blocks and trim them down to a size that leaves at least 1/2″ on each side of the fused fabrics – in my case that was 8.5″ blocks. The 1/2″ allows you room for piecing the blocks but maintaining some of the background fabric. Once you’ve laid out the blocks in a manner pleasing to you, sew them together always pressing to one of the solid fabrics.
Backing Instructions:
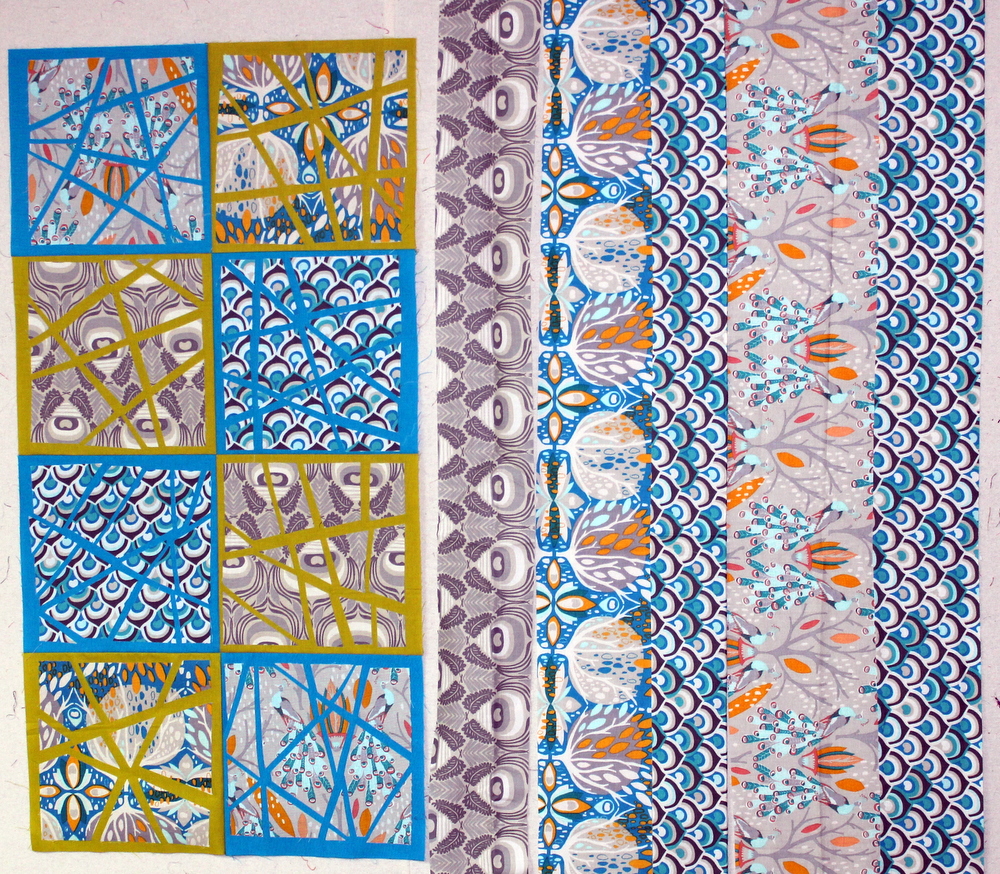
I decided to piece a backing for this table runner out of more affinity fabrics. By doing this, my table runner will actually be reversible! When making a back for your table runners make it at least 2″ larger on each side of the runner … that just gives you plenty of “wiggle” room for quilting and finishing your piece.
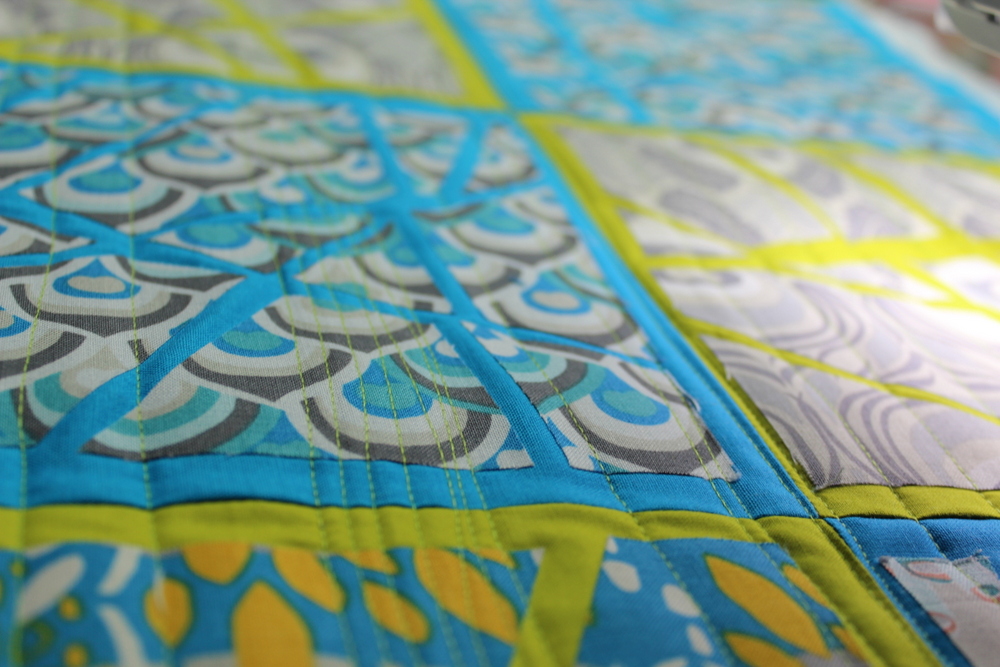
Once the back was made I sandwiched the back, batting and top together. I chose to spray baste before quilting and SprayNBond® Basting Adhesive works great for this! Because I chose to use the lite fusible the all the pieces I fused down needed to be secured. Instead of quilting around each piece (which you totally can do … I just don’t have the patience) I decided to do a matchstick type quilting on my piece. Next, I used a lime green and aqua Aurifil thread to do a wonky “straight” line quilting with my walking foot.
Often I choose “wonky straight” quilting because if you purposely go wonky no one even thinks you attempted straight. If you go straight and things go wonky it’s not quite as easy to cover up!
Once the piece was quilted to my liking, I added the binding and finished it up!
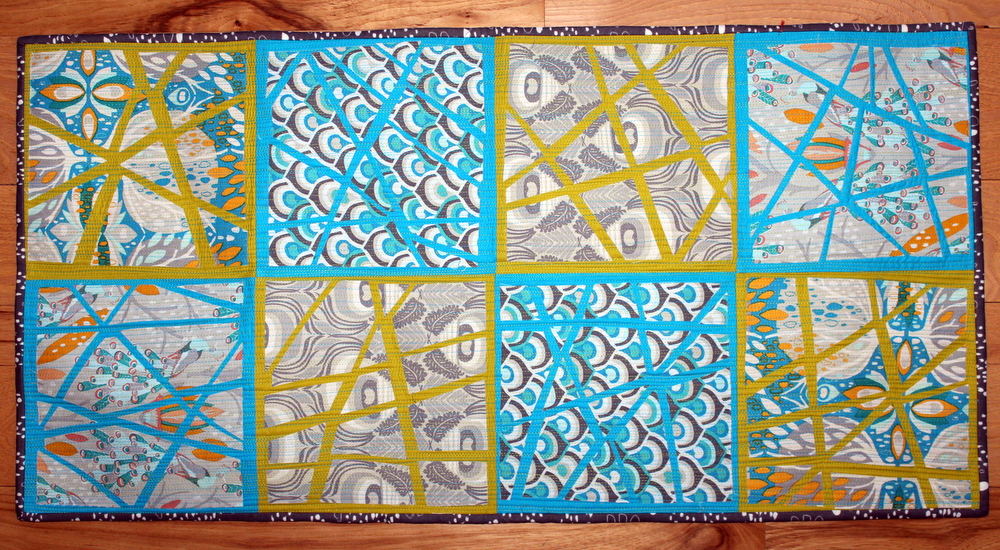
I think this table runner is going to look great on my table this summer!

It also looked pretty cool on my new pink chair.
I really can’t get enough of how cool the quilting looks on it either!
And remember how I said the table runner was reversible!? Check out the back!!!
I hope you have fun with this little tutorial and be sure to share your creations with us!