


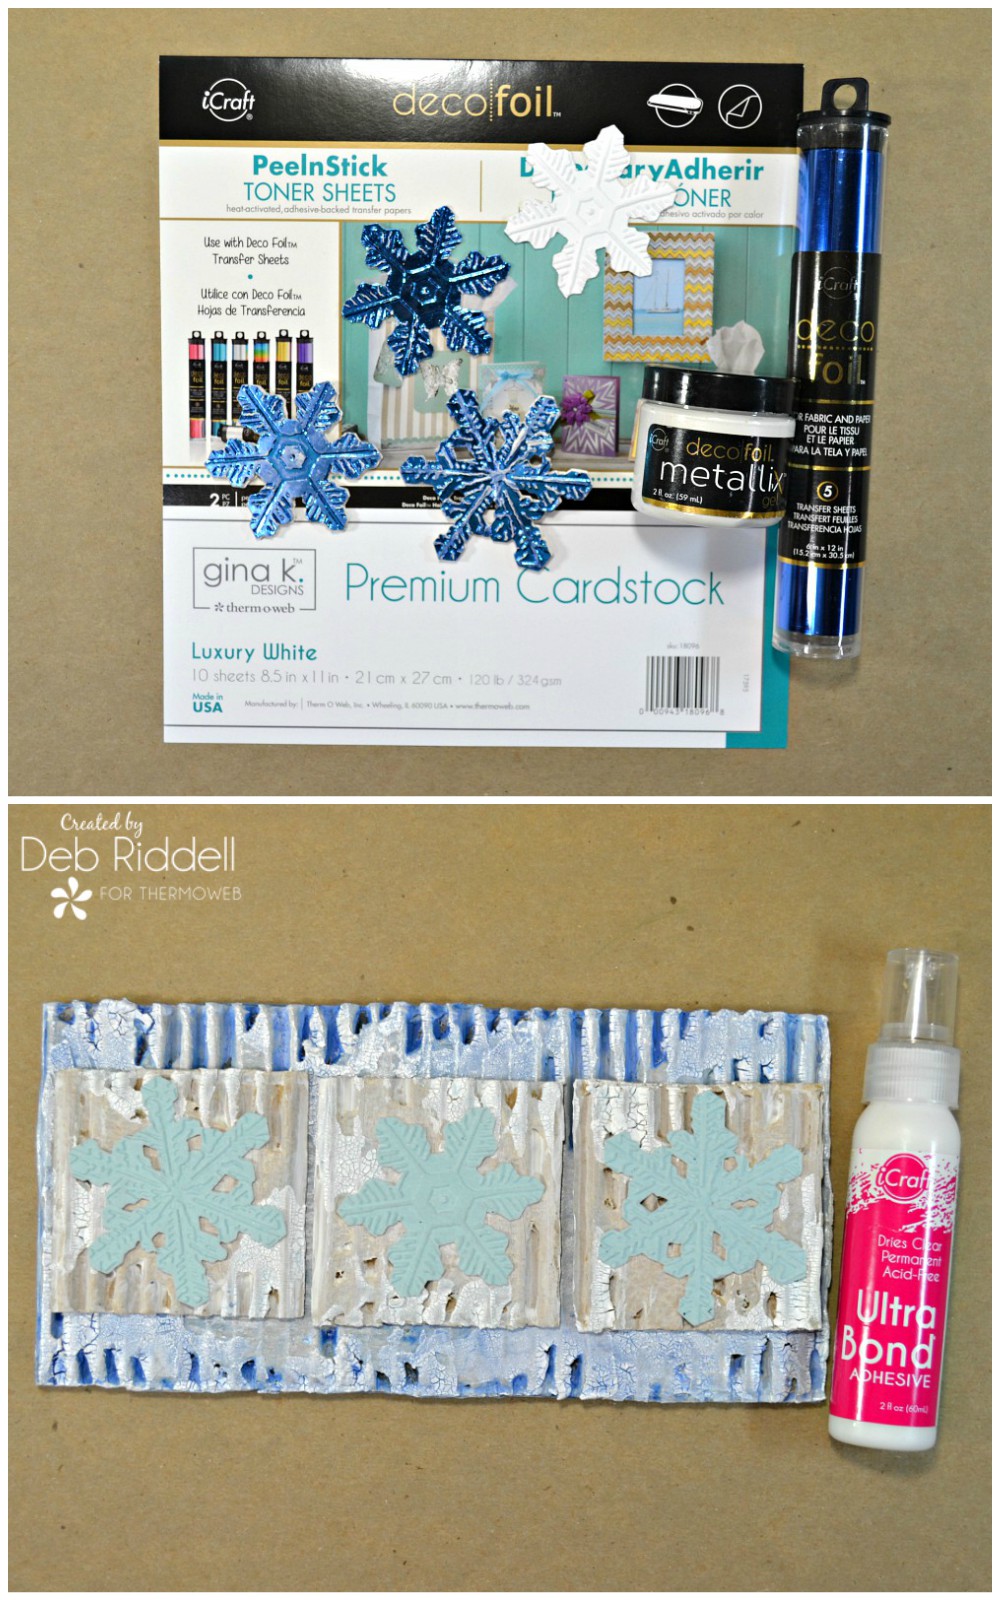
Hello everyone and thanks for stopping by at this very busy time of year. It’s Deb Riddell here with you today to share a wintery home decor wall hanging created with Deco Foil Flock Transfer Sheets, Deco Foil Foil Transfer Sheets and Deco Foil Metallix Gel.
Winter Wall Hanging
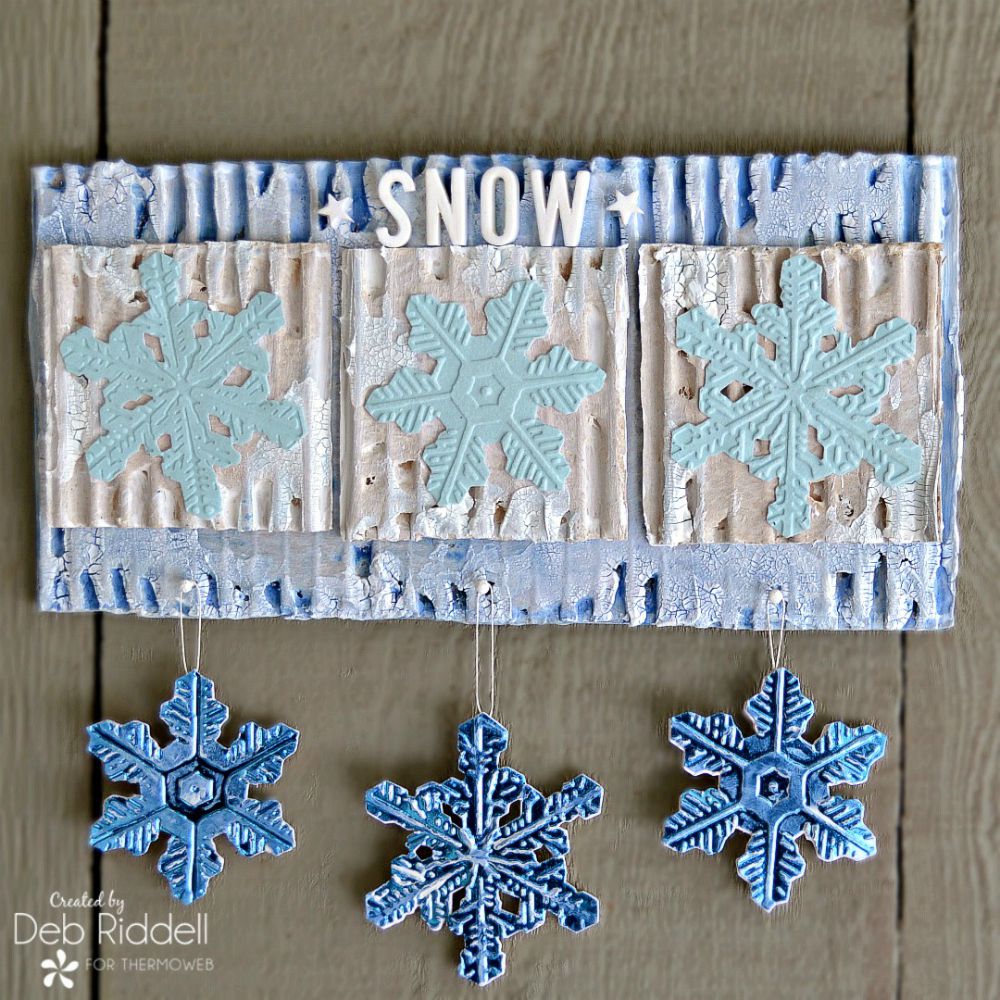
I find that the house looks so bare after the Christmas decorations have been taken down so designed this mixed media wall hanging that can be displayed all winter long. I also created it from upcycled corrugated cardboard boxes since we always have lots of those left after the Christmas presents have been unwrapped!
Therm O Web Supplies Used:
Deco Foil Flock Transfer Sheets – Blue Sky
Deco Foil Transfer Sheets – Denim
Deco Foil Metallix Gel – White Pearl
Deco Foil™ PeelnStick Toner Sheets
Gina K. Designs Premium Cardstock • Luxury White
iCraft Easy Cut Adhesive™ Sheets • Sm
iCraft Ultra Bond Adhesive 2 fl oz
Other supplies used:
Sizzix – Snowflake Duo Bigz die with Texture Fades Embossing Folder
Ranger Ink – Chipped Sapphire Distress Stain; Opaque Crackle Texture Paste
Advantus – Idea-ology Typography letters
Miscellaneous – corrugated cardboard box; white gesso; white acrylic paint; scissors and/or box cutter; 3/4″ finishing nails; white button thread; ruler; baby wipes
Snowflakes Mixed Media Wall Hanging Instructions
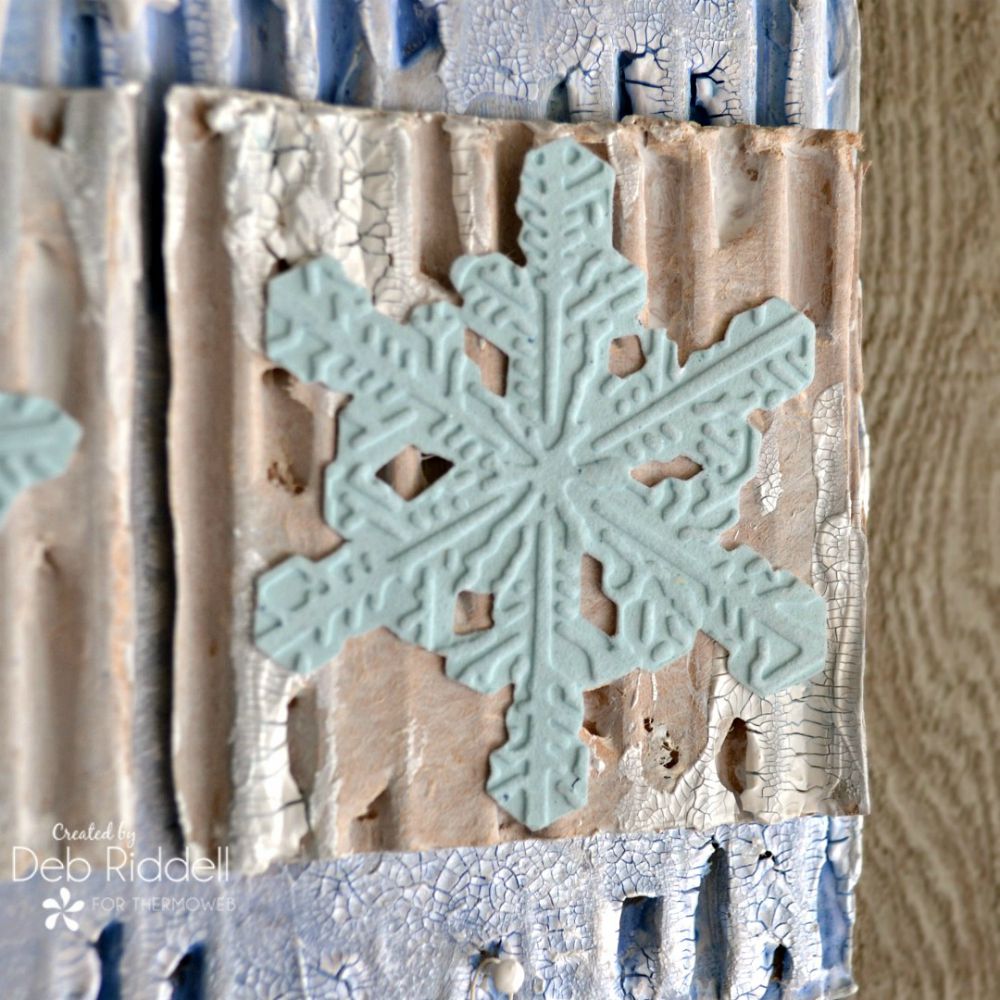
With scissors or a box cutter, cut out two backboard pieces for your wall hanging and three small squares. The size of your backboard pieces and your small squares will depend upon the size of your snowflake die cuts, I ended up cutting my backboard pieces to 9″ x 4 1/2″ and the three smaller pieces to 2 3/4″ square.
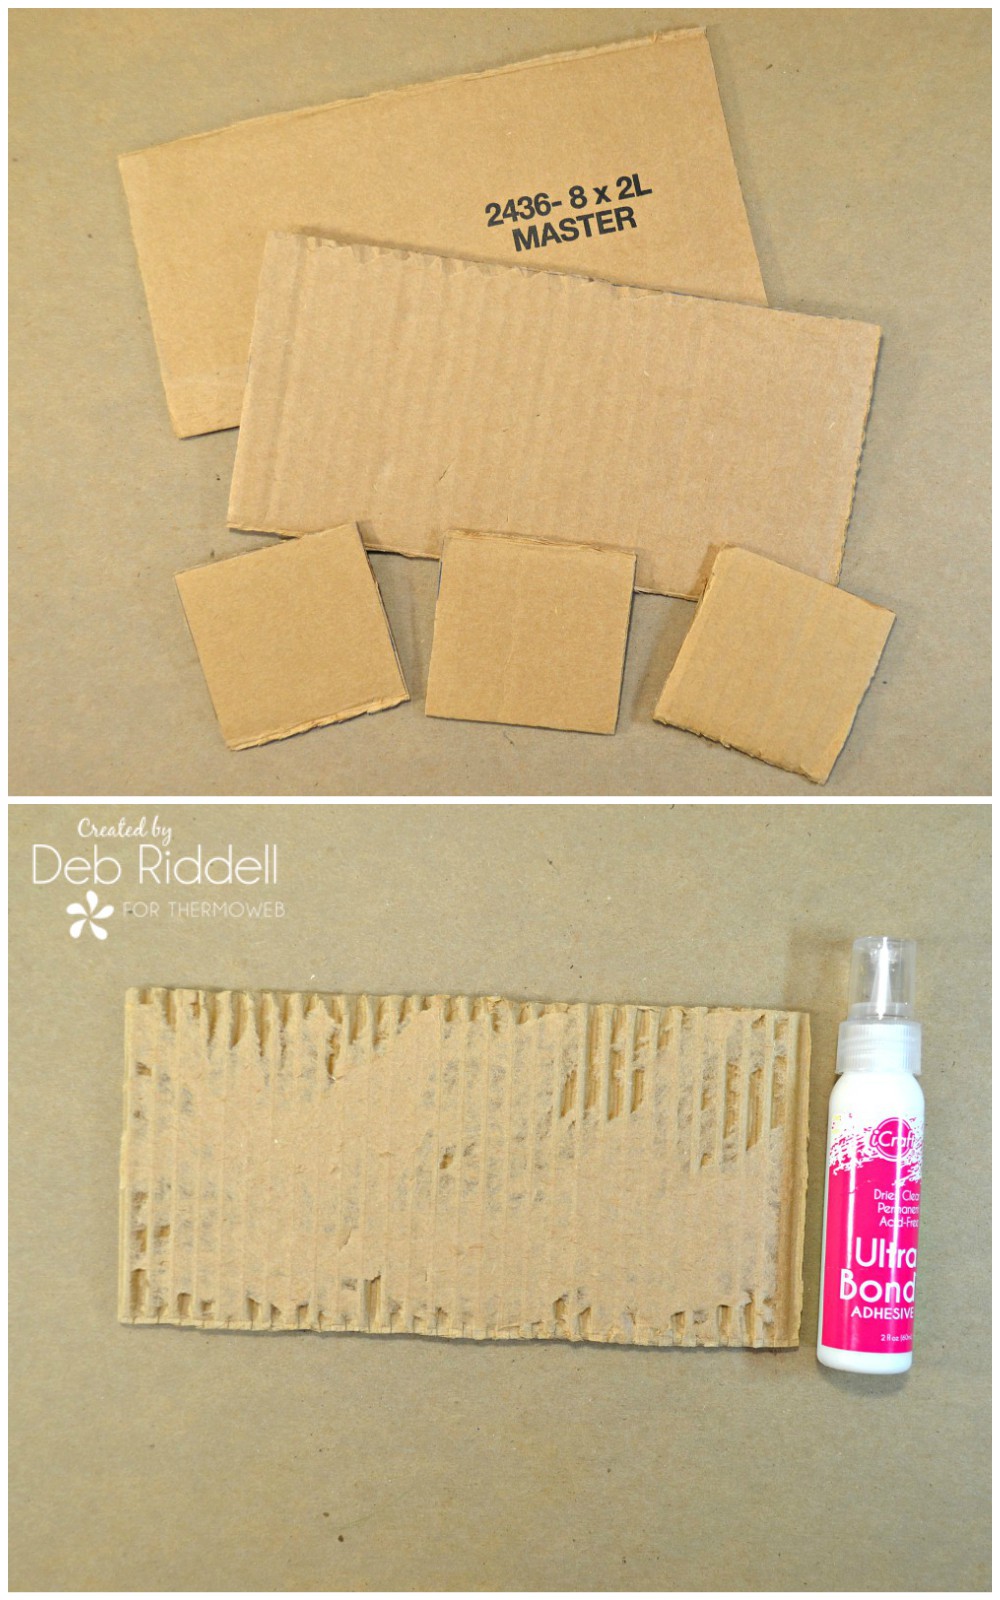
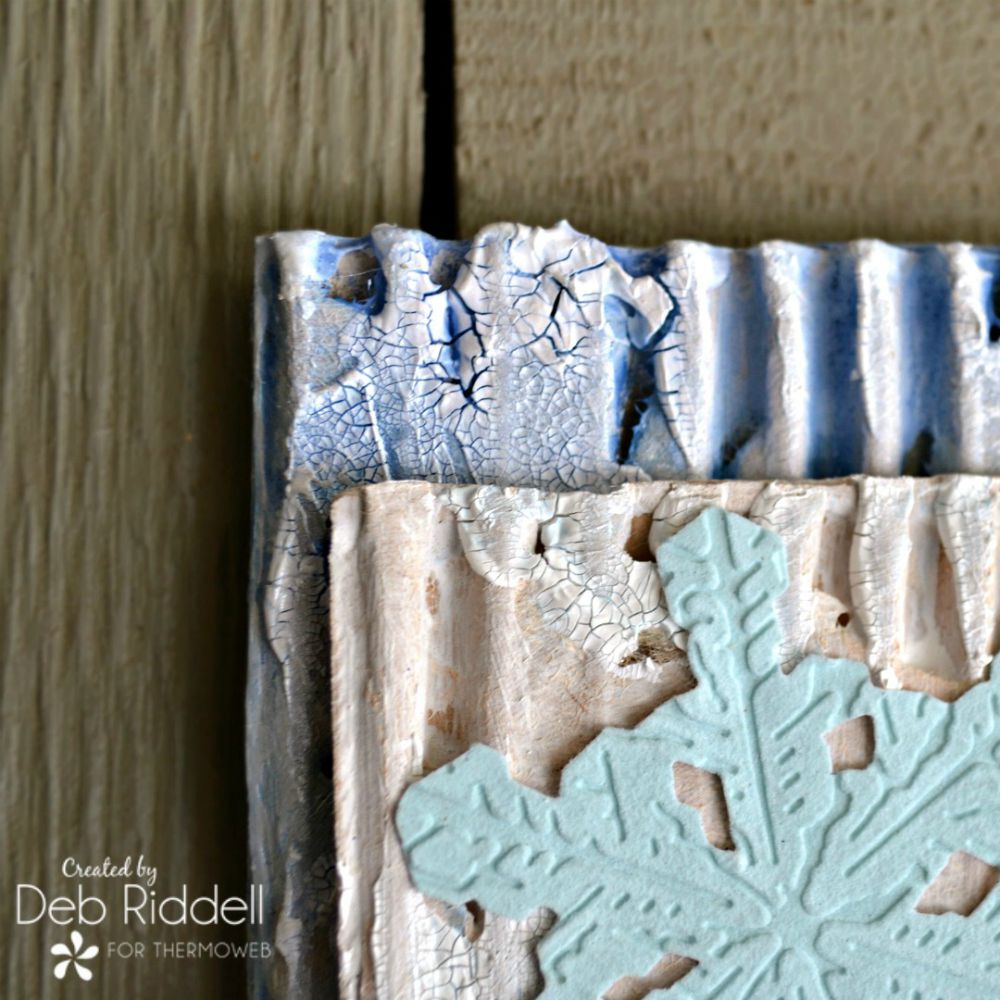
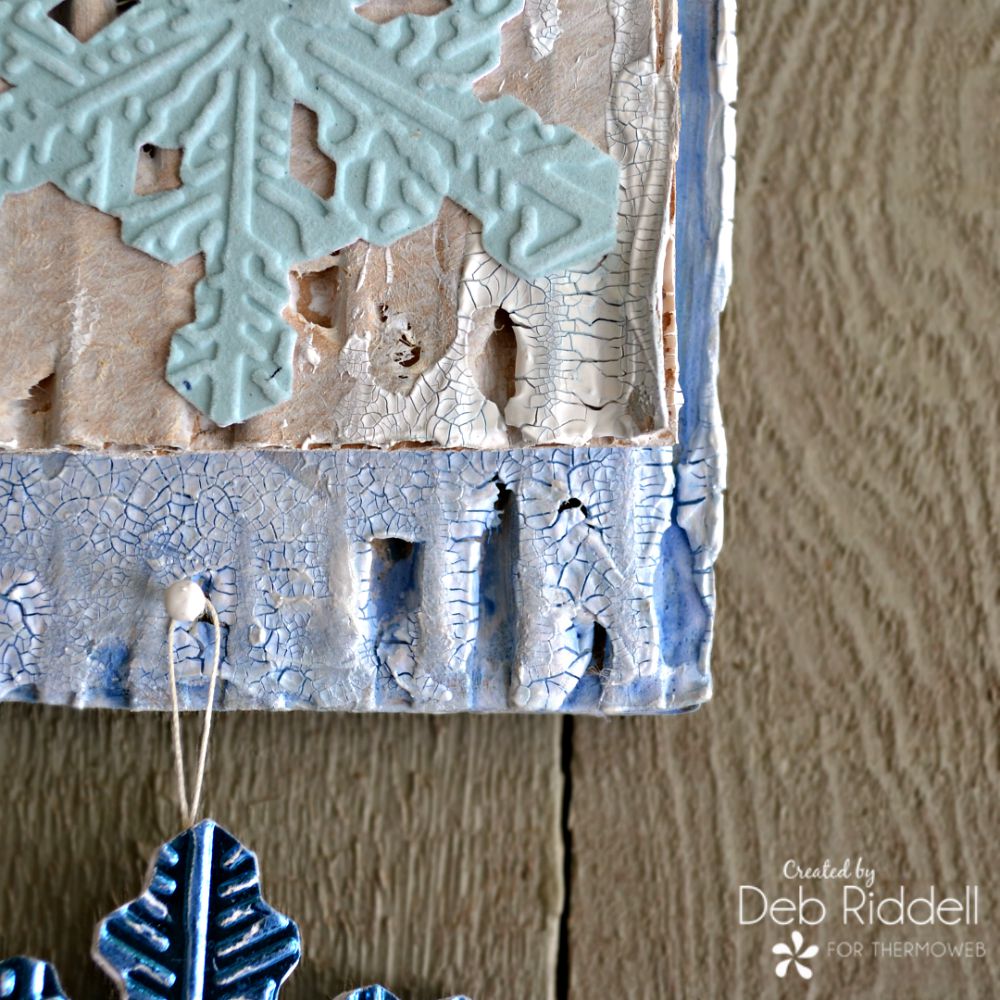
Randomly tear off some of the cardboard backing paper to reveal the corrugations underneath. Adhere the two backboard pieces together with iCraft Ultra Bond adhesive.
Tear off the backing paper from the smaller squares as well and cover all of the pieces with white gesso. Let dry thoroughly.
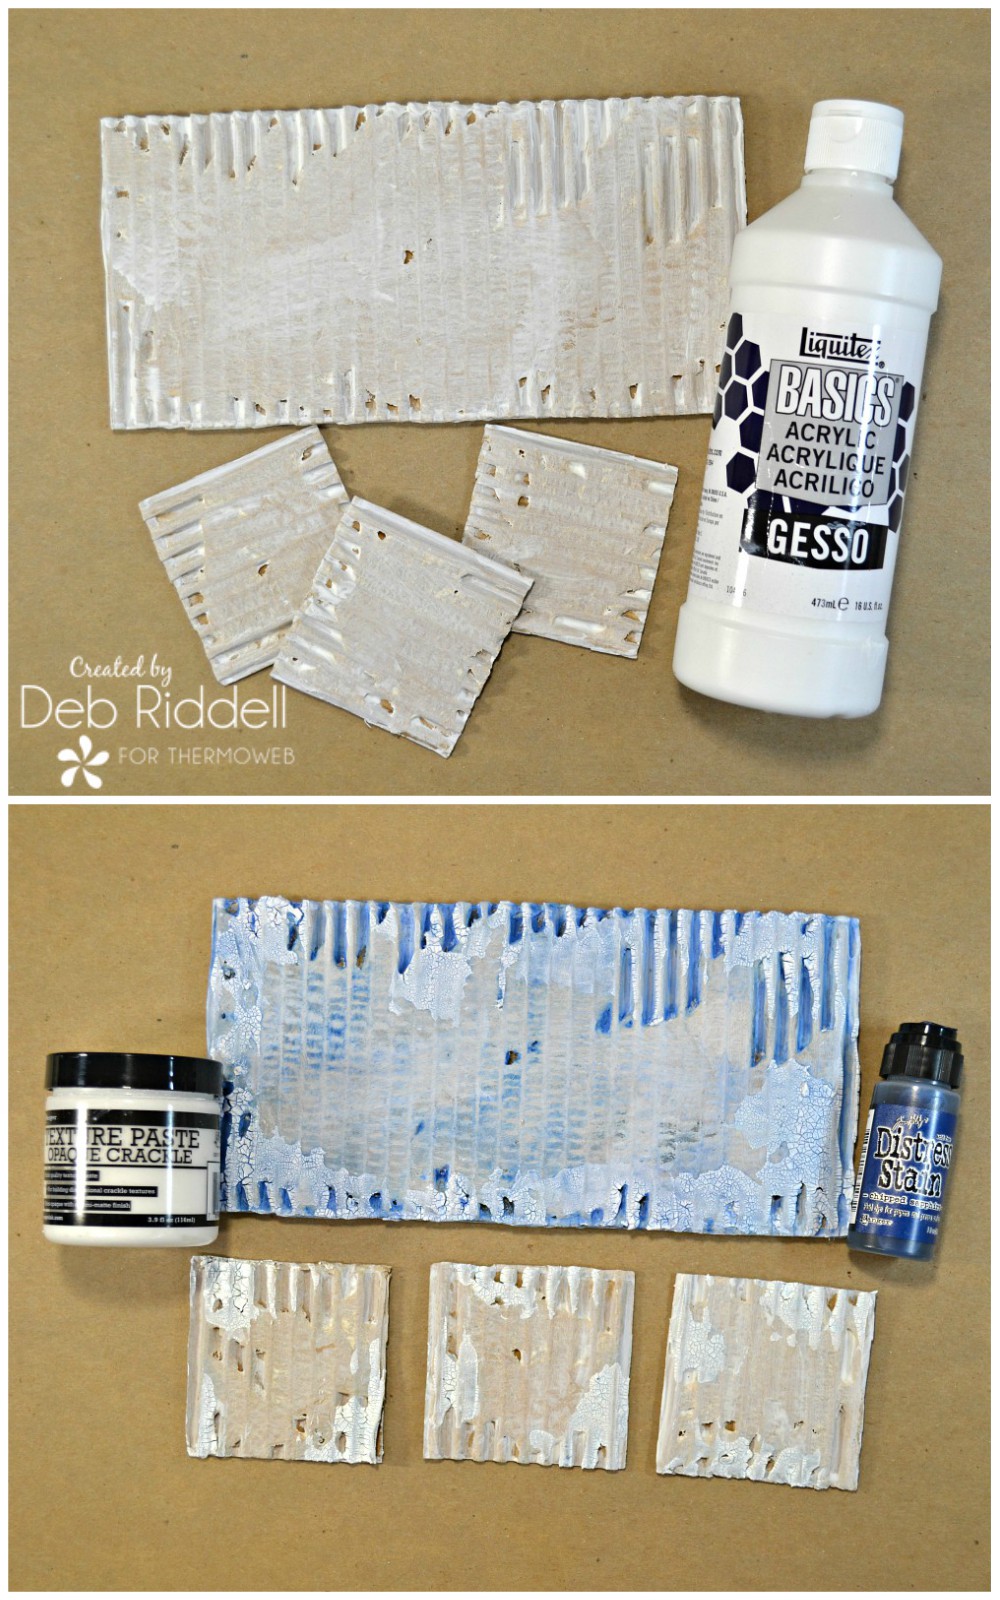
Distress Stain
Randomly apply crackle texture paste around the edges of the backboard piece and to the three small squares. Let dry till the texture medium has crackled and then wipe blue Distress Stain over the entire backboard piece, wiping it back with a damp baby wipe. Take that blue-stained baby wipe and swipe it over the crackled areas on the three smaller squares just to emphasize the crackle. Try not to get any of the stain onto the corrugated cardboard on the three small squares. Set everything aside to dry thoroughly.
Once dry, take a small amount of White Pearl Metallix Gel onto your finger and rub it around the edges of the backboard piece. It’s hard to see in the picture but it adds a beautiful metallic glow to the edges of the backboard. Set it aside for the Metallix Gel to dry.
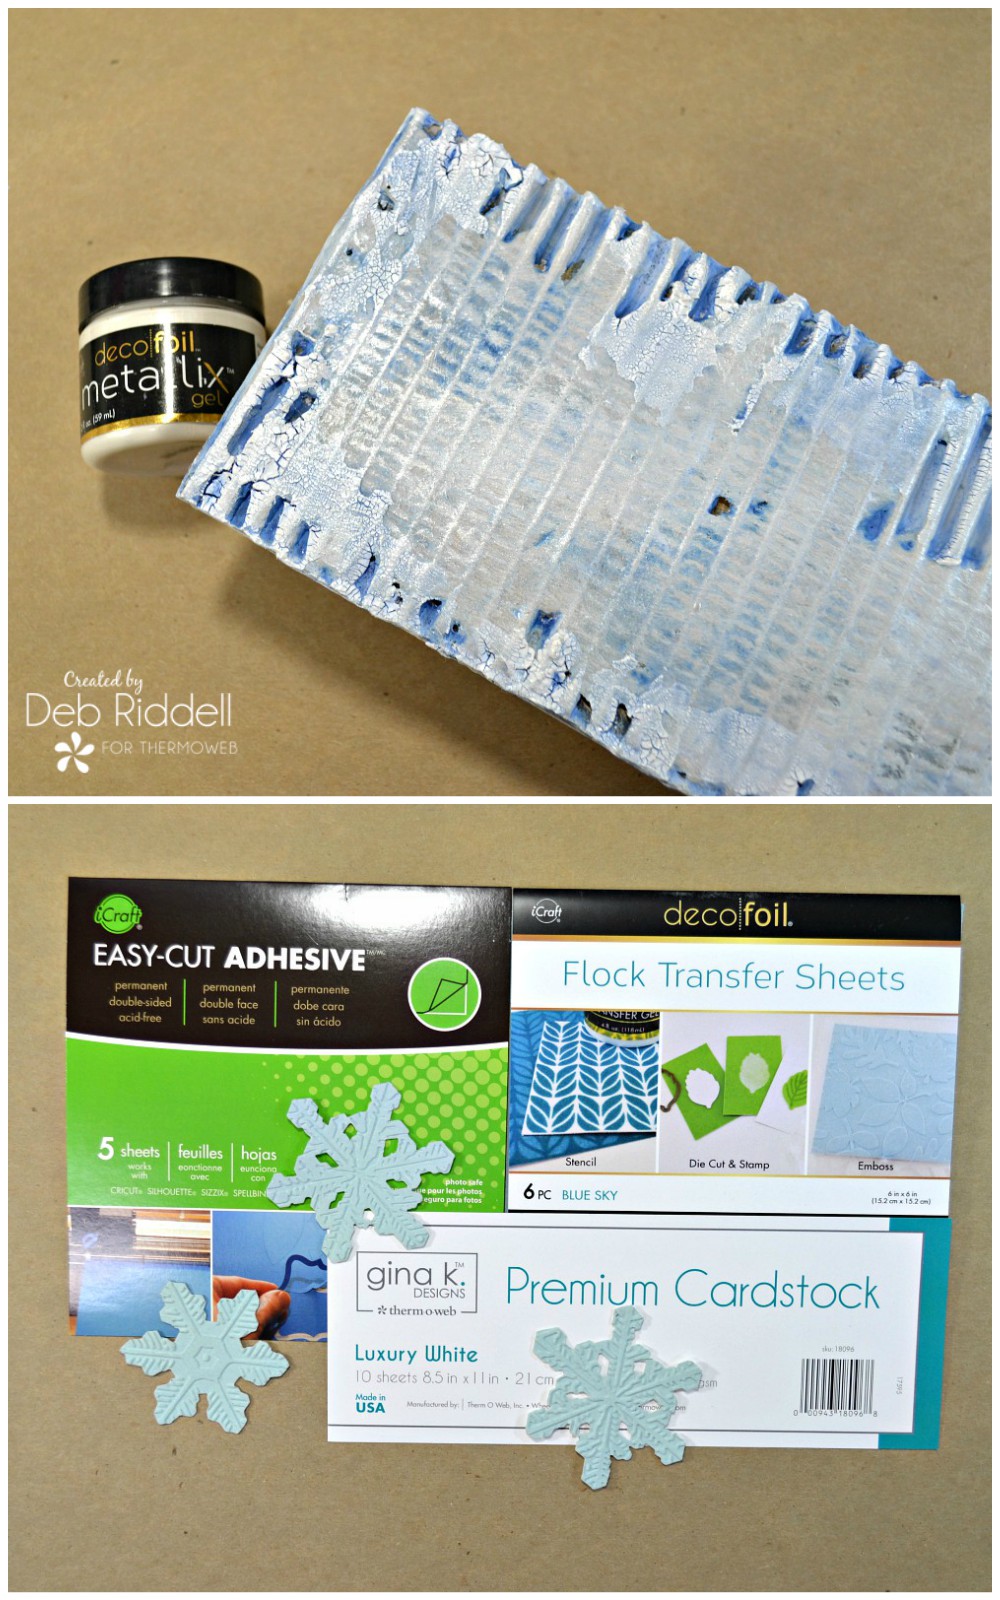
Deco Foil Flock Transfer Sheets
Apply Easy-Cut Adhesive to a piece of Gina K. Designs Luxury White cardstock. Peel off the adhesive backing paper and apply Blue Sky Flock Transfer Sheet to the adhesive (fuzzy side down!), running it through your die-cutting machine or foil laminator on the cool setting to make sure you get a good transfer of the Deco Foil Flock. Die-cut three snowflakes from the flocked cardstock and emboss them with the accompanying embossing folder.
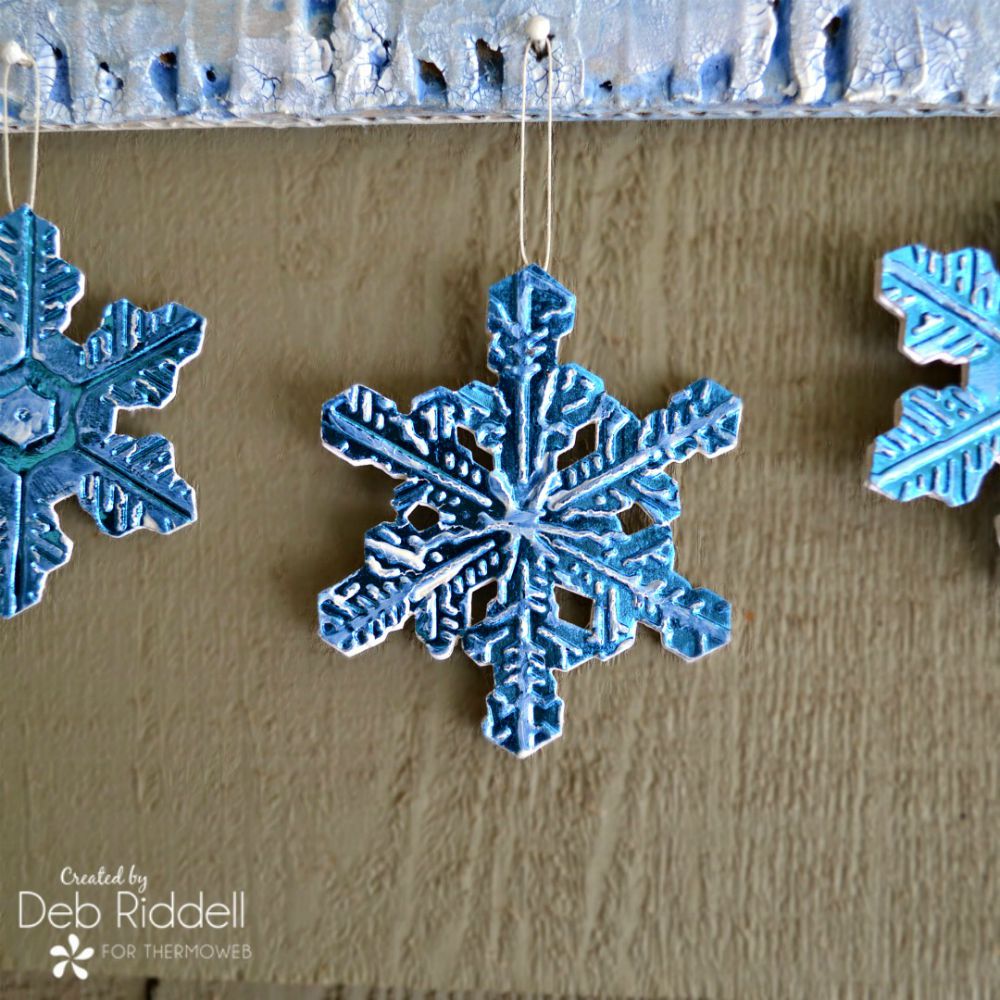
Foil a piece of PeelnStick Toner Sheet in your pre-heated foil laminator with Denim Transfer Foil (you could also use Ocean Blue Transfer Foil) and die cut three more snowflakes, embossing them with the embossing folder. Take a small amount of Deco Foil White Pearl Metallix Gel on your fingertip and rub it over the raised embossed areas of the foiled snowflakes. Die-cut the same snowflakes again from Gina K. Designs Luxury White cardstock and emboss them as well.
Ultra Bond Liquid Adhesive
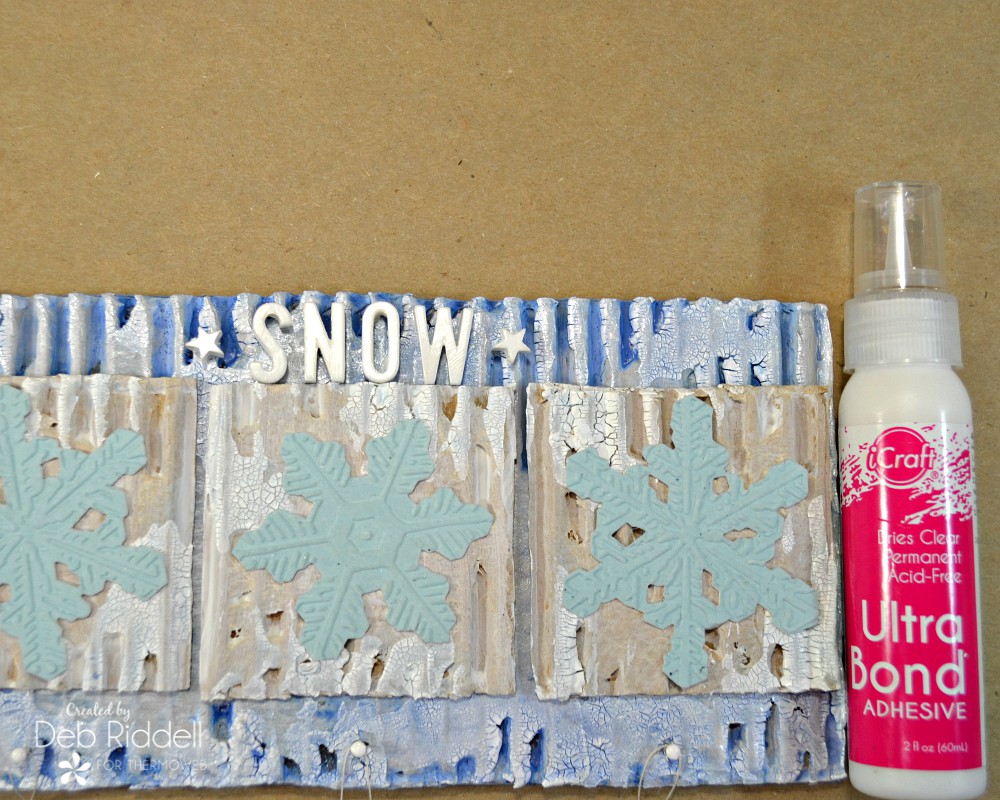
Adhere the flocked snowflakes to the three small squares with iCraft Ultra Bond adhesive and then adhere the squares to the prepared backboard, centering them on the backplate.
Paint three small finishing nails with white acrylic paint and insert them into the backboard, centering each one below the three small squares. Make some hanger loops from the white button thread. Remove the backing paper from the foiled PeelnStick snowflakes and adhere them to the coordinating white cardstock snowflakes, sandwiching the hanging loop between the two.

Add a bit more White Pearl Metallix Gel to the ‘snow’ Typography letters with your fingertip.
Adhere the ‘snow’ sentiment onto the backboard with iCraft Ultra Bond adhesive and you are done.
Here are a few closeups of the finished wintery wall hanging.
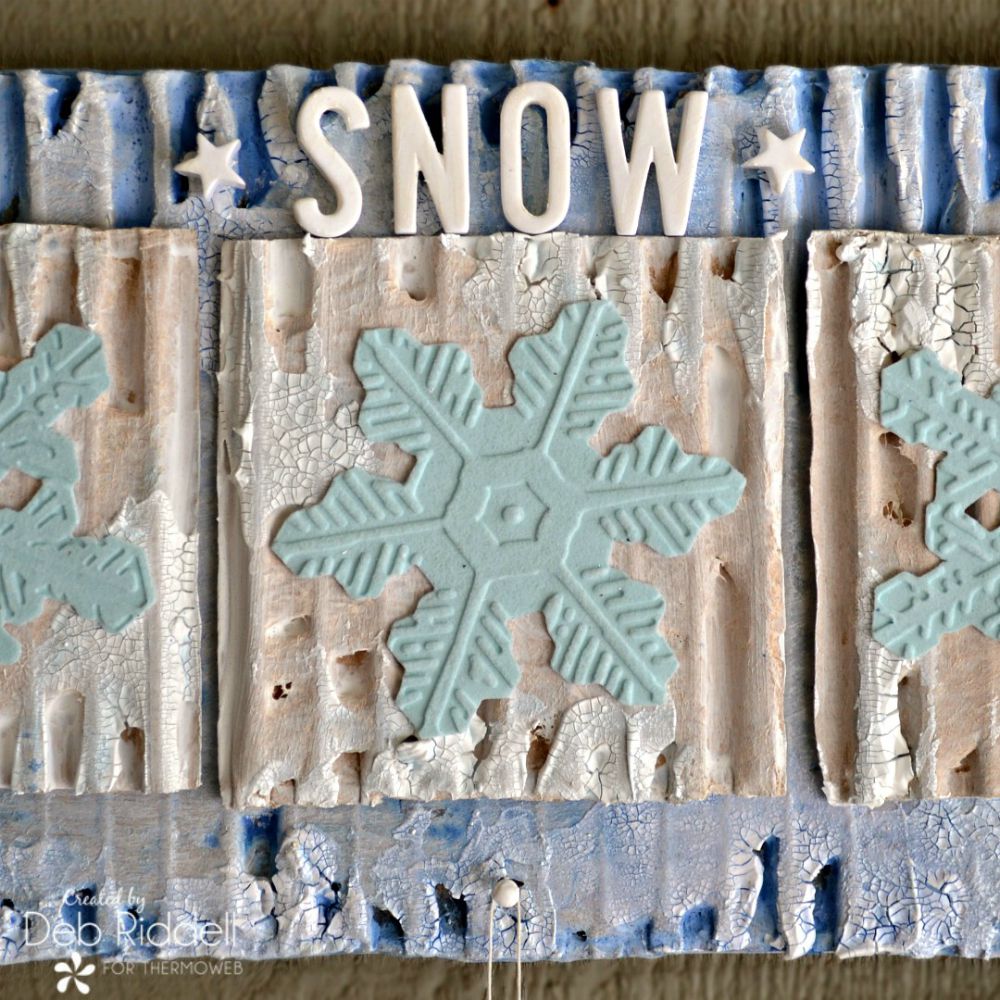
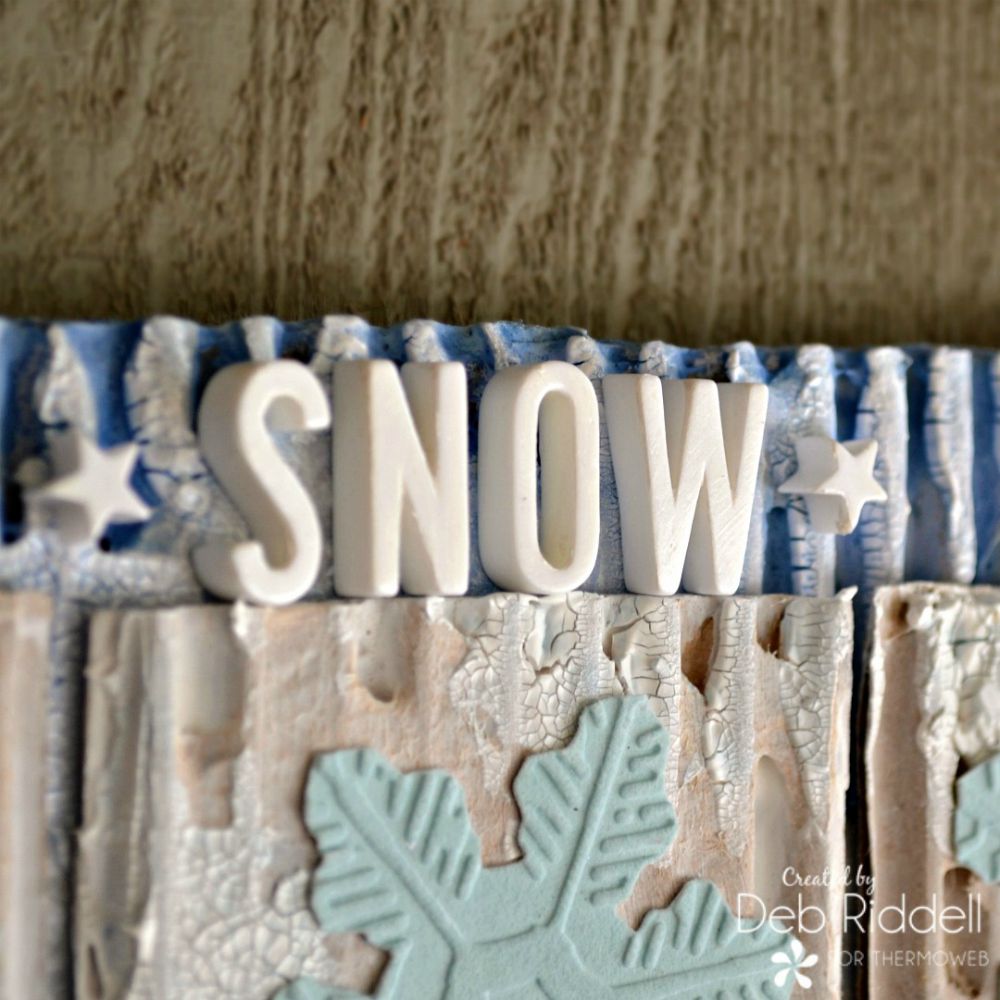
Love, love, love the texture!
I hope that you’ve enjoyed seeing how my Snowflakes mixed media wall hanging came together and that you’ve been inspired to make one with Therm O Web’s wonderful Deco Foil products to display in your own home for the rest of the winter season. Wishing you and yours happy holidays and as always happy creating!
Deb xo
Anne R
December 23, 2019 at 2:46 pm (4 years ago)An excellent tutorial Deb and the end result is beautiful! xx
Deb Riddell
December 24, 2019 at 12:39 pm (4 years ago)Thanks so much Anne, Merry Christmas to you and yours! Deb xo