


Hey there friends, it’s Ellen here today. I will be sharing two spring cards made with the ThermOweb Gina K. Designs Autumn Wishes StampnStencils. Although the stamp set looks like a typical fall set, it’s really more versatile than you think at first sight.
Spring leaf card
The first card shows you that depending on the color you choose can do a lot for the look of the card. This is a simpler card because I tried focusing on the colors and just using the Gina K. Designs stamps.
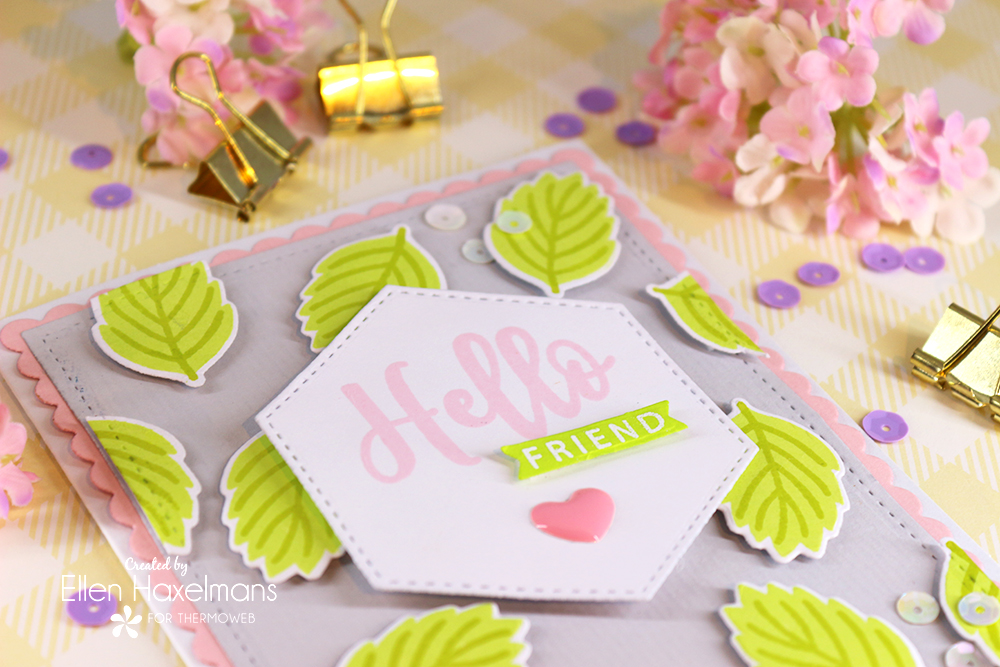
The base of this card is a self-made pattern with one of the leaf stamp from the set.
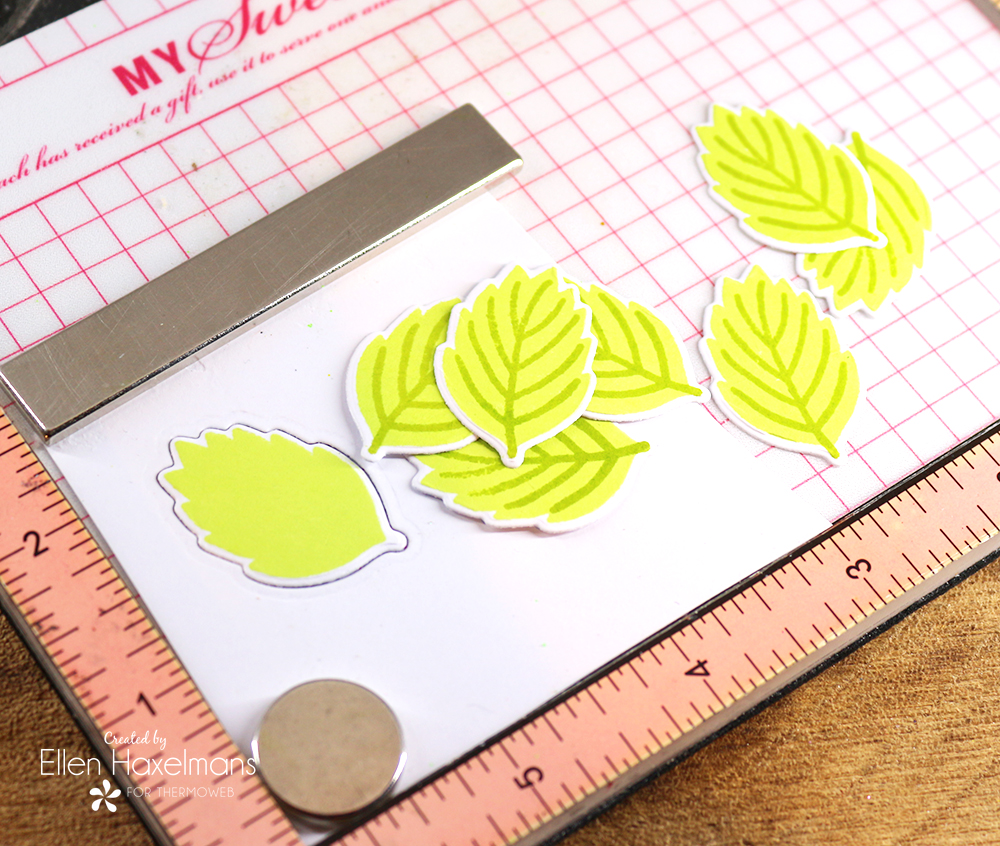
For this, I first stamped the leaves and used the dies to cut them. I kept one of the papers where I did cut out a leaf. This was used as a positioner in my stamping tool. This made stamping the second layer with the nerves easy. I only had to place the nerves once and could stamp leaf after leaf perfectly.
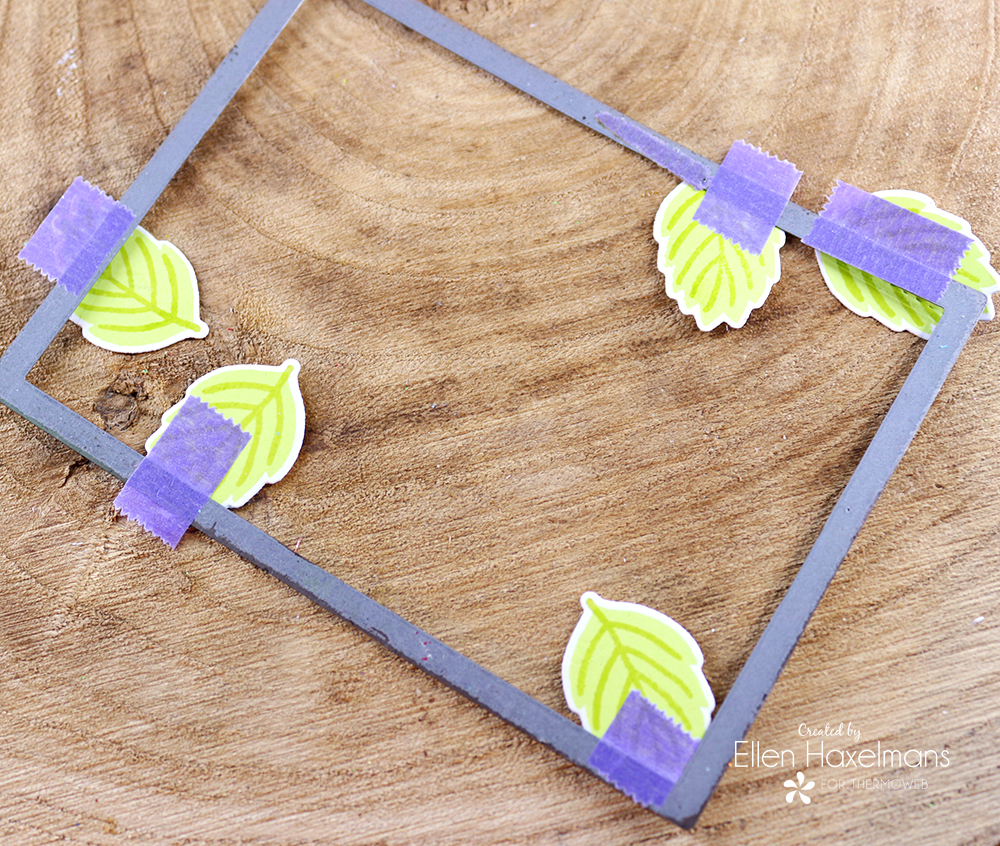
The next step was to die cut parts from some of the leaves. These were used to put on the sides of my paper.
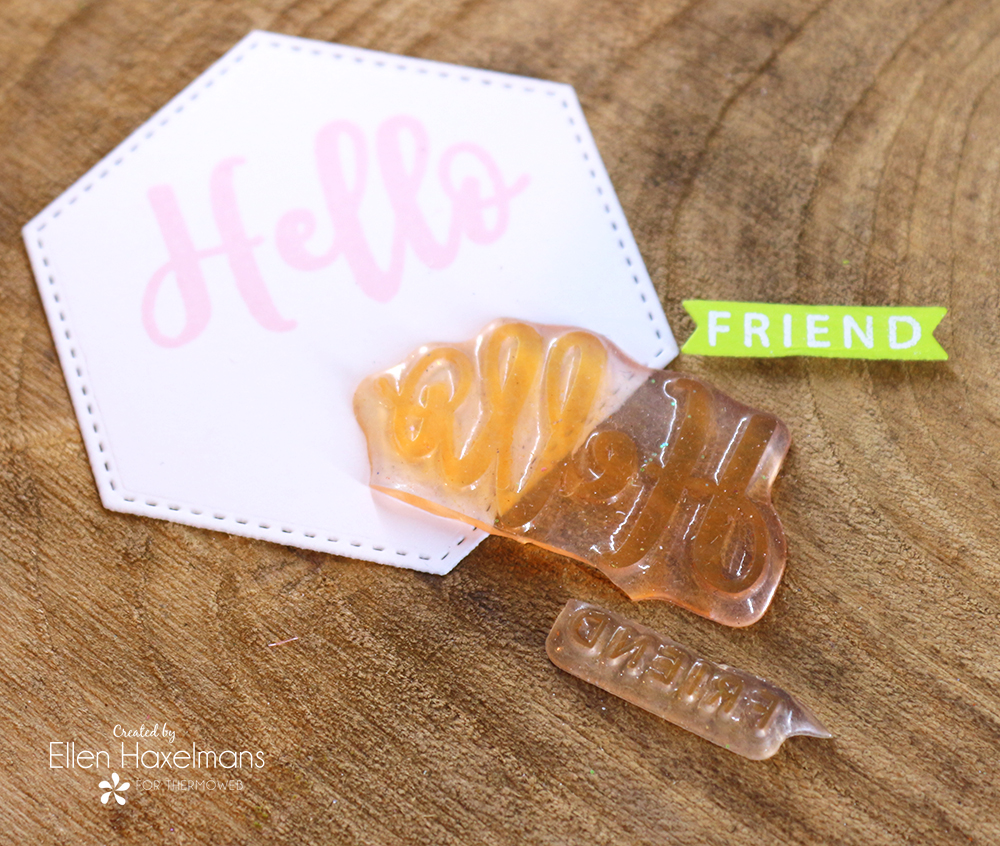
The last step on this card is the placement of the message. You probably noticed I cut the sentiment in two. This made it possible to use different colors and make it look more cohesive with the rest of the card.
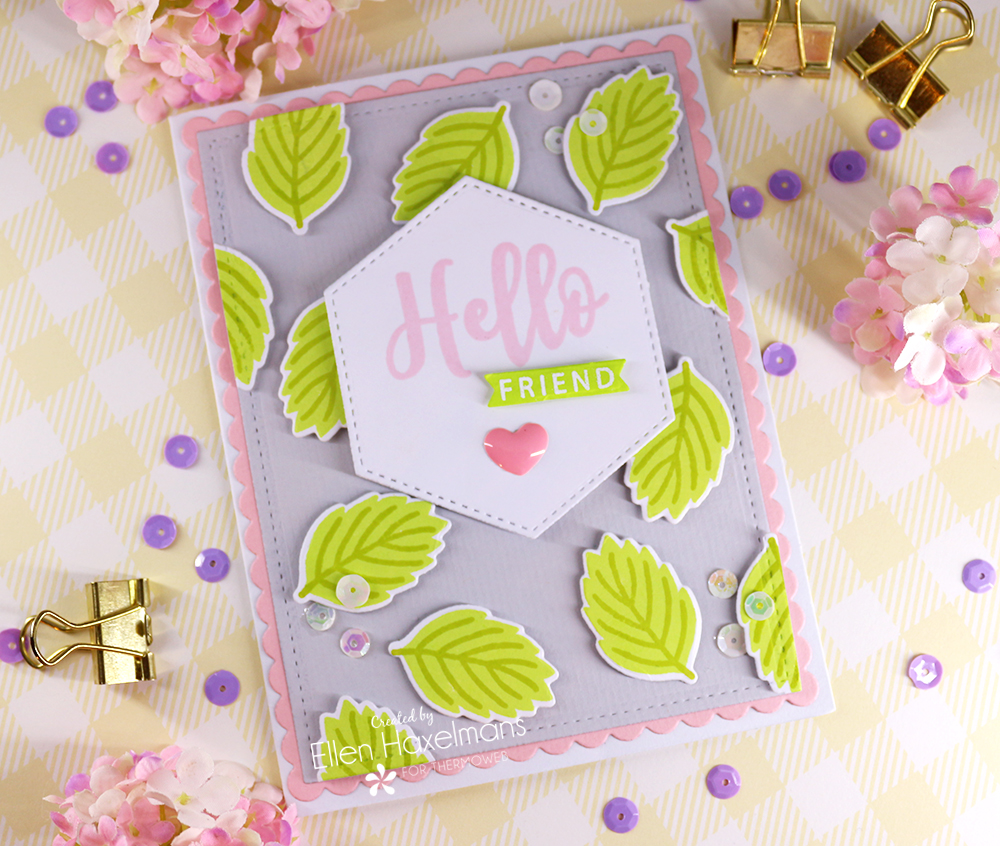
The pink and light green colors make the card a lot more fitting for a spring-themed card.
Blossom trees card
On this card, we step it up a little. I used more techniques by making it.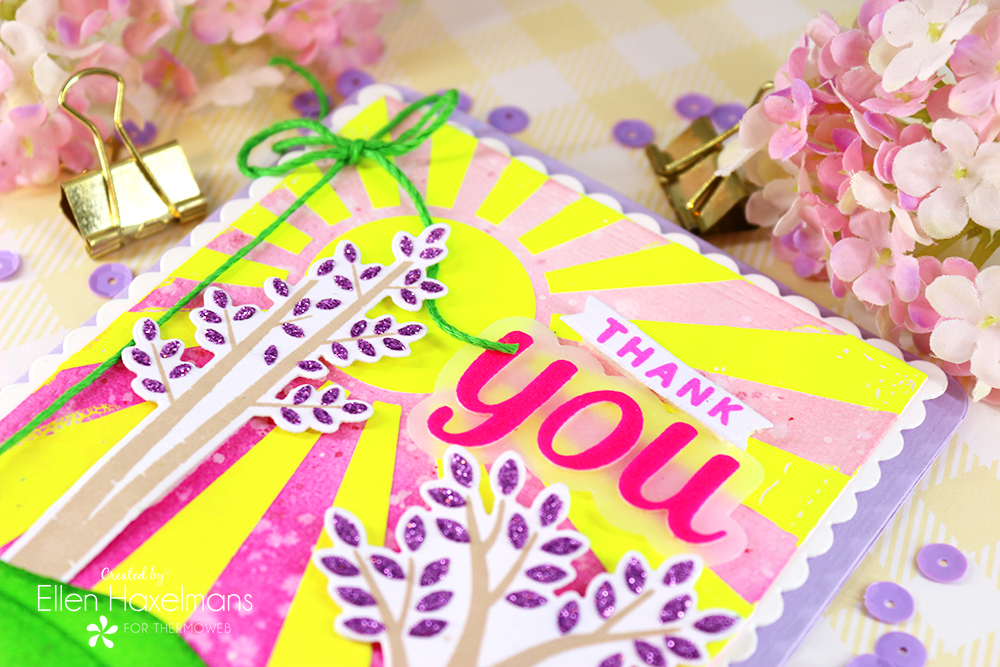
Prosecuting the techniques, I needed a lot of new products. Let me show you in the next picture tutorial how I did it.
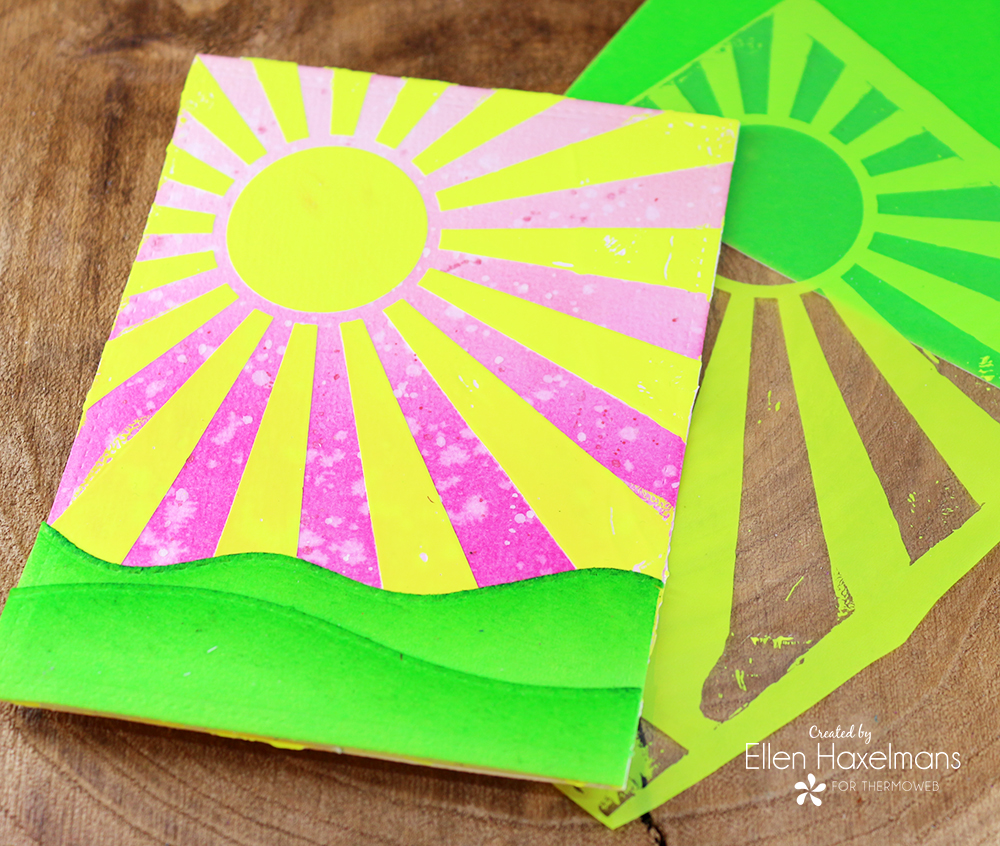
First I inked the background with pink Distress Ink. On top of that, I added a layer Deco Foil Transfer Gel Blanco by using a sunscape stencil and a Stencil Pal. When the gel was dry I added the Rina K. Designs Hello Yellow Neon Enamel Transfer Sheet pushing it true my laminator. Later I added two strokes of hills made with land border dies and Rina K. Designs Screaming Green Neon Flock Sheets. I added a little bit of darker green ink on the edges of the hills. This gives them a little more dimension.
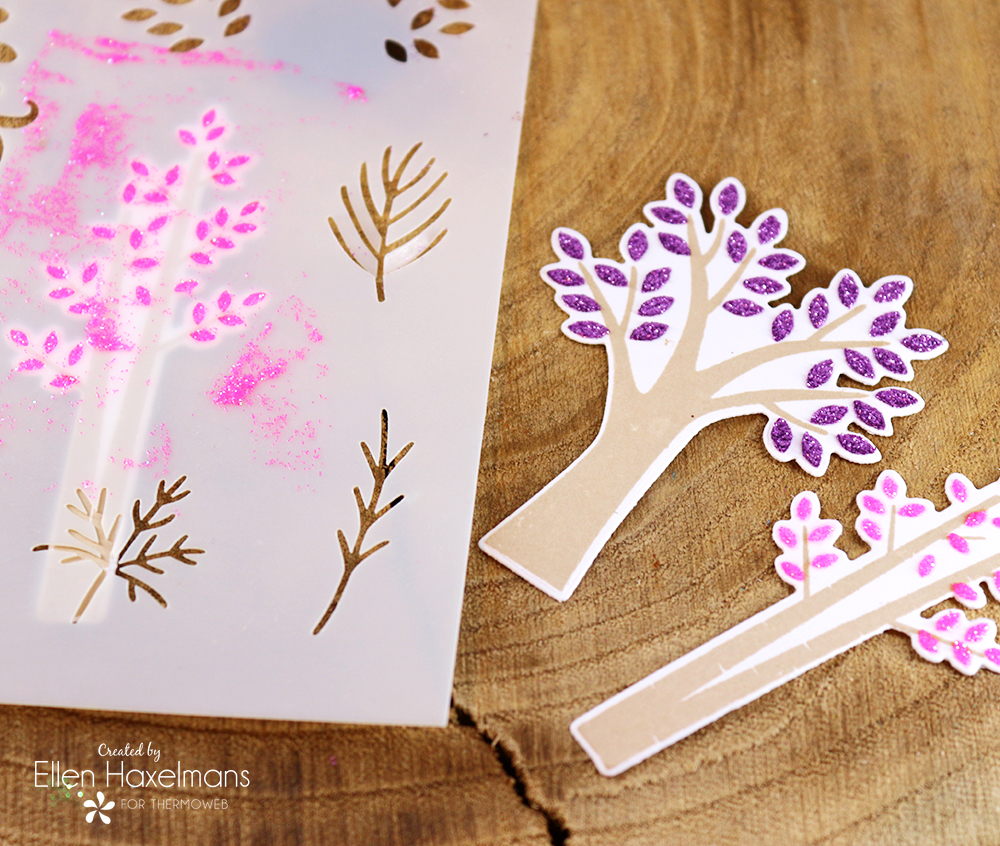
To complete the scene I added the trees. These are made with the coordinating stencil and the Gina K. Design Glitz Glitter Gel Lilac and the Rina K. Design Neon Glitz Glitter Gel Poppin’ Pink. In the end I only used the trees with the Lilac Glitz Glitter Gel.
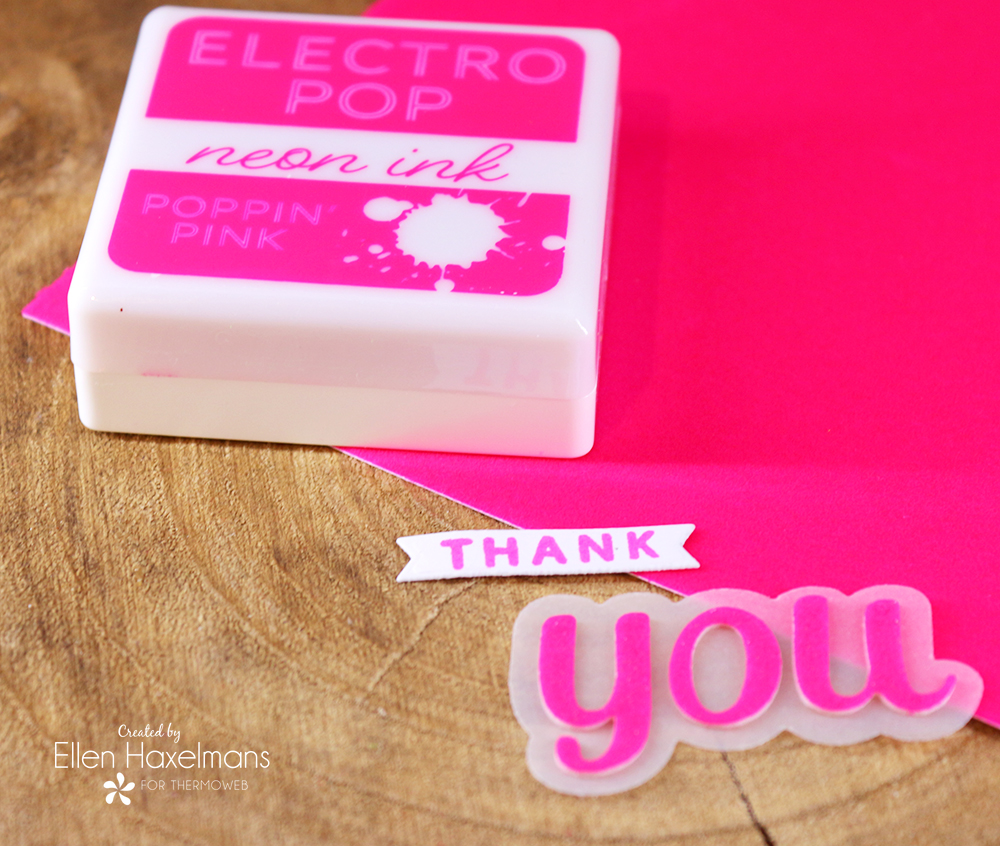
Last I stamped the thank with ink and placed the “you”. The “you” was created with a die, Deco Foil White Foam Adhesive and the Rina K. Designs Neon Flock Sheet Poppin’ Pink.
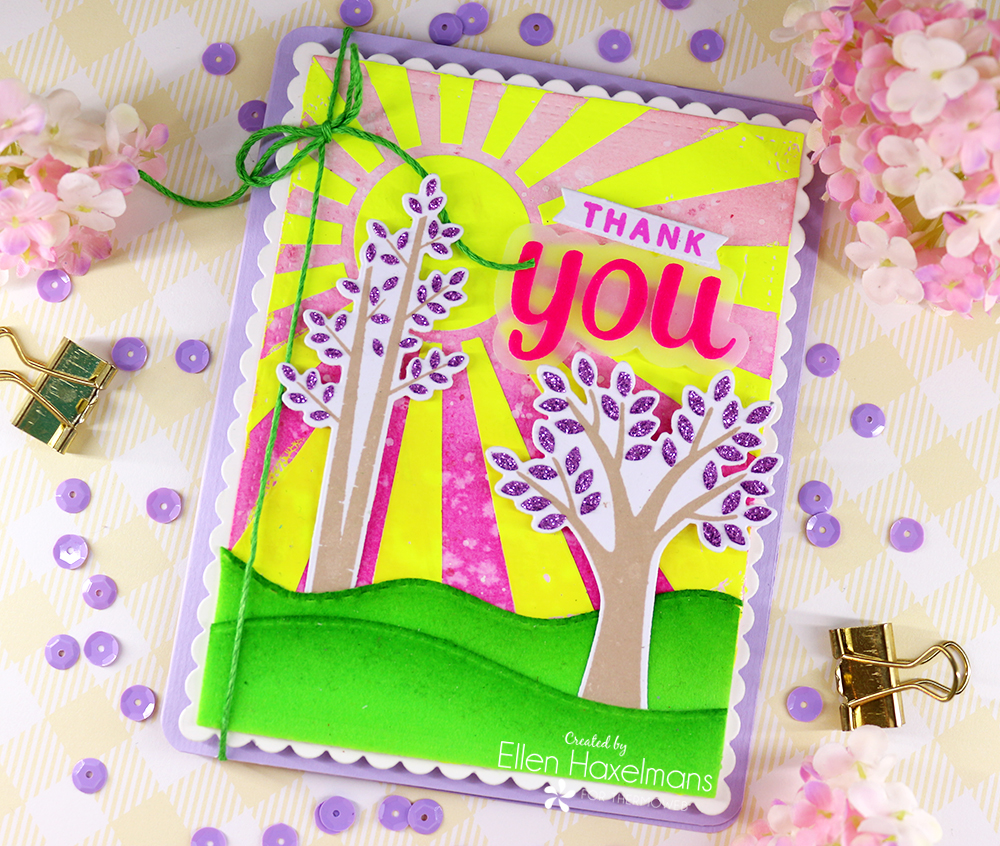
Doesn’t the card look like an early spring morning? Thank you for joining me, I hope you enjoyed today’s inspiration and see you next time.
Project Supplies:
Gina K. Designs Lilac Glitz Glitter Gel
Rina K. Designs Neon Glitz Glitter Gel – Poppin’ Pink – COMING SOON!
Gina K. Designs StampnStencil Autumn Wishes – Stamps
Gina K. Designs StampnStencil Autumn Wishes – Dies
Gina K. Designs StampnStencil Autumn Wishes – Stencil
Deco Foil Transfer Gel Blanco – COMING SOON!
Deco Foil White Foam Adhesive
Rina K. Designs Neon Enamel Transfer Sheets – Hello Yello – COMING SOON!
Rina K. Designs Neon Flock Transfer Sheets – Screamin’ Green – COMING SOON!
Rina K. Designs Neon Flock Transfer Sheets – Poppin’ Pink – COMING SOON!
Stencil Pal
ICraft Ultra Bond Adhesive
Gina K. Designs Foam Tape White
Gina K. Designs Foam Tape White (squares)
Gina K. Designs Permanent Adhesive Dot Runner
Frames and Flags die set – Newtons Nook Designs
Land Borders die set – Newtons Nook Designs
Sunscape Stencil- Newtons Nook Designs
Small stitched rectangle stackables – Lawn fawn
Hexagon Stax – My Favortie Things