


Hello everyone! Today I’m Ellen, taking over the TermOWeb blog, for the collaboration with Joy Clair. Below I want to explain 3 fun ways how to use the Metallix Gel with stencils.
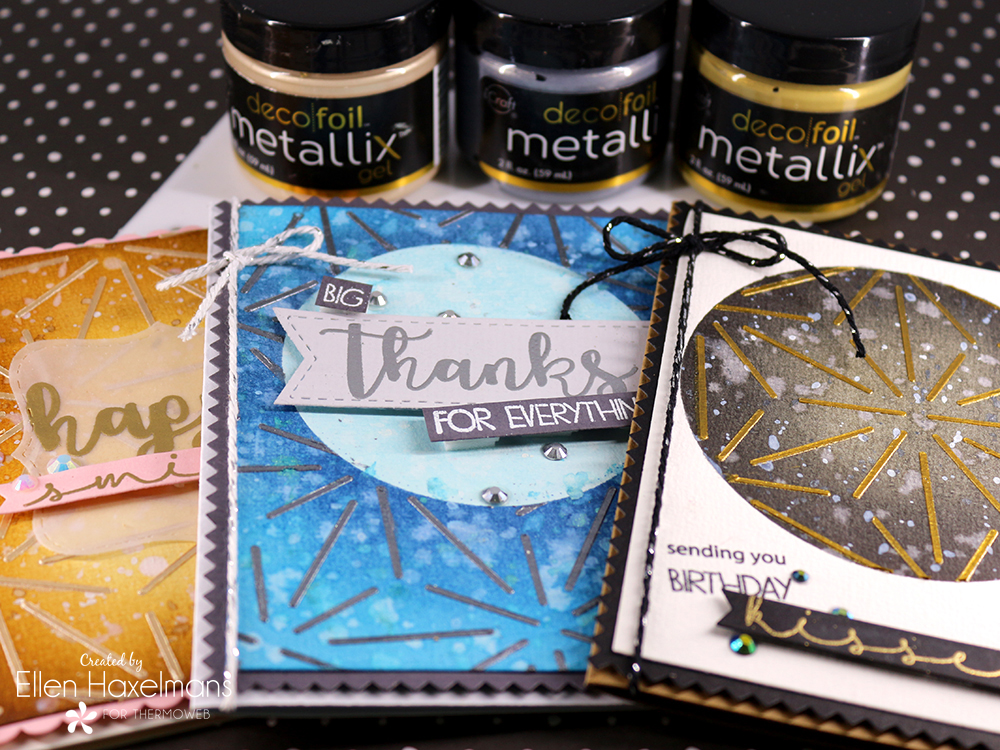
Starburst Cards
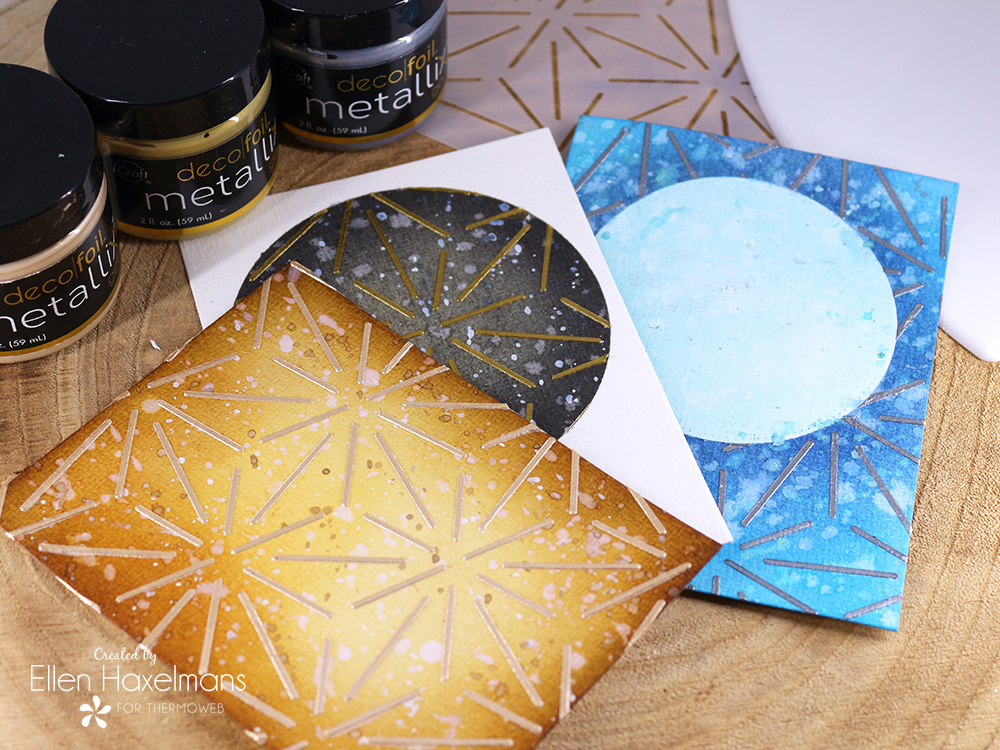
As you can see on all cards I used the same ‘Starburst” stencil on and three different Metallix colors. I used the Deco Foil Metallix Gels: Champagne Mist, Pure Gold and Glazed Pewter. Let’s start with the first card.
1. The Normal Way
On the first card, I like to show you how we mostly use stencils and the Metallix Gel.
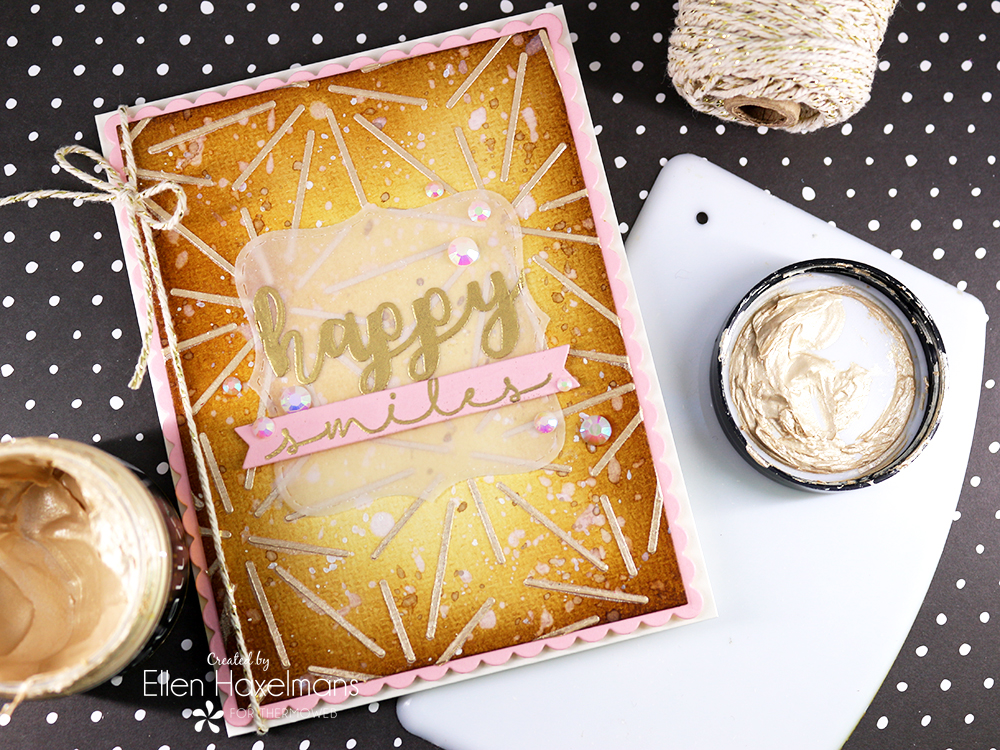
It’s simply adding gel on top of a background panel. Let me explain how you get the best results.
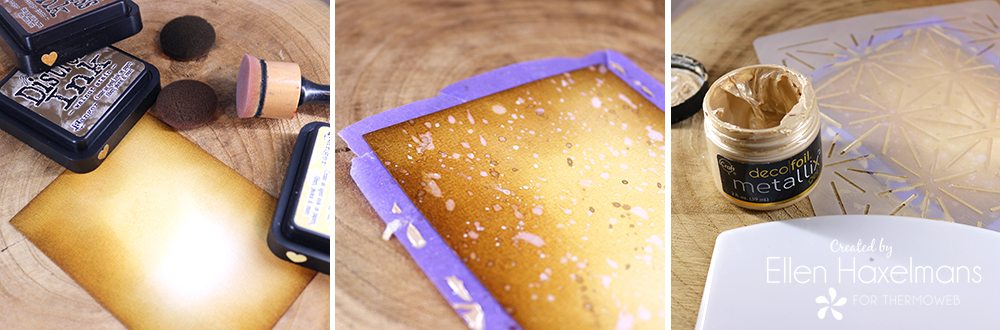
1. Cut out your background panel and give it color. I used some brown Distress inks for my background.
2. After coloring, I sprinkle ink and water on top of the panel. This is a step you can skip if you don’t like it, but I really like the reaction the Distress ink has on water and ink. You can also add Purple tape on the back of the paper.
3. The Purple Tape will assure the stencil sticks on the same place while you add the gel on the paper.
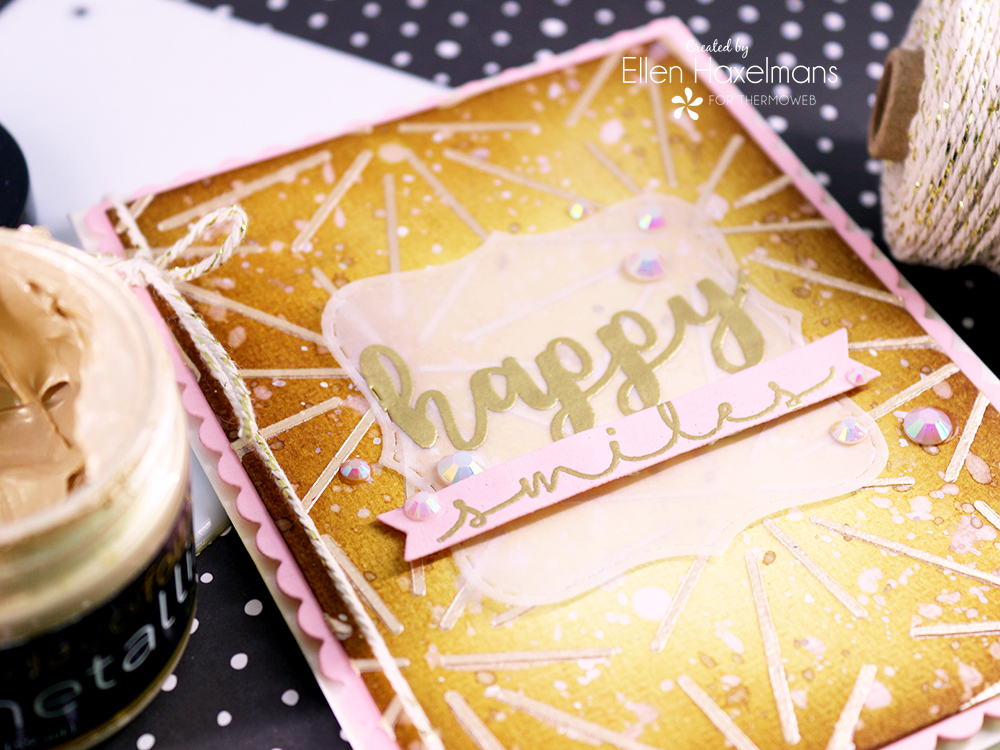 The card was finished with the pretty word stamps from the “Hugs and Smiles” and ”Hello” stamp set from Joy Clair. I really love the bold and elegant look of them.
2. Apply the Metallix Inside a Shape
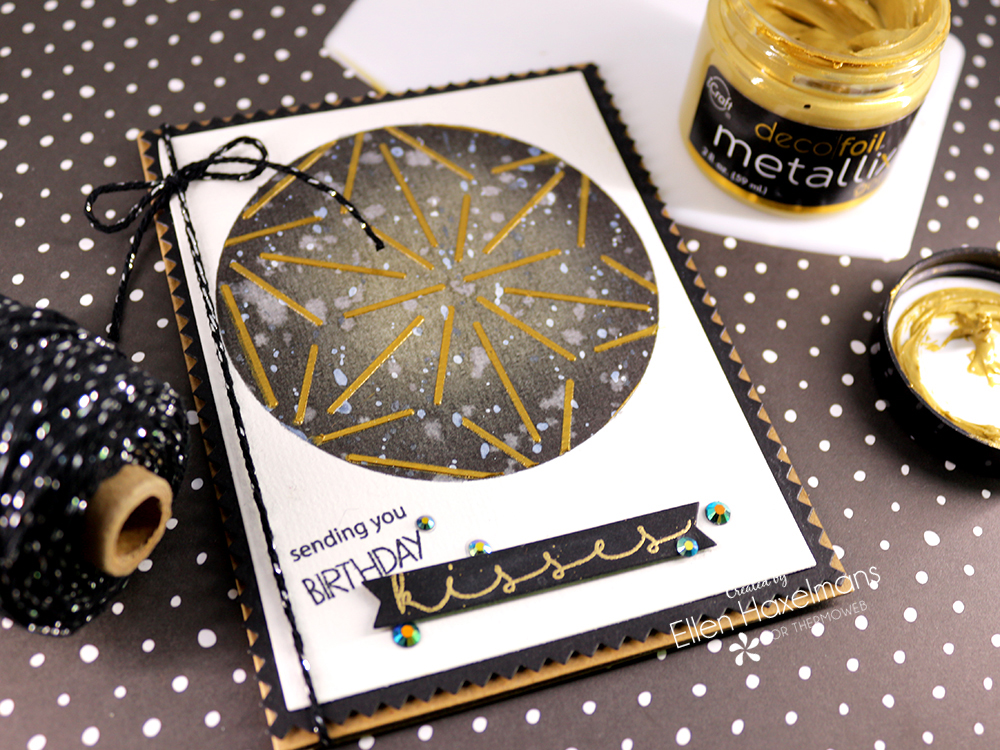
This method looks like magic when you see the gel and ink appear in the middle of the card.
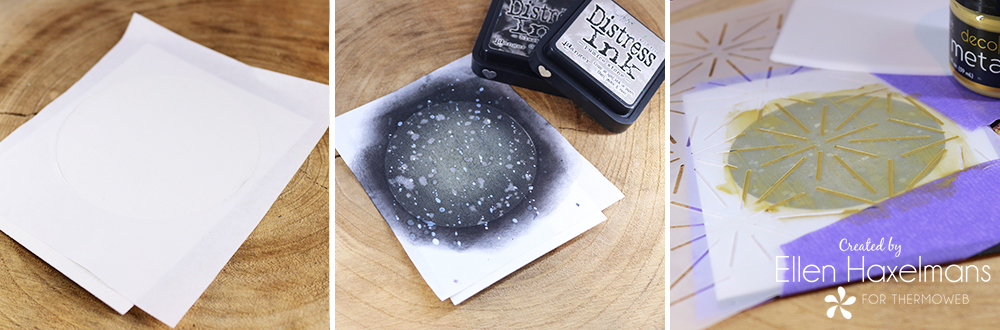
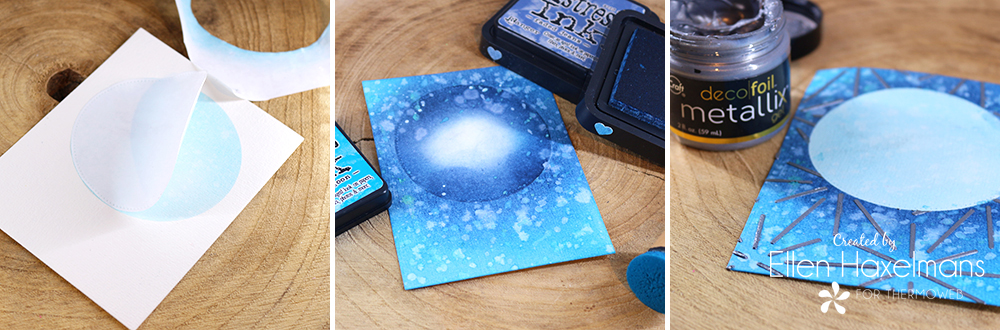
1. Cut a circle out of Masking Paper. Put the circle aside and stick the outside of your card base (maybe you can see the masking paper better on the second picture).
2. Now you can color in your circle with ink. I used black and gray Distress ink. The masking paper ensures that the rest of the paper is covered.
3. When you’re happy with your colors add the Metallix Gel on top of it (I used Pure Gold on this piece). Afterwards you remove the masking tape.
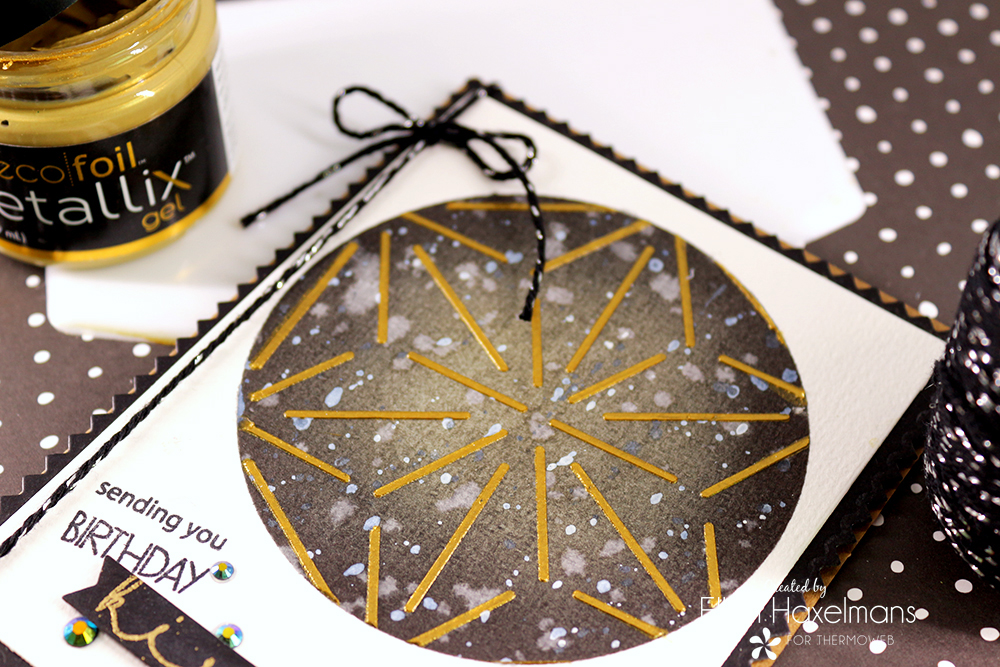
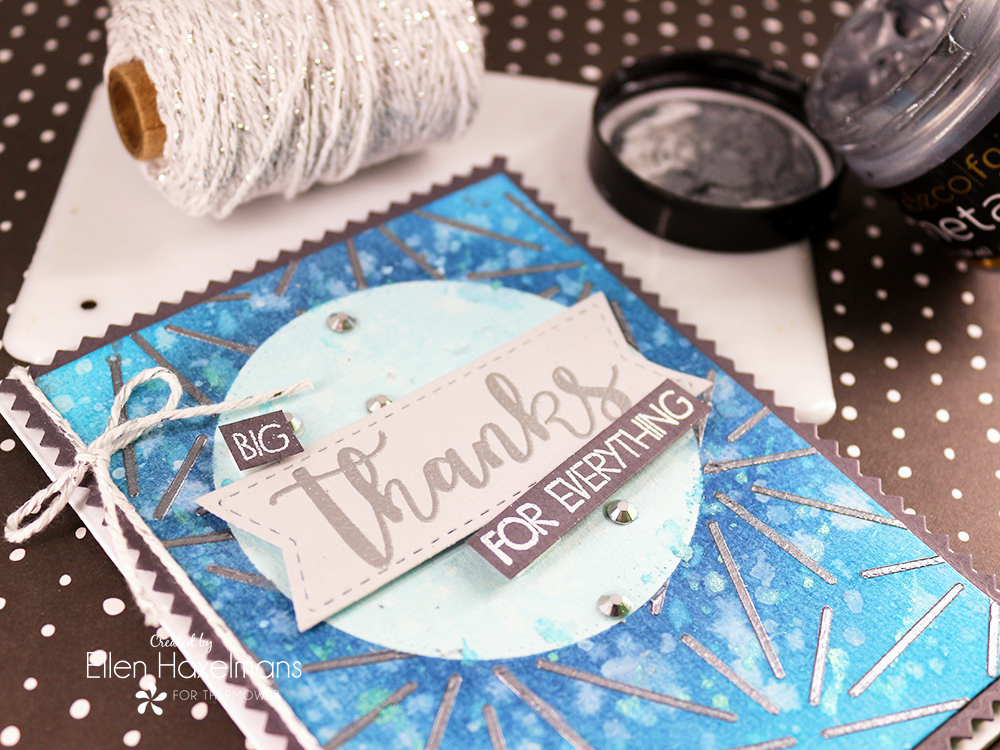
The ‘Starburst” stencil looks like a galaxy! The Pure Gold Metallix Gel on top of the black can be even used for men birthdays.
3. Apply the Gel Outside a Shape
On this card, we do the reverse of the previous card. Instead of having the Gel in a shape we put it outside a shape.
It’s as easy as the previous step, let me explain how it’s done:
1. Stick the circle made out of masking tape on top of your card base (you can apply ink in the circle as we did on the previous card if you like that).
2. Again you need to color the card base with Distress ink. As the rest of the cards, I sprinkled ink and water on top of it.
3. Without removing the masking tape you add the Metallix Gel (on this card I used Glazed Pewter). Afterwards, you remove the masking tape.
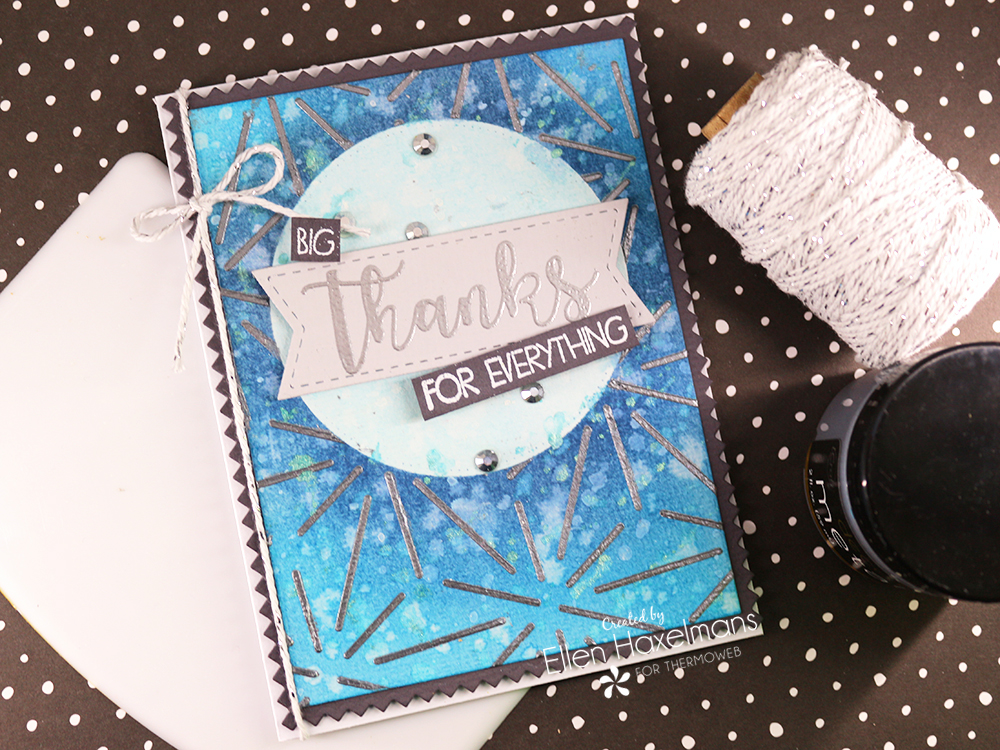
Also here the words from the two stamp sets from Joy Clair look really amazing. I love how you can mix them together.
That was 3 ways on how to apply the Metallix Gel with a stencil.
I hope you enjoyed my post and stay tuned for more inspiration on this collaboration!
ThermOWeb Supplies Used:
Deco Foil Metallix Gel – Champagne Mist
Deco Foil Metallix Gel – Pure Gold
Deco Foil Metallix Gel – Glazed Pewter
Deco Foil – Stencil Pal
Deco Foil – Starburst stencil
Gina K Design Foam Squares White
Purple Tape
Other Products:
Joy Clair: Hugs and Smiles – Clear Stamp Set, Hello Sentiments – Clear Stamp Set
Newton’s Nook Design: Frames & Flags – Die Set, Frames Squared Die Set
Lawn Fawn: Small Stitched Rectangle Stackables – Die Set, Zig Zag Rectangle Stackables – Die Set

It’s not a collaboration if we don’t offer up a chance for you to win some of these same supplies are designers are using. So follow the Rafflecopter for a chance to get yourself entered to win. Then visit our friends at Joy Clair for more ideas and giveaways as well!
Don’t miss the Birthday sale happening now at Joy Clair! Save 25% off your entire order!
Lori Smanski
August 23, 2019 at 8:15 am (5 years ago)Waffle Flower – I love the Big Dots Die
Your cards are lovely. Thank you for sharing how you do them
quilting dash lady at comcast dot net
Sue D
August 23, 2019 at 8:21 am (5 years ago)Love the different looks you achieved.
Karthikha Uday
August 23, 2019 at 9:09 am (5 years ago)Wow! Fabulous backgrounds! <3
Becca Yahrling
August 23, 2019 at 9:12 am (5 years ago)I want to try this so bad!! lol Soooo very pretty.
Denise Bryant
August 23, 2019 at 10:09 am (5 years ago)Can’t wait to try the Metallix Gel! Thanks for sharing the ideas!
Sharon Gullikson
August 23, 2019 at 11:42 am (5 years ago)The colors in the background are great. I also love the shiny look!
Mary Holshouser
August 23, 2019 at 4:25 pm (5 years ago)The design would make a fun New Year’s Eve
card. I can see the sparkles from the
fireworks at midnight. Beautiful cards.
thanks for sharing
txmlhl(at)yahoo(dot)com
trainwithmeghan
August 23, 2019 at 4:27 pm (5 years ago)What a fun background on each card! Love the colors!
Jenny Ham
August 24, 2019 at 10:42 pm (5 years ago)Be Her Combo is on my list.
Kelly Woods
August 24, 2019 at 10:50 pm (5 years ago)I love the Starbucks Stencil. Thank you