


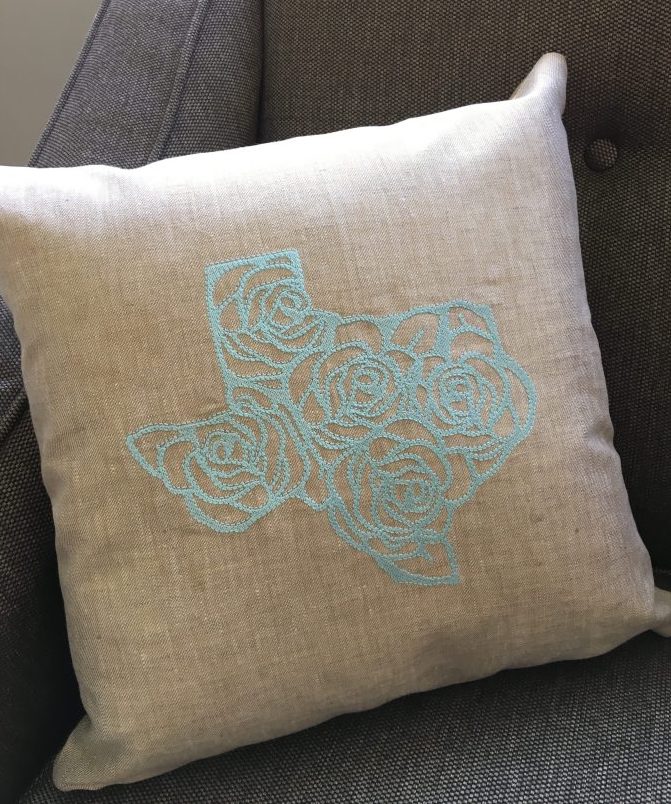
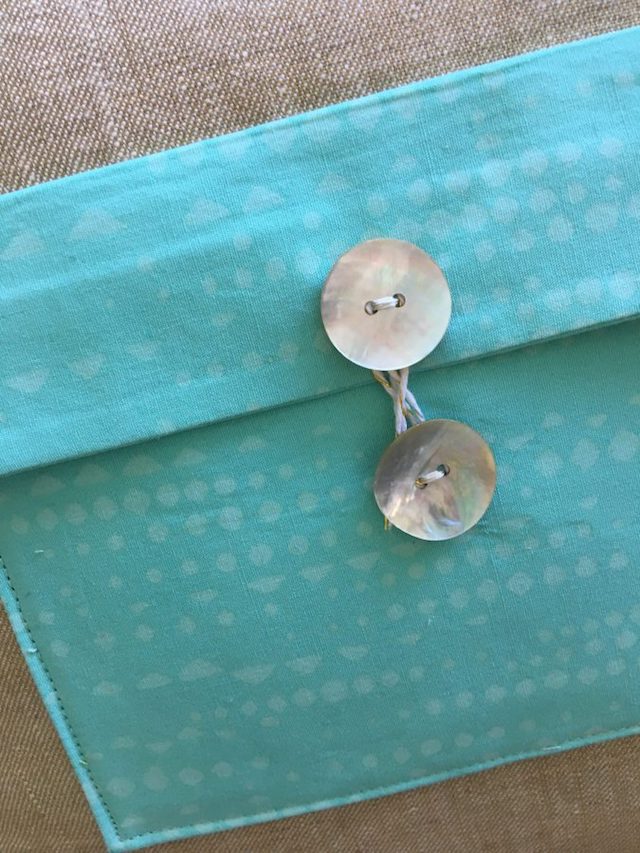
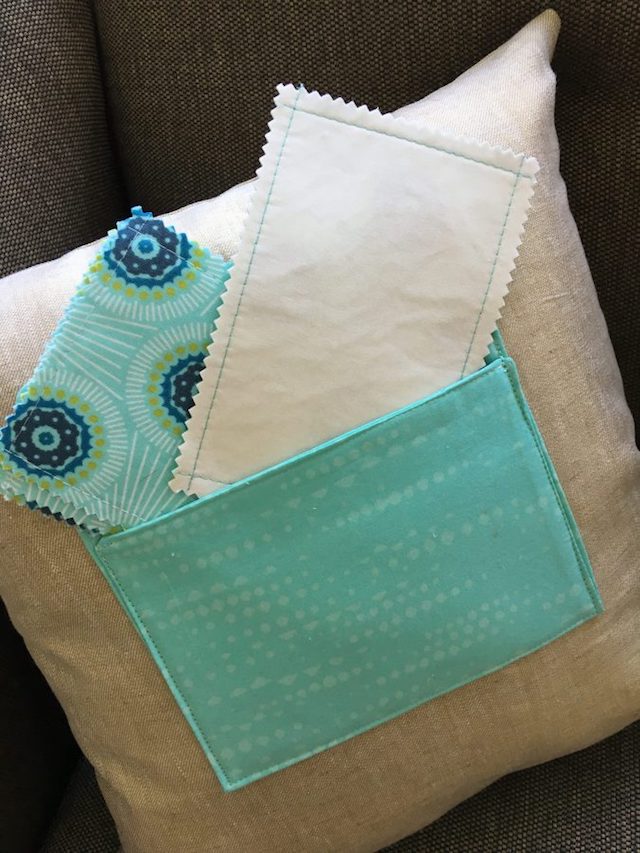
I recently had a friend move, literally, half-way around the world! A few friends got together to go out to dinner and presented her with this great gift! The embroidered front reminds her of all her friends in Texas and the back of the pillow has an envelope that conceals little fabric postcards. On each postcard, we wrote her a note to help as she makes her home in a new country! You can make your own too following this tutorial. (Hint: This also makes a GREAT teacher or coach gift!)
State of Texas Friendship Pillow
State of Texas Pillow Materials + Supplies
-TWO 16″ squares of main fabric for pillow front and back
-TWO 16″ squares of HeatnBond Fleece Fusible Interfacing
-TWO 7″ x 13″ fabric rectangles accent fabric for back pocket
-TWO 7″ x 13″ rectangles of HeatnBond Woven Fusible Soft Interfacing
-ONE piece of StitchnSew Perforated Tear-Away Soft Interfacing to place in embroidery hoop
-Various fabric scraps cut into 4 1/2″ x 6 1/2″ rectangles for postcards and interfaced with the Woven Fusible Soft Interfacing
-Texas Rose SVG file from Sophia’s Paper House
-Embroidery Digitizing Software and Embroidery Machine if embroidering design
(OR Electronic Die Cut Machine if using Heat Transfer Vinyl for pillow design instead of embroidering it)
-Thread for construction
-Thread for embroidering
-Coordinating Embroidery Floss and Two Buttons
State of Texas Pillow Instructions:
Step 1
Use Texas Rose SVG file to digitize an embroidery design (or cut with an electronic die cut machine). Embroider onto the center of one of the 16″ Main fabric squares. Use the Perforated Tear-Away to stabilize the back while embroidering it on your machine. Tear away excess stabilizer, then iron on the HeatnBond Fusible Fleece to the back of BOTH 16″ fabric squares.
Step 2
To make the back pocket iron on the Woven Fusible Soft Interfacing rectangles to the back of each of the Accent fabric rectangles. Place these two rectangles together, then sew using a 1/2″ seam around all 4 edges. Leave an opening along one short side. Clip corners and turn right side out through the opening. Press well and edgestitch the opening closed. Now mark two lines on this rectangle. Measure down 2″ from the edgestitched opening and mark one horizontal line. Now measure down 5″ and mark another horizontal line. Fold this lineup and press, then fold the 2″ line down on top, making an envelope flap.
Find the center of the pillow back and center this envelope on that spot. Edge stitch around the side edges and bottom edge to secure. Then unfold the top flap, stitch on that fold line, then fold back down. This will fully stitch the envelope to the back. Hand-stitch two buttons onto the envelope to make a closure. One button will be centered on the flap, and one on the envelope part.
Step 3
Make the postcards by stitching one fabric to another fabric, WRONG sides together, along with the edges. Use pinking shears to clean up the edges after stitching. Make as many postcards as you’d like. I was able to fit almost 10 postcards into the pocket! Use a Micron pen for writing on each postcard and place in the back.
Megridigitizing
January 24, 2018 at 11:21 pm (6 years ago)Great post.!! It takes a lot of passion to write such a informative content.