


We’re just weeks away from the exciting release of our newest products.
One of those we’re excited about is our Brand New Gina K. Designs StampnStencil Collection.
Gina K. Designs StampnStencil
If you’re not familiar with this exciting new product collection…let’s get you!
Our StampnStencil line as a new way to look at using our stamps, ink and of course stencils. Gina has created two new collections that we know you’re going to love. Our Crazy Daisy and Petals and Wings.
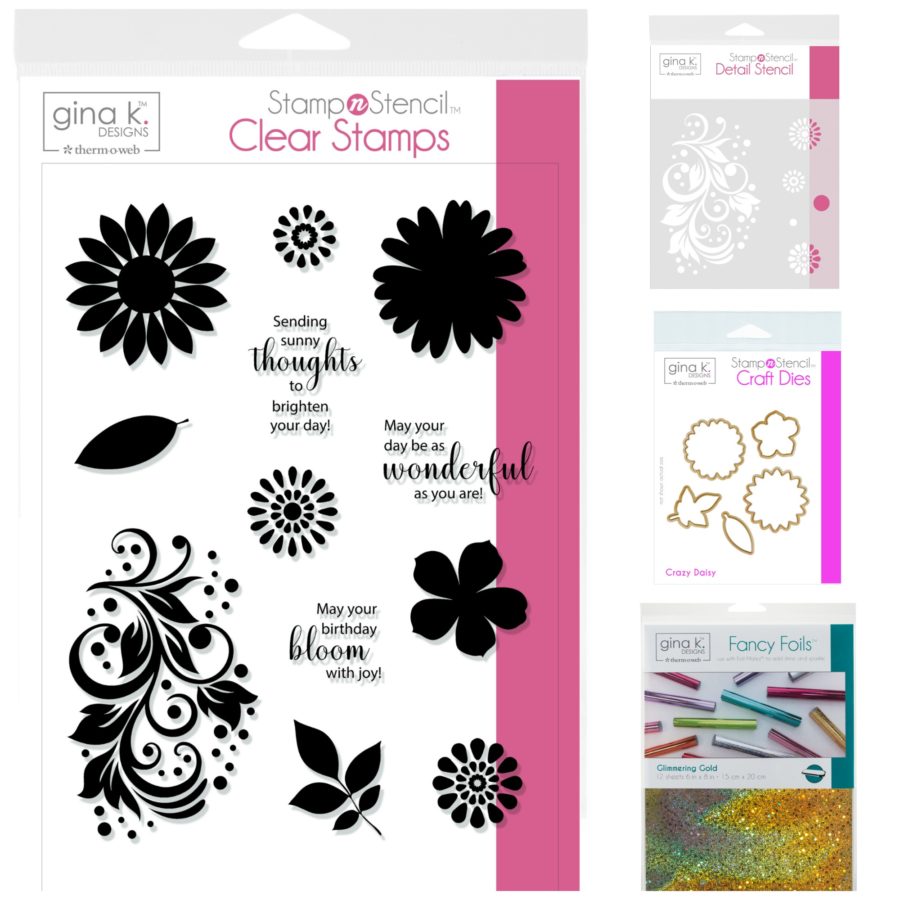
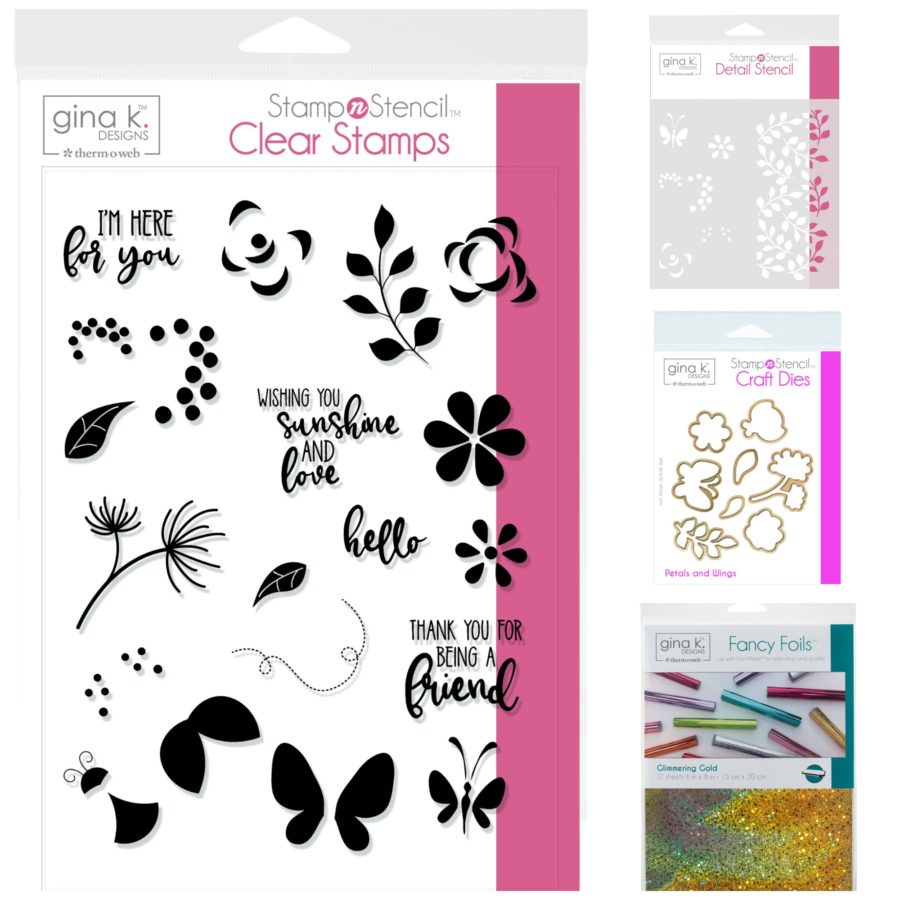
Both collections offer unlimited options for using your inks, our NEW Gina K. Designs Glitz Glitter Gels and even of Deco Foil Transfer Gel with Deco Foil Flock Sheets or our NEW Deco Foil Metallix. Whatever medium you choose will be a success.
Audrey Pettit has some incredible cards to get you inspired! Be sure to stay tuned for details on when you’ll be able to purchase these new products!
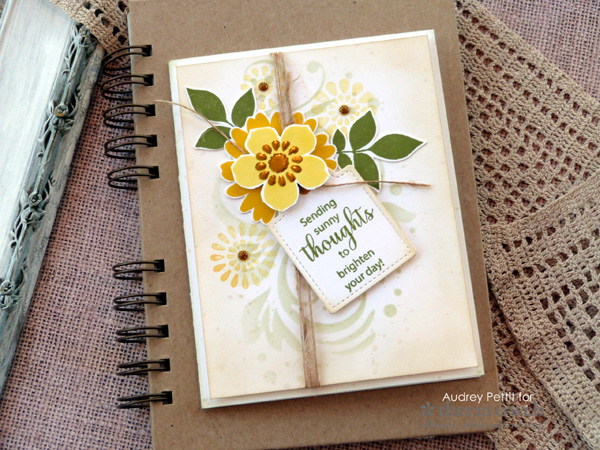
Sunny Thoughts StampnStencil Card
by Designer Audrey Pettit
Therm O Web Supplies:
Gina K Designs Stampn’Stencil: Crazy Daisy Clear Stamps, Stencil, Dies – COMING SOON!
Gina K Designs Die Set: Decorative Tag
Gina K Designs Fancy Foil: Wild Dandelion
Stencil Pal – COMING SOON!
iCraft Purple Tape
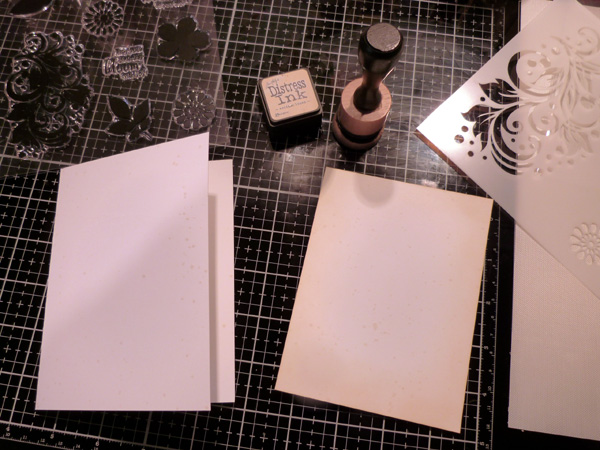
Gina K Designs Premium Cardstock: Luxury White
iCraft Deco Foil Transfer Gel
Gina K Designs Foam Adhesive
Gina K Designs Adhesive Dot Tape Runner
Other Supplies:
Royal Sovereign Laminator
Gold Enamel Dots
Ink: Gina K Designs Wild Dandelion; Ranger Distress Ink Antique Linen, Old Paper, Fossilized Amber
Twine: Maya Road
Ranger Ink Blending Tool, Artist Brushes
Here at Therm O Web, we are so excited to expand upon our popular Gina K Designs Stampn’Foil system with two new stamp and die sets that now include coordinating stencils, too! Today I’m sharing a sunny, spring-inspired friendship card using the fun new Crazy Daisy set.
StampnStencil Card
To begin, create a standard A2 card base from Luxury White cardstock, and cut a slightly smaller panel from the same cardstock to use as a second layer. Flick a bit of Antique Linen Distress ink onto the edges of the card base and all around the smaller panel by mixing the ink with a bit of water on a craft mat and picking up the mixture with a wet paintbrush. Allow the ink flecks to dry completely, and then once dry, apply the Antique Linen ink around the edges of the card panel using an ink blending tool.
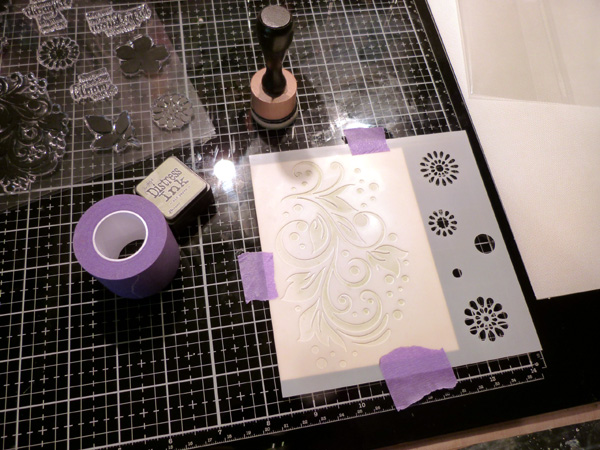
Position the coordinating Crazy Daisy stencil over the inked panel so that the large flourish image is centered on the paper, and then hold the stencil in place with a bit of Purple Tape. Apply Old Paper Distress ink over the stencil using an ink blending tool.
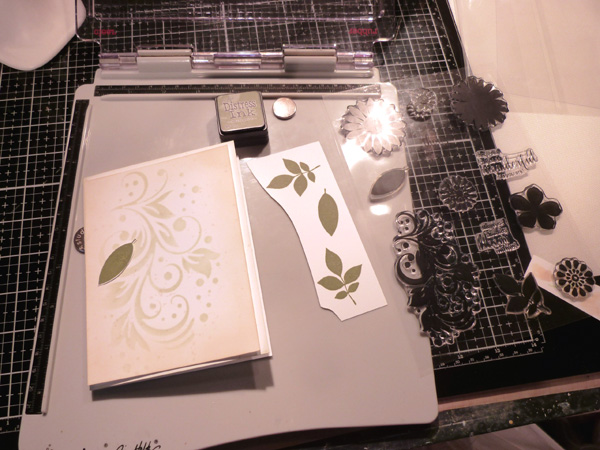
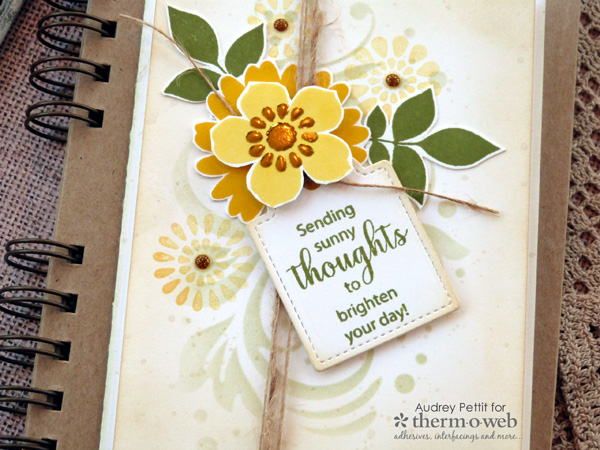
Stamp several leaf images from the set onto white cardstock using Old Paper Distress Ink, and die cut them using the matching dies. Stamp the small flower in Wild Dandelion ink onto white cardstock, and the larger solid flower in Fossilized Amber Distress ink. Die cut the flowers with the matching dies.
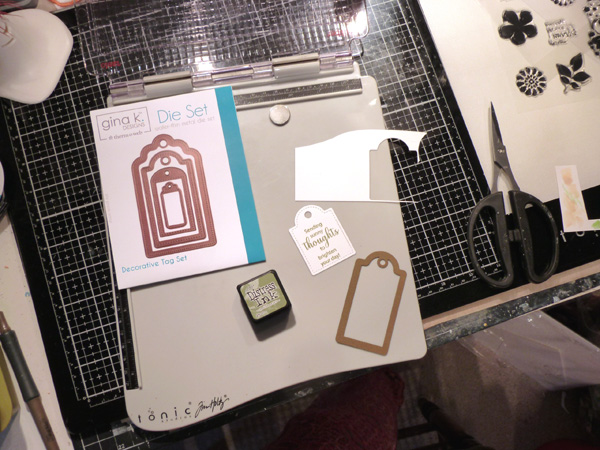
Use a partial die cutting technique to die cut a small tag from the Decorative Tag die set. To do this, first place the bottom end of the tag off the end of your cutting plate and then run the tag through your die cutting machine. This will die cut the top portion only. Stamp a sentiment onto the tag using the Old Paper ink, and then place the tag die back onto the shape, but put the bottom of the tag right under the sentiment, matching up the edges of the die with your previous cut. Then place the top of the tag off the end of your cutting plate, and run the tag through your die cutting machine again. Edge the tag with Antique Linen ink.
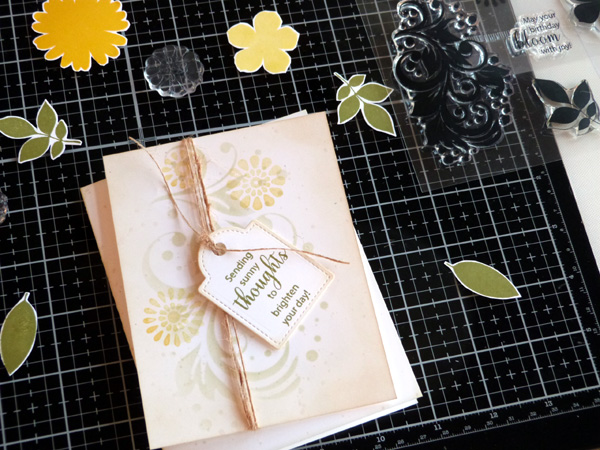
Stamp the small flower three times onto the stenciled panel using Wild Dandelion ink. Wrap twine around the panel three times, adding the tag to the center of the panel and securing it with a knot.
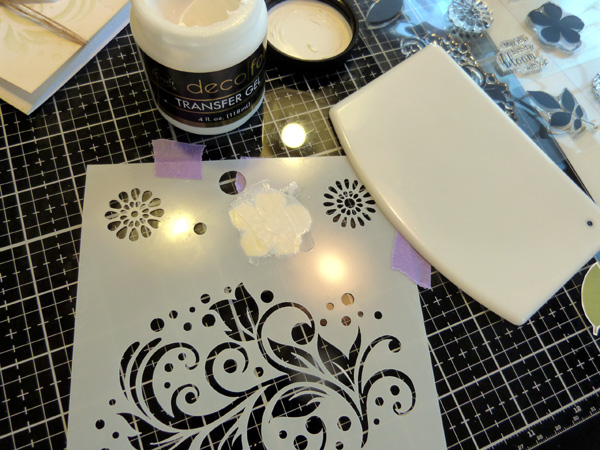
Place the stencil over the smaller flower, lining up the flower detail over the center of the stamped image. Hold the stencil in place with Purple Tape, and then apply a thin smooth coat of Deco Foil Transfer Gel over the stencil using our new Stencil Pal tool. Scrape off any excess gel, and return it to the jar. Then remove the stencil and wash it and the Stencil Pal immediately with warm soapy water. Set the gelled flower aside to dry completely.
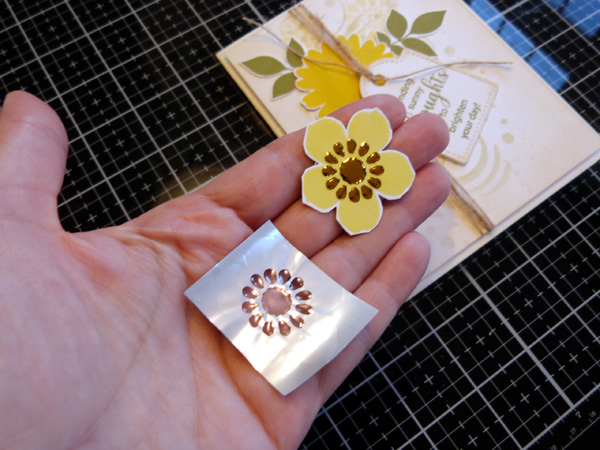
Cut a small piece of Wild Dandelion Fancy Foil sheet that is slightly larger than the gelled flower center. Place the foil down onto the flower, with the silver side down and the colored side up. Place the flower between the sheets of a folded piece of parchment paper, and run the flower through your laminator. Peel up the foil sheet to reveal your foiled flower center.
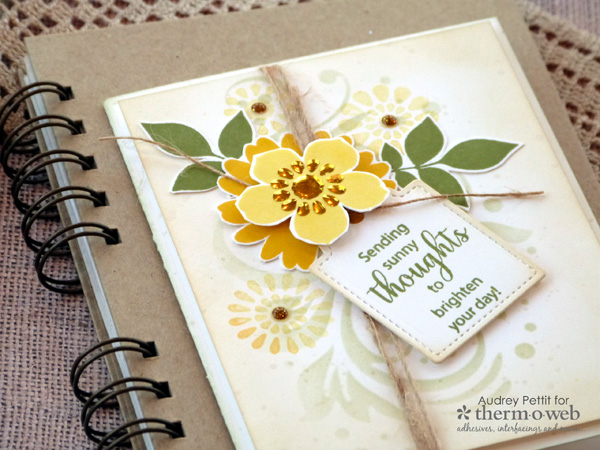
Place foam adhesive onto the back of the stenciled panel, and then adhere it to your card base. Slip the larger flower image under the twine and tag, and adhere it with tape runner. Tuck leaves under the flower. Place a square of foam adhesive onto the back of the tag (towards the bottom), and adhere the tag in place. Adhere the smaller flower using foam adhesive. Add enamel dots to the flowers in the background.

Enjoy!