


 Valentine’s Day Mini Quilt Tutorial with HeatnBond
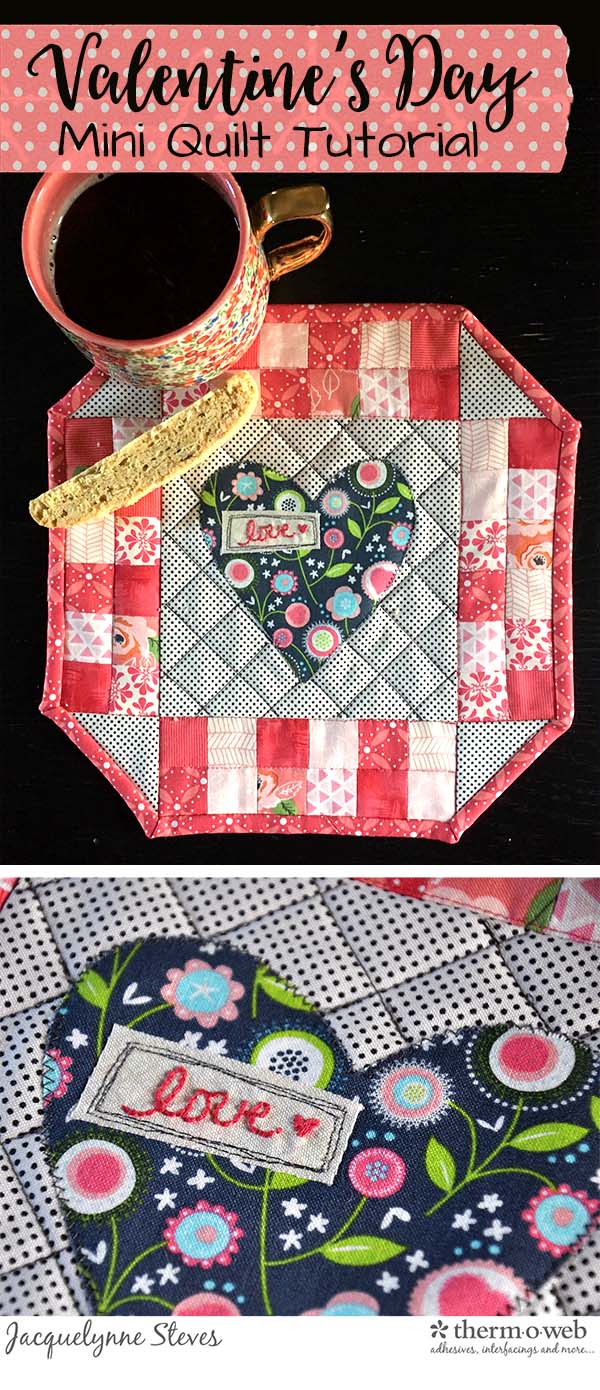
Hi! Jacquelynne here! Today we are making this cute Valentine’s Day Mini Quilt! It’s about 10 1/2″, so you could use it for a large mug rug, or a candle mat, or a little mini table topper or wall hanging. This has a fun, unexpected shape!
You will need:
- – Applique patterns- click here
- – 7″ square of light colored background fabric
- – (48) 1 1/2″ assorted pink squares
- – (2) 2 7/8″ white squares
- – (1) 5″ square scrap of gray for heart applique
- – (1) 4″ square scrap of cream for “love” embroidery
- – HeatnBond Lightweight Fusible Web
- -Thread for machine applique (Aurifil 50 wt. #5004), pink embroidery floss (Aurifloss by Aurifil #2440), washout embroidery marker
- – (1) 2 1/4″ x width of fabric strip of pink fabric for binding
- – (1) 13″ square backing fabric
- – (1) 12″ square batting
Valentine Mini Quilt Tutorial:
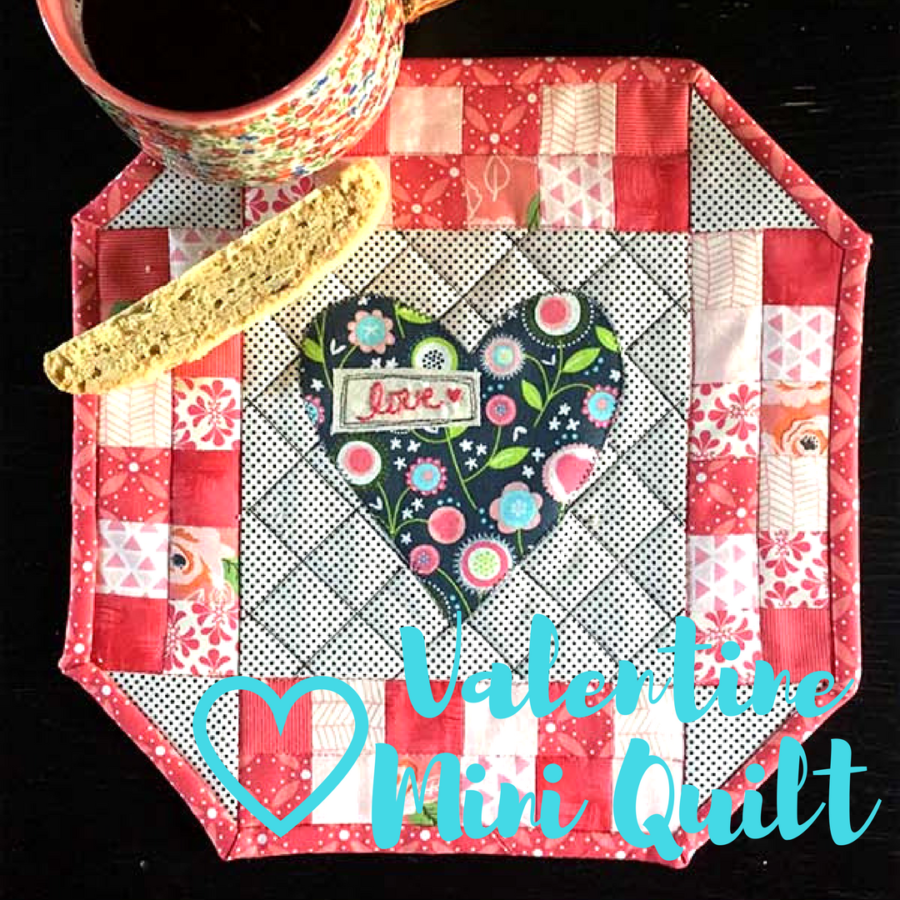
Trace heart shape onto the paper side of the Heat n Bond fusible web. Cut out the shape, leaving about a 1/8″ border around the drawn line. Fuse to the wrong side of the gray fabric; cut out on drawn line.
Fuse heart to the center of background fabric. Machine applique.
Trace “love” pattern onto 4″ cream square. Embroider using 3 strands of embroidery floss (backstitch for letters, satin stitch for the heart.)
Fuse a 3″ square of fusible web to the wrong side of the embroidered love square. Cut out a rectangle, about 2″ x 3/4″. Fuse to the upper right side of heart applique. Free motion applique around the edges.
Trim appliqued background square to 6 1/2″, centering the heart applique.
Sew pink squares into 8 rows of 6; press seam allowances open.
Sew the rows together into pairs; press seam allowances open (checkered units should be 2 1/2″ x 6 1/2″).

Sew 2 of the checkered units to the sides of the center square. Press seam allowances toward center square.

Cut the (2) 2 7/8″ white squares in half diagonally to yield 4 triangles. Sew to ends of remaining checkered units. Press seam allowances toward triangles.

Sew units to remaining sides of the center square. Press seam allowances toward center square.

Layer the quilt top, batting and backing fabric together. Quilt as desired.
Trim away excess batting and backing fabric, including the corners.


Bind with a pink fabric strip. See the tutorial for binding odd angles and corners here.
 ntine, Mini
Click here for a downloadable PDF of this tutorial.
