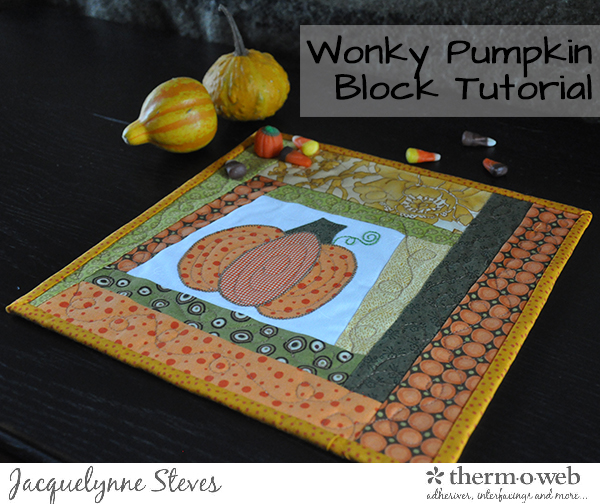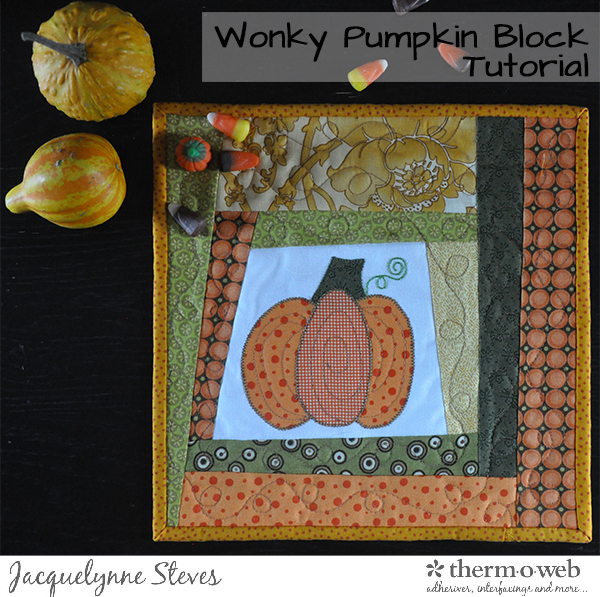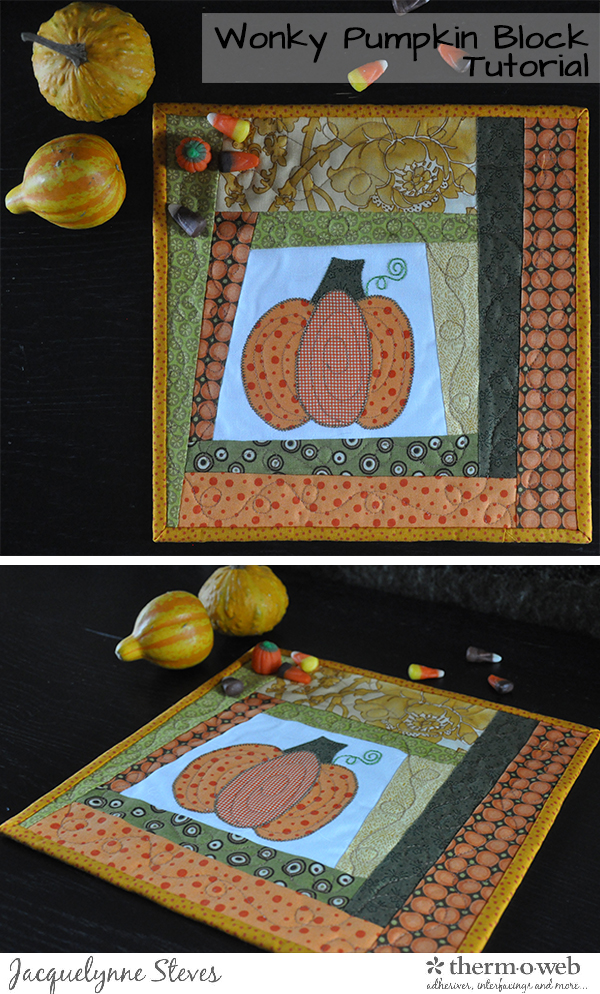
Hello! Jacquelynne here from The Art of Home! This Pumpkin Block Pattern is such a fun project, and perfect for using up those scraps! I was inspired to make this because my Wonky House block tutorial was so popular. I’ve used my “wonky” pumpkin block to make a mug rug/candle mat. You can make it any size you want, and use it in a variety of projects. Just applique the pumpkin center, then continue adding strips to the sides until it’s as big as you want. Maybe use it to make a tote bag for trick-or-treating? Make several blocks and sew them together into a scrappy fall quilt?
To make this block, you will need:

- –Pattern sheet, click here
- -Square of white or cream fabric for pumpkin applique background, about 8″
- -Scraps of fabric in orange and green for pumpkin applique
- -Scrap strips of fabric, about 1 1/2″ – 2 1/2″ wide x about 8 – 12″ long for block
- -Heat n Bond Lite fusible web
- -Heat n Bond lightweight fusible interfacing
- -Green embroidery floss (I used Aurifloss #1147 – it’s my favorite color!)
- -Thread for machine applique (I love Aurifil 50 wt. for machine applique)
- -Fabric for backing and binding
- -Batting
- -Embroidery supplies such as needle, hoop, water soluble marker
HINT- you could also skip the applique and embroider the entire pumpkin! See pattern sheet.
Trace pattern pieces from pattern sheet onto the dull side of HeatnBond fusible web. Cut out shapes, leaving about 1/4″ border around each shape. Iron to WRONG sides of applique fabrics. Cut out shapes on the traced line; peel off paper backing.
Iron an 8″ square piece of Heat n Bond lightweight interfacing to the WRONG side of the white square. I always use interfacing on the back of my embroidery, and it’s helpful on the back of machine applique, too! It will help your fabric to stay flat.
Arrange shapes on white or cream background fabric and fuse in place. Machine applique.
Place the appliqued square on top of the pattern and use the water-soluble marker to trace on the vine pattern for embroidery (you could also just “freehand draw” this.)
Embroider vine using 3 strands of green embroidery floss.

Now here’s where things get fun! Trim your block down, but it does not have to be a perfect square! The “wonkier,” the better! Just be sure to leave at least 1/2″ from the edge of your appliqued/embroidered design (remember, you will need a 1/4″ seam allowance, plus you need to leave a little space between your design and the seam allowance.)

Sew one of the scrap strips to the side of the block (notice that your strips don’t have to be a uniform width- even your strips can be “wonky”!) Press seam allowance toward the strip. Then, trim the ends off of the strip so the edge of the block is even.

Continue to sew strips onto the sides of the block. Remember to press the seam allowances toward the strip and trim off the edges each time you add a strip.

If your block isn’t looking “wonky” enough for you, can trim the edges at different angles as you add them on:

Continue to add strips until your block is as big as you want it. Trim it to your desired size. I trimmed mine to 10 1/2″. Notice that the pumpkin does not have to be centered! I think having it “off-center” makes it all the more fun and charming!

Now, you can turn your block into a mug rug, quilt, tote bag, or whatever you want! I simply layered mine with batting and backing, did some simple machine quilting, and then bound it with a fun gold and orange dot fabric to make a mug rug: