


Your pets are a big part of your family and a stocking full of treats is the perfect way to include them in your Christmas celebration. Carla Henton from Creatin’ in the Sticks is on the blog today with a sewing tutorial to make quick patchwork stockings for your favorite 4 legged friends. Those tails will be wagging with excitement when you combine HeatNBond® Fusible Fleece with Moda’s new fabric, Woof Woof Meow by Stacy Iest Hsu to make some super soft and colorful Christmas Pet stockings. A fleece cuff is easy to add with the help of HeatNBond® Soft Stretch Lite hem tape and a sweet bone applique for your dog or a mouse with a long tail appliqued for your cat will complete your pet’s stocking.
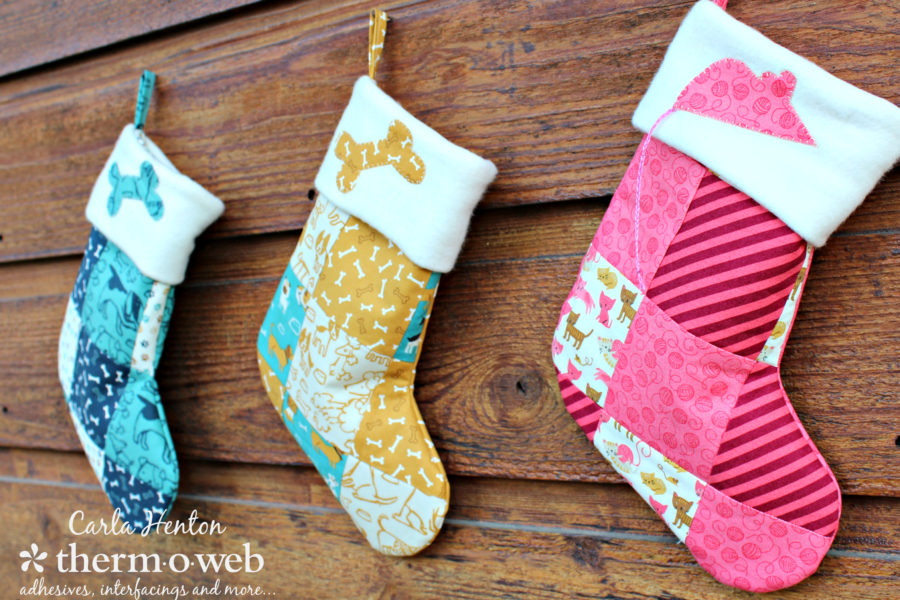
Woof Woof Meow Christmas Pet Stockings
By Carla Henton at Creatin’ in the Sticks
Finished size: 8″ x 11″ with approximately 6″ opening
Supplies:
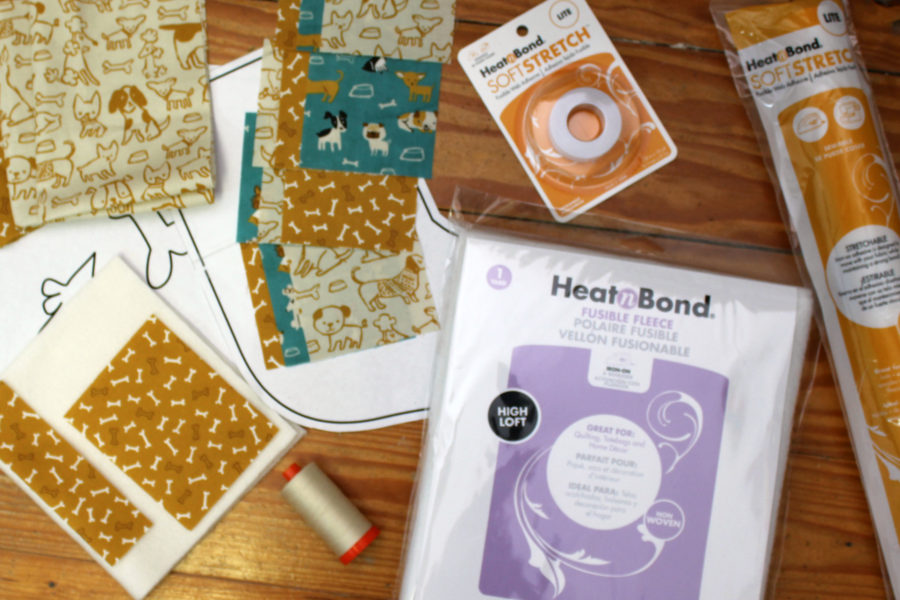
HEATnBOND® FUSIBLE Fleece – 12 1/2″ x 9 1/2″
HeatnBond® Soft Stretch™ LITE 5/8” x ’10’ roll
HeatnBond® Soft Stretch™ LITE – 3″ x 4″
Iron – (I love my Oliso Pro)
Aurifl 50 wt. thread: #2310
general sewing supplies: sewing machine, scissors, etc.
Mouse – optional: 3 strands of Aurifil 12 wt thread (#2479) 20″ long for tail.
Fabrics:
Woof Woof Meow by Moda:
12 – 3 1/2″ squares for patchwork
1 – 1 1/2″ x 5 1/2″ for hanger
1 – 3 1/2″ x 4 1/2″ for applique
1 – 9 1/2″ x 12 1/2″ for stocking back
2 – 9 1/2″ x 12 1/2″ for lining
Off white fleece for cuff: 1 – 12 1/2″ x 7″
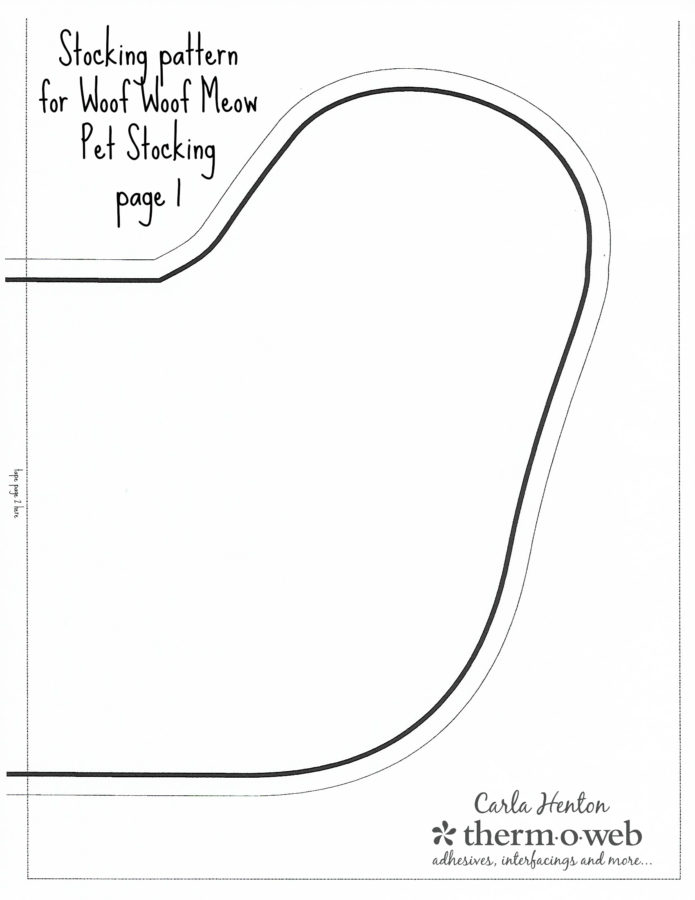
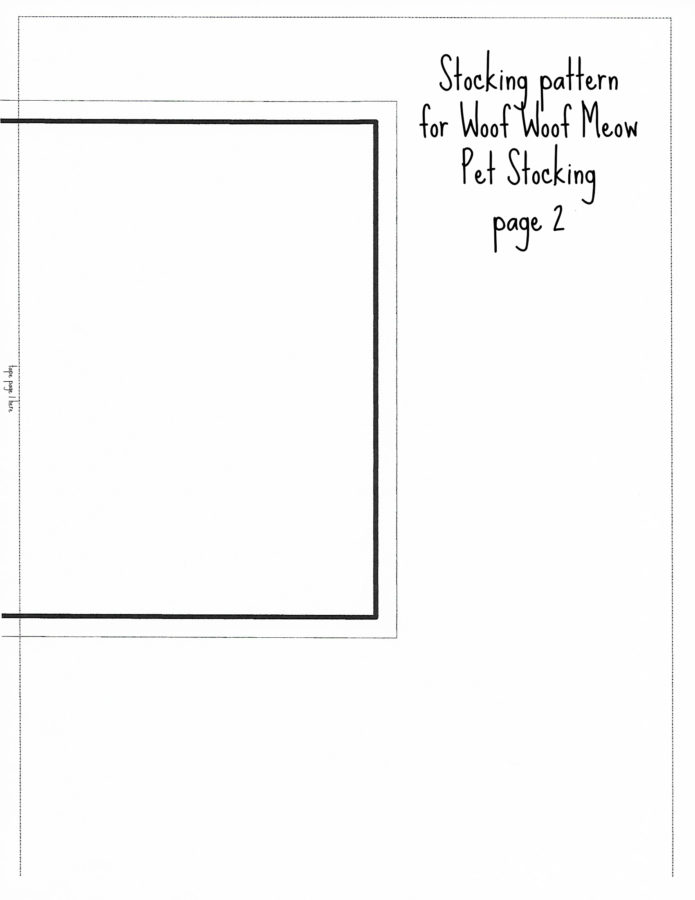
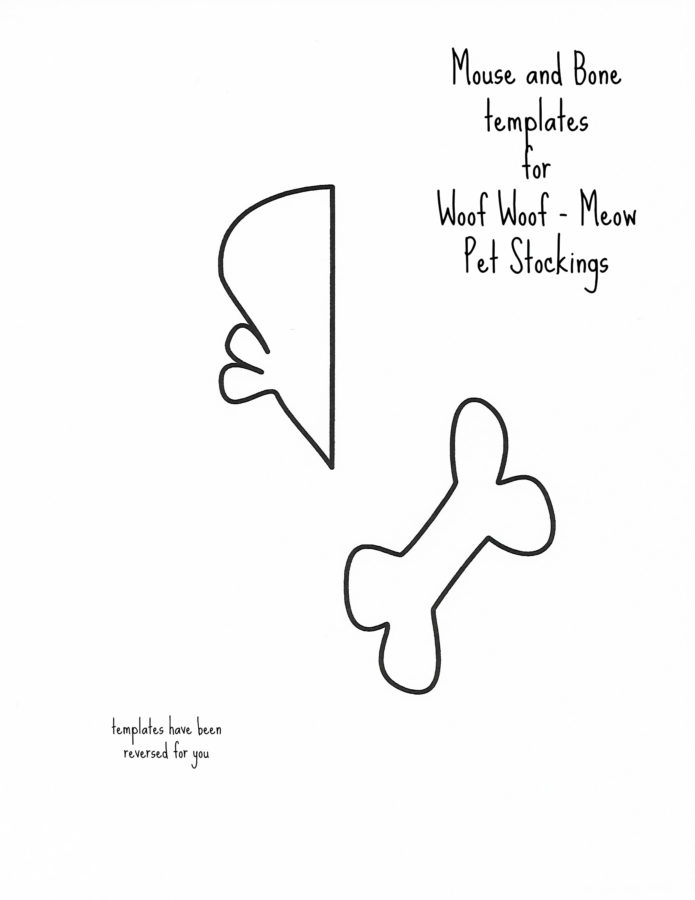
Patterns:
(click and right click each of the following 3 pages to save or print. Enlarge to fit a full piece of paper)
*All seams are stitched at 1/4″ unless otherwise stated.
Woof Woof Meow Christmas Pet Stockings Instructions:
Step 1:
Lay out 3 1/2″ squares in a 3 x 4 grid and stitch together with 1/4″ seams and press.
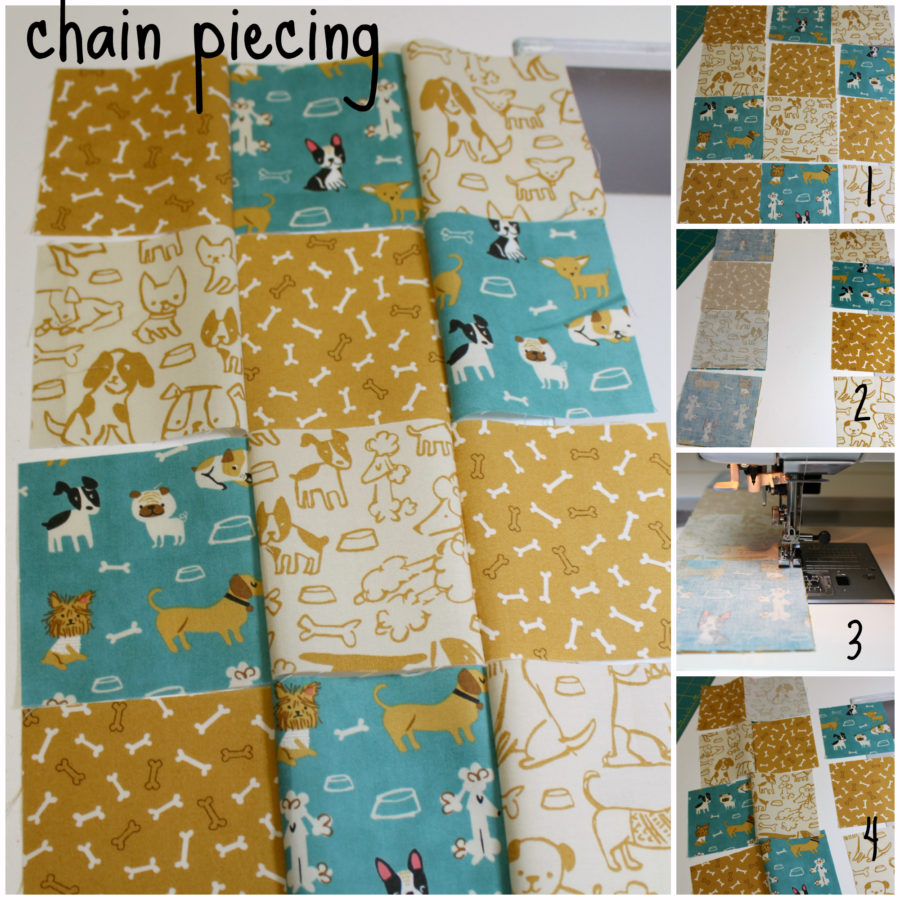
 TIP: Chain stitch to make this a faster process. 1. Lay out the pieces. 2. Take the top middle piece and lay over the top left piece. 3. Do this with all the pieces and stitch in a “chain” without cutting the threads. 4. Now place the top right piece on top of the chain and continue stitching the grid together stitching again without cutting the thread until the end. The uncut threads will act as pins as the horizontal seams are stitched.
Tape the stocking pattern together and using the pattern, cut 1 from the HeatNBond fusible fleece by pinning the pattern upside down (wrong side up) on top of the non-fusible side of the fleece and cutting on the outside line.
Lay the patchwork piece right side down and position the cut fusible fleece stocking, glue side down on top of the patchwork.. Following the package instructions, fuse the fleece to the back of the patchwork, let cool, then trim away the excess patchwork with scissors.

Step 2:
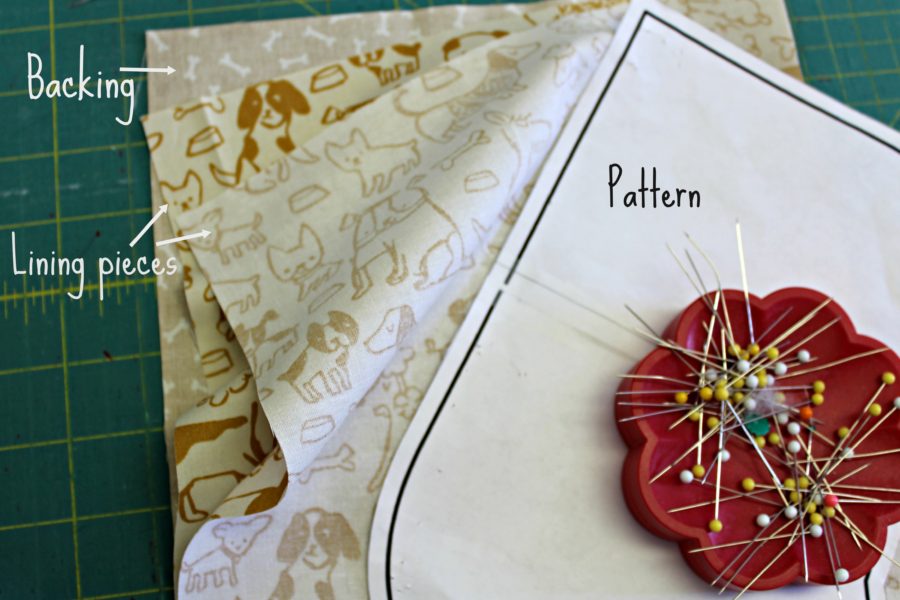
Lay the 9 1/2″ x 12 1/2″ stocking backing piece right side down. Next lay one lining piece on top of the backing, right side up, and the other lining piece right side down on top. Pin the stocking pattern on top of the stack right side up and cut all 3 layers at once with scissors or a rotary cutter.
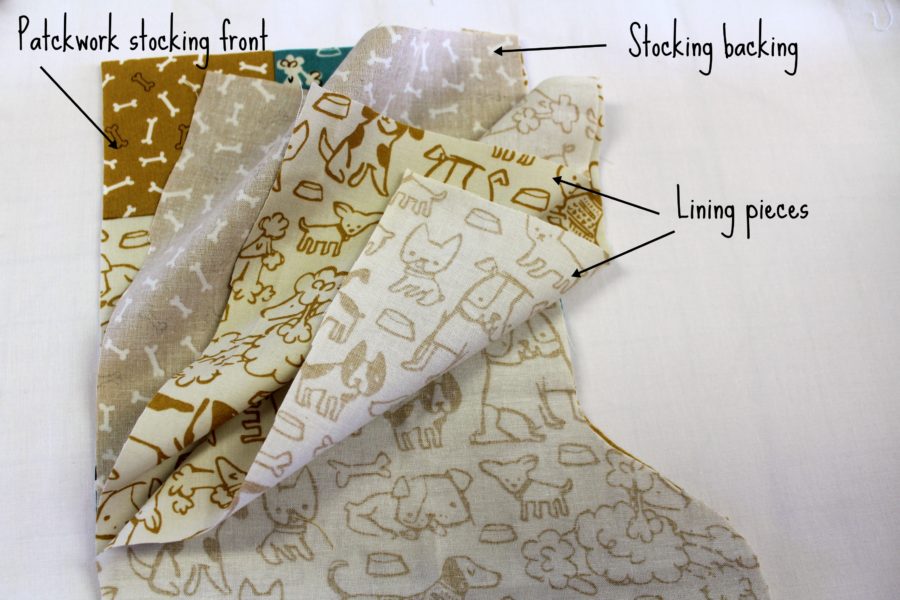
Lay the patchwork stocking piece down with the right side up and place the stack just cut on top of it. This puts the stocking back right sides together with the stocking front and the lining pieces, right sides together, on top. Pin all four layers together and stitch around the stocking with a 1/4″ seam leaving the top open. Clip the curves.
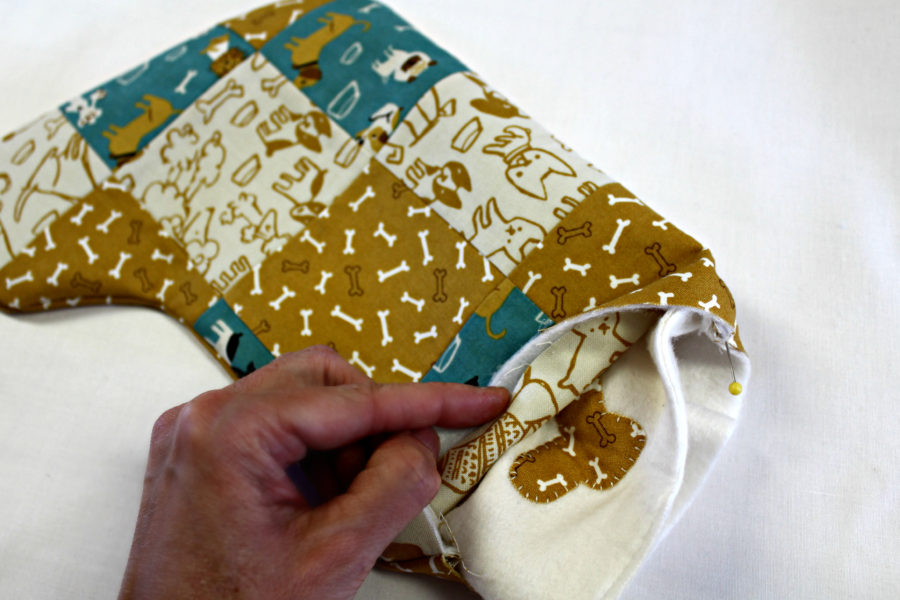
Turn the stocking right side out by slipping a hand between backing and patchwork and pulling the toe out. All of the raw edges are now inside. It’s magic.
Step 3:
Prepare the bone or mouse applique by tracing the pattern on the paper side of the HeatNBond Soft Stretch Lite. Fuse the adhesive side to the wrong side of the 3 1/2″ x 4 1/2″ piece of fabric following the package instructions. Let cool and cut the pattern out with scissors. The applique will be placed in the upper left corner of the 12 1/2″ x 7″ piece of off-white fleece leaving at least 1/4″ from the top and side of the fleece and above the center.
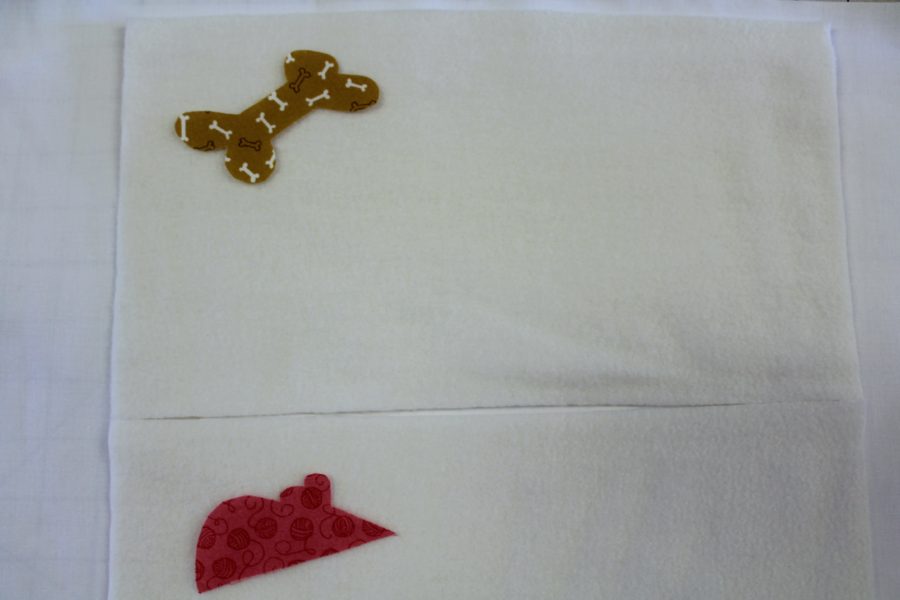
Bond the applique following the package instructions. Stitch around the applique with a zigzag, blanket or straight stitch.
Step 4:
Prepare the stocking cuff by folding it in half with right sides together and stitching 1/4″ seam on the 7″ side to form a tube.
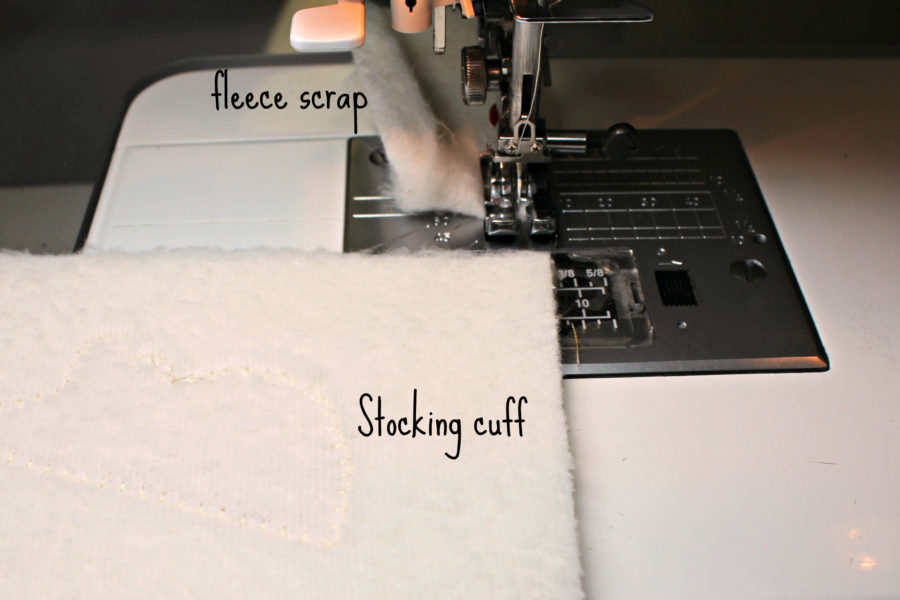
TIP: To make stitching the seam on the fleece start easier, stitch a scrap piece of fleece as a leader. This will lift the presser foot and the fleece won’t get swallowed in the throat plate.
Press the tube and on the wrong side on one of the edges, fuse the paper backed 5/8″ HeatNBond Soft Stretch completely around the tube.
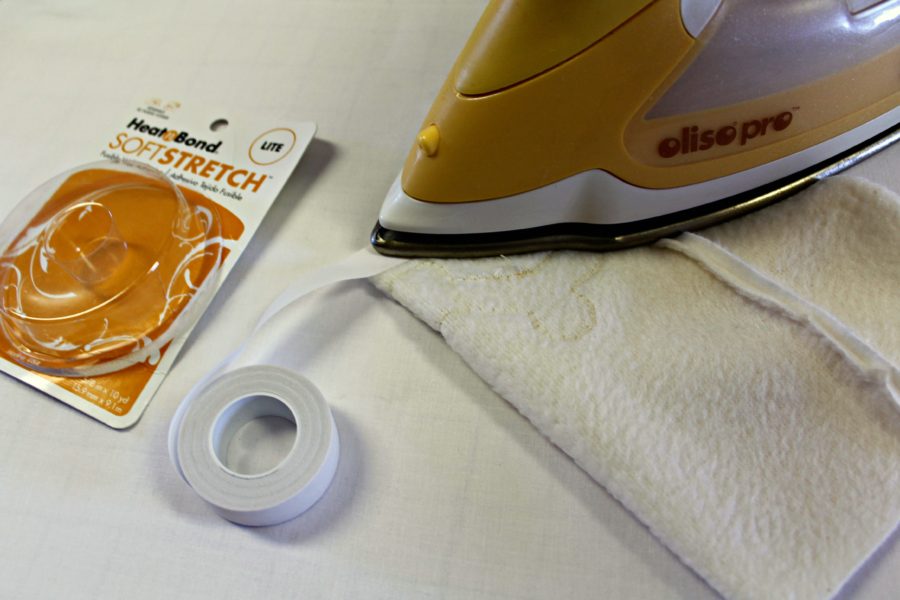
TIP: Don’t worry about overlapping the paper backed Soft Stretch. It will adhere to the fabric and peel off of the paper.
Next, fold the tube in half, wrong sides together, meeting raw edges and matching the seam to form the cuff of the stocking. Press the raw edges to fuse the HeatNBond Soft Stretch following the package directions. HeatNBond Soft Stretch stabilizes the fleece making it much easier to stitch.
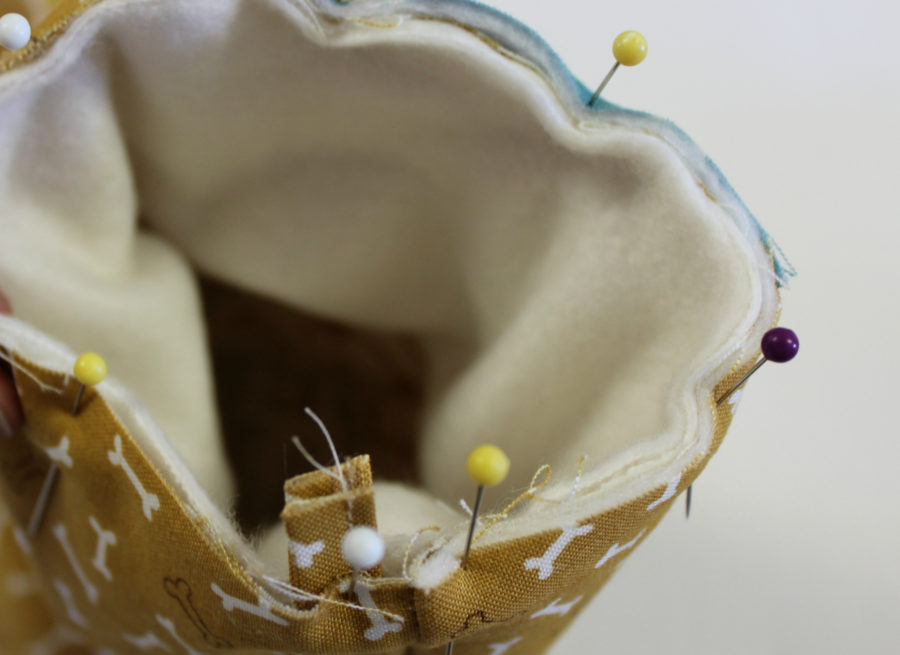
Pull the lining of the stocking apart and place the cuff inside matching the raw edges and seams. Pin around the top.
Step 5:
Make the hanger by pressing the 1 1/2″ x 5 1/2″ rectangle in half lengthwise, wrong sides together. Open the fabric and fuse a piece of 5/8″ HeatNBond Soft Stretch down the fold. Let cool and peel off the paper. Now fold the long edges to the middle covering the Soft Stretch and fuse. Next, fold in half again and press. Stitch down the length of the hanger.
Fold the hanger in half and tuck the loop down into the stocking between the cuff and lining at the seam. Pin the hanger leaving about 1/4″ of the ends above the raw edge of the stocking.
Step 6:
Stitch around the top of the stocking 1/4″ from the raw edge, backstitching at the beginning and the end. Pull the cuff out and fold it over the stocking.
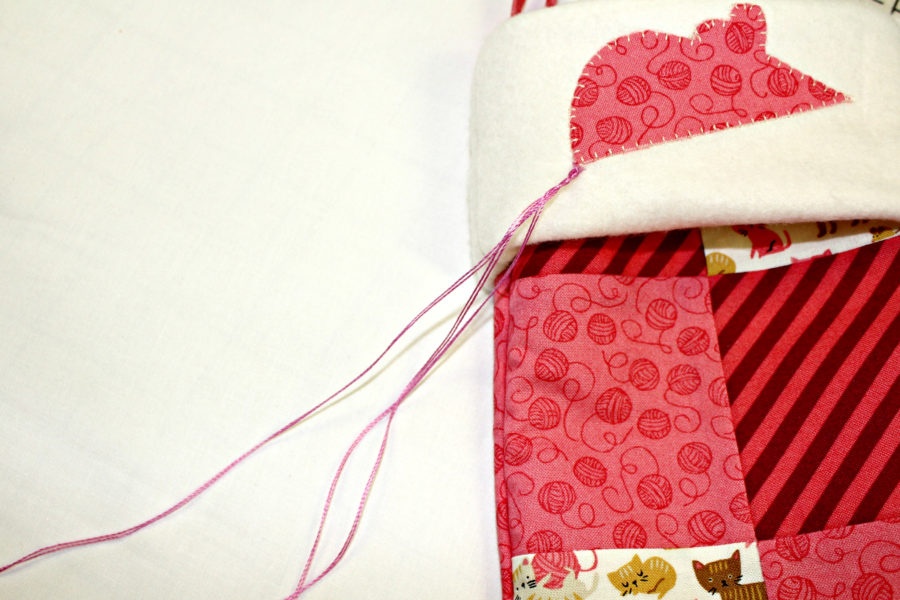
Optional mouse tail: For the kitty stocking add a tail to the mouse by threading three 20″ strands of Aurifil 12 wt thread through the end of the mouse leaving 10″ on each side. Knot the threads then braid the strands with 3 groups of two threads until the thread runs out. Knot the ends and trim.
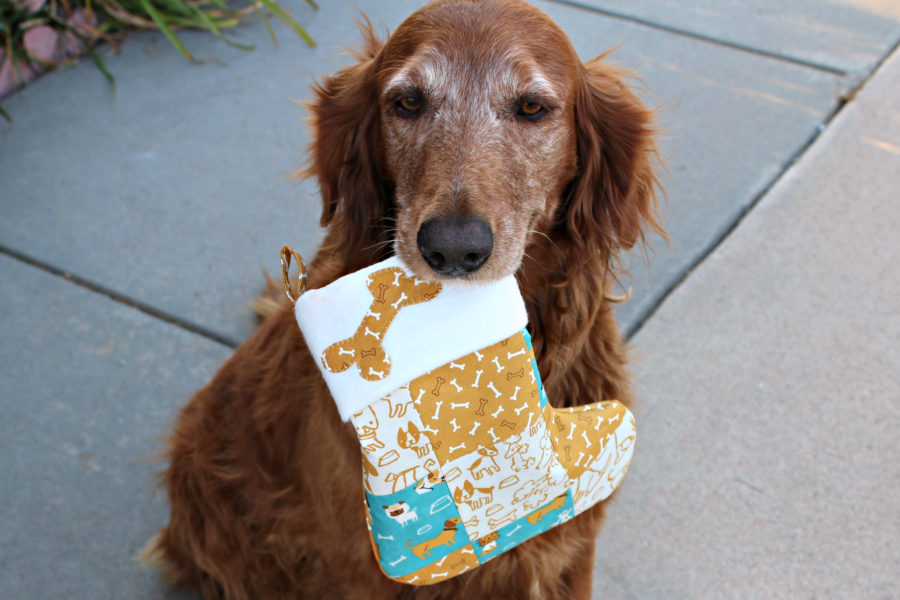
My baby girl, Mollie, can’t wait for Santa to fill her stocking up!
Carla
Cat
September 30, 2017 at 1:58 pm (7 years ago)Is there a way to ‘save’ this project to our files?
admin
October 2, 2017 at 9:50 am (7 years ago)Hi Cathy..at the bottom of the post you should see an option to email it to yourself, print it and some other options for you to use. Hope that helps! Julia
margessw
October 9, 2017 at 3:52 pm (7 years ago)These stockings are adorable !