


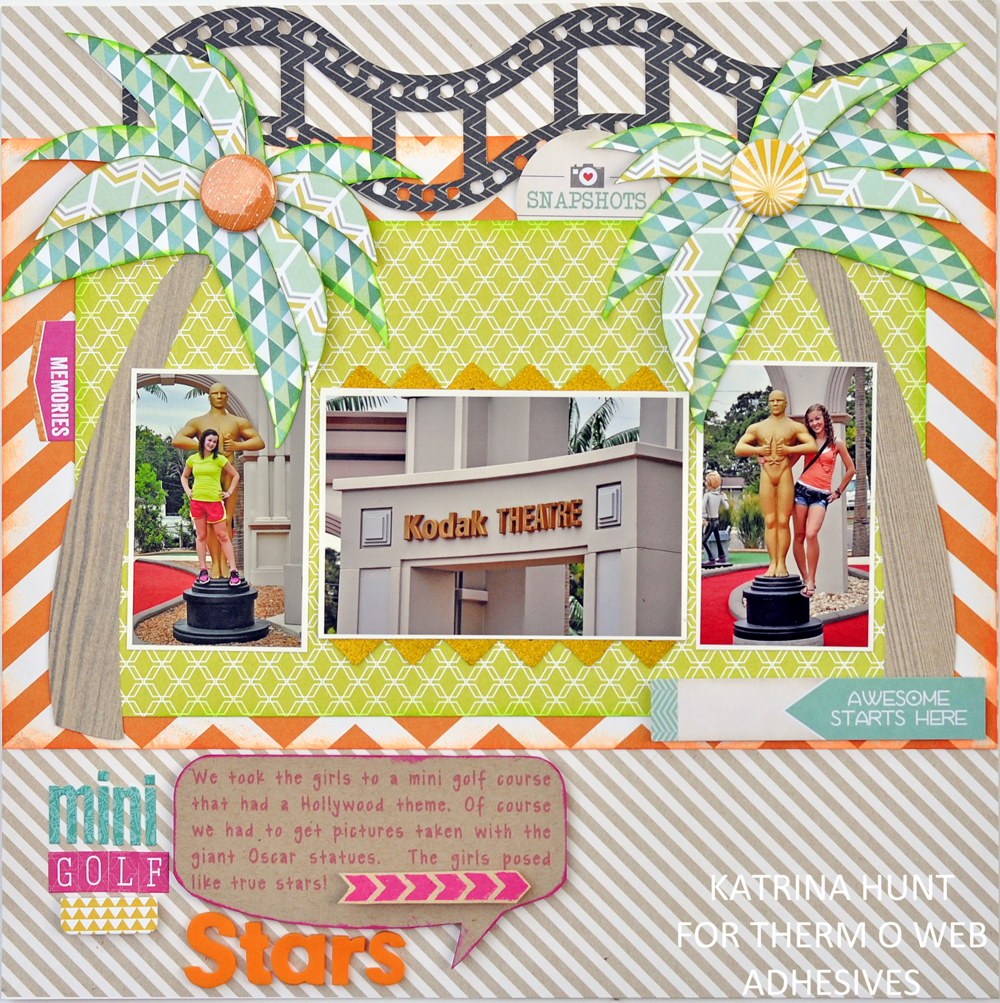
Hi there! Katrina here from Paper, Scissors and Glue with my first post on the blog. I have a summer layout full of mini golf fun and Therm O Web adhesives.
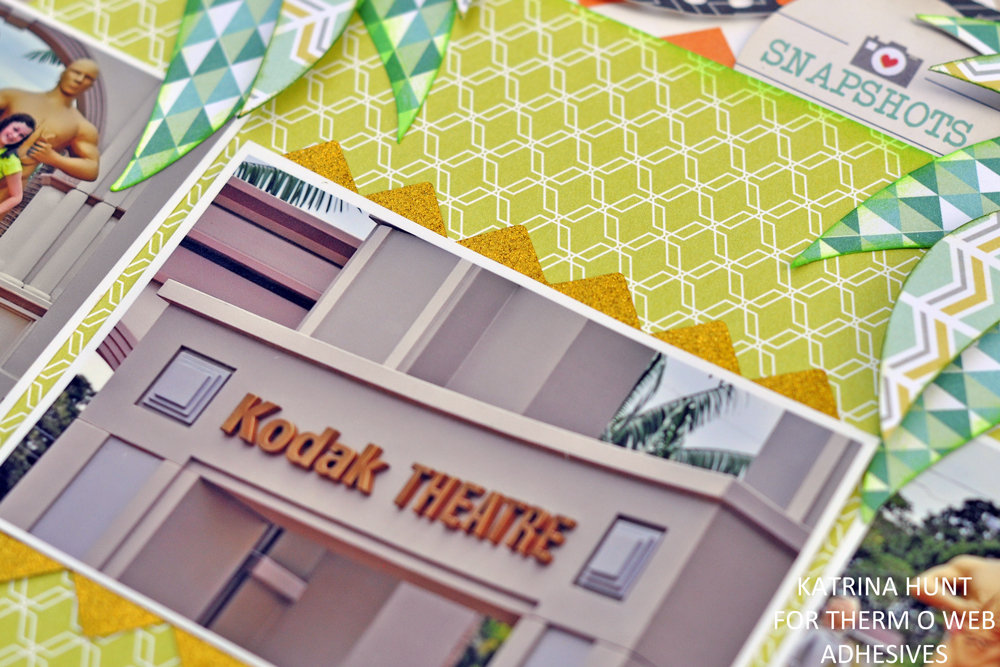
I even managed to sneak in the Glitter Dust™ Photo Corners.
Therm O Web Supplies:
Therm O Web Glitter Dust™ Photo Corners-Gold
Therm O Web Zips™-Memory 32 Feet
Therm O Web 3D White Foam Squares-1/4 inch
Therm O Web Sticky Tape Mini Runner-Pink
Other Supplies Used:
Webster’s Pages Paper Collections-Sweet Notes and Composition & Color
Webster’s Pages Sticker Collections-Sweet Notes and Composition & Color
Chic Tags Everyday Life II-Tags
American Crafts Thickers
Paper Bakery Flair-Flash Photography and That’s My Bike
Laina Lamb Designs Stamp-Document It-Right This Way
Hero Arts Ink
Silhouette Cameo with cutting files and sketch pen.
Instructions:
The placement of photos was decided on first and then the layout worked around them. Sizes of all layers can be adjusted according to size or quantity of pictures used. For this layout the most edges were inked, but they do not have to be.
Cut the following:
Orange Chevron Paper-7.5 inches by 12 inches
Green Pattern Paper-6 inches by 10.25 inches
Palm Trees-Cut at approximately 8 inches tall. This includes trunk and leaves.
Film Strip-Cut at approximately 9.5 inches long
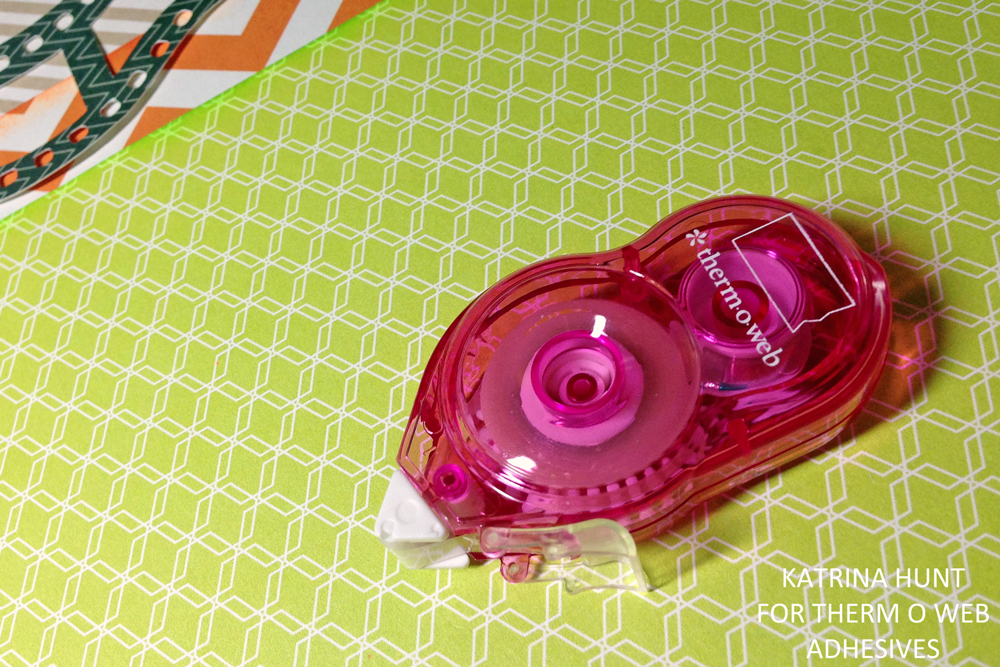
Use the Therm O Web Sticky Tape Mini Runner to adhere the orange chevron paper and the green pattern paper.
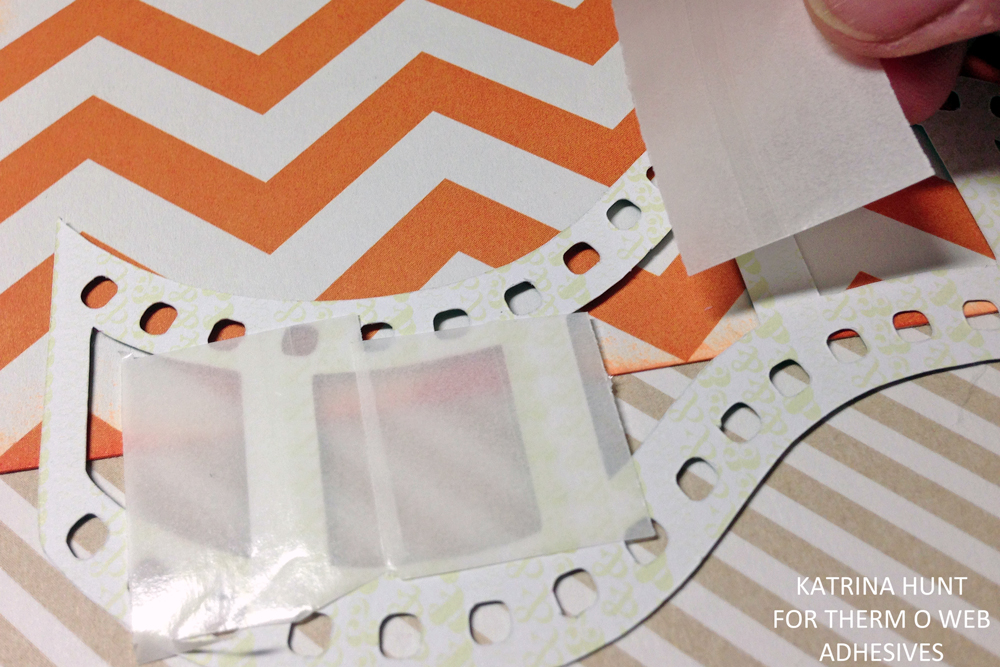
Use Therm O Web Zips to attach the film strip at the top of the page. Cut lengths of the Zips to the width of the film strip and place them all along the back. Decide on perfect placement of the film strip, remove the backing paper and adhere to layout.
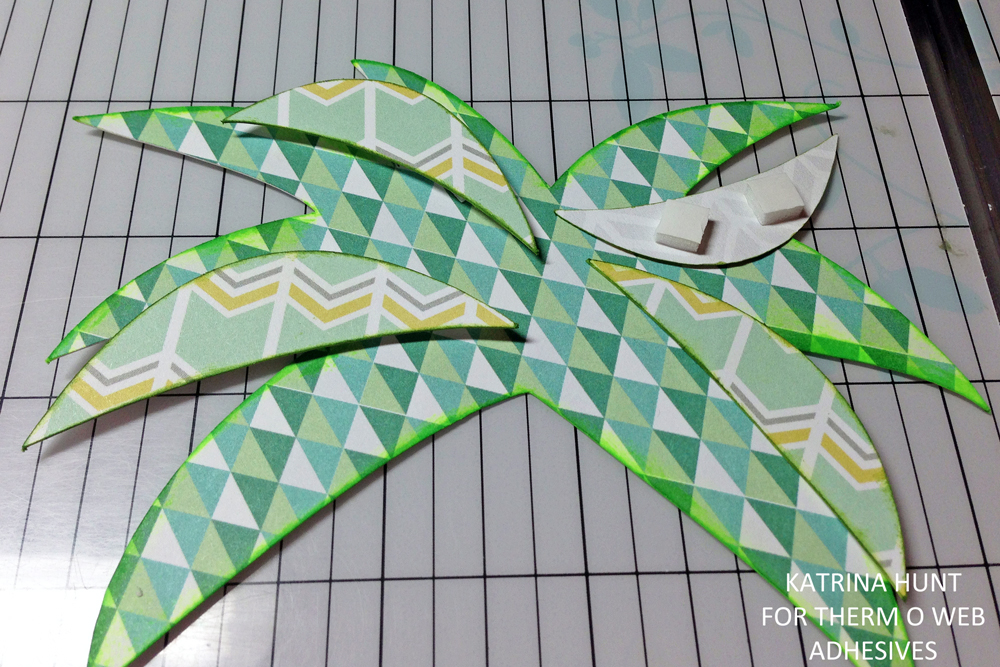
To give the top layer of the palm tree dimension, use Therm O Web 3D White Foam Squares to lift the layers of leaves. Use Therm O Web Zips to attach the tree trunks to layout and the top of the tree after deciding on placement.
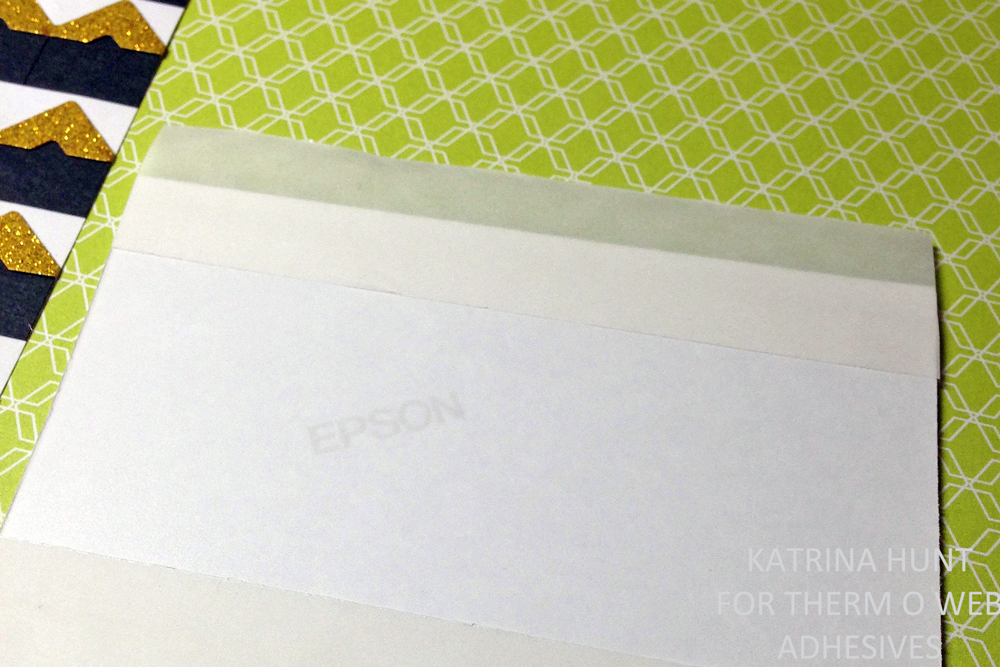
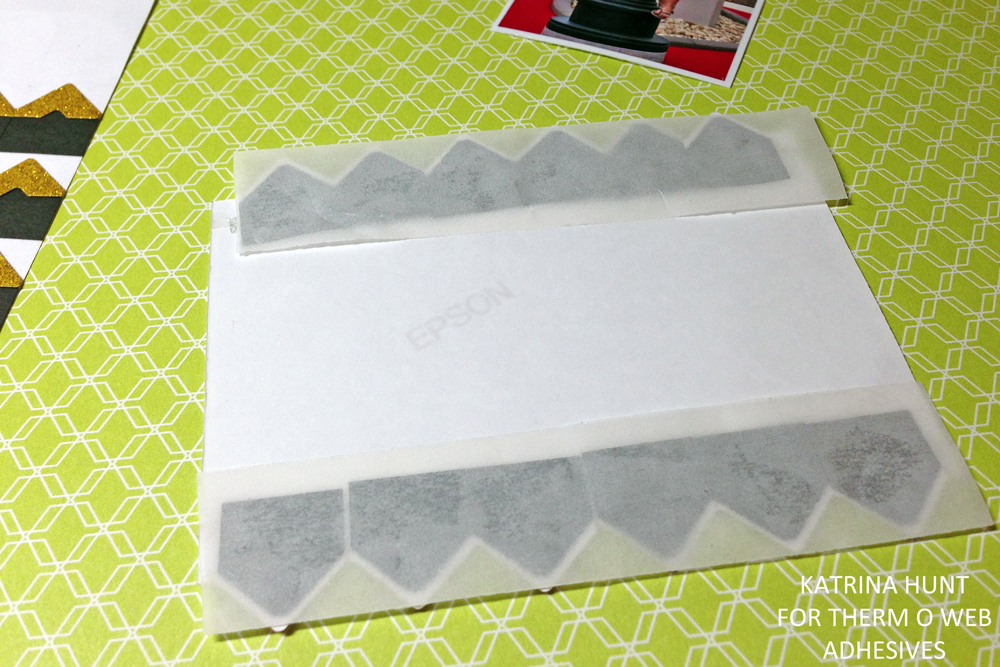
Cut two lengths of Therm O Web Zips to the length of picture. Attach them to the back of the picture, making sure to keep them somewhat close to the edge. Peel off the backing and then attach the Therm O Web Glitter Dust Photo Corners along each edge to create a border at the top and bottom of photo. Reuse the Zips backing on the Photo Corners until placement is decided on and the photo is ready to attach to layout.
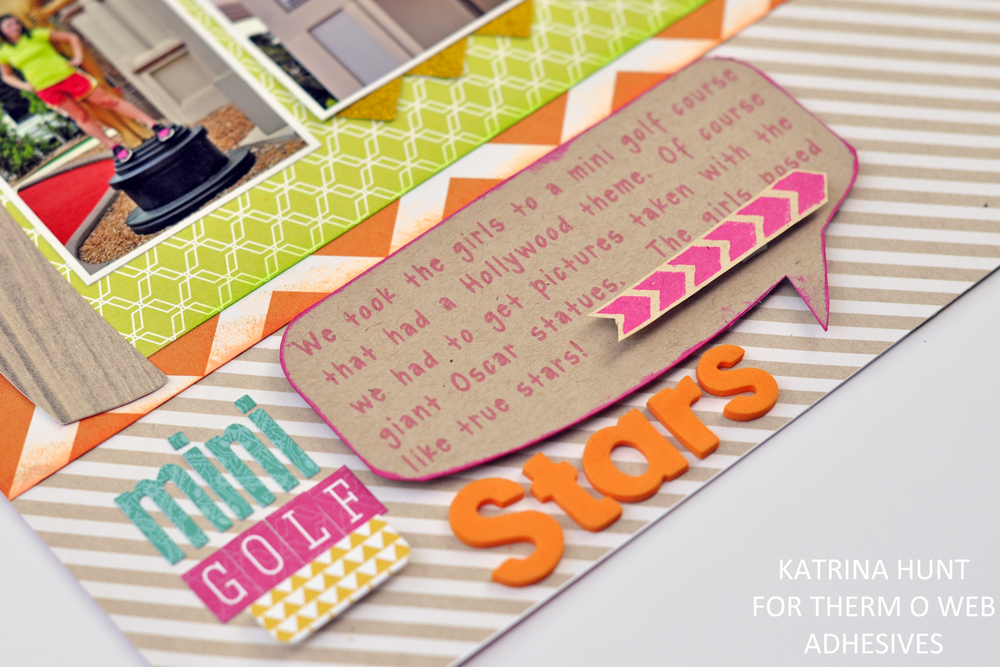
Use Therm O Web 3D White Foam Squares to attach journaling tag to layout. Stamp chevron border and add it to the journaling tag using the Therm O Web 3D White Foam Squares also. Add embellishments of choice.
Suzy Gray
July 30, 2013 at 11:24 am (11 years ago)Fun summer page Katrina thanks for sharing the details. Love the photo corner border