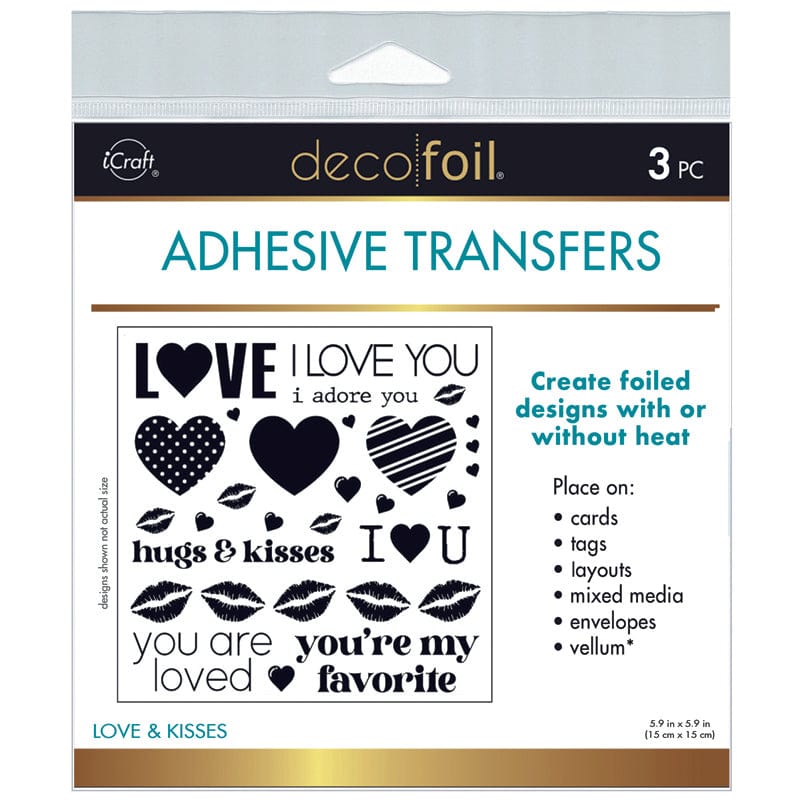
Make your mark with Deco Foil Adhesive Transfers Designs -
Love & Kisses which features bold designs, with other related sentiments you can mix and match to create your desired message.
This unique collection of designer images and sentiments allow you to add just a touch of modern metallic shine to your paper projects when used with any of Therm O Web’s 70+ Deco Foil Transfer Sheets and Unity Foils.
Deco Foil Adhesive Transfers Designs can be applied to card stock, patterned papers and ink-blended or watercolored backgrounds in two ways, with or without heat. No expensive, complicated foiling equipment is required; all you’ll need is a hot laminator or a manual die-cutting machine.
Each package of Deco Foil Adhesive Transfers contain two identical multi-design sheets. Each sheet has a clear bottom liner and a printed top liner. The adhesive itself is clear. Deco Foil Adhesive Transfers can be used to create foiled designs on cards, tags, scrapbook layouts, mixed media projects, envelopes, vellum and clear acetate.
Product Details
- 3 sheets per pack (approx. 5.9 in x 5.9 in)
- Transfers easily with a hot laminator or a die-cutting machine
- Use with Deco Foil Transfer Sheets for instant shine
- Apply to cardstock, vellum, transparencies and envelopes!
Video
General Directions
To use Deco Foil Adhesive Transfers, first decide if you’ll use a laminator or a die-cutting machine to apply them. If you’re using a laminator, allow it to pre-heat for at least 10 minutes. For best results, always pre-test new products or techniques.
- Use scissors to cut the desired design element from the sheet of Deco Foil Adhesive Transfers. Carefully peel off the clear bottom liner, position the transfer on your project, printed side up, and lightly press it with your finger to secure it in place (do not rub hard)
- Place your project inside a folded Deco Foil Craft & Carrier Sheet. The Deco Foil Craft & Carrier Sheets provides an ultra-smooth foiled finish!
- Deco Foil Adhesive Transfers can be applied in two different ways:
Using Heat: Run through hot laminator with the folded crease as the lead edge.
Using Pressure: Run through manual die-cutting machine with the same sandwich used for wafer thin dies.
- Remove your project from the carrier sheet and slowly peel back the printed top liner to reveal the clear adhesive design. Pulling up on the printed liner too quickly can cause the adhesive to stick to the liner instead of your project.
-
Foil the design: Cut a piece of foil slightly larger than the design and place it, color side up, on top of the adhesive. Return your project to the folded carrier sheet and run it through your laminator or die-cutting machine a second time to transfer the foil. Remove your project from the carrier sheet and gently peel away the foil sheet to reveal your design!
Tips
- To apply Adhesive Transfers to vellum or acetate sheets, it is recommended to use a laminator.
- Laminator settings may vary based on brands/models, temperature and speed settings.
- If your cutting plates are very worn, place a thin piece of card stock or copy paper over the top of the carrier sheet to help prevent cut lines from transferring to the adhesive.
-
We do not recommend use of other tools like a bone folder, brayer or chuckie to transfer the adhesive or the foil; you could scratch or damage the transfer. For best results, always use either a hot laminator or a manual die-cutting machine.


